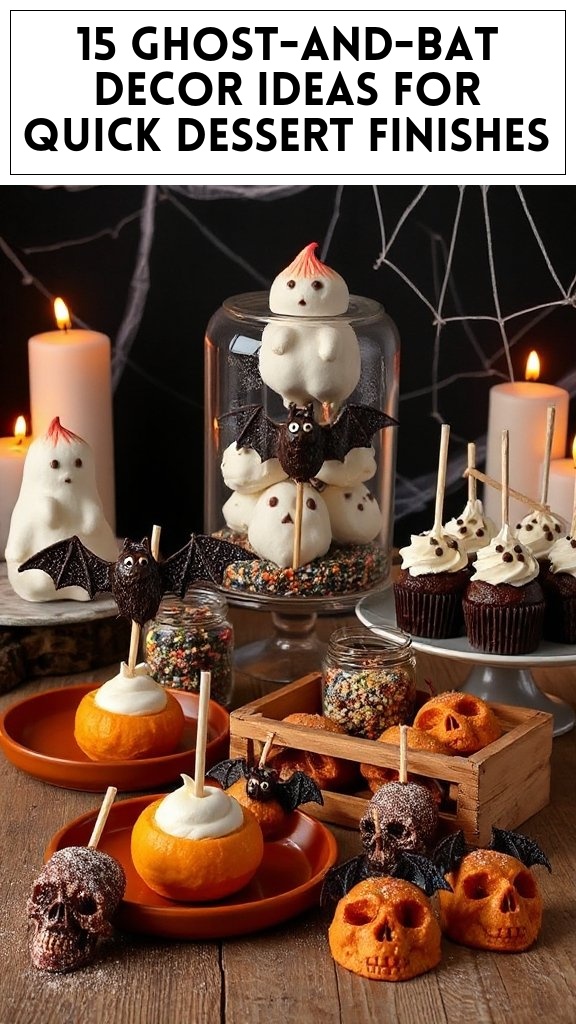
Begin by washing the apples thoroughly under cool running water to remove any dirt or wax. Pat them dry with a clean towel.
Core the apples using an apple corer or a sharp knife. This will create a space in the middle for the peanut butter.
Cut each apple into quarters. Keep the skin on for added texture and color.
Take one apple quarter and spread a generous layer of peanut butter or almond butter on the cut side of the apple. This will act as the “glue” for attaching your monster features.
Press mini marshmallows into the peanut butter to represent the monster’s teeth. You can insert them at an angle for a spooky look.
Add candy eyes on top of the peanut butter by pressing them gently into the spread. Arrange them however you’d like to give your monster character!
Some kids may enjoy adding slivered almonds or pretzel sticks as extra teeth on the other side of the apple quarter for added crunch and detail.
If you’re feeling creative, melt some chocolate chips in the microwave (30-second intervals) until smooth and drizzle over the apple monster for additional decoration.
Place your finished Monster Apple Bites on a serving platter and enjoy! These delicious snacks are sure to be a hit at any Halloween gathering.
Spooky Ghost Bananas
Spooky Ghost Bananas are a fun and healthy Halloween treat that kids will love! These adorable snacks are made with simple ingredients and can be easily assembled, making them perfect for a spooky-themed snack table or a fun classroom activity. With their playful ghostly appearance, they add a delightful touch to any Halloween gathering.
Begin by peeling the bananas and cutting them in half. Each banana will create two ghostly figures.
Melt the white chocolate or yogurt coating in a microwave-safe bowl. Heat it in 30-second intervals, stirring in between until it’s smooth and fully melted.
Dip each banana half into the melted white chocolate or yogurt, ensuring that it is completely covered. Allow any excess to drip off.
Place the dipped banana halves onto a parchment-lined baking sheet. This will prevent them from sticking and make for easy cleanup.
While the white chocolate or yogurt coating is still soft, use mini chocolate chips to create the ghost’s eyes and mouth. Press them gently into the coating to make sure they stick.
Once all the bananas are decorated, place the baking sheet in the freezer for about 30 minutes or until the coating is firm.
After the chilling time, remove the spooky ghost bananas from the freezer, and they are ready to serve!
Arrange the ghost bananas on a platter and enjoy your fun and festive Halloween treat! They’re perfect for small hands and sure to bring smiles to everyone.
Witch’s Hat Cookies
Witch’s Hat Cookies are a delightful and whimsical Halloween treat that kids will adore! These easy-to-make cookies feature a classic chocolate cookie base topped with a Hershey’s Kiss, creating a fun witch hat appearance. They’re perfect for parties, school events, or a fun afternoon bake-off with little ones.
Preheat your oven to 350°F (175°C) and line a baking sheet with parchment paper to prevent the cookies from sticking.
In a large bowl, prepare the chocolate cookie dough according to your favorite recipe or use store-bought dough. If using homemade, verify the dough is well mixed and smooth.
Take a small portion of the chocolate cookie dough, about 1 inch in diameter, and roll it into a ball. Then roll the ball in sugar to give it a sweet sparkle before baking.
Place the sugar-coated cookie balls on the prepared baking sheet, spacing them about 2 inches apart to allow for spreading.
Bake the cookies in the preheated oven for about 8-10 minutes, or until they are set but still soft.
Once they are out of the oven, immediately press a Hershey’s Kiss firmly into the center of each cookie while they are still warm. The heat will slightly melt the bottom of the kiss, helping it stick to the cookie.
Allow the cookies to cool on the baking sheet for a few minutes before transferring them to a wire rack to cool completely.
Once the cookies are completely cool, use the orange decorating icing to pipe a band around the base of each Hershey’s Kiss to resemble the buckle of a witch’s hat.
Let the icing set, and then arrange your Witch’s Hat Cookies on a platter for all to enjoy. These festive treats are sure to be a hit at any Halloween celebration!
Pumpkin Deviled Eggs
Pumpkin Deviled Eggs are a fun and festive twist on the classic deviled egg, perfect for Halloween gatherings. These bright orange bites not only look like mini pumpkins but also pack a delicious flavor that’s sure to be a hit with both kids and adults. With a few simple ingredients, you can easily whip up this delightful snack that adds a spooky touch to your Halloween festivities.
Ingredients
Quantity
Large eggs
6
Mayonnaise
1/4 cup
Mustard
1 teaspoon
Sweet pickle relish
1 tablespoon
Paprika
1/2 teaspoon
Salt
1/4 teaspoon
Orange food coloring
2-3 drops
Chives (for stems)
6 pieces
Cooking Steps:
Begin by hard boiling the eggs. Place the eggs in a pot, cover them with water, and bring to a boil. Once boiling, cover the pot, remove it from heat, and let it sit for about 12 minutes.
After 12 minutes, transfer the eggs to a bowl of ice water to cool completely. Once cool, peel the eggs and slice them in half lengthwise.
Carefully remove the egg yolks and place them in a mixing bowl. Set the egg whites aside on a serving platter.
Mash the yolks with a fork until they are fine and crumbly. Then, add the mayonnaise, mustard, sweet pickle relish, paprika, salt, and orange food coloring. Mix until everything is well combined and the mixture is smooth.
Using a spoon or a piping bag, fill each egg white half with the yolk mixture, creating a rounded mound to resemble a pumpkin shape.
For the finishing touch, take a piece of chive and insert it into the top of each egg to act as the pumpkin stem. This adds a cute and festive detail.
Chill the Pumpkin Deviled Eggs in the refrigerator for about 15-20 minutes before serving. This helps the flavors meld together and makes them invigorating to eat.
Arrange the finished Pumpkin Deviled Eggs on a serving platter. Enjoy this delightful Halloween treat at your next party or gathering!
Mummy Hot Dogs
Mummy Hot Dogs are a spooky and fun Halloween snack that will delight kids and adults alike! These bite-sized treats are made by wrapping hot dogs in crescent dough to create a mummy-like appearance. With a dash of creativity—and perhaps a bit of ketchup or mustard for eyes—these Mummy Hot Dogs are sure to be a hit at your Halloween festivities.
Ingredients
Quantity
Hot dogs
8
Crescent roll dough
1 tube (8 oz)
Mustard or ketchup (for eyes)
As needed
Cooking spray (optional)
As needed
Cooking Steps:
Preheat your oven to 375°F (190°C) and line a baking sheet with parchment paper or spray it lightly with cooking spray.
Roll out the crescent roll dough on a clean, flat surface. Instead of separating the dough into triangles, pinch the seams together to form a single sheet. Then, cut the dough into thin strips, about 1/4 inch wide.
Take one hot dog and start wrapping the dough strips around it, leaving a small space at one end for the mummy’s “face”. The wrapping does not need to be perfect; a little unevenness adds to the mummy effect.
Repeat this wrapping process for all the hot dogs until they are all covered in dough.
Place the wrapped hot dogs onto the prepared baking sheet, making sure they are spaced apart as they will puff up while baking.
Bake in the preheated oven for about 12-15 minutes, or until the dough is golden brown and cooked through.
Once baked, remove the Mummy Hot Dogs from the oven and let them cool slightly. Use mustard or ketchup to dot on little eyes at the exposed ends of the dogs.
Serve warm and enjoy your Mummy Hot Dogs at your Halloween gathering! These spooky snacks are sure to bring smiles all around.
Creepy Crawly Jello Cups
Creepy Crawly Jello Cups are a thrilling Halloween treat that will excite and delight children and adults alike! These colorful jello cups, filled with gummy worms or other creepy candy crawlers, are not only visually fun to look at but also delicious to eat. Perfect for a Halloween party, these treats can be made ahead of time and enjoyed as a spooky snack!
Ingredients
Quantity
Jello (any flavor)
2 cups boiling water + 2 cups cold water
Gummy worms (or other creepy candy)
1 cup
Clear plastic cups
8
Whipped cream (optional)
For topping
Cooking Steps:
Begin by boiling 2 cups of water in a pot. Once boiling, remove it from heat and add the Jello powder to the hot water. Stir well until the Jello is completely dissolved.
Add 2 cups of cold water to the dissolved Jello mixture and stir to combine.
Take your clear plastic cups and place them on a stable surface. Pour the Jello mixture into each cup, filling them about halfway.
Before the Jello sets, gently place a few gummy worms or your chosen creepy candies into each cup. Make sure they are partially submerged in the Jello for that “crawling” effect.
Carefully transfer the cups to the refrigerator and let them chill for about 4 hours, or until the Jello is fully set.
Once the Jello has set, you can add a dollop of whipped cream on top if you wish, for a spooky, ghostly appearance.
Serve the Creepy Crawly Jello Cups at your Halloween gathering and watch as your guests enjoy this fun and creepy treat!
Frankenstein Rice Krispie Treats
Frankenstein Rice Krispie Treats are a fun and festive twist on the classic dessert that will get everyone in the Halloween spirit! These gooey treats are shaped like Frankenstein’s monster and decorated with green and black icing, making them a perfect spooky snack for your Halloween celebration. Kids will love the creative aspect of crafting and decorating these treats, and they taste just as delightful as they look!
Begin by preparing a large mixing bowl by greasing it lightly with cooking spray to prevent sticking.
In a large saucepan, melt the butter over medium heat. Once the butter is melted, add the mini marshmallows and stir continuously until they are completely melted and smooth.
Remove the saucepan from heat and add a few drops of green food coloring to the melted marshmallow mixture. Stir well until the color is evenly distributed.
Gradually add the Rice Krispies cereal to the green marshmallow mixture, stirring gently until the cereal is fully coated with the sticky marshmallow.
Once combined, transfer the mixture into a greased 9×13 inch pan. Use a spatula (you may want to grease it lightly) to press the mixture evenly into the pan, making sure it is compact.
Let the Rice Krispie treats cool for about 30 minutes, or until they are firm enough to cut.
Once the treats are set, turn the pan upside down on a cutting board to remove the Rice Krispie block. Cut it into rectangle or square shapes to resemble Frankenstein’s head.
Use black icing to create eyes, a mouth, and bolts on the sides of the Frankenstein treats. Add candy eyes for a fun finishing touch if desired.
Serve your Frankenstein Rice Krispie Treats at your Halloween gathering in a festive display, and watch as both kids and adults enjoy these eerie yet delicious snacks!