
Spooky Spider Veggie Board

The Spooky Spider Veggie Board is a fun and creative way to serve a colorful assortment of healthy vegetables, making it a perfect snack for Halloween festivities! This dish features a variety of fresh vegetables arranged to resemble a spider crawling over a web, making healthy eating exciting and engaging for kids. It’s not only nutritious but also encourages little ones to appreciate the goodness of veggies during the spooky season.
| Ingredient | Quantity |
|---|---|
| Baby carrots | 2 cups |
| Cucumber | 1 medium |
| Cherry tomatoes | 1 cup |
| Broccoli florets | 1 cup |
| Black olives | 1/2 cup |
| Red bell pepper | 1 medium |
| Hummus (or ranch dip) | 1 cup |
Instructions
- Prepare the Base: Start by arranging a (clean and dry) large serving platter or board. You want to create an exciting visual presentation for your veggie board.
- Make the Spider: Take the cucumber and slice it into rounds to form the body of the spider. You’ll need a few slices for the round body and some to create legs. Use 2 rounds for the body and cut 4 additional rounds in half for the spider’s legs.
- Create the Spider’s Body: Place the 2 full cucumber rounds side by side in the center of the platter to represent the spider’s body. Then, take 4 cucumber half-rings and position them on either side of the body to form the legs.
- Add the Eyes: Use the black olives as the spider’s eyes. Cut two small olives in half and place half of each on top of the cucumber body to resemble eyeballs.
- Create the Web: Arrange the baby carrots around the spider to replicate spider webs radiating from the body. You can place them in a circular pattern coming out from the spider, or create a crisscross pattern.
- Fill in the Surroundings: Add the cherry tomatoes and broccoli florets around the spider and web. This will create a burst of color and texture on your veggie board.
- Garnish with the Bell Pepper: Slice the red bell pepper into thin strips and place them around the perimeter of the platter as a decorative border.
- Add Dip: In a small bowl, place the hummus (or ranch dip) in the center or off to the side of the spider body. This will not only add flavor but also serve as a delicious dipping option for the vegetables.
- Serve & Enjoy: Once your Spooky Spider Veggie Board is assembled, gather the kids around for a fun snack time! Remind them to enjoy the veggies and have fun during the Halloween celebrations.
Monster Mouth Fruit Platter

The Monster Mouth Fruit Platter is a spooky yet fun way to encourage kids to enjoy healthy fruit snacks this Halloween! This vibrant dish features an assortment of fruits arranged to resemble a ghoulish monster’s open mouth, complete with teeth made from apple slices and a variety of colorful toppings. It’s an engaging and creative way to get children excited about eating fruit while adding a festive twist to your Halloween gatherings.
| Ingredient | Quantity |
|---|---|
| Apple (green or red) | 2 medium |
| Banana | 1 large |
| Strawberries | 1 cup |
| Blueberries | 1 cup |
| Grapes (green or red) | 1 cup |
| Kiwi | 2 medium |
| Mini marshmallows | 1 cup |
| Peanut butter (optional) | 1/2 cup |
Instructions
- Prepare the Apples: Start by washing the apples thoroughly. Cut each apple in half horizontally. Then, cut each half into thin slices, leaving the peel on to maintain color and texture. Set the apple slices aside.
- Create the Monster Mouth: Take a large serving platter and position one half of the apple with the cut side facing up. This will serve as the base for your monster’s mouth.
- Add the Teeth: Take the apple slices you cut earlier and arrange them along the edges of the apple half, pointy side sticking up. This mimics sharp monster teeth.
- Prepare the Tongue: Slice the banana lengthwise in half or into smaller pieces, and place it in the center of the apple half to represent the monster’s tongue. The banana’s yellow color adds a cheerful touch!
- Decorate the Mouth: Fill the spaces in the mouth with strawberries, blueberries, and grapes to create a colorful and inviting appearance. Place the strawberries around the tongue, some cut in halves to show off their juicy insides, while scattering blueberries and grapes throughout for visual appeal.
- Make Monster Eyes: Cut the kiwis in half and use the flesh side as eyes. You can place a blueberry on each half to represent the pupils. Position the kiwi halves on top of the apple half to complete the monster’s face.
- Add Marshmallow Teeth (Optional): For extra fun, place mini marshmallows around the edges of the monster’s mouth to fill any gaps and create additional “teeth.” This adds a playful touch that kids will love!
- Peanut Butter Dip (Optional): If desired, serve peanut butter in a small bowl on the side for a fun dipping option. Kids can use it to dip strawberries and grapes, enhancing the flavor and making the snack even more enjoyable.
- Serve & Enjoy: Present your Monster Mouth Fruit Platter on a table, and watch as the kids jump into this deliciously spooky treat! It’s sure to be a hit at any Halloween celebration.
Pumpkin Patch Cheese and Dip Board

The Pumpkin Patch Cheese and Dip Board is a delightful and visually appealing platter perfect for Halloween gatherings. It combines a variety of cheeses, crackers, and healthy vegetables arranged to resemble pumpkins and gourds, creating a fun and festive presentation. Kids will love choosing from this colorful board, making it a great way to encourage snack time while enjoying the spirit of Halloween.
| Ingredient | Quantity |
|---|---|
| Cheddar cheese | 8 oz (cubed) |
| Pepper jack cheese | 8 oz (cubed) |
| Cream cheese | 4 oz |
| Baby carrots | 1 cup |
| Cucumber | 1 large |
| Bell peppers (orange and green) | 1 each |
| Ranch dressing | 1/2 cup |
| Crackers (variety) | 1 box |
| Fresh parsley or chives | For garnish |
Instructions
- Prepare Your Base: Start by selecting a large wooden or plastic serving board as your base for the cheese and dip display. This will be the foundation for your pumpkin patch presentation.
- Cut the Vegetables: Slice the cucumber into thick rounds, and then using a small cookie cutter, cut out shapes to resemble pumpkin tops (optional). Cut the orange bell pepper in half and remove the seeds—these halves can stand in for small pumpkins or gourds.
- Assemble the Cheese Shapes: Use a cookie cutter in the shape of a pumpkin (or a knife to carve) to cut the cheddar and pepper jack cheese into festive shapes. You can also form small balls of cream cheese and roll them in chopped herbs to create little “pumpkins” with green tops.
- Arrange the Dip: Place the ranch dressing in a small bowl and set it in the center of the board. This will act as the “dirt” in your pumpkin patch, surrounding it with the colorful vegetables and cheese shapes.
- Place the Crackers: Scatter a variety of crackers around the cheese, filling in the gaps on the board. This provides a tasty pairing with the cheeses and veggies.
- Add the Carrots: Use baby carrots to represent “pumpkin vines” by placing them around the cheese and dip, offering a vibrant orange contrast.
- Garnish: For a finishing touch, sprinkle fresh parsley or chives around the board for greenery, simulating leaves or grass present in a pumpkin patch.
- Serve and Enjoy: Once everything is beautifully arranged, invite the kids to enjoy their spooky Halloween cheese and dip board. Encourage them to create their own combinations with the cheeses, crackers, and veggies for a fun and interactive experience!
Ghostly Banana and Yogurt Treats

The Ghostly Banana and Yogurt Treats are a fun and healthy Halloween snack that your kids will absolutely love! These adorable ghost-shaped treats are a simple combination of bananas dipped in yogurt, creating a spooky yet delicious treat that’s perfect for Halloween parties or just for a fun after-school snack. Not only are they cute, but they also provide a good source of potassium and calcium!
| Ingredient | Quantity |
|---|---|
| Ripe bananas | 2 large |
| Vanilla yogurt | 1 cup |
| Mini chocolate chips | 1/4 cup |
| Pop sticks (optional) | 5-10 sticks |
Instructions
- Prepare the Bananas: Start by peeling the ripe bananas and cutting each banana in half crosswise. If you’d like, you can insert a pop stick into one end of each banana half for easy handling.
- Dip the Bananas: In a medium bowl, pour the vanilla yogurt. One by one, dip each banana half into the yogurt, ensuring that it is completely covered. Allow any excess yogurt to drip off before placing them on a wax paper-lined baking sheet.
- Create Ghost Faces: Once the yogurt-coated bananas are placed on the baking sheet, use mini chocolate chips to create eyes and mouths. Simply press two mini chocolate chips onto each banana to resemble ghostly faces.
- Freeze the Treats: Place the baking sheet into the freezer for about 2-3 hours, or until the yogurt coating is frozen solid. This helps the ghosts maintain their shape and makes them extra invigorating!
- Serve: Once frozen, carefully remove the ghostly banana treats from the baking sheet. Serve them immediately or store them in a zip-lock bag in the freezer for later enjoyment!
- Enjoy: Gather the kids and let them have fun snacking on these spooky ghost treats while keeping the Halloween spirit alive!
Wicked Witch’s Veggie Cauldron

The Wicked Witch’s Veggie Cauldron is a delightful and colorful dish that combines a variety of fresh vegetables into a spooky and fun Halloween-themed presentation. This dish is perfect for a Halloween party, serving as a nutritious snack that kids will love to munch on. The vibrant colors and whimsical presentation make this veggie platter not only healthy but also eye-catching!
| Ingredient | Quantity |
|---|---|
| Bell peppers (various colors) | 2 large |
| Carrot sticks | 1 cup |
| Cucumber | 1 large |
| Cherry tomatoes | 1 cup |
| Celery sticks | 1 cup |
| Broccoli florets | 1 cup |
| Hummus | 1 cup |
| Olive slices | 1/4 cup |
| Black olives (for cauldron handle) | 3-4 |
| Pita chips (optional) | 1 bag |
Instructions
- Prepare the Vegetables: Wash all the vegetables thoroughly. Cut the bell peppers into large slices, remove seeds, and set aside. Cut the cucumber into thick wedges. Peel and cut the carrot into sticks. Cut the celery sticks into equal lengths.
- Create the Veggie Cauldron: On a large serving platter, arrange the bell pepper slices in a circular shape to resemble a cauldron. This will serve as the base for your veggie display. Place a bowl of hummus in the center to act as the “witch’s brew.”
- Add Vegetables Around the Cauldron: Surround the hummus with the prepared carrot sticks, cucumber wedges, cherry tomatoes, celery sticks, and broccoli florets. Be creative with the arrangement, making sure to include a variety of colors and shapes.
- Make the Cauldron a Little Spookier: Use the olive slices to create “eyes” on the bell pepper cauldron. Simply place a couple of olive slices within the pepper to give it a spooky face. For an extra Halloween touch, you can use black olives to create a handle for the cauldron by sticking two olives on either side of the bell pepper slices.
- Serve: Add a side of pita chips for an optional crunchy treat. Encourage kids to dip their veggies into the hummus using the carrot sticks or celery for a fun, interactive snack!
- Enjoy: Gather everyone around the Wicked Witch’s Veggie Cauldron and watch as they enjoy this healthy and fun Halloween treat!
Creepy Crawly Snack Board

The Creepy Crawly Snack Board is a fun and inventive way to get kids excited about healthy snacking this Halloween. This board features an assortment of nutritious items presented in a playful, spooky manner that looks like a creepy crawly scene. With some simple ingredients and creative arrangement, you can delight kids and adults alike with this ghastly yet delicious treat!
| Ingredient | Quantity |
|---|---|
| Mini pretzel sticks | 1 cup |
| Cucumber | 1 large |
| Cherry tomatoes | 1 cup |
| Black grapes | 1 cup |
| Almonds (for spider legs) | 1/2 cup |
| Cheese slices | 4-6 slices |
| Hummus or ranch dip | 1 cup |
| Sliced bell pepper (for additional decoration) | 1 cup |
Instructions
- Prepare the Vegetables and Fruits: Wash the cucumber and cherry tomatoes thoroughly. Slice the cucumber into rounds and set aside. Rinse the black grapes and keep them in a bowl.
- Create the Base: On a large, flat serving board or platter, start by placing bowls of hummus or ranch dip in the center. This will serve as the “swamp” for your creepy crawly creatures.
- Add Cucumber and Cherry Tomatoes: Arrange the cucumber slices around the bowl of dip, creating a circle that acts as a “border.” Then, place the cherry tomatoes around the cucumbers to create a vibrant look.
- Make the Creepy Crawly Spiders: For the spiders, take some cheese slices and cut them into circles. Use mini pretzel sticks for the spider legs by inserting them into the cheese circles. Alternatively, you can shape a small ball of cheese and press in almonds as “legs” for a more thematic spider effect. Place these spiders scattered around the board to heighten the creepy effect.
- Add the Black Grapes: Scatter black grapes around the board to represent creepy crawly insects. For an added twist, you can set some grapes on top of the cucumber slices or dip some in the hummus for a fun surprise.
- Decorate Further: If desired, use sliced bell peppers to cut out shapes like bats or ghosts to lend extra Halloween spirit. Place these decorations strategically to make the board look lively and festive.
- Serve: Encourage kids to grab their snacks from the board, using the mini pretzels or cucumber slices to dip into the hummus or ranch dip.
- Enjoy: Gather around the Creepy Crawly Snack Board and watch as the fun and healthy snacking begins, bringing smiles and excitement to your Halloween gathering!
Halloween Fruit Skewers

Halloween Fruit Skewers are a delightful and colorful treat that adds a festive flair to your Halloween celebration. These fun skewers combine a variety of fruits cut into spooky shapes, making them a healthy and visually appealing snack for kids and adults alike. They can be enjoyed as is or paired with a delicious yogurt dip.
| Ingredient | Quantity |
|---|---|
| Strawberries | 1 cup |
| Pineapple chunks | 1 cup |
| Green grapes | 1 cup |
| Orange slices | 1 cup |
| Bananas | 2 |
| Mini chocolate chips | 1/4 cup |
| Yogurt (for dipping) | 1 cup |
| Skewers | 10-12 |
Instructions
- Prepare the Fruit: Wash all the fruit thoroughly. Hull the strawberries, peel the bananas, and cut them into thick slices. If using whole orange slices, make sure they are pre-sliced or easy to manage.
- Cut Fruit into Shapes: Using a small Halloween-themed cookie cutter (optional), cut some of the fruit into fun shapes like stars, pumpkins, or bats. You can use the pineapple for the shapes, as it’s easier to cut into forms than some softer fruits.
- Assemble the Skewers: Take a skewer and start threading the fruit onto it, alternating between different colors and textures to create a visually appealing design. For example, you can start with a strawberry, then add a banana slice, followed by a pineapple chunk, and finish with a green grape.
- Add Spooky Decorations: To represent spooky elements, place mini chocolate chips on the end of the skewers as “eyes” or simply scatter some on the plate around the skewers for a fun touch. You can also arrange the fruit in such a way that it resembles ghosts or monsters.
- Prepare the Yogurt Dip: If desired, serve with a yogurt dip. Simply place yogurt in a small bowl and optionally add a sprinkle of cinnamon or a dash of vanilla extract for extra flavor.
- Serve: Arrange the completed fruit skewers on a platter, along with the yogurt dip on the side. Encourage kids to grab their own skewers and dip them in yogurt.
- Enjoy: Watch as everyone enjoys this fun, festive, and healthy Halloween treat!
Mummy Wraps and Dips

Mummy Wraps and Dips are a fun and creative Halloween dish that transforms ordinary ingredients into adorable, spooky treats perfect for kids. These delightful wraps combine tasty deli meats and cheese, artfully wrapped in crescent dough to resemble cute mummies, and served alongside a variety of dips for extra flavor. They’re simple to make and sure to be a hit at any Halloween gathering!
| Ingredient | Quantity |
|---|---|
| Crescent roll dough | 2 cans |
| Deli turkey or ham | 8 ounces |
| Mozzarella cheese sticks | 8 ounces |
| Black olives (for eyes) | 1/2 cup |
| Mustard (for dipping) | 1/2 cup |
| Ranch dressing (for dipping) | 1/2 cup |
| Marinara sauce (for dipping) | 1/2 cup |
Instructions
- Preheat the Oven: Preheat your oven to 375°F (190°C) to prepare for baking the mummy wraps.
- Prepare the Crescent Roll Dough: Open the cans of crescent roll dough and unroll the sheets. Keep them separated into triangles.
- Assemble the Mummies: Take a slice of deli turkey or ham and place it on a triangle of crescent dough. Add a mozzarella cheese stick on top of the meat. Roll the dough from the wide end to the narrow end while wrapping it around the meat and cheese.
- Create Mummy Wrappings: Once rolled, cut additional small strips from the remaining dough. Gently wrap these strips around the rolled dough to create a “bandage” effect, leaving gaps to represent mummy wrappings. Make sure the ends are sealed so the filling does not spill out during baking.
- Add Eyes: Place a small piece of black olive on top of each mummy wrap to serve as the eyes.
- Bake the Mummies: Place the wrapped mummies on a baking sheet lined with parchment paper. Bake in the preheated oven for 10-12 minutes, or until the dough is golden brown.
- Prepare the Dips: While the mummies are baking, prepare your dips by placing mustard, ranch dressing, and marinara sauce in small bowls for serving.
- Serve: Once the mummies are baked to perfection, remove them from the oven and let them cool slightly before serving. Arrange them on a platter next to the bowls of dips.
- Enjoy: Encourage kids to dip their mummy wraps into their favorite sauces before taking a bite, turning snack time into a fun Halloween experience!
Fearsome Fruit and Nut Medley

The Fearsome Fruit and Nut Medley is a nutritious and visually striking Halloween-themed snack that showcases a variety of colorful fruits and crunchy nuts. This dish is not only healthy but also engaging for kids, making it an excellent addition to any Halloween gathering. The combination of sweet, tangy, and nutty flavors encourages kids to enjoy fruits while celebrating the spooky season.
| Ingredient | Quantity |
|---|---|
| Apples (diced) | 2 medium |
| Pears (diced) | 2 medium |
| Grapes (halved) | 1 cup |
| Oranges (segments) | 2 medium |
| Dried cranberries | 1/2 cup |
| Mixed nuts (chopped) | 1/2 cup |
| Honey (optional) | 2 tablespoons |
| Cinnamon (optional) | 1/2 teaspoon |
Instructions
- Prepare the Fruits: Begin by washing all fresh fruit under cold running water. Dice the apples and pears into bite-sized pieces, ensuring that there are no seeds. Cut the grapes in half and separate the segments of the oranges, removing any seeds if present.
- In a Large Bowl: Combine the diced apples, pears, halved grapes, and orange segments in a large mixing bowl. Gently toss the fruits together to mix.
- Add Dried Fruit and Nuts: Next, add the dried cranberries and mixed nuts to the bowl with the fresh fruit. Again, use a gentle tossing motion to incorporate everything without mashing the fresh fruit.
- Flavoring (Optional): If desired, drizzle honey over the fruit and nut mixture for added sweetness. Sprinkle cinnamon on top for a touch of spice. Gently toss the mixture again to evenly coat the fruits with the honey and cinnamon.
- Presentation: After mixing, transfer the Fearsome Fruit and Nut Medley to a serving platter or individual bowls for a festive look. You can also use cookie cutters to create shape out of some fruits for added fun.
- Chill (Optional): If you prefer a cooler snack, cover the dish with plastic wrap and place it in the refrigerator for about 30 minutes before serving. This allows the flavors to meld and enhances the invigorating aspect of the snack.
- Serve and Enjoy: Finally, serve the Fearsome Fruit and Nut Medley at your Halloween gathering, inviting kids to enjoy a colorful and healthy treat that adds a festive touch to the celebration!
Ghoulish Guacamole and Tortilla Chips
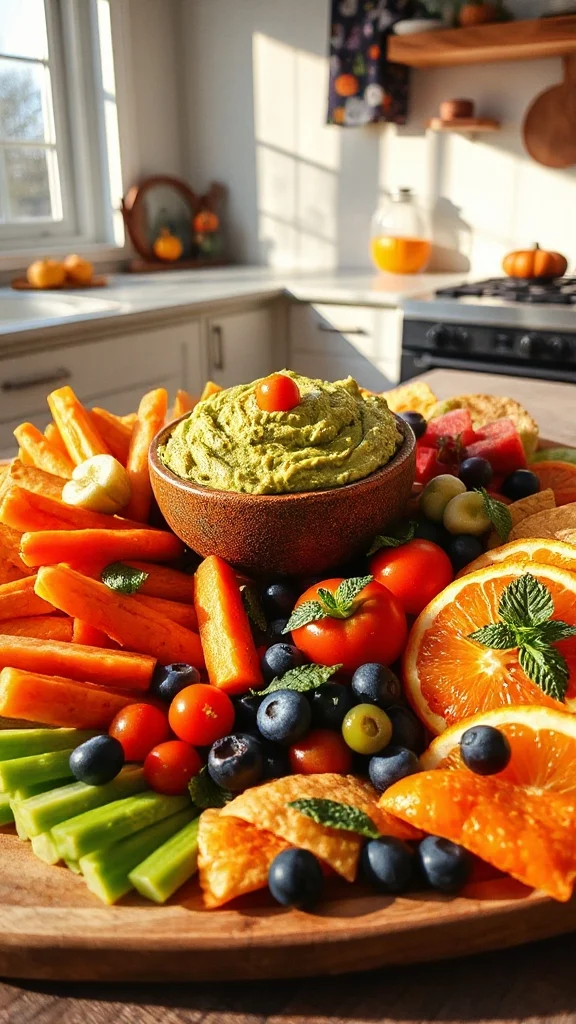
Ghoulish Guacamole is a playful and delicious dip that brings a fun twist to the traditional avocado spread, making it perfect for Halloween festivities. Crafted with ripe avocados, zesty lime juice, and a mix of spices, this spooky green delight pairs wonderfully with crunchy tortilla chips for a kid-friendly snack that will be a hit at any Halloween gathering.
| Ingredient | Quantity |
|---|---|
| Ripe avocados | 2 large |
| Lime juice | 2 tablespoons |
| Garlic (minced) | 1 clove |
| Onion (finely chopped) | 1/4 cup |
| Tomato (diced) | 1 medium |
| Fresh cilantro (chopped) | 2 tablespoons |
| Salt | 1/2 teaspoon |
| Tortilla chips | 1 bag |
Instructions
- Prep the Ingredients: Start by gathering all the ingredients. Cut the ripe avocados in half, remove the pit, and scoop out the creamy flesh into a mixing bowl.
- Mash the Avocados: Using a fork or a potato masher, gently mash the avocados to your preferred level of smoothness. If you like a chunkier guacamole, be careful not to over-mash.
- Add Lime Juice: Squeeze fresh lime juice over the mashed avocados. This adds flavor and helps prevent the avocados from browning.
- Incorporate Other Ingredients: Add the minced garlic, finely chopped onion, diced tomato, and chopped fresh cilantro to the bowl. Sprinkle salt over the mixture as well.
- Mix Everything Together: Using a spoon, gently fold all the ingredients together until well combined. Be careful not to mash the tomatoes too much to keep some texture in the guacamole.
- Taste and Adjust: Give the guacamole a taste. If needed, you can add more salt or lime juice according to your preference.
- Prepare for Serving: To make it extra fun for Halloween, create a spooky face on the guacamole with toppings like sliced olives for eyes, or use a dollop of sour cream to form a ghost shape on top.
- Serve with Tortilla Chips: Scoop the Ghoulish Guacamole into a serving bowl and arrange a plate of tortilla chips around it.
- Enjoy the Festivities: Serve immediately at your Halloween gathering, inviting kids and adults alike to enjoy this tasty treat that’s sure to steal the spotlight!
Chilling Carrot and Celery Sticks

Chilling Carrot and Celery Sticks are a rejuvenating and crunchy addition to your Halloween spread that’s both healthy and fun for kids. Perfect for dipping in spooky dips or enjoying plain, these vibrant veggies can make healthy snacking exciting during the Halloween festivities. Not only are they nutritious, but they can also be arranged to look like Halloween characters, adding to the festive atmosphere.
| Ingredient | Quantity |
|---|---|
| Carrots | 4 large |
| Celery | 4 large stalks |
| Cream cheese | 1 cup |
| Ranch dressing | 1/2 cup |
| Black olives | 1/2 cup (sliced) |
| Red bell pepper | 1 (for decoration) |
| Optional garnish | Fresh parsley leaves (for a ghostly effect) |
Instructions
- Wash and Prepare the Vegetables: Start by rinsing the carrots and celery under cold water to remove any dirt. Pat them dry with a paper towel.
- Cut the Carrots and Celery: Trim the ends of the carrots and celery stalks. For the carrots, cut them into sticks about 4-5 inches long. For the celery, cut them into 4-5 inch sections as well.
- Create the Dip: In a mixing bowl, combine the cream cheese and ranch dressing. Stir until the mixture is smooth and well blended. This will serve as your fun and spooky dip.
- Arrange the Veggies: On a large serving platter, create a spooky display by standing the carrot and celery sticks upright in the dip mixture. You can use a small bowl filled with the dip in the center or spoon the dip onto the platter around the sticks.
- Make Ghosts with Olives: Take the sliced black olives and place them on top of the cream cheese dip to represent eyes on the carrot sticks. This adds a playful touch to your veggie display.
- Add Colorful Decorations: If you wish, slice the red bell pepper into small shapes (like triangles) to become additional spooky decorations on your platter, or use them to create a fun Halloween-related figure among the veggies.
- Garnish (Optional): For an extra festive touch, sprinkle fresh parsley leaves around the platter to create a garden effect that can accentuate the veggie sticks.
- Serve and Enjoy: Present your Chilling Carrot and Celery Sticks at your Halloween gathering for everyone to enjoy. Encourage kids to dip and snack on these healthy treats while indulging in the spooky festivities!
Haunted House Sweet Treat Board

The Haunted House Sweet Treat Board is a delightful and creative way to celebrate Halloween by assembling an array of sweet treats that are perfect for kids and adults alike. This fun and interactive dessert board encourages everyone to mix and match with their favorite candies, cookies, and chocolates, while letting their imagination run wild as they build their own spooky edible houses and creatures. It’s an ideal centerpiece for your Halloween gathering, guaranteed to impress with its visual appeal and delicious flavors.
| Ingredient | Quantity |
|---|---|
| Graham crackers | 1 box |
| Chocolate frosting | 1 tub |
| Mini marshmallows | 2 cups |
| Candy corn | 1 bag (16 oz) |
| Gummy candies | 1 bag (assorted) |
| Pretzel sticks | 1 bag |
| Licorice strings | 1 bag |
| Chocolate bars (fun size) | 4-6 pieces |
| Edible eyes | 1 package |
| Sprinkles | 1 container |
Instructions
- Prepare the Board: Start by choosing a large, flat serving board or platter to assemble your sweet treat display. Confirm it’s clean and ready for decoration.
- Create the House Base: Use the graham crackers as the foundation for your haunted houses. Break or cut them into various shapes like triangles for roofs and rectangles for walls. Arrange these pieces on the board to represent multiple houses.
- Add Chocolate Frosting: Use a spatula to spread chocolate frosting on the graham crackers, which will act as “glue” to hold the pieces together and add flavor. Securely place the walls and roofs of the houses in position.
- Decorate with Candies: Begin decorating the houses with mini marshmallows, candy corn, and gummy candies. Use the marshmallows as “bricks” on the walls and candy corn as fun roof tiles. Get creative!
- Use Pretzel Sticks: Insert pretzel sticks into the houses or around them to create spooky fences or support poles. You can also break them into smaller pieces to use as details.
- Design with Licorice: Cut licorice strings into manageable pieces and use them to outline windows, doors, or trails leading to each haunted house.
- Place Chocolate Bars: Position fun-sized chocolate bars around the board as additional decoration. These can act as more tasty elements to your display.
- Add Edible Eyes: For a creepy touch, stick edible eyes onto some of the candies or marshmallows to create eerie creatures and enhance the haunted theme.
- Sprinkle Finishing Touches: Use colorful sprinkles to fill any gaps on the board or to enhance the overall look of your sweet treat assembly. Scatter them generously for a vibrant touch.
- Serve and Enjoy: Once complete, gather your family and friends around the Haunted House Sweet Treat Board. Let everyone help themselves to the goodies and enjoy the festive spirit of Halloween with this delightful, edible creation!
Eerie Edible Eyeballs

Eerie Edible Eyeballs are a fun and spooky treat perfect for Halloween gatherings. These creepy-looking snacks are made using cake pops coated in white chocolate and decorated to resemble creepy eyeballs. They’re not only a hit with kids but can also serve as a playful centerpiece for your Halloween dessert spread, adding a touch of whimsy and fright to your celebration.
| Ingredient | Quantity |
|---|---|
| Cake (any flavor, baked and cooled) | 1 cake (8-inch) |
| Cream cheese frosting | 1 cup |
| White chocolate chips | 2 cups |
| Edible candy eyes | 1 package |
| Food coloring (red) | A few drops |
| Lollipop sticks | 12 sticks |
| Candy melts (red or black) | 1 cup (optional) |
Instructions
- Prepare the Cake Mixture: Start by crumbling the baked and cooled cake into a large bowl. Break it apart until it resembles fine crumbs.
- Mix with Frosting: Add the cream cheese frosting to the crumbled cake. Mix thoroughly until the mixture is well combined and holds together when pressed. You can use your hands for better mixing.
- Form the Eyeballs: Scoop out small portions of the mixture, about 1 inch in diameter, and roll them into balls using your hands. Place the formed cake balls on a baking sheet lined with parchment paper.
- Insert the Sticks: Once all the cake balls are prepared, insert lollipop sticks into the center of each ball, pushing it about halfway through. This will help in dipping them later.
- Chill the Eyeballs: Place the baking sheet with the cake balls in the refrigerator for at least 30 minutes to allow them to firm up.
- Melt the White Chocolate: While the cake balls are chilling, melt the white chocolate chips in a microwave-safe bowl. Heat in 30-second intervals, stirring in between until the chocolate is fully melted and smooth.
- Coat the Eyeballs: Once the cake balls are firm, remove them from the refrigerator. Dip each cake ball into the melted white chocolate, coating it completely. Allow any excess chocolate to drip off before placing it back onto the parchment-lined baking sheet.
- Add the Edible Eyes: While the white chocolate is still wet, place an edible candy eye in the center of each cake ball to resemble a creepy eyeball.
- Create Bloodshot Effects *(Optional)*: If desired, melt the red candy melts as per package instructions and use a toothpick to drizzle them over the white chocolate-covered eyeballs to create the appearance of bloodshot eyes.
- Let Set: Allow the coated eyeballs to set completely at room temperature or in the refrigerator until the chocolate hardens.
- Serve and Enjoy: Once set, your Eerie Edible Eyeballs are ready to be served. Arrange them on a spooky platter, and watch your guests marvel at these frightful yet delightful treats! Enjoy!
Sinister Salsa and Corn Chip Spread

Sinister Salsa and Corn Chip Spread is a hauntingly delicious appetizer perfect for Halloween gatherings. This dip features a zesty blend of fresh ingredients that make it a revitalizing choice, while the spooky presentation with black beans and ghostly white cheese creates a fun atmosphere for your party. Serve it alongside crunchy corn chips to complete the creepy snack experience.
| Ingredient | Quantity |
|---|---|
| Fresh tomatoes | 3 medium, diced |
| Red onion | 1 small, diced |
| Fresh cilantro | ¼ cup, chopped |
| Lime juice | 2 tablespoons |
| Jalapeño pepper | 1, seeded and minced |
| Canned black beans | 1 can (15 oz), rinsed and drained |
| Corn kernels | 1 cup (canned or frozen) |
| Salt | ½ teaspoon |
| Tortilla chips | 1 bag (for serving) |
| Shredded mozzarella cheese | 1 cup |
Instructions
- Prepare the Fresh Ingredients: Start by washing the tomatoes and cilantro. Dice the tomatoes into small pieces and finely chop the cilantro. Peel and dice the red onion into small bits, and slice the jalapeño pepper in half to remove the seeds. Then, mince the jalapeño until finely chopped.
- Combine the Salsa Ingredients: In a large mixing bowl, add the diced tomatoes, red onion, minced jalapeño, and chopped cilantro. Pour in lime juice and sprinkle with salt. Using a spatula or wooden spoon, gently mix all the ingredients together until well combined.
- Add Beans and Corn: To the mixture, add the rinsed and drained black beans and corn. Fold the ingredients together to guarantee an even distribution of beans and corn within the salsa. Be careful not to mash the beans.
- Chill the Salsa: Cover the bowl with plastic wrap or a lid and place it in the refrigerator for at least 30 minutes. Chilling will let all the flavors meld together, enhancing the taste of your salsa.
- Serve with Tortilla Chips: Once chilled, remove the salsa from the fridge and give it a quick stir. Transfer the salsa into a festive serving bowl. Arrange tortilla chips around the bowl for easy dipping, and sprinkle shredded mozzarella cheese on top for a ghostly effect.
- Presentation: To add to the spooky theme, you can place some tortilla chips standing upright around the salsa to resemble gravestones, or use cookie cutters to cut out spooky shapes from some additional cheese slices to place on top.
Now you have a deliciously sinister salsa and corn chip spread ready to entertain your guests this Halloween! Enjoy the eerie snacking experience!
Jack-O’-Lantern Veggie Cups

Jack-O’-Lantern Veggie Cups are a fun and healthy Halloween treat that brings a festive twist to raw vegetables. These adorable cups are designed to mimic jack-o’-lanterns, making them a delightful addition to any Halloween gathering. Filled with a colorful assortment of vegetables and served with a tasty dip, they are sure to be a hit among kids and adults alike!
| Ingredient | Quantity |
|---|---|
| Orange bell peppers | 4 large |
| Celery sticks | 2 cups, cut into sticks |
| Carrot sticks | 2 cups, cut into sticks |
| Cucumber | 1 large, sliced |
| Cherry tomatoes | 1 cup |
| Hummus or ranch dressing | 1 cup |
| Olive slices | For eyes and mouths (optional) |
Instructions
- Prepare the Bell Peppers: Start by washing the orange bell peppers. Carefully cut the top off each bell pepper to create a lid, and remove the seeds from inside. This will become the cup for your veggie display.
- Carve Jack-O’-Lantern Faces: Using a small knife, carefully carve spooky or silly faces into the sides of the orange bell peppers. You can cut out triangles for eyes, a jagged mouth, or any design you like.
- Prep the Vegetables: Rinse and cut the celery sticks and carrots into sticks that fit well inside the bell pepper cups. Slice the cucumber into rounds and set aside the cherry tomatoes for easy dipping.
- Fill the Pepper Cups: Take the carved bell peppers and fill them with the prepared celery sticks, carrot sticks, and cucumber slices. Alternate the colors for a vibrant display, making it look appealing and festive.
- Add Cherry Tomatoes: Place a few cherry tomatoes into each bell pepper cup as an extra treat. They can fit nicely alongside the other veggies and add a splash of color.
- Incorporate the Dip: At the bottom of each bell pepper, you can add a tablespoon of hummus or ranch dressing for dipping. If you prefer, you can serve the dip in a small bowl placed next to your veggie cups.
- Finish with Eyes and Mouths: If you want to enhance the spooky look, you can use olive slices to create eyes and mouths on your jack-o’-lanterns. Simply cut small pieces of olives and place them where you’ve carved the faces.
- Arrange and Serve: Once all the cups are filled and decorated, arrange them on a platter. These Jack-O’-Lantern Veggie Cups are now ready to be served at your Halloween event. Enjoy the healthy snacks alongside the treats!
These festive veggie cups not only contribute to a colorful Halloween spread but also encourage kids to enjoy their veggies in a fun and playful way!