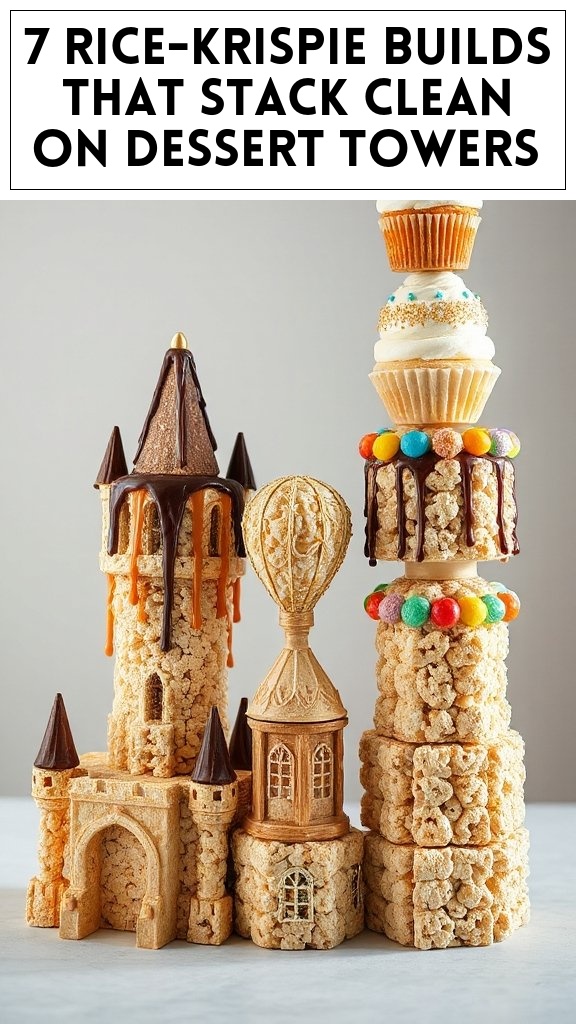
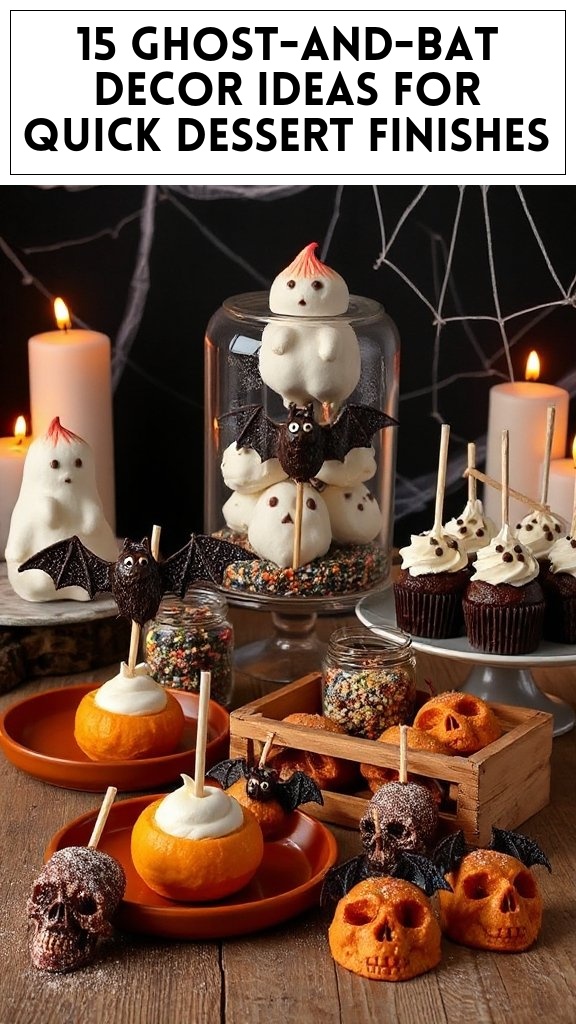
15 Rice Krispie Transformations For Cute Halloween Bites
Ghostly Rice Krispie Treats
Ghostly Rice Krispie Treats are a fun and festive twist on the classic treat, perfect for Halloween celebrations. These delightful bites are made with the traditional Rice Krispies and melted marshmallows, but with a spooky ghostly appearance that will thrill kids and adults alike. They’re easy to make and can serve as a wonderful addition to any Halloween party or gathering!
Prepare Your Workspace: Begin by lining a 9×13 inch baking dish with wax paper. This will prevent the treats from sticking and make for easier removal later.
Melt the Butter: In a large saucepan, melt the butter over low heat. Keep stirring until it’s completely melted.
Add Marshmallows: Once the butter is melted, add the mini marshmallows to the saucepan. Stir continuously until the marshmallows are completely melted and the mixture is smooth.
Add Vanilla: Remove the saucepan from heat and stir in the vanilla extract. This adds a lovely flavor to your treats.
Combine with Rice Krispies: Gradually add the Rice Krispies to the marshmallow mixture. Stir until all the cereal is evenly coated with the marshmallow mixture.
Transfer to Baking Dish: Pour the mixture into the prepared baking dish. Using a spatula or wax paper, press the mixture down evenly into the dish. Make sure it’s tightly packed for the best results.
Let Cool: Allow the mixture to cool completely at room temperature. This usually takes about 30 minutes.
Cut into Shapes: Once cooled, remove the treat from the baking dish by lifting the wax paper. Place it on a cutting board and cut into rectangles or squares for treating.
Melt White Chocolate: In a microwave-safe bowl, melt the white chocolate chips in 30-second intervals, stirring after each until smooth.
Coat the Treats: Dip one side of each Rice Krispie treat into the melted white chocolate, coating it generously. Shake off any excess chocolate and place back onto the wax paper.
Create Ghost Faces: Once the chocolate has set slightly (but is still soft), use black icing or an edible marker to draw ghostly eyes and mouths on the chocolate-coated side.
Final Cooling: Let the treats cool completely until the chocolate hardens.
Serve and Enjoy: Once set, your Ghostly Rice Krispie Treats are ready to be served! Enjoy these spooky delights with friends and family, or share them at your Halloween gathering!
Pumpkin Spice Rice Krispie Treats
Pumpkin Spice Rice Krispie Treats are a scrumptious seasonal twist on the classic Rice Krispie treat, perfect for Halloween or fall gatherings. With the addition of pumpkin spice, these delightful bites bring warm, cozy flavors that will please both kids and adults. They’re easy to whip up and can serve as a fun and festive treat for any celebration!
Prepare Your Workspace: Begin by lining a 9×13 inch baking dish with wax paper. This will prevent the treats from sticking and will make it easier to remove them later.
Melt the Butter: In a large saucepan, melt the butter over low heat. Stir frequently until the butter is completely melted.
Add Marshmallows and Pumpkin: Once the butter is melted, add the mini marshmallows and pumpkin puree to the saucepan. Stir continuously until the marshmallows are fully melted and the mixture is smooth and well-combined with the pumpkin.
Add Pumpkin Spice and Vanilla: Remove the saucepan from heat and stir in the pumpkin spice and vanilla extract. This will give your treats a distinct fall flavor.
Combine with Rice Krispies: Gradually add the Rice Krispies to the marshmallow and pumpkin mixture. Stir until all the cereal is evenly coated with the gooey mixture.
Transfer to Baking Dish: Pour the mixture into the prepared baking dish. Using a spatula or wax paper, press the mixture down evenly into the dish, ensuring it’s tightly packed for the best texture.
Let Cool: Allow the mixture to cool completely at room temperature. This should take about 30 minutes.
Cut into Shapes: Once the treats are cool, remove them from the baking dish by lifting out the wax paper. Place the mixture on a cutting board and cut it into rectangles or squares.
Melt White Chocolate: In a microwave-safe bowl, melt the white chocolate chips in 30-second intervals, stirring after each interval until smooth and fully melted.
Coat the Treats: Dip one side of each Rice Krispie treat into the melted white chocolate, ensuring a generous coating. Shake off any excess chocolate and place the treats back on the wax paper.
Add Sprinkles: While the white chocolate is still soft, sprinkle fall-themed decorations over the chocolate-coated side of the treats to add a festive touch.
Let Set: Allow the white chocolate to harden completely at room temperature before serving. Enjoy your Pumpkin Spice Rice Krispie Treats at your Halloween or fall gatherings!
Spiderweb Rice Krispie Treats
Spiderweb Rice Krispie Treats are a fun and festive twist on the classic treat, perfect for Halloween gatherings! These delightful bites are made with the iconic combination of Rice Krispies and marshmallows, then drizzled with chocolate to create a spooky spiderweb design. They’re bound to be a hit with kids and adults alike, making them a great addition to your Halloween party spread!
Prepare Your Workspace: Start by lining a 9×13 inch baking dish with wax paper. Lightly spray the paper and the sides of the dish with cooking spray to guarantee easy removal of the treats later.
Melt the Butter: In a large saucepan, melt the butter on low heat, stirring frequently until fully melted.
Add Marshmallows and Color: Once the butter has melted, add the mini marshmallows and a couple of drops of black food coloring to the saucepan. Stir continuously until the marshmallows are completely melted, and the mixture takes on a dark color.
Combine with Rice Krispies: Gradually add the Rice Krispies to the melted marshmallow mixture. Stir until all the cereal is evenly coated with the gooey mixture.
Transfer to Baking Dish: Pour the mixture into the prepared baking dish. Using a spatula or wax paper, press the mixture down evenly and firmly into the dish to create a dense treat.
Let Cool: Allow the Rice Krispie mixture to cool at room temperature for about 30 minutes, or until it is firm enough to cut.
Cut into Shapes: Once the mixture has cooled completely, remove it from the baking dish by lifting out the wax paper. Place it on a cutting board and cut it into squares or rectangles.
Melt the Dark Chocolate: In a microwave-safe bowl, melt the dark chocolate chips in 30-second intervals, stirring after each interval until smooth and creamy.
Create Spiderwebs: Using a piping bag or a small plastic bag with a corner snipped off, drizzle the melted dark chocolate in a circular pattern over each Rice Krispie treat to create a spiderweb design. Start from the center and work your way outward.
Melt the White Chocolate: In another microwave-safe bowl, melt the white chocolate chips using the same 30-second intervals until fully melted.
Add Finishing Touches: Drizzle the melted white chocolate over the dark chocolate spiderwebs for an added spooky effect. Allow the chocolate to set at room temperature.
Serve and Enjoy: Once the chocolate has hardened, the Spiderweb Rice Krispie Treats are ready to be served! Enjoy this spooky treat at your Halloween celebrations!
Witch’s Hat Rice Krispie Treats
Witch’s Hat Rice Krispie Treats are a delightful and spooky twist on the traditional Rice Krispie treat, perfect for Halloween celebrations! These fun, cone-shaped treats are not only a treat for your taste buds but also make for a festive decoration on any Halloween dessert table. Topped with a chocolate “brim” and adorned with colorful sprinkles, these treats are simple to make and sure to impress your guests!
Prepare Your Workspace: Line a baking sheet with wax paper and lightly spray it with cooking spray to prevent sticking.
Melt the Butter: In a large saucepan, melt the butter over low heat. Stir frequently until the butter is completely melted.
Add Marshmallows and Color: Once the butter is melted, add the mini marshmallows and a couple of drops of green food coloring to the saucepan. Stir continuously until the marshmallows are fully melted and the mixture is a uniform green color.
Combine with Rice Krispies: Gradually add the Rice Krispies to the melted marshmallow mixture. Stir well until all cereal is evenly coated with the gooey mixture.
Shape the Treats: Allow the mixture to cool slightly, enough to handle. Take a handful of the mixture and form it into a cone shape, pressing it firmly to create a point at the top. Repeat this process until you have formed cones for each ice cream cone.
Transfer to Baking Sheet: Carefully place the formed cones on the prepared baking sheet. Let them cool completely at room temperature, about 30 minutes.
Melt Dark Chocolate: In a microwave-safe bowl, melt the dark chocolate chips in 30-second intervals, stirring after each interval until smooth.
Decorate the Hats: Once the Rice Krispie cones have cooled and firmed up, dip the tops of each cone into the melted dark chocolate to create the “brim” of the witch’s hat. Allow excess chocolate to drip off before placing the cone back on the baking sheet.
Add Sprinkles: While the chocolate is still wet, sprinkle Halloween sprinkles on top to add a festive touch.
Let Chocolate Set: Allow the chocolate to set at room temperature or place the hats in the refrigerator for faster setting.
These colorful and creative Witch’s Hat Rice Krispie Treats are now ready to be enjoyed at your Halloween festivities!
Monster Rice Krispie Treats
Monster Rice Krispie Treats are a fun and whimsical twist on the classic Rice Krispie treat, making them perfect for Halloween celebrations or any festive gathering. These treats are shaped like friendly monsters and are topped with colorful candy eyes and spooky decorations, making them a hit with both kids and adults alike. With just a few easy steps, you can create a batch of these adorable Monsters that will delight everyone at your party!
Prepare Your Workspace: Line a baking sheet with wax paper and lightly spray it with cooking spray to prevent sticking.
Melt the Butter: In a large saucepan, melt the butter over low heat, stirring frequently until completely melted.
Add Marshmallows and Color: Once the butter is melted, add the mini marshmallows and a couple of drops of food coloring (your choice of colors) to the saucepan. Stir continuously until the marshmallows are fully melted and the mixture is a uniform color.
Combine with Rice Krispies: Gradually add the Rice Krispies to the melted marshmallow mixture. Stir well until all the cereal is evenly coated with the gooey mixture.
Shape the Treats: Allow the mixture to cool slightly, just enough to handle. Take a handful of the mixture and form it into round mounds or monster shapes, pressing firmly to hold their form. Repeat this process until all the mixture is used.
Transfer to Baking Sheet: Carefully place the formed monster shapes on the prepared baking sheet. Let them cool completely at room temperature, about 30 minutes.
Melt Candy Melts: In a microwave-safe bowl, melt the candy melts in 30-second intervals, stirring after each interval until smooth.
Decorate the Monsters: Once the Monster Rice Krispie treats have cooled and firmed up, dip the top of each treat into the melted candy melts to coat. Allow excess candy melts to drip off before placing the treat back on the baking sheet.
Add Candy Eyes and Toppings: Before the candy melt coating sets, add candy eyeballs to each treat and top with gummy candies or other spooky decorations to create fun monster faces!
Cool and Serve: Allow the decorated treats to cool completely until the candy melts have set. Serve them on a festive platter and enjoy the spooky fun!
Mummy Rice Krispie Treats
Mummy Rice Krispie Treats are a festive and fun Halloween treat that transforms the classic Rice Krispie treat into adorable mummies! These treats are sure to be a hit at Halloween gatherings, with their gooey marshmallow base wrapped in white chocolate “bandages” and decorated with candy eyes. They are easy to make and provide a perfect opportunity for some creative decorating!
Prepare Your Workspace: Line a baking sheet with wax paper and lightly spray it with cooking spray to prevent sticking. Set aside.
Melt the Butter: In a large saucepan, melt the butter over low heat. Stir frequently until it’s completely melted.
Add Marshmallows: Once the butter is melted, add the mini marshmallows to the saucepan. Stir continuously until the marshmallows are fully melted and incorporate smoothly with the butter.
Combine with Rice Krispies: Gradually add the Rice Krispies to the melted marshmallow mixture. Stir well until all the cereal is evenly coated with the sticky mixture.
Shape the Treats: Allow the mixture to cool slightly until it is manageable. Take a handful of the mixture and form it into oval shapes, and press them firmly to hold their form. Place the shaped treats onto the prepared baking sheet.
Cool the Treats: Let the shaped Rice Krispie treats cool completely at room temperature for about 30 minutes.
Melt White Chocolate: In a microwave-safe bowl, melt the white chocolate chips in 30-second intervals, stirring after each interval until the chocolate is smooth and completely melted.
Wrap the Mummies: Once the Rice Krispie treats have cooled, use a spoon to drizzle the melted white chocolate over the treats in zigzag patterns to create “bandages.” You can also dip half of the treat into the melted chocolate for a more covered look.
Add Candy Eyes: While the white chocolate is still wet, place two candy eyeballs on each treat to give them that adorable mummy look.
Set the Treats: Allow the chocolate to set completely at room temperature or in the refrigerator for quicker results. Once set, your Mummy Rice Krispie Treats are ready to be enjoyed!
Skeleton Rice Krispie Treats
Skeleton Rice Krispie Treats are a spooky and fun twist on the classic Rice Krispie treat, perfect for Halloween celebrations! These treats are shaped like skeletons and decorated with melted chocolate to create a playful and festive appearance. With a gooey marshmallow base and a crunchy texture, these treats will delight kids and adults alike at any Halloween gathering!
Prepare Your Workspace: Line a baking sheet with wax paper and lightly grease it with cooking spray to prevent any sticking.
Melt the Butter: Over low heat, melt the butter in a large saucepan while stirring frequently until it is fully melted.
Add Marshmallows: Stir in the mini marshmallows into the melted butter, stirring continuously until they are completely melted and blended into the butter.
Combine with Rice Krispies: Gradually add the Rice Krispies cereal into the melted marshmallow mixture, stirring well to guarantee all the cereal gets evenly coated.
Shape the Treats: Once the mixture is slightly cool and manageable, take a handful and shape it into skull and bone forms on the prepared baking sheet. Make sure to press the mixture firmly to hold its shape.
Cool the Treats: Allow the shaped Rice Krispie treats to cool at room temperature for about 30 minutes until they are firm.
Melt Dark Chocolate: In a microwave-safe bowl, melt the dark chocolate chips in 30-second intervals, stirring after each to achieve a smooth consistency.
Decorate Skeleton Bodies: Using a spoon, drizzle the melted dark chocolate over the Rice Krispie treats to form the skeleton features, such as the skull and bones.
Add Candy Eyes: While the chocolate is still wet, carefully place candy eyes onto the skulls to give them a cheeky look.
Set the Treats: Let the dark chocolate set completely at room temperature, or place the baking sheet in the refrigerator for faster setting.
Melt White Chocolate (optional): If desired, melt the white chocolate chips following the same melting method and use it to create additional decorations on the skeletons, like ribcages or skull outlines.
Enjoy: Once all the decorations have set, these Skeleton Rice Krispie Treats are ready to be served at your Halloween festivities!
Bat Rice Krispie Treats
Bat Rice Krispie Treats are a delightful and spooky twist on the classic Rice Krispie treat, perfect for Halloween festivities! These treats are shaped like bats and can be decorated with chocolate and colorful sprinkles, making them an adorable yet frightening addition to your Halloween snack table. They are fun to make and eat, sure to charm kids and adults alike!
Prepare Your Workspace: Line a baking sheet with wax paper and lightly grease it with cooking spray to guarantee the treats will not stick.
Melt the Butter: In a large saucepan, melt the butter over low heat, stirring frequently until it’s completely melted.
Add Marshmallows: Stir in the mini marshmallows into the melted butter and mix continuously until the marshmallows are entirely melted and combined with the butter.
Mix in Rice Krispies: Gradually add the Rice Krispies cereal into the melted marshmallow mixture, stirring well to make certain every piece of cereal is evenly coated.
Shape the Treats: Allow the mixture to cool for a few moments until manageable. Take a handful of the mixture and shape it into bat wings and bodies, pressing firmly to make sure they hold their shape on the prepared baking sheet.
Cool the Treats: Let the shaped Rice Krispie treats sit at room temperature for about 30 minutes, allowing them to cool and firm up.
Melt Black Chocolate: In a microwave-safe bowl, melt the black chocolate chips in 30-second intervals, stirring after each to make sure the chocolate melts smoothly.
Decorate the Bats: Use a spoon to drizzle the melted black chocolate over the Rice Krispie bat shapes to coat them. Get creative and make the wings and body contrasted!
Add Candy Eyes: While the black chocolate is still wet, carefully place candy eyes on each bat to give them a fun and frightful expression.
Finish with Sprinkles: If desired, sprinkle colorful chocolate sprinkles on top of the wet chocolate for an extra festive touch.
Let the Chocolate Set: Allow the black chocolate to set completely at room temperature, or place the baking sheet in the refrigerator for quicker setting.
Serve and Enjoy: Once the chocolate has hardened, the Bat Rice Krispie Treats are ready to be enjoyed! Serve them at your Halloween party or package them up as treats for friends.
Eyeball Rice Krispie Treats
Eyeball Rice Krispie Treats are a ghoulishly fun and delicious snack perfect for Halloween celebrations! These treats capture the eerie spirit of the season by resembling a creepy eyeball, complete with colorful candy melts and candy eyes. They are not just a treat for the taste buds but also a hit for party aesthetics, making them a must-try Halloween delight!
Prepare Your Workspace: Start by lining a baking sheet with wax paper and lightly greasing it with cooking spray to guarantee the treats do not stick.
Melt the Butter: In a large saucepan, melt the butter over low heat. Stir constantly until the butter is completely melted.
Add Marshmallows: Once the butter is melted, add the mini marshmallows to the saucepan. Stir continuously until the marshmallows are fully melted and mixed with the butter.
Mix in Rice Krispies: Gradually fold in the Rice Krispies cereal into the melted mixture, using a spatula to guarantee all the cereal is evenly coated with the marshmallow mixture.
Shape the Treats: Allow the mixture to cool for a few minutes until it’s safe to handle. With your hands, take small portions of the mixture and shape them into round balls, about the size of a golf ball. Place them on the prepared baking sheet.
Cool the Treats: Let the shaped Rice Krispie treats sit at room temperature for about 30 minutes so they can firm up.
Melt White Candy: In a microwave-safe bowl, melt the white candy melts following package instructions, typically in 30-second intervals, stirring after each until melted and smooth.
Coat the Eyeballs: Using a fork or a toothpick, dip each Rice Krispie ball into the melted white candy to coat it evenly, then return to the wax paper to let the excess drip off.
Melt Red Candy: In another microwave-safe bowl, melt the red candy melts following the same method. This will be used to create the ‘veins’ of the eyeballs.
Add Veins: Once the white candy coating has set, use a small spoon or piping bag to drizzle the melted red candy in vein-like patterns on each eyeball. Get creative to make them look extra creepy!
Decorate with Candy Eyes: While the red candy is still wet, carefully place a candy eye on top of each eyeball to complete the creepy look.
Finish with Icing: If desired, use the green or blue icing to add additional details, like a pupil around the candy eye.
Let Everything Set: Allow the finished Eyeball Rice Krispie Treats to set completely at room temperature before serving. Enjoy your spooky treats!
Cauldron Rice Krispie Treats
Cauldron Rice Krispie Treats are a whimsical and festive treat that will add a touch of Halloween magic to any gathering! These fun-shaped, gooey, and chocolaty delights are perfect for kids and adults alike, resembling bubbling cauldrons ready to enchant anyone with their deliciousness. Made with marshmallows and Rice Krispies, they are decorated to fit the eerie theme of Halloween, making them a wonderful addition to your spooky celebrations!
Prepare Your Workspace: Line a baking sheet with wax paper and lightly grease it with cooking spray to prevent the treats from sticking.
Melt the Butter: In a large saucepan, melt the butter over low heat. Stir constantly until the butter is completely melted.
Add Marshmallows: Once the butter is melted, add the mini marshmallows to the saucepan. Stir until the marshmallows are fully melted and combined with the butter, forming a creamy mixture.
Mix in Rice Krispies: Gradually fold in the Rice Krispies cereal, ensuring that all the cereal is evenly coated with the marshmallow mixture. Use a spatula for this step to make mixing easier.
Shape the Cauldrons: Allow the mixture to cool for a couple of minutes until it’s easier to handle. Take small portions of the mixture and shape them into small oval balls resembling cauldrons. Place them on the prepared baking sheet.
Create a Hollow: While the mixture is still warm, gently press the inside of each cauldron shape to create a hollow center, being careful not to break them.
Cool the Treats: Let the shaped Rice Krispie cauldrons sit at room temperature for about 30 minutes so they can firm up.
Melt Black Candy: In a microwave-safe bowl, melt the black candy melts according to package instructions, typically in 30-second intervals, stirring after each until smooth.
Coat the Cauldrons: Using a fork or a spoon, dip each Rice Krispie cauldron into the melted black candy to coat the outside evenly. Allow any excess candy to drip off before placing them back on the baking sheet.
Melt Green Candy: In another microwave-safe bowl, melt the green candy melts in the same manner as before.
Fill the Cauldrons: Once the black candy coating has hardened, fill the hollow center of each cauldron with melted green candy. This will give the appearance of ‘bubbling potion’ inside the cauldrons.
Decorate: If desired, sprinkle some edible sprinkles on top of the green candy for added flair. Allow the treats to cool completely before serving.
Serve and Enjoy: Once set, these Cauldron Rice Krispie Treats are ready to be served. Enjoy the magical combination of flavors in every bite!
Candy Corn Rice Krispie Treats
Candy Corn Rice Krispie Treats are a festive twist on the classic Rice Krispie treat, infused with the colorful essence of Halloween’s favorite confection—candy corn! These delightful treats are not only easy to make but also visually striking, making them perfect for parties or festive gatherings. With a fun flavor combination and vibrant layers that mimic the iconic candy, these treats are guaranteed to be a hit with both kids and adults.
Prepare Your Workspace: Line a 9×9 inch baking dish with wax paper or parchment paper, leaving some overhang for easy removal later. Lightly grease the paper with cooking spray to prevent sticking.
Melt the Butter: In a large saucepan, melt the butter over low heat. Stir constantly until the butter is fully melted and starting to bubble slightly.
Add Marshmallows: Once the butter is melted, add the mini marshmallows into the saucepan. Stir continuously until the marshmallows are completely melted, and the mixture is smooth and creamy.
Mix in Rice Krispies: Gradually fold in the Rice Krispies cereal with a spatula, mixing well to confirm all the cereal is coated with the marshmallow mixture.
Divide and Color: Divide the Rice Krispie mixture into three bowls. Leave one bowl plain. In the second bowl, add melted yellow candy melts, and in the third bowl, add melted orange candy melts. Mix each bowl thoroughly until the color is evenly distributed.
Layer the Mixtures: Spread the yellow Rice Krispie mixture evenly in the bottom of the prepared baking dish, pressing it down gently with your spatula to create a smooth layer. Next, add the orange mixture and press it down, followed by the plain mixture on top. Make sure each layer is densely packed.
Cool the Mixture: Allow the layered treats to cool at room temperature for about 30 minutes, or until they are firm enough to cut.
Melt White Candy: In a microwave-safe bowl, melt the white candy melts according to package instructions, typically in 30-second increments, stirring after each until smooth.
Drizzle the Top: Once the layered Rice Krispie treats have cooled, drizzle the melted white candy over the top layer. Allow it to set for a few minutes.
Cut and Serve: Once the white chocolate drizzle has hardened, use the overhang of the wax or parchment paper to lift the treats out of the baking dish. Cut them into squares or bars and serve at your Halloween gathering!
Enjoy your festive Candy Corn Rice Krispie Treats!
Creepy Crawly Rice Krispie Treats
Creepy Crawly Rice Krispie Treats are a spooktacular twist on the classic dessert, perfect for Halloween gatherings or monster-themed parties. With their fun, creepy-crawly additions like gummy worms and chocolate drizzles, these treats not only look frightful but deliver an exciting combination of textures and flavors that kids will love. Get ready to create a fun and frightful dessert that’s sure to please everyone!
Prepare Your Workspace: Line a 9×9 inch baking dish with wax paper or parchment paper, leaving some overhang for easy removal. Lightly grease the paper with cooking spray to prevent the treats from sticking.
Melt the Butter: In a large saucepan, melt the butter over low heat. Stir constantly until the butter is fully melted and just starting to bubble.
Add Marshmallows: Once the butter is melted, add the mini marshmallows to the saucepan. Stir continuously until the marshmallows are completely melted and you have a smooth, creamy mixture.
Combine Rice Krispies: Gradually fold in the Rice Krispies cereal using a spatula, ensuring that all of the cereal is coated evenly with the marshmallow mixture.
Add Gummy Worms: Fold in the gummy worms into the Rice Krispie mixture, distributing them throughout the mixture for a fun surprise in every bite.
Transfer to Baking Dish: Pour the mixture into the prepared baking dish. Use your spatula or your hands to gently press it down into an even layer. Be careful not to squish it too hard, as you want to maintain some of the texture.
Cool the Treats: Allow the filled baking dish to cool at room temperature for about 30 minutes or until the mixture is firm enough to cut into squares.
Melt the Chocolate: In a microwave-safe bowl, melt the chocolate chips according to the package instructions, typically in 30-second increments, stirring until completely smooth.
Drizzle the Chocolate: Once the Rice Krispie treats are cool, remove them from the baking dish using the parchment overhang. Place the treats on a cutting board and drizzle the melted chocolate over the top in a zigzag pattern to create a creepy look.
Cut and Serve: Cut the cooled Rice Krispie treats into squares or rectangles. Serve them on a platter, and watch as they disappear at your Halloween celebration! Enjoy the creepy fun!
Frankenstein Rice Krispie Treats
Frankenstein Rice Krispie Treats are a fun and festive way to celebrate Halloween while enjoying a classic dessert. These treats take on the legendary creature’s iconic look, with green icing and candy features that make them eye-catching and delicious. Perfect for sharing at parties or making with kids, these treats will certainly be a hit at any Halloween gathering!
Prepare Your Workspace: Start by lining a 9×9 inch baking dish with wax paper or parchment paper, leaving an overhang for easy removal. Lightly grease the paper with cooking spray to guarantee the treats don’t stick.
Melt the Butter: In a large saucepan, melt the butter over low heat. Keep stirring until the butter is fully melted and starts to bubble slightly to avoid burning.
Add Marshmallows: Once the butter is melted, add the mini marshmallows to the saucepan. Stir continuously until the marshmallows are completely melted and mixed with the butter, resulting in a smooth, creamy mixture.
Color the Mixture: Remove the saucepan from heat and add a few drops of green food coloring to the melted marshmallow mixture. Stir well until the color is evenly distributed and you achieve the desired shade of green.
Combine Rice Krispies: Gradually fold in the Rice Krispies cereal with a spatula, making sure every piece is well coated with the marshmallow mixture for a uniform texture.
Transfer to Baking Dish: Pour the green Rice Krispie mixture into the prepared baking dish. Use your spatula or hands to press it down evenly. Be careful not to compress it too much; you want the treats to remain light and crispy.
Cool the Treats: Allow the Rice Krispie mixture to cool at room temperature for about 30 minutes or until it is firm enough to cut into squares.
Melt the White Chocolate: In a microwave-safe bowl, melt the white chocolate chips according to the package instructions, usually in 30-second intervals. Stir until it is completely smooth.
Decorate the Treats: Once the treats have cooled and set, remove them from the baking dish using the parchment overhang. Cut them into rectangles or squares to resemble Frankenstein’s face. Dip the tops of the treats into the melted white chocolate to create a “frosted” look, then allow it to set for a few minutes.
Add Features: Using the black writing icing, draw on facial features like eyes, a mouth, and stitches to add the finishing touches. Place candy eyes on each treat to give it a more whimsical, spooky appearance.
Serve and Enjoy: Arrange your Frankenstein Rice Krispie Treats on a platter and serve them at your Halloween festivities. Enjoy the delight and fun as everyone takes a bite out of these monstrous treats!
Haunted House Rice Krispie Treats
Haunted House Rice Krispie Treats are a delightful and spooky twist on the classic Rice Krispie treat, perfect for Halloween celebrations. These fun and edible gingerbread-like houses are made from the same marshmallow and cereal mixture, and then decorated with candy and icing to create a haunted house theme. They make for a great activity with kids and are perfect for displaying at Halloween parties.
Prepare Your Workspace: Line a baking dish (preferably a 9×13 inch dish) with wax paper or parchment paper and lightly grease it with cooking spray to prevent sticking.
Melt the Butter: In a large saucepan, melt the butter over low heat. Stir it continuously until it has completely melted and is bubbling slightly to avoid burning.
Add Marshmallows: Once the butter is melted, add the mini marshmallows into the saucepan. Stir constantly until all the marshmallows are fully melted and the mixture is smooth.
Color the Mixture: Remove the saucepan from heat, then add a few drops of black food coloring to the melted marshmallow mixture. Stir well until the color is evenly blended.
Combine Rice Krispies: Begin folding in the Rice Krispies cereal using a spatula. Make sure every piece is coated with the marshmallow mixture for a uniform distribution.
Transfer to Baking Dish: Pour the colored Rice Krispie mixture into the prepared baking dish. Press it down evenly with your spatula or hands, ensuring not to compress it too tightly, to maintain a light texture.
Cool the Treats: Allow the mixture to cool at room temperature for about 30 minutes or until it is firm enough to cut into pieces.
Cut into Shapes: Once cooled, cut the Rice Krispie treats into rectangles or squares to form the base of the haunted houses. You might want to use a sharp knife to create more precise shapes.
Assemble Haunted Houses: Use the chocolate frosting as glue to attach pieces together. Start by stacking one piece on top of another to create walls, and then use a third piece as a roof.
Decorate: Get creative with the frosting and assorted candies to decorate your haunted houses. Use gummy worms to look like snakes, candy corn for windows, or any other candies to create a spooky atmosphere.
Display or Serve: Once the haunted houses are decorated, they can be displayed or served at your Halloween gathering. Enjoy your festive treats!
Autumn Leaf Rice Krispie Treats
Autumn Leaf Rice Krispie Treats are a fun and festive twist on the classic dessert, designed to celebrate the vibrant colors of fall. Shaped like leaves and embellished with autumnal colors, these treats combine the gooey goodness of marshmallows with the crunch of cereal. They’re perfect for Halloween parties or fall-themed gatherings and can be a delightful activity to share with family.
Prepare Your Workspace: Begin by lining a large baking dish (approximately 9×13 inches) with wax or parchment paper, then lightly grease it with cooking spray to avert the mixture from sticking.
Melt the Butter: In a large saucepan, melt the butter over low heat. Stir continuously until the butter is fully melted and begins to bubble to prevent any burning.
Add Marshmallows: When the butter is melted, mix in the mini marshmallows. Continue stirring until all of the marshmallows are fully melted and the mixture is smooth.
Color the Mixture: Remove the saucepan from heat. Add drops of yellow, red, and green food coloring, experimenting until you achieve a nice autumn hue. Mix thoroughly to make sure the colors are well-incorporated.
Combine with Rice Krispies: Gradually fold the Rice Krispies cereal into the melted marshmallow mixture, using a spatula to coat every cereal piece with the mushy goodness.
Transfer to Baking Dish: Pour the mixed cereal and marshmallow into the prepared baking dish. Press down gently using the spatula or your hands, making sure it’s even but not packed too tightly to keep the treats light and airy.
Cool the Mixture: Let the mixture cool at room temperature for about 30 minutes or until it feels firm enough to cut.
Cut into Leaf Shapes: Once cooled, transfer the mixture to a cutting board and use a sharp knife or leaf-shaped cookie cutter to cut the treats into leaf shapes.
Add Cinnamon Sugar (Optional): For extra flavor, sprinkle cinnamon sugar lightly over the top of the leaf-shaped treats.
Serve and Enjoy: Arrange your Autumn Leaf Rice Krispie Treats on a festive platter and enjoy them at your Halloween gatherings or fall celebrations!