Ghostly Meringue Cookies
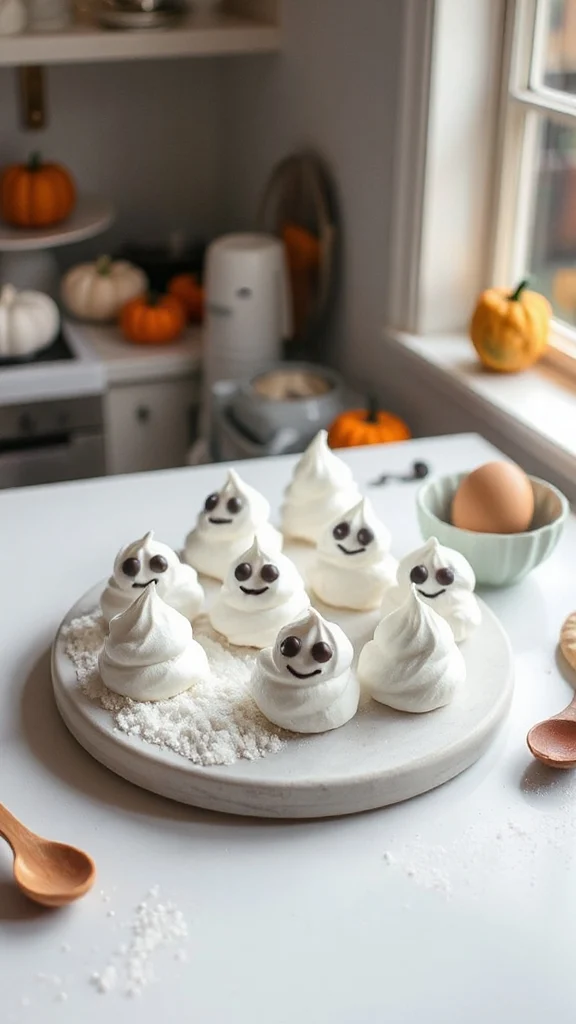
Ghostly meringue cookies are delightful, airy treats that are perfect for Halloween gatherings. These whimsical cookies are light, crunchy, and can be made using just a few simple ingredients. Their ghostly shapes make them an adorable addition to any festive dessert platter while also being gluten-free and low in fat!
| Ingredient | Quantity |
|---|---|
| Egg whites | 3 large |
| Granulated sugar | 1 cup |
| Vanilla extract | 1 teaspoon |
| Pinch of salt | to taste |
| Mini chocolate chips | for decoration |
Cooking Instructions:
- Preheat the Oven: Begin by preheating your oven to 225°F (110°C). Line a baking sheet with parchment paper to prevent the meringues from sticking.
- Whip the Egg Whites: In a clean, dry mixing bowl, add the egg whites and a pinch of salt. Using an electric mixer, beat the egg whites on medium speed until they become frothy.
- Add the Sugar: Gradually sprinkle in the granulated sugar, one tablespoon at a time, while continuing to beat the mixture. Increase the mixer speed to high and beat until the egg whites form stiff peaks and the mixture is glossy. This should take about 5-7 minutes.
- Flavor the Meringue: Add the vanilla extract to the meringue mixture and gently fold it in using a spatula. Be careful not to deflate the meringue.
- Pipe Ghost Shapes: Fill a piping bag with the meringue mixture. You can use a round tip for this or simply cut a small hole at the end of the bag. On the prepared baking sheet, pipe small dollops of meringue to create ghost shapes, making sure to leave some space between each one.
- Add Eyes: Place mini chocolate chips on each meringue dollop to create ghostly eyes. You can use a toothpick to help position the chocolate chips if needed.
- Bake the Meringues: Once all the meringue shapes are piped and decorated, place the baking sheet in the preheated oven. Bake for 1-1.5 hours, or until the meringues are dry to the touch and can easily lift off the parchment paper.
- Cool and Serve: After baking, turn off the oven and let the meringue cookies cool inside for an additional hour. This helps to guarantee they are fully crisp. Once cooled, gently remove them from the parchment paper and serve.
Enjoy these ghostly meringue cookies as a light and festive treat at your Halloween celebration!
Spider Oreo Truffles
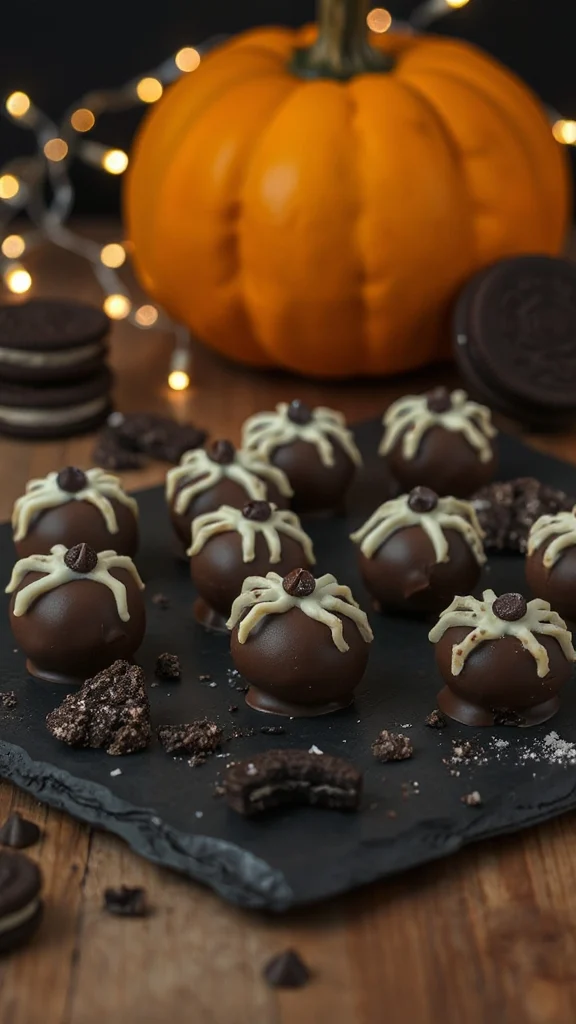
Spider Oreo Truffles are an adorable and slightly spooky Halloween treat that are sure to please guests of all ages. These no-bake truffles are made by combining crushed Oreo cookies with cream cheese to create a rich and creamy filling. Once rolled into balls and covered in chocolate, they get decorated with pretzel legs and candy eyes, transforming them into cute, edible spiders perfect for your Halloween festivities.
| Ingredient | Quantity |
|---|---|
| Oreo cookies | 1 package (14.3 ounces) |
| Cream cheese | 8 ounces, softened |
| Semi-sweet chocolate chips | 10 ounces |
| Pretzel sticks | 1 cup |
| Candy eyes | 24 pieces |
Cooking Instructions:
- Crush the Oreos: Place the Oreo cookies in a food processor and pulse them until they are finely crushed. If you don’t have a food processor, you can place the cookies in a zip-top bag and crush them with a rolling pin.
- Combine with Cream Cheese: In a large mixing bowl, combine the crushed Oreo cookies with the softened cream cheese. Use a spatula or your hands to mix until fully incorporated and the mixture is well combined. It should be thick and sticky.
- Form Truffles: Scoop out small portions of the Oreo mixture (about 1 inch in diameter) and roll them into balls using your hands. Place the rolled truffles on a baking sheet lined with parchment paper.
- Chill the Truffles: Once all the truffles are formed, place the baking sheet in the refrigerator for about 30 minutes or until the truffles are firm.
- Melt the Chocolate: While the truffles are chilling, melt the semi-sweet chocolate chips. You can do this in a microwave-safe bowl, heating in 30-second intervals and stirring in between until smooth, or use a double boiler on the stovetop.
- Coat the Truffles: Once the truffles are firm, remove them from the refrigerator. Dip each truffle into the melted chocolate, ensuring they are fully coated, and then return them to the parchment-lined baking sheet.
- Add the Spider Legs: While the chocolate is still wet, break the pretzel sticks in half and gently insert four pieces into each truffle to create spider legs.
- Add Candy Eyes: Place two candy eyes on the top of each chocolate-coated truffle before the chocolate sets. You can gently press them in so they stay put.
- Let Them Set: Allow the chocolate coating to set completely at room temperature, or you can speed up the process by placing the truffles back in the refrigerator for about 15-20 minutes.
- Serve and Enjoy: Once the chocolate is set, your Spider Oreo Truffles are ready to be served! Place them on a Halloween-themed platter and watch guests delight in these creepy, yet delicious, treats.
Enjoy these spooky Spider Oreo Truffles at your Halloween celebrations—they’re a hit that everyone will love!
Pumpkin Spice Energy Bites
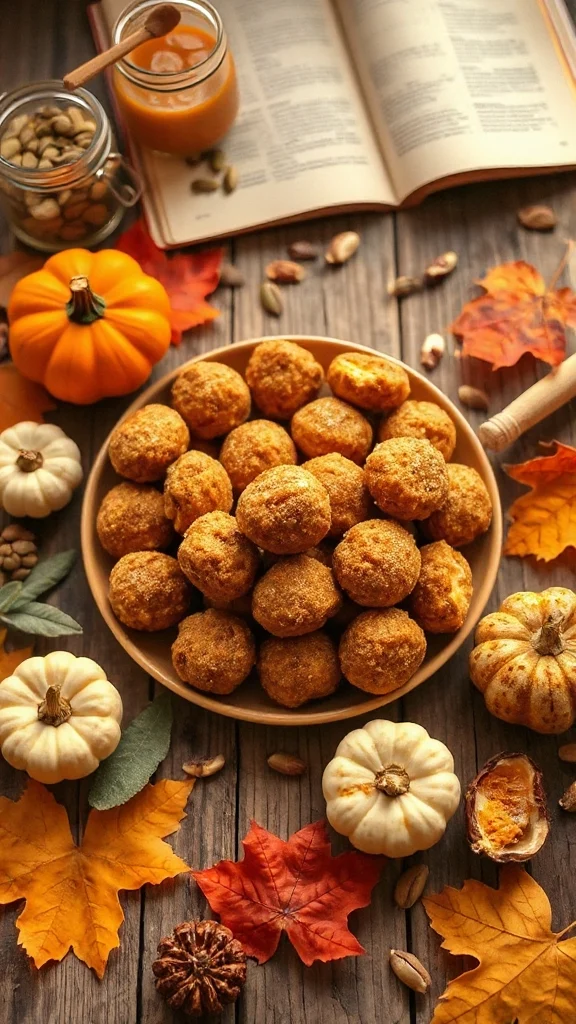
Pumpkin Spice Energy Bites are a deliciously healthy treat that captures the essence of fall while providing a quick energy boost. These no-bake bites are packed with wholesome ingredients like oats, nut butter, and warm pumpkin spice, making them perfect for a festive snack or a pick-me-up during your Halloween celebrations.
| Ingredient | Quantity |
|---|---|
| Rolled oats | 2 cups |
| Pumpkin puree | 1 cup |
| Nut butter (peanut or almond) | 1/2 cup |
| Honey or maple syrup | 1/4 cup |
| Pumpkin spice | 1 teaspoon |
| Vanilla extract | 1 teaspoon |
| Chocolate chips (optional) | 1/2 cup |
| Chia seeds (optional) | 1 tablespoon |
Cooking Instructions:
- Mix Dry Ingredients: In a large mixing bowl, combine the rolled oats, pumpkin spice, and chia seeds (if using). Stir well to guarantee the dry ingredients are evenly mixed.
- Add Wet Ingredients: In another bowl, mix together the pumpkin puree, nut butter, honey (or maple syrup), and vanilla extract. Verify the mixture is smooth and well combined.
- Combine Mixtures: Pour the wet mixture into the dry ingredients and stir until fully blended. If you are adding chocolate chips, fold them in at this step.
- Form Bites: Using your hands, scoop out small portions of the mixture (about 1 tablespoon each) and roll them into balls. Place the energy bites on a baking sheet or plate lined with parchment paper.
- Chill the Bites: Cover the baking sheet or plate with plastic wrap or aluminum foil and refrigerate the energy bites for at least 30 minutes. This helps them firm up for easier handling.
- Store and Enjoy: Once chilled, transfer the energy bites to an airtight container. They can be stored in the refrigerator for up to one week, making them a great on-the-go snack throughout the Halloween season.
Chocolate-Covered Pretzel Broomsticks

Chocolate-Covered Pretzel Broomsticks are a fun and festive treat that make a great addition to your Halloween festivities. These sweet and salty snacks are super easy to prepare and are sure to delight both kids and adults alike. With chocolate-dipped pretzel rods that resemble broomsticks, they’re perfect for decorating your Halloween table or for handing out to trick-or-treaters.
| Ingredient | Quantity |
|---|---|
| Pretzel rods | 10-12 rods |
| Semi-sweet chocolate chips | 1 cup |
| Orange candy melts | 1/2 cup |
| Mini Reeses Peanut Butter Cups | 10 (optional) |
| Edible eyes (optional) | 1 pack |
Cooking Instructions:
- Melt the Chocolate: In a microwave-safe bowl, add the semi-sweet chocolate chips. Heat them in the microwave in 30-second intervals, stirring after each interval until the chocolate is completely melted and smooth.
- Dip Pretzel Rods: Hold a pretzel rod by one end and dip the other end into the melted chocolate, covering about 2/3 of the rod. Allow any excess chocolate to drip off before placing it on a parchment-lined baking sheet.
- Add Candy Melts: In a separate bowl, melt the orange candy melts using the same method (30 seconds in the microwave, stirring in between). Once melted, use a fork to drizzle the orange candy over the chocolate-coated pretzel rods for a fun broom effect.
- Attach Peanut Butter Cups: Immediately after drizzling the orange candy, take a mini Rees’ Peanut Butter Cup, unwrap it, and gently press it onto the non-chocolate end of the pretzel rod to serve as the broom’s base. If you are omitting the peanut butter cups, you can skip this step.
- Decorate with Edible Eyes: If you’re using edible eyes, place them on the chocolate-coated section of the pretzel while it’s still wet so they can adhere properly.
- Let Set: Allow the pretzel broomsticks to sit at room temperature until the chocolate and candy melts are fully set. This usually takes about 30-45 minutes. Alternatively, you can place the baking sheet in the refrigerator for quicker setting.
- Store and Serve: Once set, you can transfer your Chocolate-Covered Pretzel Broomsticks to an airtight container, or serve them immediately for a delightful Halloween treat! Enjoy your spooky creation!
Easy Witch Hat Cookies
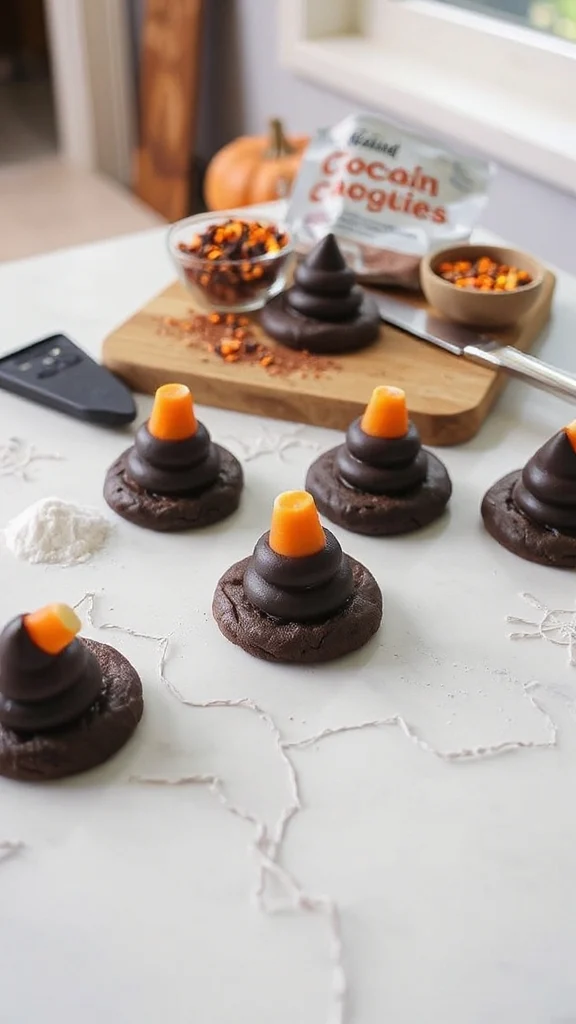
Easy Witch Hat Cookies are a delightful Halloween treat that kids and adults will love making together. These no-bake cookies are crafted from chocolate cookies topped with a Hershey’s Kiss, transforming them into cute witch hats. They’re quick to prepare and make for a fun Halloween activity or festive addition to any spooky gathering.
| Ingredient | Quantity |
|---|---|
| Chocolate wafer cookies | 12 cookies |
| Hershey’s Kisses | 12 candies |
| Orange icing or candy melts | 1/4 cup |
| Green icing (optional) | 1 piping bag |
Cooking Instructions:
- Prepare the Base: Arrange the chocolate wafer cookies on a flat surface or a large platter, as this will be the base for your witch hats.
- Melt Hershey’s Kisses: Preheat your oven to 200°F (93°C). Line a baking sheet with parchment paper. Place the unwrapped Hershey’s Kisses on the baking sheet, spacing them out evenly. Place the baking sheet in the oven for about 5 minutes, or just until the bottom of the Kisses is slightly softened.
- Assemble the Hats: Once the Kisses are soft, carefully remove the baking sheet from the oven. Using a spatula, gently press one Kiss onto the center of each chocolate cookie. This will create the witch hat shape.
- Decorate: Take your orange icing or melted candy melts and use a piping bag to pipe a small circle around the base of the Hershey’s Kiss on the cookie. This will represent the hat’s band. If you have green icing, you can create additional designs or accents on the cookie for a fun touch.
- Let Set: Allow the icing to set for a few minutes at room temperature until it hardens slightly.
- Serve: Your Easy Witch Hat Cookies are ready to enjoy! Serve them on a festive platter or store them in an airtight container until you’re ready to share them at your Halloween celebration. Enjoy these whimsical treats with friends and family!
Creepy Crawly Rice Krispie Treats
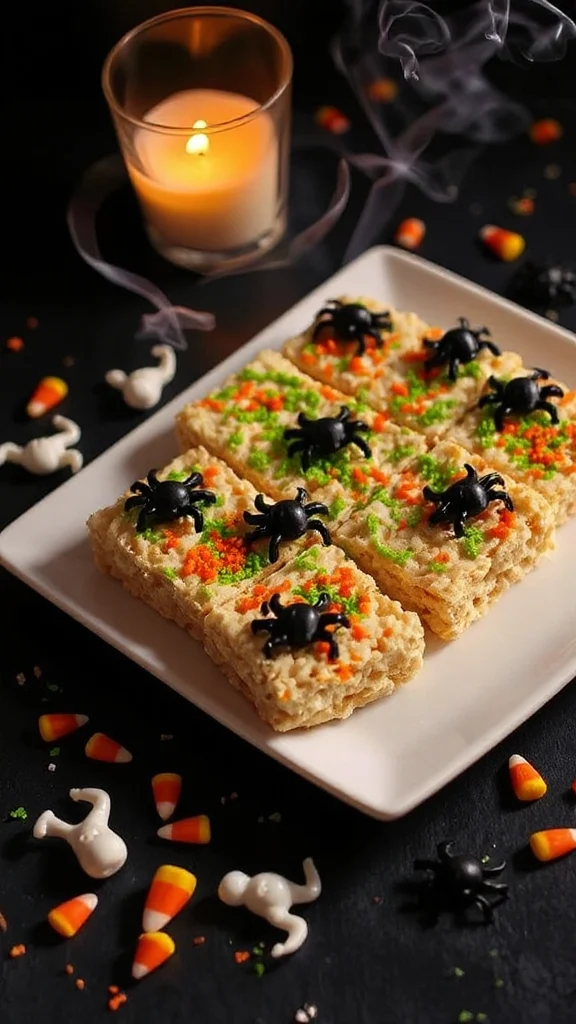
Creepy Crawly Rice Krispie Treats are a fun and spooky twist on the classic snack, perfect for Halloween gatherings. These treats are made with crispy rice cereal, marshmallows, and butter, then decorated with edible creepy crawly candies for a frightfully delicious bite. They’re easy to make and will surely delight children and adults alike.
| Ingredient | Quantity |
|---|---|
| Rice Krispies cereal | 6 cups |
| Mini marshmallows | 4 cups |
| Butter | 1/4 cup (1/2 stick) |
| Edible creepy crawly candies (e.g., gummy worms, spiders) | 1 cup |
| Cooking spray | As needed |
Cooking Instructions:
- Prep Your Pan: Grease a 9×13 inch baking dish with cooking spray or butter to prevent the mixture from sticking.
- Melt Butter and Marshmallows: In a large saucepan over low heat, melt the butter. Once melted, add the mini marshmallows to the pan, stirring continuously until completely melted and combined with the butter. This should take about 5 minutes.
- Mix in Rice Krispies: Once the marshmallow mixture is smooth, remove the saucepan from heat. Gradually add the Rice Krispies cereal, stirring until fully coated with the marshmallow mixture.
- Add Creepy Crawly Candies: Gently fold in half of the edible creepy crawly candies into the mixture, ensuring they are evenly distributed throughout.
- Transfer to Baking Dish: Pour the mixture into the prepared baking dish. Use a spatula (greased with cooking spray to avoid sticking) to press the mixture down evenly into the pan.
- Cool and Set: Allow the Rice Krispie treats to cool at room temperature for about 30 minutes or until they are firm enough to cut.
- Cut and Decorate: Once cooled, cut them into squares or rectangles. For an extra creepy touch, add the remaining edible creepy crawly candies on top of the treats for decoration.
- Serve: Arrange your Creepy Crawly Rice Krispie Treats on a spooky platter or serve in individual bags for a fun Halloween treat. Enjoy the spooky vibes!
Monster Mash Popcorn Balls

| Ingredient | Quantity |
|---|---|
| Popcorn (popped) | 10 cups |
| Mini marshmallows | 4 cups |
| Butter | 1/4 cup (1/2 stick) |
| Candy corn | 1 cup |
| Edible spooky decorations (e.g., Halloween sprinkles, chocolate candies) | 1 cup |
| Cooking spray | As needed |
Cooking Instructions:
- Prepare Your Popcorn: Start by popping the popcorn according to the package instructions. Once popped, place it in a large mixing bowl and make sure to remove any unpopped kernels.
- Melt Butter and Marshmallows: In a medium saucepan over low heat, melt the butter. Once melted, add the mini marshmallows. Stir continuously until the marshmallows are fully melted and combined with the butter.
- Combine Popcorn and Marshmallow Mixture: Pour the melted marshmallow mixture over the popped popcorn. Use a spatula to gently mix, ensuring that all the popcorn is evenly coated. Be careful not to crush the popcorn while mixing.
- Add the Candy Corn: Once the popcorn is coated with the marshmallow mixture, fold in the candy corn and any other edible spooky decorations you are using. Mix until evenly distributed.
- Form the Popcorn Balls: To create popcorn balls, lightly grease your hands with cooking spray to prevent sticking. Grab a handful of the mixture and squeeze it tightly to form a ball, about the size of a golf ball. Place the formed popcorn ball on a tray lined with parchment paper. Repeat this process until all the mixture has been shaped into balls.
- Let Them Set: Allow the popcorn balls to sit at room temperature for about 30 minutes, so they can firm up.
- Serve: Once set, you can serve the Monster Mash Popcorn Balls in a large bowl or wrap them individually in cellophane for party favors. Enjoy these spooky, crunchy treats at your Halloween festivities!
No-Bake Pumpkin Cheesecake Cups
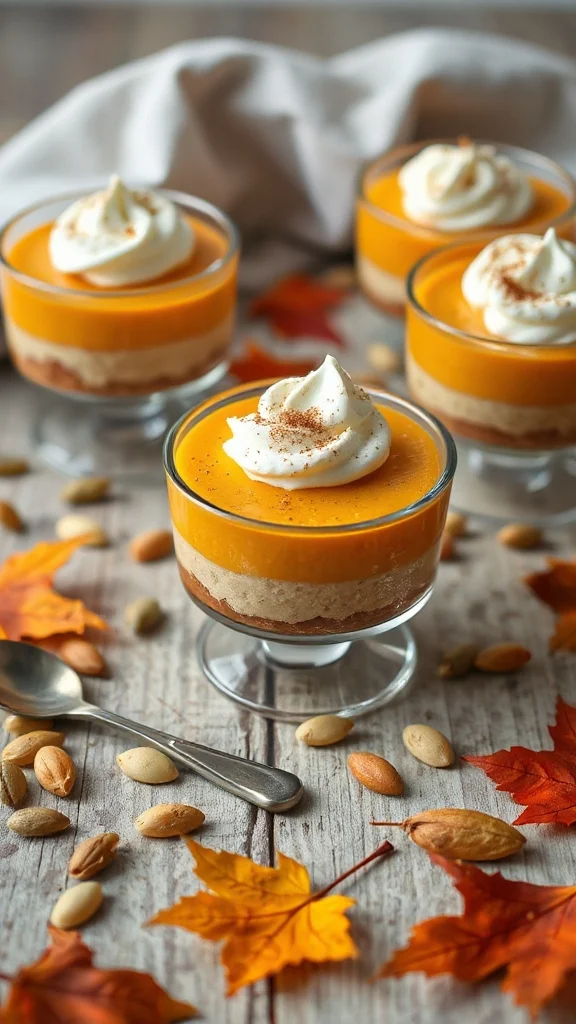
No-Bake Pumpkin Cheesecake Cups are a delightful, creamy dessert that captures the essence of fall in every bite. Combining the rich flavors of pumpkin, cream cheese, and warm spices, these individual servings are easy to prepare and perfect for Halloween gatherings or harvest celebrations. Plus, with no baking required, they come together quickly, letting you enjoy your festivities without the fuss.
| Ingredient | Quantity |
|---|---|
| Cream cheese | 8 oz (1 package) |
| Pumpkin puree | 1 cup |
| Powdered sugar | 1 cup |
| Vanilla extract | 1 tsp |
| Ground cinnamon | 1 tsp |
| Ground nutmeg | 1/2 tsp |
| Whipped topping (thawed) | 1 cup |
| Graham cracker crumbs | 1 cup |
| Butter (melted) | 1/4 cup |
| Optional: additional spices | Dash for garnish |
Cooking Instructions:
- Prepare the Graham Cracker Crust: In a medium mixing bowl, combine the graham cracker crumbs and melted butter. Mix well until the crumbs are fully coated. Distribute the mixture evenly into the bottom of serving cups or small jars, pressing down gently to create a firm crust.
- Make the Pumpkin Cheesecake Filling: In another bowl, beat the cream cheese until smooth using an electric mixer. Add the pumpkin puree, powdered sugar, vanilla extract, cinnamon, and nutmeg. Mix until well combined and creamy.
- Incorporate the Whipped Topping: Gently fold the whipped topping into the pumpkin mixture. Use a spatula to combine until fully incorporated, being careful not to deflate the whipped cream too much, as this will keep the filling light and airy.
- Assemble the Cups: Spoon the pumpkin cheesecake filling over the prepared graham cracker crust in each cup, filling them to the top. Smooth the surface with the back of a spoon if desired.
- Chill: Cover the cups with plastic wrap or lids and refrigerate for at least 2 hours to let the flavors meld and the mixture firm up.
- Serve: Once chilled, optionally sprinkle a little extra cinnamon on top for garnish before serving. Enjoy these No-Bake Pumpkin Cheesecake Cups as a festive treat at your Halloween gatherings!
Sweet and Salty Halloween Bark

Sweet and Salty Halloween Bark is a fun and festive treat that combines the flavors of chocolate, pretzels, and various toppings for a crunchy, satisfying snack. This easy-to-make dessert can be customized with your favorite candies and is perfect for Halloween parties, movie nights, or as a spooky sweet gift.
| Ingredient | Quantity |
|---|---|
| Semi-sweet chocolate chips | 2 cups |
| Pretzels (broken into pieces) | 1 cup |
| Candy corn | 1/2 cup |
| M&Ms (Halloween-themed) | 1/2 cup |
| Sea salt | 1/2 tsp |
| Optional: sprinkles or nuts | For topping |
Cooking Instructions:
- Prepare a Baking Sheet: Line a rimmed baking sheet with parchment paper. This will prevent the chocolate from sticking and make it easier to remove the bark once it’s set.
- Melt the Chocolate: In a microwave-safe bowl, add the semi-sweet chocolate chips. Heat in the microwave in 30-second intervals, stirring between each interval, until the chocolate is completely melted and smooth. Be careful not to overheat the chocolate.
- Combine Ingredients: Once the chocolate is melted, pour it onto the prepared baking sheet. Use a spatula to spread the chocolate evenly to about 1/4 inch thickness.
- Add Toppings: While the chocolate is still warm, sprinkle the broken pretzel pieces, candy corn, and Halloween-themed M&Ms evenly over the chocolate layer. Press down gently with your hands to guarantee they adhere to the melted chocolate.
- Sprinkle with Sea Salt: Lightly sprinkle sea salt over the top for a sweet and salty contrast. Add any additional toppings such as sprinkles or chopped nuts if desired.
- Chill to Set: Place the baking sheet in the refrigerator for about 30 to 60 minutes, or until the chocolate has completely hardened.
- Break into Pieces: Once set, remove the bark from the refrigerator and gently lift it off the parchment paper. Break the bark into irregular pieces.
- Serve and Enjoy: Place the pieces in a bowl or package them in cellophane bags for a festive Halloween treat. Enjoy your Sweet and Salty Halloween Bark!
Ghoulish Green Grapes
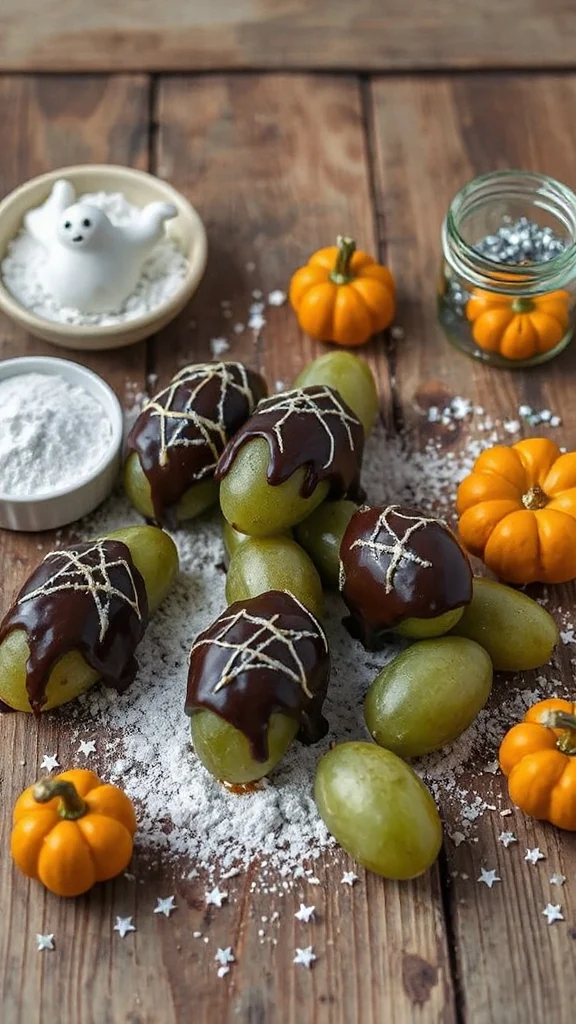
Ghoulish Green Grapes are a fun and healthy Halloween treat that add a spooky twist to your holiday celebrations. Dressed up to look like creepy, crawly monsters, these grapes are a hit with kids and adults alike. With their simple preparation and festive flair, they make a great addition to any Halloween party or gathering.
| Ingredient | Quantity |
|---|---|
| Green grapes | 1 bunch (about 2-3 cups) |
| Chocolate melts (green) | 1 cup |
| Candy eyes | 1 pack |
| Optional: coconut flakes | 1 cup |
Cooking Instructions:
- Wash the Grapes: Rinse the green grapes thoroughly under cold water. Remove any stems and let them dry completely on a paper towel. This will guarantee that the chocolate adheres well.
- Melt the Chocolate: In a microwave-safe bowl, place the green chocolate melts. Heat them in the microwave in 30-second intervals, stirring in between, until the chocolate is fully melted and smooth.
- Dip the Grapes: Once the chocolate is melted, take each grape and dip it into the chocolate, making sure it’s completely coated. Use a fork to lift the grape out of the chocolate and gently tap it against the side of the bowl to remove any excess chocolate.
- Add Candy Eyes: Place the chocolate-covered grape on a baking sheet lined with parchment paper. Before the chocolate sets, press two candy eyes onto each grape to create a ghoulish effect.
- Optional Coconut Coating: If using coconut flakes, roll the chocolate-dipped grape lightly in the coconut before adding the candy eyes. This adds a delightful texture and a bit of extra spookiness.
- Let Set: Once all the grapes are decorated, place the baking sheet in the refrigerator for about 30 minutes, or until the chocolate has fully hardened.
- Serve and Enjoy: Once set, transfer the Ghoulish Green Grapes to a serving platter or bowl. Enjoy these fun, healthy treats at your Halloween party, or pack them as a festive snack for school or work!
Vampire Blood Strawberry Pudding Cups

Vampire Blood Strawberry Pudding Cups are a delightfully spooky treat that’s perfect for Halloween festivities. This simple dessert combines creamy strawberry pudding with a gory twist—it’s served in clear cups, allowing you to see the rich, red “blood” ooze that makes these cups both fun and delicious. Not only are they easy to prepare, but they’re also sure to be a hit with both kids and adults alike.
| Ingredient | Quantity |
|---|---|
| Instant strawberry pudding mix | 1 box (3.4 oz) |
| Milk | 2 cups |
| Whipped cream | 1 cup |
| Red gel food coloring | 1 teaspoon (adjust to taste) |
| Gummy vampire teeth | 1 pack |
| Optional: crushed graham crackers | ½ cup |
Cooking Instructions:
- Prepare the Pudding: In a medium-sized bowl, combine the instant strawberry pudding mix with 2 cups of cold milk. Whisk the mixture together until it’s smooth and well combined. Allow it to sit for about 5 minutes until it thickens.
- Add Food Coloring: Once the pudding has thickened, add 1 teaspoon of red gel food coloring. Stir well to incorporate the color completely, giving it a more sinister appearance. You can adjust the amount of coloring to achieve your desired shade of “blood.”
- Layer the Cups: Take clear plastic or glass cups and begin to layer the pudding. Spoon a generous amount of the strawberry pudding into the cups until they are about half full. If desired, sprinkle a layer of crushed graham crackers on top for a “ground” effect.
- Add Whipped Cream: Next, add a layer of whipped cream on top of the pudding in each cup, creating a nice contrast with the red pudding beneath.
- Garnish with Vampire Teeth: Finish decorating the cups by placing gummy vampire teeth on top of the whipped cream. Position them so that they look like they are “biting” into the pudding.
- Chill: Cover the cups with plastic wrap and place them in the refrigerator for at least 30 minutes to chill. This will help set the dessert and make it more invigorating when served.
- Serve and Enjoy: After chilling, serve the Vampire Blood Strawberry Pudding Cups at your Halloween gathering. Watch as your guests delight in the spooky presentation and delicious flavor of this festive treat!
Simple Halloween Rice Crispy Treats

Simple Halloween Rice Crispy Treats are a fun and festive twist on the classic Rice Crispy treats, perfect for adding a touch of spookiness to your Halloween celebrations. These treats are easy to make and require minimal ingredients, yet they can be transformed with some creative decorations to resemble ghosts, pumpkins, and more. Ideal for both kids and adults, these chewy, crunchy treats are sure to be a hit!
| Ingredient | Quantity |
|---|---|
| Rice crispy cereal | 6 cups |
| Mini marshmallows | 4 cups |
| Unsalted butter | 1/2 cup (1 stick) |
| Vanilla extract (optional) | 1 teaspoon |
| Edible decorations (sprinkles, chocolate, etc.) | As desired |
Cooking Instructions:
- Prepare Your Ingredients: Gather all your ingredients and have them ready to use. Lightly grease a 9×13-inch baking pan with butter or cooking spray to prevent the treats from sticking.
- Melt the Butter: In a large saucepan, melt the 1/2 cup of unsalted butter over medium heat. Stir occasionally until the butter is completely melted and bubbling.
- Add Marshmallows: Once the butter is melted, reduce the heat to low and add the 4 cups of mini marshmallows to the saucepan. Stir the marshmallows continuously until they are fully melted and the mixture is smooth. If using, add 1 teaspoon of vanilla extract and mix well.
- Combine with Rice Crispy Cereal: Remove the saucepan from heat and gradually add the 6 cups of rice crispy cereal to the melted marshmallow mixture. Stir gently until all the cereal is evenly coated with the marshmallow mixture.
- Shape the Treats: Once combined, pour the mixture into the greased 9×13-inch baking pan. Press down firmly with your hands or a spatula to spread the mixture evenly and compact it. Be careful as the mixture may be warm!
- Let It Set: Allow the rice crispy treats to cool in the pan for about 30 minutes at room temperature. This will help them firm up for easier cutting.
- Cut and Decorate: Once set, cut the treats into squares or use cookie cutters to create Halloween shapes such as ghosts or pumpkins. Decorate your treats with edible decorations like sprinkles or melted chocolate to enhance the Halloween theme.
- Serve and Enjoy: Place your decorated Halloween Rice Crispy Treats on a platter and serve them at your Halloween party. Enjoy these delightful treats with friends and family!
Mummy Marshmallow Pops

Mummy Marshmallow Pops are a delightfully spooky treat that combines fluffy marshmallows with a fun, wrapping of white chocolate, making them look like cute little mummies. These pops not only make great additions to Halloween parties, but they’re also simple to assemble and require minimal ingredients. Kids will love helping to decorate these sweet treats, and they make for a fantastic festive snack!
| Ingredient | Quantity |
|---|---|
| Large marshmallows | 12 |
| White chocolate chips | 1 cup |
| Lollipop sticks | 12 |
| Black icing or chocolate chips | For eyes |
| Optional sprinkles | For decorating |
Cooking Instructions:
- Prepare Your Workspace: Set up a workspace on your kitchen counter. Gather all your ingredients and equipment, including a microwave-safe bowl, lollipop sticks, and parchment paper for cooling the pops.
- Melt the White Chocolate: Place the 1 cup of white chocolate chips in a microwave-safe bowl. Heat in the microwave in 30-second intervals, stirring well in between, until the chocolate is completely melted and smooth. Be cautious not to overheat the chocolate.
- Assemble the Pops: Take a large marshmallow, insert a lollipop stick into one end, pushing it halfway through the marshmallow. Repeat with the remaining marshmallows until all are completed.
- Coat with Chocolate: Dip each marshmallow pop into the melted white chocolate, completely covering the marshmallow. Allow any excess chocolate to drip off, then place the coated pops upright in a cup or stand, or lay them on the parchment paper.
- Create the Mummy Wrap: Using a fork or a piping bag, drizzle more melted white chocolate over the coated marshmallow pops to create a “bandage” effect, making sure to leave some space for the eyes.
- Add the Eyes: Before the white chocolate sets, place two small dots of black icing or chocolate chips onto the marshmallow to serve as eyes for your mummies.
- Let It Set: Allow the pops to cool and let the chocolate harden at room temperature for about 30 minutes. Alternatively, you can place them in the refrigerator for quicker setting.
- Serve Your Mummy Pops: Once the chocolate is set, arrange the Mummy Marshmallow Pops on a platter for your Halloween gathering. Enjoy these adorable, tasty treats!
Super Simple Caramel Apples

Super Simple Caramel Apples are a classic Halloween treat that combines the crunch of fresh apples with the rich sweetness of gooey caramel. This easy-to-make dessert is perfect for get-togethers, allowing everyone to enjoy a healthy fruit covered in irresistible candy. With just a few ingredients, you can create a delightful festive snack that will have everyone reaching for another bite!
| Ingredient | Quantity |
|---|---|
| Fresh apples | 6 |
| Caramel candies | 14 oz (about 1 bag) |
| Heavy cream | 2 tbsp |
| Chopped nuts or sprinkles | Optional, for topping |
| Wooden stick or popsicle sticks | 6 |
Cooking Instructions:
- Prepare the Apples: Start by washing the fresh apples thoroughly to remove any wax residue. Pat them dry with a clean towel. Remove the stems from the apples and insert a wooden stick or popsicle stick into the top of each apple, pushing it in about halfway.
- Melt the Caramel: Unwrap the caramel candies and place them in a microwave-safe bowl. Add 2 tablespoons of heavy cream for a smoother consistency. Heat in the microwave for about 1 minute, then stir. Continue heating in 15-second intervals, stirring in between, until the caramel is completely melted and smooth.
- Dip the Apples: Hold each apple by the stick and dip it into the melted caramel, rotating to guarantee the apple is fully coated. Allow any excess caramel to drip off before placing the caramel-coated apple upright onto a parchment-lined baking sheet.
- Add Toppings (Optional): If desired, while the caramel is still warm, sprinkle chopped nuts or colorful sprinkles over the caramel coating to add an extra festive touch. This step is optional but adds a nice crunch and visual appeal.
- Let It Set: Allow the caramel to cool and set at room temperature for about 30 minutes. If you prefer, you can place the tray in the refrigerator to speed up the setting process.
- Serve the Caramel Apples: Once the caramel is firm, arrange the caramel apples on a platter for serving. These caramel-coated delights are perfect for Halloween parties and are sure to be a hit with guests!
Enjoy your Super Simple Caramel Apples while they are fresh and gooey!
Festive Fruit & Nut Halloween Cookies

| Ingredient | Quantity |
|---|---|
| All-purpose flour | 1 ½ cups |
| Baking soda | 1 tsp |
| Cinnamon powder | 1 tsp |
| Salt | ½ tsp |
| Unsalted butter, softened | ½ cup |
| Brown sugar | ¾ cup |
| Granulated sugar | ¼ cup |
| Eggs | 1 large |
| Vanilla extract | 1 tsp |
| Dried cranberries | ¾ cup |
| Chopped walnuts or pecans | ¾ cup |
| Chocolate chips (optional) | ½ cup |
Cooking Instructions:
- Preheat the Oven: Begin by preheating your oven to 350°F (180°C). This guarantees that the cookies will bake evenly.
- Mix Dry Ingredients: In a medium bowl, whisk together the all-purpose flour, baking soda, cinnamon, and salt. Set this bowl aside as you prepare the wet ingredients.
- Cream Butter and Sugars: In a large mixing bowl, use an electric mixer to cream together the softened unsalted butter, brown sugar, and granulated sugar. Mix on medium speed for about 2-3 minutes until the mixture is light and fluffy.
- Add the Egg and Vanilla: Beat in the egg and vanilla extract to the butter and sugar mixture. Continue to mix until well combined.
- Combine Wet and Dry Ingredients: Gradually add the dry ingredient mixture to the wet mixture, mixing on low speed until just combined. Be careful not to over-mix; it’s okay if a few flour streaks remain.
- Fold in Fruits and Nuts: Gently fold in the dried cranberries, chopped walnuts or pecans, and chocolate chips (if using) using a spatula. Verify the fruits and nuts are evenly distributed throughout the dough.
- Scoop the Dough: Using a cookie scoop or tablespoon, drop rounded balls of dough onto a parchment-lined baking sheet, spacing them about 2 inches apart to allow for spreading.
- Bake the Cookies: Place the baking sheet in the preheated oven and bake for 10-12 minutes, or until the cookies are lightly golden around the edges. The centers might look slightly undercooked, but they will continue to set as they cool.
- Cool the Cookies: Once baked, remove the cookies from the oven and let them cool on the baking sheet for 5 minutes. Then, transfer them to a wire rack to cool completely.
- Serve and Enjoy: Once cooled, your Festive Fruit & Nut Halloween Cookies are ready to be served! They are perfect for sharing with friends and family during spooky celebrations.
Enjoy these delightful cookies as a festive treat this Halloween season!