
Ghostly Meringue Cookies

Ghostly meringue cookies are a delightful and spooky treat perfect for Halloween festivities. These light and airy cookies resemble little ghosts, making them a fun and festive addition to your ghost-and-bat décor. With their crisp exterior and soft interior, they are not only adorable but also deliciously sweet, guaranteeing they will be a hit with kids and adults alike.
| Ingredients | Quantity |
|---|---|
| Egg whites | 3 large |
| Granulated sugar | 1 cup |
| Vanilla extract | 1 teaspoon |
| Cream of tartar | 1/4 teaspoon |
| Semi-sweet chocolate chips | 1/4 cup |
Cooking Instructions:
- Preheat the Oven: Begin by preheating your oven to 200°F (90°C). This low temperature is essential for drying out the meringues without browning them.
- Prepare Baking Sheets: Line two baking sheets with parchment paper. This will prevent the meringue cookies from sticking.
- Whip Egg Whites: In a clean, dry mixing bowl, add the three large egg whites. Using an electric mixer, whip the egg whites on medium speed until they start to foam.
- Add Cream of Tartar: Once the egg whites are foamy, add the cream of tartar. Continue to whip on medium speed until soft peaks form.
- Incorporate Sugar: Gradually add the cup of granulated sugar, one tablespoon at a time, while continuing to whip the egg whites. Increase the speed to high and beat until the mixture is glossy and stiff peaks form.
- Add Vanilla Extract: Gently fold in the teaspoon of vanilla extract using a spatula. Be careful not to deflate the meringue.
- Pipe Meringue Ghosts: Transfer the meringue mixture into a piping bag fitted with a round tip. Pipe the meringue onto the prepared baking sheets in ghost shapes—an upward swirl for the body and a slightly larger swirl for the base.
- Bake: Place the baking sheets in the oven and bake for about 1.5 hours, or until the meringues are hard and easily lift off the parchment paper. They should feel dry to the touch.
- Cool: Turn off the oven and leave the meringues inside to cool completely. This helps to guarantee they dry out completely.
- Decorate with Chocolate: Once cooled, melt the semi-sweet chocolate chips in a microwave-safe bowl, stirring every 30 seconds until smooth. Use a toothpick to dip or drizzle the melted chocolate onto the meringue cookies to create little eyes.
- Serve and Enjoy: Once the chocolate has set, your Ghostly meringue cookies are ready to serve. Enjoy your hauntingly delicious treats at your Halloween gathering!
Bat-Shaped Chocolate Lollipops

Bat-shaped chocolate lollipops are a fun and creative treat that is perfect for Halloween celebrations. These adorable lollipops are not only a delightful addition to your spooky decor but also a deliciously sweet treat that both kids and adults will enjoy. With easy-to-follow instructions, you can whip up a batch of these festive bat designs and decorate them to suit your Halloween theme.
| Ingredients | Quantity |
|---|---|
| Semi-sweet chocolate chips | 1 cup |
| Lollipop sticks | 10 sticks |
| Black candy melts | 1 cup |
| Candy eyes | 20 pieces |
| Parchment paper | As needed |
Cooking Instructions:
- Prepare Your Workspace: Begin by gathering all your ingredients and setting up a clean work surface. Lay out a sheet of parchment paper for your finished lollipops.
- Melt the Chocolate: In a microwave-safe bowl, add the semi-sweet chocolate chips. Microwave the chocolate in 30-second intervals, stirring in between, until fully melted and smooth.
- Create the Bat Shape: Using a bat-shaped cookie cutter as a guide, take a spoonful of the melted chocolate and pour it onto the parchment paper, shaping it into a bat form (or use a bat mold if you have one). Make sure to create an area at the bottom of the bat shape for inserting the lollipop stick.
- Insert Lollipop Sticks: While the chocolate is still warm, press one lollipop stick into the bottom of each bat shape, ensuring it stands upright. Let the chocolate cool slightly before moving on to the next step.
- Melt Black Candy Melts (optional): If you want to add decorations or details, melt the black candy melts in a separate microwave-safe bowl using the same method as before.
- Decorate Your Bats: Once the bat shapes have cooled and hardened but still have a slight sheen, dip a toothpick into the melted black candy melts and use it to add features like ears or wing details onto your bats.
- Add Candy Eyes: Immediately press two candy eyes onto each bat lollipop while the chocolate is still soft. This will help them adhere properly.
- Cool the Lollipops: Allow the bat-shaped lollipops to cool completely. If you want to speed up the process, you can place them in the refrigerator for about 10-15 minutes until they are set.
- Serve and Enjoy: Once fully hardened, your bat-shaped chocolate lollipops are ready to be displayed at your Halloween gathering! Serve them on a decorative platter or stick them into a piece of foam or a pumpkin for a fun presentation.
These treats are sure to be a hit and can add a spooky touch to your Halloween festivities!
Spooky Cupcake Toppers
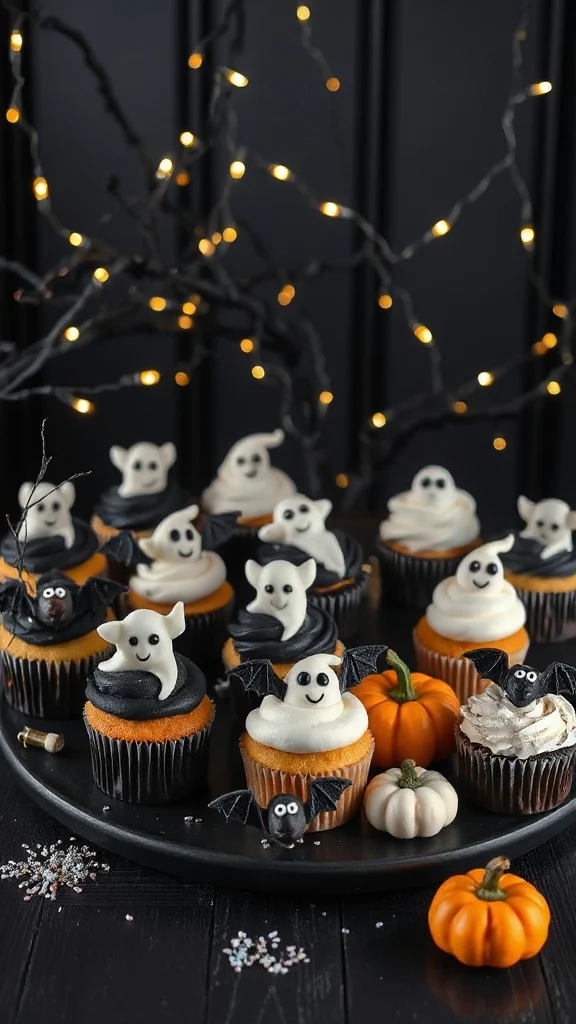
Spooky cupcake toppers are an excellent way to elevate your Halloween treats, adding whimsical and festive flair to your baked goods. These simple yet creative decorations will delight guests of all ages and make your cupcakes a standout addition to any Halloween gathering. Made with just a few ingredients, you can customize them to match your party theme or personal taste.
| Ingredients | Quantity |
|---|---|
| Fondant (black, white, orange) | 1 cup each |
| Edible glue or water | As needed |
| Rolling pin | 1 |
| Cupcake bases (of your choice) | 12 |
| Toothpicks | 10 or more |
| Edible markers | 2 (black and red) |
Cooking Instructions:
- Prepare Your Workspace: Begin by cleaning your workspace and gathering all your ingredients. Dust your surface lightly with powdered sugar to prevent fondant from sticking.
- Roll Out the Fondant: Take the black fondant and knead it until it’s soft and pliable. Use a rolling pin to roll it out to about 1/8-inch thickness. Repeat this process with the white and orange fondant, keeping them separated.
- Cut Out Shapes: Use cookie cutters or a knife to cut out various spooky shapes from the rolled fondant. Common designs include bats, ghosts, pumpkins, and spooky faces. Aim for about 2-3 of each shape to have a variety for your cupcakes.
- Assemble the Toppers: Once your fondant shapes are cut out, use a small amount of edible glue or water to attach smaller pieces (like eyes, mouths, or other decorations) to the larger shapes. For ghosts, you can use a small piece of black fondant for eyes.
- Attach Toothpicks: Insert a toothpick into the base of each fondant shape for easy placement on the cupcakes. Confirm the toothpick goes only halfway through the fondant so it doesn’t poke through the top.
- Decorate with Edible Markers: Using the edible markers, add extra details to your toppers, such as spooky expressions on ghosts or stitching on pumpkins. Get creative with different colors and designs!
- Let Them Set: Allow the decorated fondant shapes to sit for 10-20 minutes to dry slightly. This helps them hold their shape when placed on the cupcakes.
- Prepare Your Cupcakes: Bake and frost your cupcakes as desired. Traditional Halloween colors (like orange frosting) work great, but feel free to get creative with your flavors and frostings.
- Add the Toppers: Once your cupcakes are frosted and the toppers have set, gently insert the toothpick end of each spooky cupcake topper into the center of the cupcake.
- Display and Enjoy: Arrange your spooky cupcakes on a platter or cake stand for a festive appearance. Serve at your Halloween party and enjoy the delighted reactions as guests admire your festive creations!
Marshmallow Ghosts

Marshmallow ghosts are a fun and easy treat to make for Halloween parties or gatherings. These adorable little ghosts are made from fluffy marshmallows, dipped in white chocolate, and decorated with chocolate chips or edible markers for eyes and mouths. They are sure to be a hit with kids and adults alike, adding a cute and spooky touch to your Halloween dessert table!
| Ingredients | Quantity |
|---|---|
| Large marshmallows | 12 |
| White chocolate chips | 1 cup |
| Mini chocolate chips | 1/2 cup |
| Parchment paper | As needed |
| Edible markers | Optional |
Cooking Instructions:
- Melt the White Chocolate: Begin by placing the white chocolate chips in a microwave-safe bowl. Heat them in the microwave in 30-second intervals, stirring in between, until completely melted and smooth. Be careful not to overheat, as this can cause the chocolate to seize.
- Prepare Your Work Surface: Line a baking sheet with parchment paper to create a non-stick surface for your marshmallow ghosts. This will make it easier to remove the ghosts once they’re set.
- Dip the Marshmallows: Using a fork or a skewer, dip each large marshmallow into the melted white chocolate, ensuring it is fully coated. Allow any excess chocolate to drip off before carefully placing the coated marshmallow onto the prepared parchment paper.
- Add the Eyes and Mouth: While the white chocolate is still wet, place two mini chocolate chips on top of each marshmallow for the eyes. If desired, you can also use edible markers to draw spooky faces or mouths after the chocolate has dried.
- Let the Ghosts Set: Allow the dipped marshmallows to sit at room temperature until the chocolate has completely hardened. This usually takes about 30 minutes. If you’re in a hurry, you can refrigerate them for about 10-15 minutes to speed up the process.
- Display Your Ghosts: Once set, the marshmallow ghosts are ready to be displayed or served. Arrange them on a platter or in clear treat bags for a fun Halloween treat. You can even stick them on skewers and place them into a spooky centerpiece!
Enjoy your adorable marshmallow ghosts this Halloween season!
Edible Glitter Bat Sprinkles
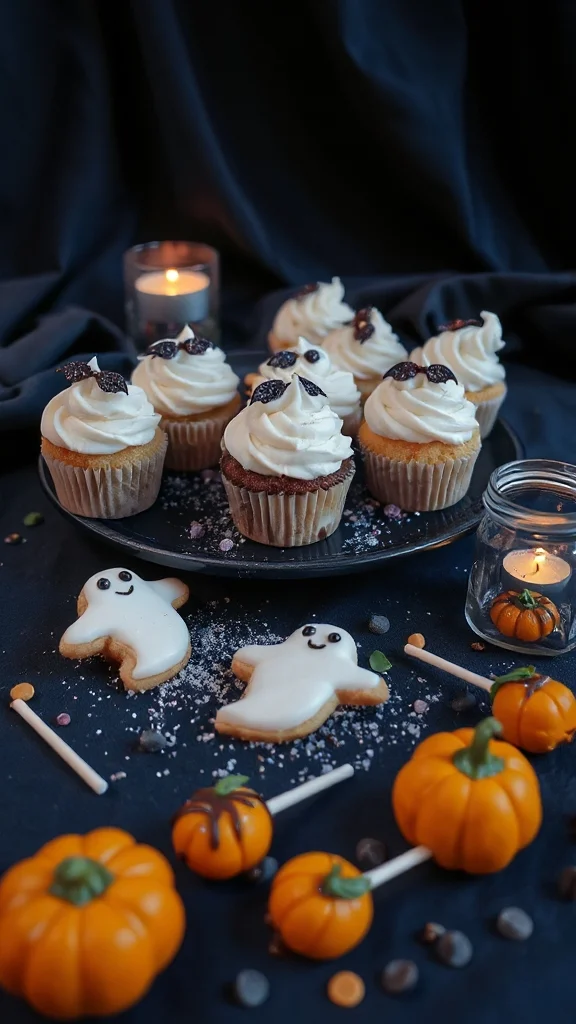
Edible glitter bat sprinkles are a whimsical addition that can elevate your Halloween desserts and treats. These charming bat-shaped sprinkles are perfect for adding a sparkle of fun to cookies, cupcakes, cakes, and other spooky Halloween goodies. Not only do they offer a touch of glamour, but they’ll also make your treats visually enchanting while celebrating the Halloween spirit!
| Ingredients | Quantity |
|---|---|
| Black sanding sugar | 1 cup |
| Edible glitter (black/silver) | 2 tablespoons |
| Bat-shaped cookie cutter | 1 |
| Wax paper | As needed |
| Air-tight container | 1 |
Cooking Instructions:
- Prepare Your Work Surface: Clear a flat work surface and lay down a sheet of wax paper. This will prevent the ingredients from sticking and make for easy cleanup.
- Mix the Sanding Sugar and Edible Glitter: In a mixing bowl, combine 1 cup of black sanding sugar with 2 tablespoons of edible glitter (you can use either black or silver glitter depending on your preference). Gently stir the mixture with a spoon until the glitter is evenly distributed throughout the sugar.
- Cut Out Bat Shapes: If you wish to have perfect bat shapes, sprinkle the sanded sugar mixture over a clean baking sheet. Use a bat-shaped cookie cutter to create bat outlines. The sugar mixture will adhere to the cookie cutter as you press down. This step is optional; you can simply use the sugar mixture as it is.
- Transfer to Wax Paper: If you’ve cut out bat shapes, carefully lift the cookie cutter, allowing the bat-shaped sprinkles to remain on the wax paper. If you prefer a more rustic approach, simply leave the sugar mixture in the bowl.
- Let the Sprinkles Dry: Allow the bat sprinkles to dry for about 30 minutes at room temperature. This helps the edible glitter stick firmly to the sanding sugar, ensuring it remains on your desserts when applied.
- Store the Sprinkles: Once dried, transfer your bat sprinkles into an air-tight container for storage. They can be kept for several weeks, making them great for spontaneous Halloween baking!
Use these edible glitter bat sprinkles to add a festive touch to your Halloween treats that is as delightful to look at as it is to enjoy!
Fondant Bat Decorations
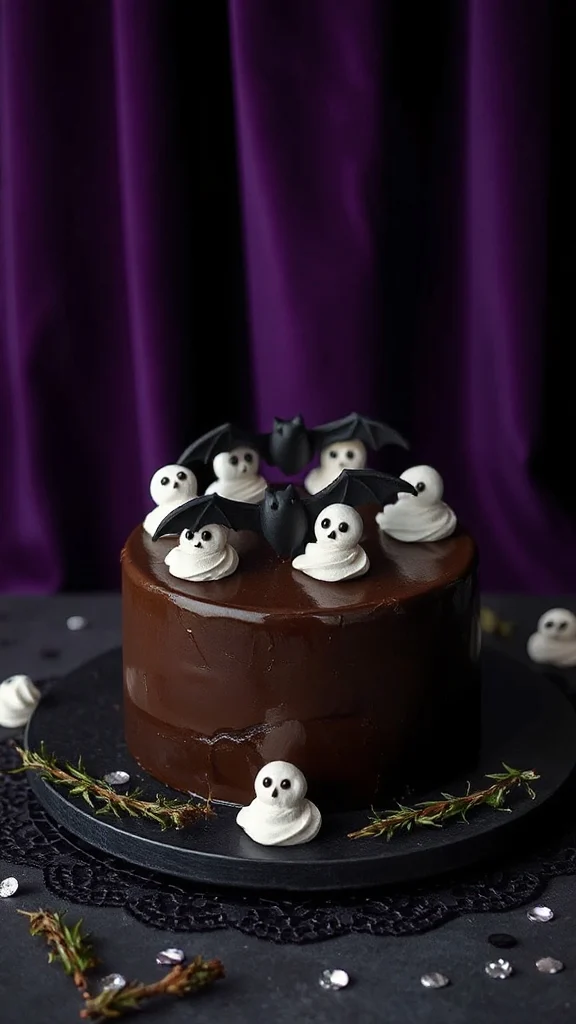
Fondant bat decorations are a fun and easy way to add a spooky touch to your Halloween-themed treats. These charming little bats can be crafted from fondant, which is a pliable sugar dough, allowing for endless customization. Use them to adorn cakes, cupcakes, or even as cake toppers for your Halloween celebrations!
| Ingredients | Quantity |
|---|---|
| Fondant (black) | 1 cup |
| Cornstarch | As needed (for dusting) |
| Rolling pin | 1 |
| Bat-shaped cookie cutter | 1 |
| Edible glue or water | A few drops |
| Food-safe brush | 1 |
Cooking Instructions:
- Prepare Your Workspace: Clear a clean, flat surface and dust it lightly with cornstarch to prevent the fondant from sticking. Having a nice workspace will make the process smoother.
- Knead the Fondant: Take 1 cup of black fondant and knead it in your hands for a minute or two. This will make it more pliable and easier to work with. If the fondant feels too dry, you can add a tiny bit of water to achieve the right consistency.
- Roll Out the Fondant: Using your rolling pin, roll the fondant out to about 1/8 inch thickness on your cornstarch-dusted surface. Make sure the fondant is even to guarantee uniform bat shapes.
- Cut Out Bat Shapes: Press the bat-shaped cookie cutter firmly into the rolled fondant to create bat shapes. Carefully lift the cutter off to reveal the bats. If the cut-out bats stick to the cutter, gently push them out using your fingers.
- Attach Bat Wings (Optional): For added detail, you can reshape the wings of the bats using small pieces of fondant, creating a 3D effect. Use a bit of edible glue or water to attach these pieces if desired.
- Allow to Dry: Place the bat decorations on a clean surface or a baking tray lined with parchment paper. Let them dry for at least a couple of hours or overnight so they harden up slightly and hold their shape better when decorating.
- Decorate Your Treats: Once your fondant bats are dry, attach them to your baked goods using a tiny amount of edible glue or water. They can be placed on cupcakes, cakes, or cookies to give a festive Halloween look.
Using these fondant bat decorations will bring an adorable and scary vibe to your Halloween gatherings, making your treats stand out and delighting guests of all ages!
Decorated Sugar Cookies
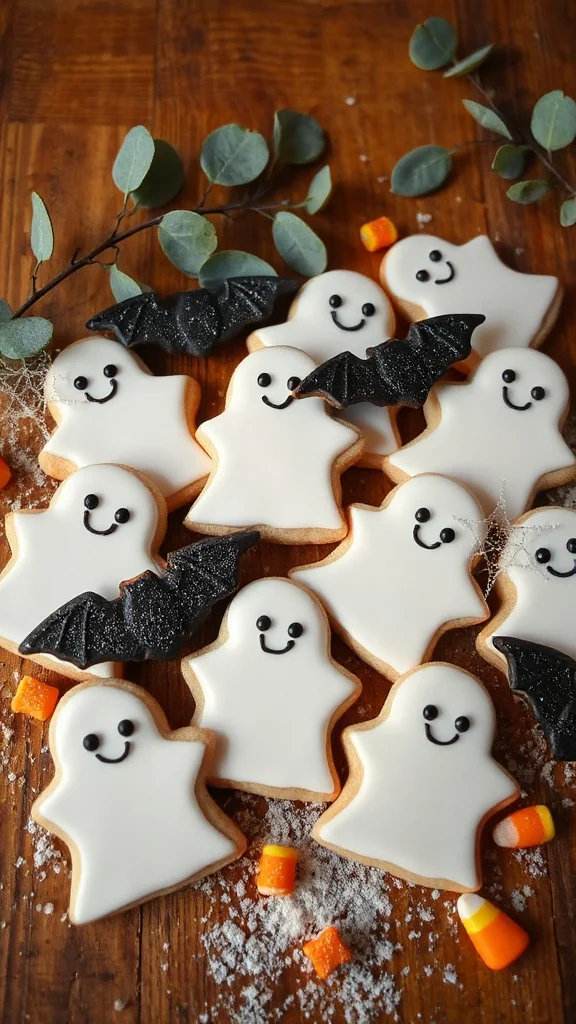
Decorated sugar cookies are a delicious and festive way to add a personal touch to your Halloween celebrations. These soft, buttery cookies can be shaped and decorated in any fun Halloween design, making them a great project for kids and adults alike. Whether you choose to create spooky ghosts, creepy bats, or adorable pumpkins, decorated sugar cookies are certain to be a hit at any Halloween gathering!
| Ingredients | Quantity |
|---|---|
| All-purpose flour | 3 cups |
| Baking soda | 1 tsp |
| Baking powder | 1/2 tsp |
| Unsalted butter | 1 cup (softened) |
| Granulated sugar | 1 1/2 cups |
| Eggs | 2 |
| Vanilla extract | 1 tsp |
| Salt | 1/2 tsp |
| Royal icing (for decoration) | As needed |
| Food coloring | As needed (for decoration) |
Cooking Instructions:
- Preheat Oven: Begin by preheating your oven to 350°F (175°C). This guarantees your cookies bake evenly.
- Mix Dry Ingredients: In a large mixing bowl, whisk together the all-purpose flour, baking soda, baking powder, and salt. Set this mixture aside.
- Cream Butter and Sugar: In another large bowl, cream the softened butter and granulated sugar together using an electric mixer on medium speed. Beat until the mixture is light and fluffy, which should take about 2-3 minutes.
- Add Eggs and Vanilla: Add the eggs, one at a time, to the creamed butter and sugar, mixing well after each addition. Then stir in the vanilla extract until fully combined.
- Combine Wet and Dry Ingredients: Gradually add the dry ingredients to the wet mixture, mixing on low speed until just combined. Be careful not to overmix; you want to keep the dough soft.
- Chill the Dough: Divide the dough into two equal portions, wrap each in plastic wrap, and refrigerate for at least 1 hour. This helps the cookies maintain their shape while baking.
- Roll Out Dough: Once the dough is chilled, remove it from the refrigerator. On a lightly floured surface, roll out the dough to about 1/4 inch thickness.
- Cut Out Shapes: Use cookie cutters to cut out your desired Halloween shapes. Place the cookie cutouts onto ungreased baking sheets, ensuring they are spaced about 2 inches apart.
- Bake Cookies: Bake the cookies in the preheated oven for 8-10 minutes or until the edges are lightly golden. Keep a close eye on them as baking times may vary.
- Cool Cookies: Once baked, remove the cookies from the oven and let them cool on the baking sheets for 5 minutes. Then, transfer them to wire racks to cool completely.
- Decorate the Cookies: Once the cookies are completely cool, you can decorate them with royal icing and food coloring to create spooky designs. Use piping bags for intricate details and let the icing dry completely before serving.
Enjoy these decorated sugar cookies at your Halloween party or give them as treats to friends and family! They are certain to bring smiles and add a festive touch to the season.
Chocolate-Covered Pretzel Bats
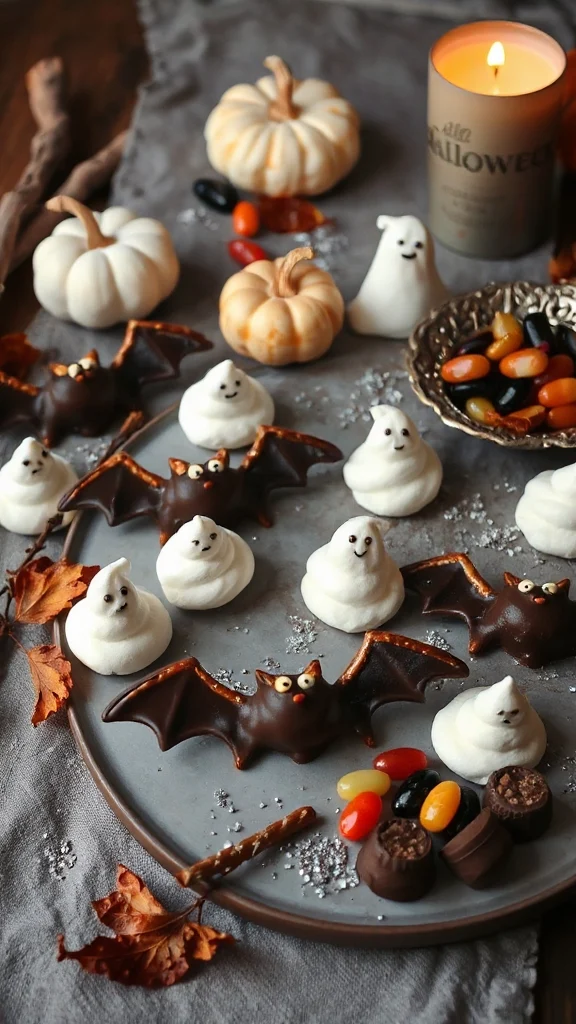
Chocolate-covered pretzel bats are a fun and festive snack that perfectly captures the spirit of Halloween! These adorable treats combine the salty crunch of pretzels with sweet chocolate, creating a delightful combination that is certain to please guests of all ages. They are easy to make and can be customized with different types of chocolate and toppings, making them a must-have for your Halloween festivities.
| Ingredients | Quantity |
|---|---|
| Pretzel rods | 1 bag (about 12-15 rods) |
| Milk chocolate chips | 1 cup |
| Dark chocolate chips | 1 cup |
| White chocolate chips | 1/2 cup (for eyes) |
| Candy eyes | As needed (for decoration) |
| Edible black glitter or sprinkles | As needed (optional) |
Cooking Instructions:
- Melt the Chocolate: Begin by melting the milk chocolate and dark chocolate chips separately. You can do this using a microwave-safe bowl. Microwave the milk chocolate in 30-second intervals, stirring in between until smooth. Repeat the same process for the dark chocolate.
- Dip the Pretzels: Carefully dip each pretzel rod into the melted milk chocolate using a fork to guarantee it’s fully coated. Allow any excess chocolate to drip off before placing the pretzel onto a parchment-lined baking sheet.
- Create Bat Wings: Using a second pretzel rod, break it into half or quarters to create wings. Dip these broken pieces into the dark chocolate and place them alongside the coated pretzel rod on the baking sheet, positioning them to look like bat wings.
- Add Eyes: While the chocolate is still soft, take a small amount of melted white chocolate and use it to attach candy eyes to the pretzel rod, giving your bat a fun and spooky face.
- Chill to Set: Once all your pretzel bats are assembled, place the baking sheet in the refrigerator for about 30 minutes or until the chocolate has fully set.
- Add Glitz (Optional): If you’d like, once the chocolate has hardened, you can sprinkle on some edible black glitter or sprinkles to add an extra touch of spookiness.
- Serve and Enjoy: After the chocolate has completely set, remove the pretzel bats from the parchment paper and arrange them on a platter. They’re now ready to be enjoyed at your Halloween celebration!
Whipped Cream Ghost Faces

Whipped Cream Ghost Faces are a delightful and spooky addition to your Halloween spread! These cute little treats are simple to create and add a fun, festive touch to desserts or can even be served as an accompaniment to hot cocoa. With just a few ingredients, you can whip up these ghostly faces that everyone will love.
| Ingredients | Quantity |
|---|---|
| Heavy whipping cream | 1 cup |
| Powdered sugar | 2 tablespoons |
| Vanilla extract | 1 teaspoon |
| Chocolate chips | 1/4 cup (for eyes) |
| Edible black glitter (optional) | As needed (for decoration) |
Cooking Instructions:
- Whip the Cream: In a mixing bowl, pour in the heavy whipping cream. Using an electric mixer, beat the cream on medium speed until soft peaks begin to form.
- Sweeten the Cream: Add the powdered sugar and vanilla extract to the whipped cream. Continue beating on high speed until stiff peaks form. Be careful not to overbeat, as this can turn the cream into butter.
- Prepare a Piping Bag: Once your whipped cream is ready, transfer it to a piping bag fitted with a large round tip. If you don’t have a piping bag, you can also use a zip-top bag, cutting a small hole in one of the corners.
- Pipe Ghost Shapes: On a serving platter, pipe small ghost shapes by squeezing the piping bag to create a round body with a tapered top. Aim for about 1-2 inches in height for each ghost.
- Add Eyes: Once you have piped all your ghost shapes, add two chocolate chips for eyes on each ghost, gently pressing them into the whipped cream. If you prefer, you can use edible black glitter to create spooky eyes instead!
- Chill (Optional): For a chilly dessert, you can place the platter of whipped cream ghost faces in the refrigerator for about 15-20 minutes to allow them to firm up slightly.
- Serve and Enjoy: Your Whipped Cream Ghost Faces are now ready to impress! Serve them alongside cakes, pies, or even as a fun topping for drinks. Enjoy your Halloween treat!
Candy Corn Ghosts
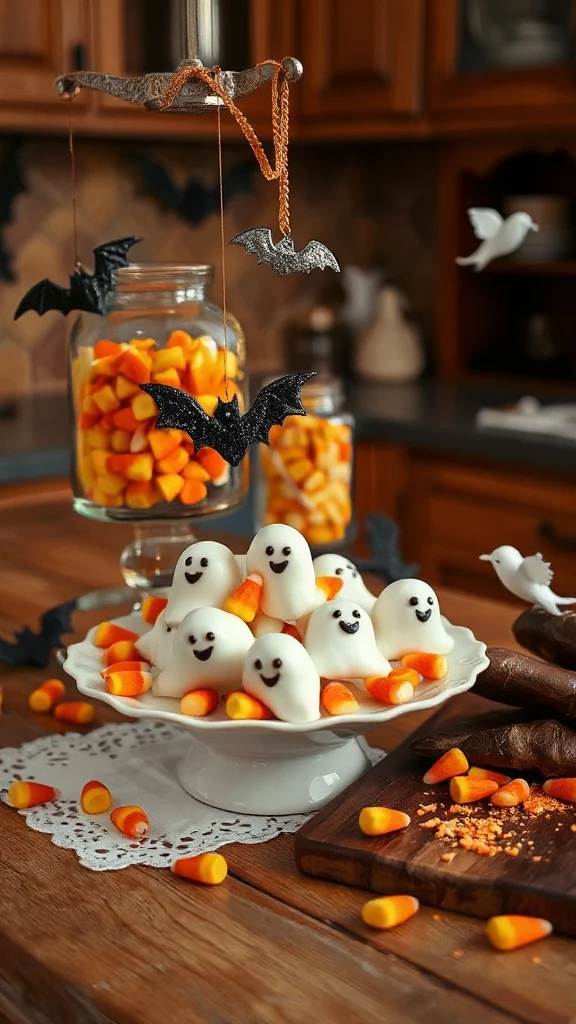
Candy Corn Ghosts are a delightful no-bake treat that embody the spirit of Halloween with their colorful layers and playful ghostly appearance. These sweet snacks are perfect for parties, classroom treats, or just as a fun dessert to enjoy while celebrating the spooky season. With their vibrant colors and whimsical design, Candy Corn Ghosts will surely delight both kids and adults alike!
| Ingredients | Quantity |
|---|---|
| Candy corn | 2 cups |
| Mini marshmallows | 2 cups |
| White chocolate chips | 1 cup |
| Black edible marker (optional) | As needed |
Cooking Instructions:
- Prepare the Cupcake Liners: Place cupcake liners in a muffin tin. This will provide support and shape for your Candy Corn Ghosts.
- Layer the Candy Corn: Begin by adding a layer of candy corn to each cupcake liner. Fill them approximately one-third of the way full. This will create the base of your ghostly treats.
- Add Mini Marshmallows: Next, take the mini marshmallows and layer them on top of the candy corn, filling the liners about two-thirds of the way. The marshmallows will represent the “ghost” of the treat.
- Melt the White Chocolate: In a microwave-safe bowl, melt the white chocolate chips. Heat in 30-second intervals, stirring between each, until fully melted and smooth.
- Drizzle White Chocolate: Carefully drizzle the melted white chocolate over the mini marshmallows in each cupcake liner, ensuring they are well coated. This will help to hold the treats together and create a ghostly appearance.
- Chill to Set: Transfer the muffin tin to the refrigerator for about 15-20 minutes to allow the white chocolate to cool and harden.
- Create Ghostly Faces (Optional): If desired, you can use a black edible marker to draw spooky faces on the white chocolate drizzled on top of each ghost. This adds a fun finishing touch to your Candy Corn Ghosts.
- Serve: Once set, carefully remove each Candy Corn Ghost from the cupcake liners and arrange them on a serving platter. Enjoy your festive treat!
These Candy Corn Ghosts are a fun and easy way to get into the Halloween spirit and are sure to be a hit at any gathering!
Miniature Bat Cupcake Wrappers
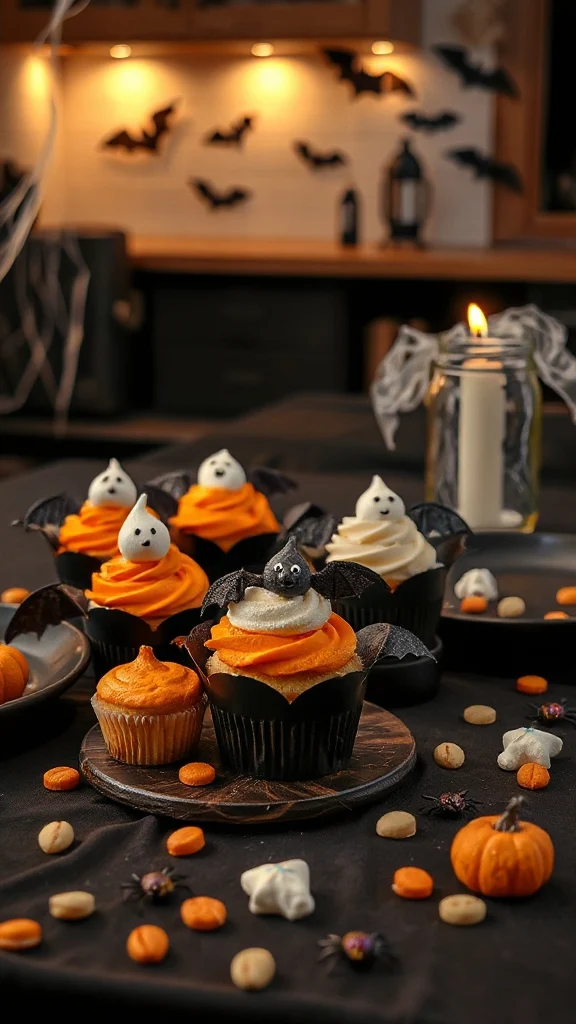
Miniature Bat Cupcake Wrappers are a fun and creative way to dress up your Halloween treats. These whimsical wrappers are perfect for adding a spooky touch to your cupcake presentations at Halloween parties or gatherings. Designed to resemble adorable bats, they not only enhance the thematic décor but also delight kids and adults alike!
| Ingredients | Quantity |
|---|---|
| Black cardstock paper | 2 sheets |
| Scissors | 1 pair |
| Bat template (printable) | 1 |
| Glue stick | 1 |
| Craft knife | 1 |
| Cupcake liners | As needed (1 per cupcake) |
| Optional: Glitter or stickers | As desired |
Cooking Instructions:
- Print the Bat Template: Begin by printing out a bat template on a piece of regular paper. You can find various bat designs online or create your own. The template should ideally be the size that will fit around your cupcakes.
- Cut Out the Bat Shapes: Using scissors, carefully cut out the bat shapes from the printed template. This step will serve as your guide for tracing and cutting the bat wrappers from the cardstock.
- Trace Bat Shapes on Cardstock: Lay the cut-out bat shapes on top of the black cardstock paper. Using a pencil, trace around the bat shapes to create as many wrappers as needed for your cupcakes.
- Cut Out the Bat Wrappers: Using scissors or a craft knife, cut out the traced bat shapes from the black cardstock carefully. Confirm each bat shape has clean edges for a polished look.
- Create the Wrapper Structure: Gently fold the wings of each bat shape downwards to create a “wrapper” that will go around the cupcake. The body of the bat should be wider than the wings to allow space for the cupcake.
- Glue Ends Together: Apply glue to the ends of the bat body and fold them around the base of the cupcake liner, sticking them together to create a circular wrapper. Hold for a few seconds to verify they adhere properly.
- Decorate as Desired: If you want to add some extra flair, use glitter or stickers to embellish your bat cupcake wrappers. Add small stickers or sprinkle some glitter along the bat’s body for a more festive touch.
- Insert Cupcakes: Once your cupcake wrappers are complete, place the cupcakes in their respective wrappers and arrange them on a serving platter.
- Serve and Enjoy: Your Miniature Bat Cupcake Wrappers are now ready to add a fun spooky twist to your Halloween celebration! Enjoy the festive spirit they bring to your dessert table!
Cookie Decorating With Royal Icing
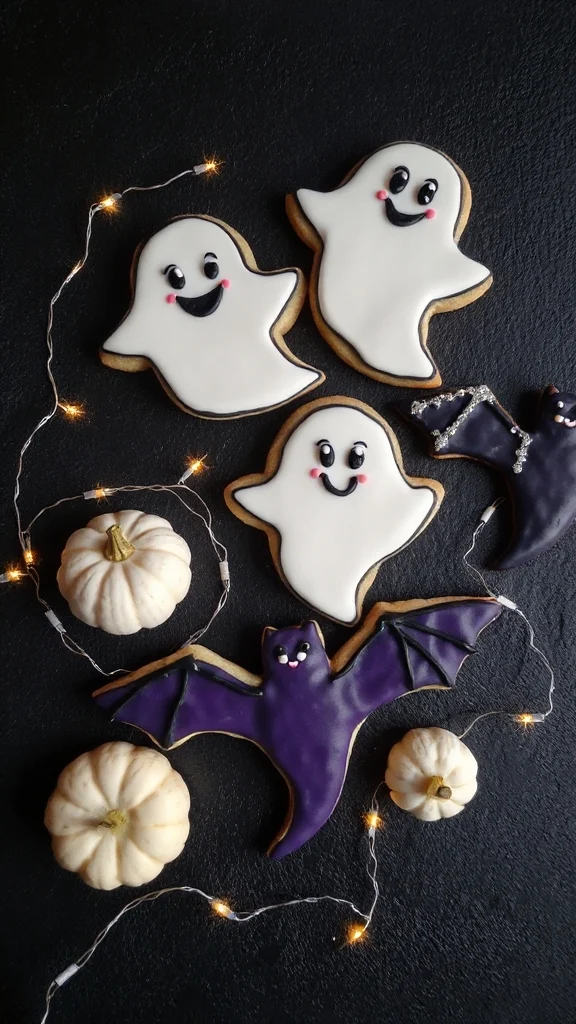
Cookie decorating with royal icing is a delightful and artistic way to transform ordinary cookies into visually stunning treats! Ideal for various occasions, from Halloween to birthdays, royal icing can be used to create intricate designs and vivid colors that will impress anyone who tastes them. This method involves making a cookie base and then decorating it with a smooth, glossy icing that sets to a hard finish.
| Ingredients | Quantity |
|---|---|
| All-purpose flour | 2 ¾ cups |
| Baking powder | 1 teaspoon |
| Salt | ½ teaspoon |
| Unsalted butter | 1 cup (softened) |
| Granulated sugar | 1 cup |
| Egg | 1 |
| Vanilla extract | 1 teaspoon |
| Royal icing sugar | 4 cups |
| Meringue powder | 4 teaspoons |
| Water | As needed |
| Food coloring | As desired |
Cooking Instructions:
- Prepare the Cookie Dough: In a mixing bowl, whisk together the all-purpose flour, baking powder, and salt. In another large bowl, cream the softened unsalted butter and granulated sugar together until light and fluffy. Beat in the egg and vanilla extract until well combined.
- Mix the Dry and Wet Ingredients: Gradually mix the dry ingredients into the wet mixture until the dough comes together. You may need to use your hands to knead the dough slightly. Form the dough into a disc, wrap it in plastic wrap, and refrigerate for at least one hour.
- Preheat and Roll Out: Preheat your oven to 350°F (175°C). Once the dough is chilled, remove it from the refrigerator and roll it out on a lightly floured surface to about ¼ inch thickness.
- Cut Out Cookies: Use cookie cutters to cut out shapes from the rolled dough. Place the cookies on a parchment-lined baking sheet. Gather any scraps, re-roll, and cut out more cookies as needed.
- Bake the Cookies: Bake the cookies in the preheated oven for about 8-10 minutes, or until the edges just start to turn golden. Remove from the oven and let them cool completely on a wire rack.
- Prepare Royal Icing: In a large mixing bowl, combine the royal icing sugar and meringue powder. Gradually add water, starting with 5 tablespoons, and mixing until you reach a smooth consistency. If the icing is too thick, add more water one teaspoon at a time. For piping, the icing should be thick enough to hold its shape; for flooding, it should be thinner.
- Color the Icing: Divide the royal icing into separate bowls if you want to create different colors. Add food coloring to each bowl and mix until well combined.
- Decorate the Cookies: Using a piping bag with a small round tip, outline the edges of each cookie with royal icing. Then fill in the center with the appropriate colored icing (flooding). Use a toothpick to help spread the icing to the edges and eliminate any air bubbles.
- Allow to Dry: Let the decorated cookies sit at room temperature for several hours, or ideally overnight, until the royal icing hardens completely.
- Serve and Enjoy: Once your cookies are fully dry, they are ready to be enjoyed! Arrange them on a serving platter, or package them as delightful gifts to share with friends and family.
With practice, you can create beautiful and personalized cookies for any occasion using royal icing!
Ghostly Cake Pops
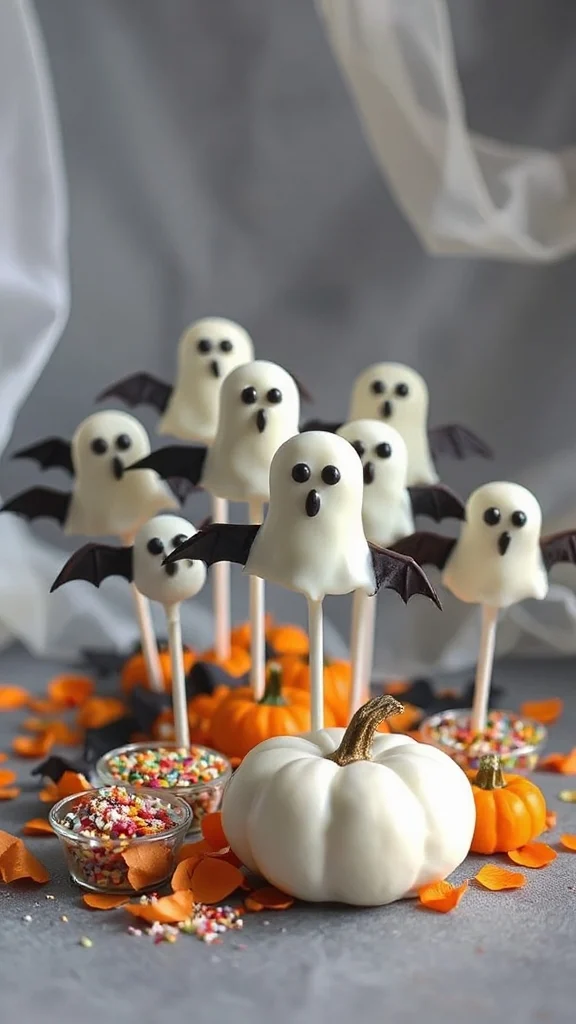
Ghostly cake pops are a fun and festive treat that embodies the spirit of Halloween! These bite-sized delights combine moist cake with a creamy frosting center, all coated in white chocolate and decorated to look like little ghostly figures. They’re perfect for parties, gatherings, or just as a spooky dessert at home.
| Ingredients | Quantity |
|---|---|
| Cooked cake (any flavor) | 1 standard round cake (about 2 cups crumbled) |
| Cream cheese frosting | 1 cup |
| White chocolate melts | 12 oz. |
| Lollipop sticks | 12 |
| Black gel food coloring | As needed |
| Edible eyes | 24 (optional) |
Cooking Instructions:
- Crumble the Cake: Start by taking your cooked cake and crumbling it into a large mixing bowl. Confirm there are no large chunks left, as it should resemble fine crumbs.
- Mix with Frosting: Add the cream cheese frosting to the cake crumbs. Mix thoroughly until well combined. The mixture should be moist enough to hold its shape when rolled into balls.
- Form Cake Balls: Take small portions of the cake mixture and roll them into balls, about 1 inch in diameter. Place the rolled balls onto a baking sheet lined with parchment paper.
- Insert Sticks: Melt a small amount of white chocolate according to package instructions. Dip one end of a lollipop stick into the melted chocolate, then insert it into the center of each cake ball. This will help hold the stick in place. Once done, place the baking sheet in the refrigerator for 30 minutes to firm up the cake pops.
- Melt White Chocolate: While the cake pops are chilling, melt the remaining white chocolate according to the package instructions. Stir until smooth and let it cool slightly before dipping.
- Dip Cake Pops: Once the cake pops are firm, dip each one into the melted white chocolate, making sure to coat evenly. Gently tap the stick on the edge of the bowl to remove any excess chocolate.
- Add Ghost Features: Before the chocolate hardens, use the black gel food coloring to draw small eyes and mouths on each cake pop to create ghostly faces. If using edible eyes, gently press them onto the melted chocolate before it sets.
- Let Set: Place the dipped cake pops upright in a styrofoam block or cake pop stand to let the chocolate coating set completely. This may take about 10-15 minutes.
- Serve and Enjoy: Once the chocolate has hardened, your ghostly cake pops are ready to be served! Arrange them on a plate or stand for a festive Halloween display. Enjoy this spooky treat with friends and family!
Bat Sugar Decorations
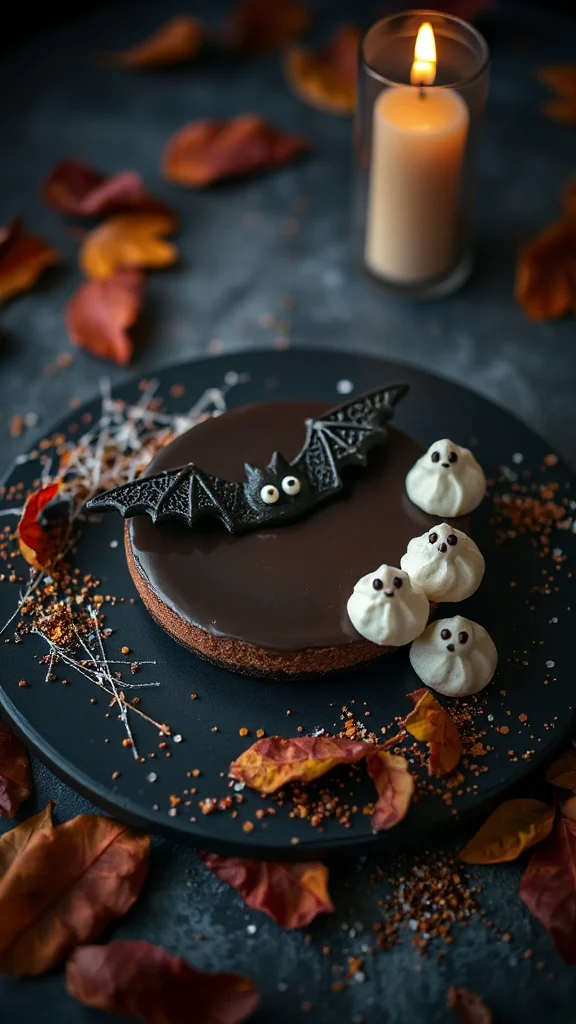
Bat sugar decorations are a whimsical and spooky way to enhance your Halloween treats and desserts. These delightful edible bat decorations can be used to adorn cakes, cupcakes, cookies, or even as fun garnishes for drinks. Made from simple sugar and food coloring, these bats are easy to create and add a festive touch to your Halloween festivities!
| Ingredients | Quantity |
|---|---|
| Granulated sugar | 1 cup |
| Water | 1/4 cup |
| Corn syrup | 1 tablespoon |
| Black gel food coloring | As needed |
| Vegetable oil (for greasing) | As needed |
| Bat-shaped cookie cutter | 1 |
Cooking Instructions:
- Prepare a Baking Sheet: Line a baking sheet with parchment paper to prevent the sugar from sticking and grease it lightly with vegetable oil. This will guarantee easy removal of the bat shapes once they are set.
- Make the Sugar Mixture: In a medium saucepan, combine granulated sugar, water, and corn syrup. Stir the mixture over medium heat until the sugar dissolves completely.
- Heat to Hard-Crack Stage: Increase the heat and bring the mixture to a boil. Use a candy thermometer to monitor the temperature; cook until it reaches 300°F (hard-crack stage). If you don’t have a thermometer, you can drop a small amount into cold water; it should become hard and brittle.
- Add Color: Once the mixture reaches the correct temperature, remove it from the heat and wait for about 30 seconds. Add black gel food coloring to the mixture, stirring it in quickly until evenly colored. Be cautious, as the mixture will be very hot.
- Pour the Sugar Mixture: Carefully pour the colored sugar mixture onto the prepared baking sheet. Quickly spread it into an even layer about 1/4 inch thick using a spatula, but be careful as the mixture is very hot.
- Cut Out Bats: Allow the sugar to cool for just a few minutes until still pliable but not too hot to handle (about 5-10 minutes). Use the bat-shaped cookie cutter to press into the sugar mixture, creating bat shapes. Carefully lift each bat out and place them onto a cool surface or additional parchment paper.
- Let Set Completely: Allow the bat sugar decorations to cool and harden completely, which may take about 30 minutes to an hour.
- Store or Use: Once fully set, you can use the bat sugar decorations immediately or store them in an airtight container at room temperature until you’re ready to use them for your Halloween treats!
These bat sugar decorations will bring a fun and spooky flair to your Halloween celebrations!
Halloween-Themed Fruit Skewers
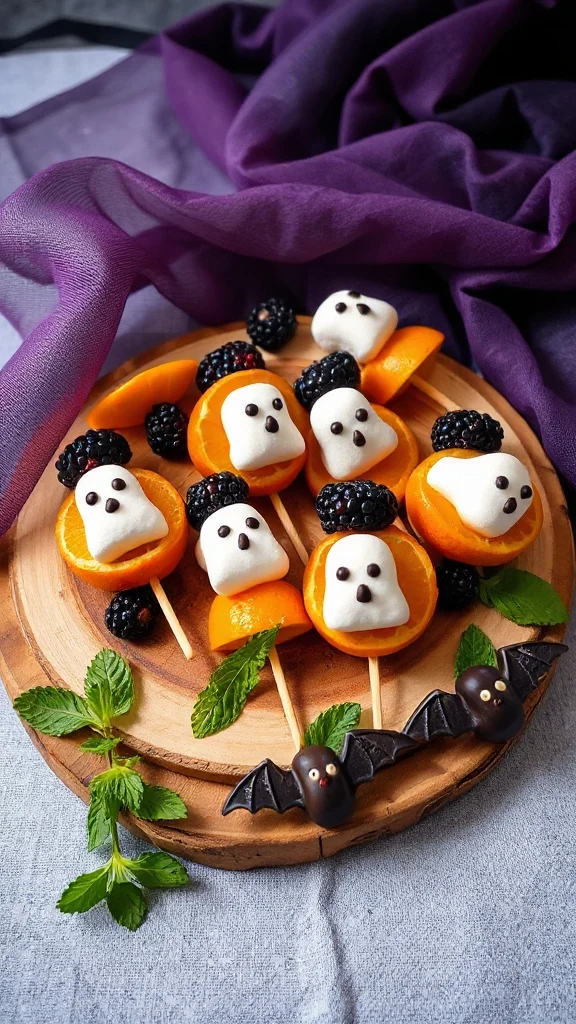
Halloween-Themed Fruit Skewers are a fun and healthy way to incorporate festive flavors into your Halloween celebrations. These colorful, spooky fruit creations are perfect for parties, as they are easy to prepare and visually appealing, making them a hit with both kids and adults. Using seasonal fruits and simple decorations, you can transform ordinary fruit into whimsical treats that will delight your guests.
| Ingredients | Quantity |
|---|---|
| Strawberries | 1 pound |
| Cantaloupe | 1 medium |
| Honeydew melon | 1 medium |
| Black grapes | 1 cup |
| Mini marshmallows | 1 cup |
| Chocolate chips (for eyes) | 1/2 cup |
| Wooden skewers | 10-12 skewers |
| Candy eyes (optional) | As needed |
Cooking Instructions:
- Prepare the Fruit: Start by rinsing all the fruits. Hull the strawberries and cut them in half. Cut the cantaloupe and honeydew melon into bite-sized cubes. Make sure all fruit pieces are of similar size so that they can be evenly threaded onto skewers.
- Assemble the Skewers: Take a wooden skewer and begin to thread the fruit pieces onto it. Start with a strawberry half to represent a “witch’s hat,” followed by a cantaloupe cube as the “body,” and then add a honeydew melon cube for variation. Aim to alternate the colors and types of fruit for an eye-catching presentation.
- Add Grape “Bats”: To create bat-like figures, take black grapes and thread them onto the skewer. You can use two grapes for the “wings” by placing them on either side of a melon cube. Feel free to get creative with the arrangement for an artistic look.
- Finish with Marshmallows: Place a mini marshmallow at the top of the skewer after the bat-shaped grapes to mimic the ghostly appearance. This will also give a fluffy, whimsical touch to your skewers.
- Add Eyes: If using chocolate chips or candy eyes, place them on top of the marshmallow to resemble the eyes of a ghost or other spooky creature. Use a small dab of chocolate or a tiny bit of water if necessary to help the eyes stick.
- Repeat: Continue threading the rest of the fruits and marshmallows onto the skewers following the same pattern until you’ve made all your skewers.
- Serve and Enjoy: Arrange the finished Halloween-themed fruit skewers on a platter. They can be served immediately or stored in the refrigerator until ready to serve, making them a perfect festive treat for your Halloween gatherings!