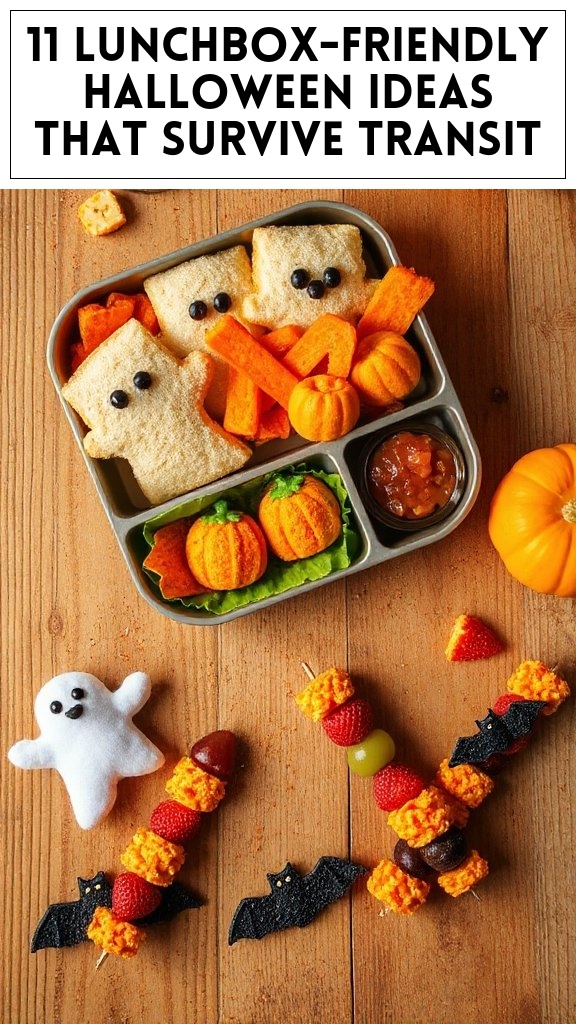
11 Kids’ Halloween Lunchbox Wins That Survive The Bus Ride
Monster-Shaped Sandwiches
Monster-shaped sandwiches are a fun and creative way to bring some Halloween spirit to your kids’ lunchboxes. These playful, quirky sandwiches are not only delicious but can also be made using your child’s favorite fillings, making lunchtime exciting and festive. Get ready to release your inner monster!
Prepare the Bread: Start by laying out your slices of bread on a clean cutting board. You may use any bread of your choice, such as whole grain, white, or even rye.
Cut the Shape: Use a monster-shaped cookie cutter to cut out fun shapes from each slice of bread. Depending on the cutter, you can create little monsters with spikes or silly faces.
Spread the Base: Take the cream cheese or butter and spread it evenly on one side of each monster-shaped bread cutout. This will act as a flavorful base.
Add Fillings: Layer your selected deli meats on top of the cream cheese or butter. You can add one or two slices depending on how thick you want the filling to be.
Layer with Cheese: Place a slice of cheese over the deli meats. You can cut the cheese into smaller fun shapes or leave it as is.
Top It Off: Finish your sandwich by adding another monster-shaped bread cutout on top (cream cheese side facing inward), creating a complete sandwich.
Decorate with Eyes: Cut olive slices in half to create eyes for your monsters, and place them on top of the sandwich. You can also slice cherry tomatoes if you’d like to use these for extra décor.
Optional Vegetables: If you wish, add a few leaves of lettuce or spinach inside the sandwich for some healthy crunch.
Cut in Half: For easier handling, gently cut the sandwich in half diagonally or into smaller pieces, ensuring the fun monster shape remains visible.
Pack the Lunchbox: Place your monster sandwiches in a lunchbox or on a plate, and include any additional snacks or fruits for a complete Halloween lunch.
Now you have adorable monster-shaped sandwiches ready to delight your little ghosts and goblins at lunchtime! Enjoy the spooky creativity!
Pumpkin-Patch Fruit Cups
Pumpkin-patch fruit cups are a delightful and nutritious addition to your kids’ Halloween lunchboxes. These colorful and festive fruit cups resemble mini pumpkin patches and are sure to bring smiles to your little ones’ faces. With a mix of seasonal fruits and a creative presentation, they make for a healthy treat that’s as fun to look at as it is to eat!
Prepare the Fruit: Start by peeling the clementines or mandarin oranges. If you’re using larger oranges, you may want to segment them as well. Make sure to wash and slice the strawberries, and peel and dice the kiwi into small pieces.
Mix the Fruits: In a large bowl, gently combine the peeled oranges, diced kiwi, and sliced strawberries. Add in the green grapes for a pop of color. Stir carefully to avoid bruising the fruit.
Assemble the Cups: Take small clear plastic cups or any cup of your choice (if using hollowed-out orange halves, cut them in half and scoop out some of the flesh). Fill each cup about halfway with the mixed fruit from Step 2.
Create the Pumpkin Patch Look: Layer the remaining fruit mixture on top of the fruit cups, making it look like a pumpkin patch. Arrange the fruit so that some grapes are peeking out to resemble vines.
Decorate with Chocolate Chips: Sprinkle mini chocolate chips on top of the fruit mixture to resemble ‘bugs’ or little surprises in the pumpkin patch.
Add Stems (optional): If you’d like to add a whimsical touch, insert green paper straws into the fruit cups to represent pumpkin stems. Cut them to your desired height for visual appeal.
Pack the Lunchbox: Carefully place the prepared fruit cups in the lunchbox, keeping them upright. If desired, pack along additional snacks such as granola or yogurt for a complete Halloween-themed lunch.
Now your kids can enjoy these fun and healthy pumpkin-patch fruit cups during lunchtime, adding a festive twist to their meal!
Witches’ Broomstick Cheese Sticks
Witches’ broomstick cheese sticks are a fun and clever snack that kids will love to munch on during Halloween! These cheesy treats are not only delicious but also a creative way to incorporate a festive theme into lunchboxes. Using string cheese and pretzel sticks, you can whip up these adorable broomsticks in no time.
Ingredients
Quantity
String cheese sticks
2-3 sticks per lunchbox
Pretzel sticks
1 per cheese stick
Fresh parsley or celery leaves (for bristles)
Small handful
Optional: Mini candy eyes
2 per cheese stick (for decoration)
Instructions:
Prepare the Cheese: Start by unwrapping the string cheese sticks. If your cheese sticks are too long for a lunchbox, you can cut them in half to make a more manageable size.
Insert the Pretzel Sticks: Take one pretzel stick and gently push it into one end of the cheese stick, about halfway in. This will act as the broomstick handle.
Create the Broom Bristles: Take a small handful of fresh parsley or a few pieces of chopped celery leaves and push them into the opposite end of the cheese stick. These will serve as the bristles of the broom.
Add Mini Candy Eyes (Optional): If you want to give your broomstick some character, add two mini candy eyes near the top of the cheese stick, just above the bristles. This adds a whimsical touch to your creation.
Pack the Lunchbox: Carefully place the witches’ broomstick cheese sticks in your child’s lunchbox. For extra fun, you can pair them with some Halloween-themed snacks like carrot sticks or mini crackers.
Now you have a spooktacular Halloween treat that’s both tasty and nutritious ready for your kid’s lunch!
Ghostly Yogurt Parfaits
Ghostly yogurt parfaits are a fun and nutritious Halloween-themed treat that kids will love! These delightful parfaits are made with layers of yogurt, fruit, and granola, topped with spooky ghost faces made from whipped cream and chocolate chips. They are perfect for adding a healthy option to your child’s lunchbox while keeping the Halloween spirit alive.
Prepare the Fruit: Start by washing the fruit you’ve chosen for your parfait. If you’re using bananas, slice them into small pieces. For berries, make sure to remove any stems and rinse them thoroughly.
Layer the Yogurt: In a clear cup or a small mason jar, begin by adding about 1/3 cup of vanilla yogurt at the bottom. This acts as the first layer of your parfait.
Add the Fruit: Next, add a layer of your prepared fruit on top of the yogurt, about 1/4 cup. You can mix and match different fruits for variety and color.
Sprinkle in Granola: After the fruit layer, add about 1/4 cup of granola on top. This will give your parfait a crunchy texture.
Repeat Layers: For a more visually appealing parfait, repeat the layers: another 1/3 cup of yogurt, followed by more fruit, and then more granola. Make sure to leave some space at the top for the whipped cream ghosts.
Create Ghost Faces: To make the ghostly faces, spoon the white whipped cream on top of the final granola layer, creating a fluffy layer that resembles a ghost.
Add Chocolate Chip Eyes: Using mini chocolate chips, create two eyes on the whipped cream to give your ghosts some character. You can also use sprinkles to add a little extra Halloween charm!
Chill or Serve: You can either serve the parfaits immediately or cover them with a lid and refrigerate until lunchtime. These ghostly yogurt parfaits make for a spooky yet healthy Halloween treat that kids will adore!
Mummy Hot Dogs
Mummy Hot Dogs are a quick and fun Halloween-themed dish that transforms ordinary hot dogs into adorable mummies. Wrapped in crescent roll dough and baked until golden, these tasty treats are easy to prepare and perfect for kids’ lunches or Halloween parties. They can be served with mustard or ketchup for dipping, adding to the spooky delight!
Ingredients
Quantity
Hot dogs
8
Crescent roll dough
1 can (8 oz)
Mustard or ketchup (for serving)
As desired
Optional: candy eyes
16
Instructions:
Preheat the Oven: Begin by preheating your oven to 375°F (190°C). This guarantees that the Mummy Hot Dogs will bake evenly and become crispy.
Prepare the Crescent Dough: Open the can of crescent roll dough and unroll it on a clean surface. You will see that the dough is divided into triangles. Pinch the seams of the triangles to create a single sheet of dough.
Cut the Dough: Using a pizza cutter or sharp knife, cut the dough into thin strips, approximately 1/2 inch wide. These strips will serve as the “bandages” for your mummies.
Wrap the Hot Dogs: Take one hot dog and start wrapping it with the dough strips. Begin at one end of the hot dog, spiraling the dough around, leaving a little space between the wraps to resemble mummy bandages. After a few turns, leave a gap for the “face,” and then continue wrapping until the hot dog is mostly covered. Repeat this step for all hot dogs.
Place on Baking Sheet: Line a baking sheet with parchment paper or a silicone baking mat. Carefully place the wrapped hot dogs on the baking sheet, making sure they are not touching each other.
Bake: Place the baking sheet in your preheated oven and bake for about 12-15 minutes, or until the crescent dough is golden brown and flaky. Keep an eye on them to avoid over-browning.
Add Candy Eyes (Optional): If you’re using candy eyes, remove the hot dogs from the oven and let them cool for a minute. Then, while they are still warm, place two candy eyes on each mummy where you left the gap for the face.
Serve: Let the Mummy Hot Dogs cool slightly before serving. You can serve them with mustard or ketchup on the side for dipping. Your spooky Mummy Hot Dogs are now ready to be enjoyed, bringing smiles and screams of delight!
Spooky Trail Mix
Spooky Trail Mix is a fun and festive snack that’s perfect for Halloween-themed lunches or after-school treats. This colorful blend of sweet and savory ingredients not only satisfies hunger but also adds a delightful touch to any spooky celebration. The combination of crunchy nuts, chocolate, and fruity snacks makes it a treat that kids will love!
Gather Ingredients: Start by gathering all the ingredients listed above. Having everything ready will make the process smooth and easy.
Mix Dry Ingredients: In a large mixing bowl, combine the cheddar or Halloween-shaped cheese crackers, mixed nuts, candy corn, mini chocolate candies, pretzel bites, and dried cranberries or raisins.
Toss to Combine: Use a large spoon or spatula to gently toss the ingredients together until they are well combined. Make sure that each ingredient is evenly distributed throughout the mixture.
Add Sprinkles (Optional): If you’re using Halloween-themed sprinkles for an extra festive touch, sprinkle them over the top of your trail mix. Gently fold them into the mixture for a fun pop of color.
Serve or Store: You can serve the Spooky Trail Mix immediately or transfer it to an airtight container for later. If storing, keep it in a cool, dry place to maintain freshness.
Pack for Lunch: If you’re preparing this for kids’ lunches, portion out the trail mix into individual snack bags or containers.
Your Spooky Trail Mix is now ready to be enjoyed! This delightful and customizable snack is sure to bring smiles and spooky fun to your Halloween festivities!
Creepy Veggie Monsters
Creepy Veggie Monsters are a fun and creative way to get kids excited about eating their vegetables. Transform ordinary veggies into frightfully adorable monsters that are perfect for a Halloween-themed lunch or party. Not only do they promote healthy eating, but they also allow children to get involved in the kitchen by building their own spooky creatures!
Ingredients
Quantity
Cucumbers
2 medium
Baby carrots
1 cup
Cherry tomatoes
1 cup
Black olives
1 small can
Cream cheese or hummus
1 cup
Bell peppers (various colors)
1 cup (diced)
Green bell pepper (for monster “mouth”)
1 medium
Toothpicks
As needed
Optional: Edible googly eyes
As desired
Instructions:
Prepare the Veggies: Start by washing all your vegetables thoroughly. Pat them dry with a paper towel. Slice the cucumbers into thick rounds, about ½ inch each, which will serve as the bodies of the monsters. Cut the baby carrots into shorter sticks to be used as limbs.
Create Faces: For each cucumber slice, spread a layer of cream cheese or hummus on top to act as the glue for sticking on the monster features.
Add Features: Using the cherry tomatoes, cut them in half and press the cut side down onto the cream cheese or hummus to create eyes. For a fun touch, place black olives on top to form eyeballs. If you have edible googly eyes, you can use those instead!
Make Mouths: Take the green bell pepper and slice it open. Cut an angled shape to create a monster mouth and use a toothpick to secure it under the cucumber body. You can also add extra pieces of bell pepper around the mouth for a more dramatic effect.
Create Limbs: Use the baby carrots to create “arms” and “legs.” Simply stick the ends into the sides or bottom of the cucumber body. Feel free to use toothpicks to secure them, if needed.
Arrange on a Platter: Once all the veggie monsters are assembled, arrange them on a platter or lunchbox for serving. You can add extra vegetables like diced bell pepper around the monsters as “grass” to enhance the Halloween theme.
Serve: These Creepy Veggie Monsters are now ready to be enjoyed! They make a perfect and healthy Halloween snack that kids will love.
Encourage kids to use their creativity when building their own veggie monsters, making variations based on their favorite ingredients and designs!
Jack-O’-Lantern Stuffed Peppers
Jack-O’-Lantern Stuffed Peppers are a whimsical and festive dish perfect for Halloween. These colorful bell peppers are hollowed out and filled with a delicious mixture of rice, beans, and spices, making them not only a fun presentation but also a nutritious option for a Halloween-themed lunch or dinner. Kids will love the spooky appearance, and parents will appreciate the healthy ingredients!
Preheat the Oven: Preheat your oven to 375°F (190°C) to prepare for baking the stuffed peppers.
Prepare the Peppers: Cut the tops off the orange bell peppers and remove the seeds and membranes. Using a small knife, carefully carve out Jack-O’-Lantern faces on one side of each pepper to create spooky designs.
Make the Filling: In a large mixing bowl, combine the cooked rice, black beans, corn, diced tomatoes, and taco seasoning. Stir well to guarantee all ingredients are mixed and evenly coated with seasoning.
Fill the Peppers: Drizzle the insides of each carved bell pepper with olive oil to add flavor. Using a spoon, generously fill each pepper with the rice mixture, pressing down gently to pack the filling in.
Top with Cheese: Once all the peppers are filled, sprinkle the shredded cheese evenly on top of each stuffed pepper.
Bake the Peppers: Arrange the filled peppers upright in a baking dish. If they won’t stand on their own, you can slice a small amount off the bottom to create a flat base. Pour a little water at the bottom of the dish to help steam the peppers during baking. Cover the dish with aluminum foil and bake for 25 minutes.
Uncover and Finish Baking: After 25 minutes, remove the foil and bake for an additional 10-15 minutes, or until the peppers are tender and the cheese is melted and bubbly.
Garnish and Serve: Once done, remove the peppers from the oven and let them cool slightly. If desired, garnish with fresh cilantro before serving. These Jack-O’-Lantern Stuffed Peppers are now ready to be enjoyed as a fun and healthy Halloween meal!
Eyeball Pasta Salad
Eyeball Pasta Salad is a playful and spooky dish that blends fun with nutritious ingredients, making it an ideal addition to any Halloween-themed lunchbox. This vibrant pasta salad features eyes made from mozzarella balls and olives, giving it a delightful creepy twist that kids will love while providing a variety of flavors and textures in each bite.
Cook the Pasta: Bring a large pot of salted water to a boil. Add the pasta and cook according to package instructions until al dente. Once cooked, drain the pasta and rinse it under cold water to stop the cooking process. This also helps cool down the pasta for the salad.
Prepare the Vegetables: While the pasta is cooling, wash and prepare your vegetables. Slice the cherry tomatoes in half, dice the cucumber, and set these aside.
Create the Eyeballs: For each mozzarella ball, take a smaller piece of black olive and place it in the center to create the “pupil” of the eyeball. Repeat this process until all mozzarella balls are turned into eyeballs, and set them aside.
Combine Ingredients: In a large mixing bowl, add the cooled pasta, cherry tomatoes, diced cucumber, and the mozzarella eyeballs. Gently toss to combine all the ingredients without breaking the mozzarella balls.
Dress the Salad: Pour the Italian dressing over the pasta mixture and sprinkle with chopped fresh parsley. Season with salt and pepper to taste. Toss everything together until the ingredients are well coated with the dressing.
Chill the Salad: For best results, cover the bowl with plastic wrap and refrigerate the salad for at least 30 minutes. This allows the flavors to meld together and makes the salad extra invigorating.
Serve: After chilling, give the salad a final toss and serve it in fun Halloween-themed containers. This Eyeball Pasta Salad is not only a delicious dish but also a festive treat that’s sure to delight at Halloween lunches!
Candy Corn Rice Crispy Treats
Candy Corn Rice Crispy Treats are a festive twist on the classic dessert, perfect for Halloween celebrations. These colorful treats combine the traditional marshmallow and rice cereal mixture with the vibrant hues of candy corn, making them a delightful and eye-catching snack that kids will love. Easy to make and fun to eat, these treats are great for lunchboxes or party treats.
Prepare Pan: Begin by greasing a 9×13-inch baking dish with cooking spray. This will guarantee that the treats don’t stick to the pan when it’s time to cut them.
Melt Butter: In a large pot, melt the butter over low heat. Stir gently until it is completely melted and bubbly.
Add Marshmallows: Once the butter is melted, add the mini marshmallows to the pot. Stir continuously over low heat until the marshmallows have melted completely and formed a smooth mixture.
Color the Mixture: Divide the melted marshmallow mixture into three equal parts. Leave one part plain, then add 3-4 drops of yellow food coloring to the second part and 3-4 drops of orange food coloring to the third part. Stir until the colors are well blended.
Combine Rice Cereal: In a large bowl, add the rice cereal. Pour the plain marshmallow mixture over the cereal and mix thoroughly until the cereal is evenly coated.
Layer the Treats: Transfer the plain rice crispy mixture to the prepared baking dish and press it down firmly into an even layer. Next, take the yellow mixture and spread it on top of the first layer, pressing it down gently. Finally, repeat this process with the orange mixture.
Cool and Cut: Allow the layered treats to cool for at least 30 minutes. Once cooled, use a sharp knife to cut them into squares or rectangles.
Add Candy Corn: Before serving, sprinkle candy corn on top of the treats for an extra festive touch. These Candy Corn Rice Crispy Treats are now ready to be enjoyed in a Halloween lunchbox or as a spooky snack!
Halloween-Themed Wraps
Halloween-themed wraps are a fun and creative way to serve lunch this spooky season. These delicious and visually appealing wraps are packed with nutritious ingredients and dressed up to fit the Halloween spirit, making them a perfect addition to kids’ lunchboxes. With a simple assembly process, these wraps can be enjoyed by children and adults alike, providing a playful and healthy option for Halloween festivities.
Ingredients
Quantity
Large tortillas
4
Cream cheese
8 ounces
Spinach leaves
1 cup
Deli turkey or ham
8 slices
Bell peppers (various colors)
1 cup, sliced
Black olives
1/2 cup, sliced
Cut carrots
1/2 cup, julienned
Edible googly eyes
1/2 cup
Instructions:
Prepare the Tortillas: Start by laying each large tortilla flat on a clean surface. This will serve as the base of your wraps.
Spread Cream Cheese: Take the cream cheese and spread an even layer over each tortilla, leaving about a half-inch border around the edges. This will help keep the fillings in place.
Layer the Spinach: Place a layer of spinach leaves over the cream cheese on each tortilla. The spinach adds a nice crunch and a healthy element to the wraps.
Add Deli Meat: Next, add 2 slices of deli turkey or ham on top of the spinach on each wrap. This will provide protein and flavor.
Stack on Veggies: Add a handful of sliced bell peppers and a sprinkle of sliced black olives on top of the deli meat. Feel free to use a mix of colors for a vibrant presentation.
Add Carrots: Arrange the julienned carrots on top as well to add extra crunch and festive color to your wraps.
Roll the Wraps: Starting from one edge, carefully roll the tortilla tightly over the fillings. Make sure to keep the roll tight to prevent any ingredients from falling out.
Slice and Serve: Once rolled, use a sharp knife to cut the wrap into pinwheels or halves for easy eating. Arrange the pieces on a platter and use edible googly eyes to decorate them, giving them a fun Halloween appearance.
These Halloween-themed wraps are now ready to be packed into lunchboxes or served at a Halloween gathering, providing tasty treats that are as fun to look at as they are to eat!