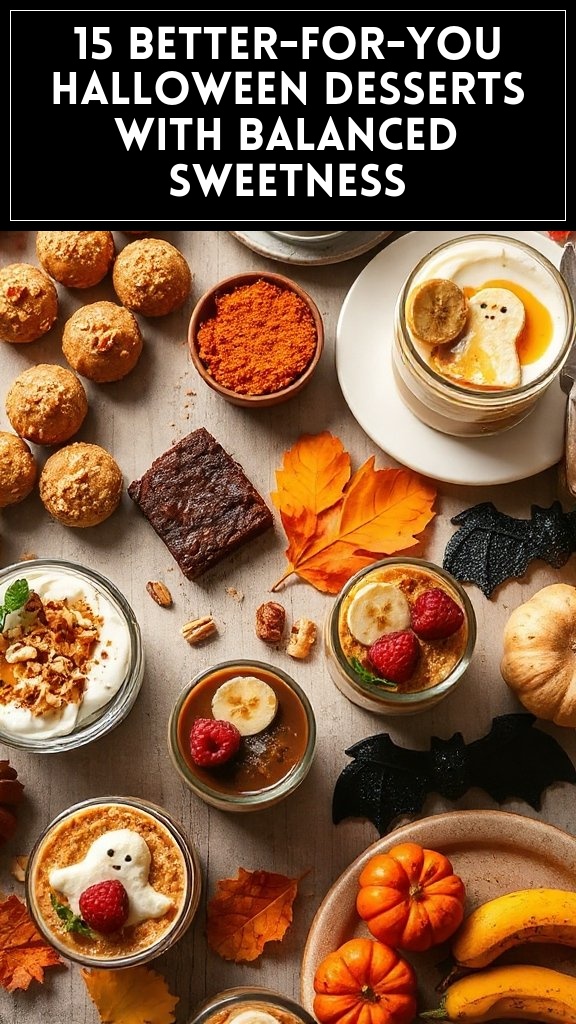
15 Healthy-ish Halloween Treats That Still Taste Indulgent
Pumpkin Spice Energy Balls
Pumpkin Spice Energy Balls are a nutritious and delicious snack perfect for the fall season, especially around Halloween. These energy balls combine the warm flavors of pumpkin spice with wholesome ingredients, making them a healthy treat that can satisfy your sweet tooth without compromising your wellness goals. Packed with natural sweetness and fiber, they are ideal for a quick energy boost or a guilt-free dessert.
Prepare Your Work Area: Start by cleaning your kitchen counter and gather all the ingredients and tools you will need, including a mixing bowl, measuring cups, and a spatula.
Mix the Dry Ingredients: In a large mixing bowl, combine the rolled oats, ground flaxseed, and pumpkin pie spice. Stir the mixture until all the dry ingredients are evenly incorporated.
Add the Wet Ingredients: To the dry ingredient mixture, add the pumpkin puree, almond butter, honey or maple syrup, and vanilla extract. Using a spatula, mix everything together until well combined. The mixture should be tacky but hold together.
Incorporate Optional Add-Ins: If you’re choosing to add chocolate chips or chopped nuts for extra flavor and texture, fold them into the mixture until evenly distributed.
Form the Energy Balls: Use your hands to grab a small amount of the mixture (about 1 inch or a tablespoon) and roll it into a ball shape. Place the formed balls on a parchment-lined baking sheet or plate. Repeat until all the mixture is used.
Chill the Energy Balls: Once all the energy balls are formed, place them in the refrigerator for at least 30 minutes. This will help them firm up and hold their shape better.
Store and Enjoy: Once chilled, transfer the energy balls to an airtight container. They can be enjoyed immediately or stored in the fridge for up to a week. They also freeze well, allowing you to enjoy a healthy treat anytime!
Enjoy your homemade Pumpkin Spice Energy Balls as a delightful and guilt-free Halloween treat!
Dark Chocolate-Covered Almonds
Dark Chocolate-Covered Almonds are a delightful and nutritious snack that combines the crunch of almonds with the rich flavor of dark chocolate. These treats are not only satisfying but also packed with health benefits, as almonds are a great source of healthy fats, protein, and fiber. By coating them in dark chocolate, you get a touch of indulgence that feels like a treat while still being good for you. Perfect for Halloween snacking or as a sweet gift, these chocolate-covered almonds are easy to make and can be enjoyed year-round.
Ingredients
Quantity
Raw almonds
1 cup
Dark chocolate (70% cacao or higher)
8 oz
Sea salt (optional)
Sprinkle
Coconut oil (optional)
1 teaspoon
Instructions:
Prepare Your Workspace: Start by cleaning your kitchen counter and gathering all the ingredients along with a double boiler or a microwave-safe bowl, a baking sheet, and parchment paper.
Melt the Chocolate: If using a double boiler, fill the bottom pot with water and bring it to a gentle simmer. Place the dark chocolate in the top pot and stir until melted and smooth. If using a microwave, heat the chocolate in a microwave-safe bowl in 30-second intervals, stirring after each interval until fully melted.
Add Coconut Oil: For a smoother coating, you can add 1 teaspoon of coconut oil to the melted chocolate. Stir well until combined.
Coat the Almonds: Once the chocolate is melted and smooth, add the raw almonds to the bowl. Use a spatula or spoon to gently stir and coat the almonds evenly with the chocolate.
Prepare the Baking Sheet: Line a baking sheet with parchment paper to prevent sticking.
Drop the Chocolate-Covered Almonds: Using a fork or a slotted spoon, lift the coated almonds one at a time from the chocolate and let the excess chocolate drip off. Place them onto the prepared baking sheet in a single layer.
Sprinkle with Sea Salt: If desired, sprinkle a little sea salt over the chocolate-covered almonds for an extra flavor boost.
Let the Chocolate Set: Allow the chocolate-covered almonds to sit at room temperature until the chocolate has hardened, or place the baking sheet in the refrigerator for 15-20 minutes to speed up the process.
Store and Enjoy: Once the chocolate has set, transfer the almonds to an airtight container. They can be stored at room temperature for a week or in the refrigerator for extended freshness. Enjoy your delicious Dark Chocolate-Covered Almonds as a healthy snack or treat!
Ghostly Banana Pops
Ghostly Banana Pops are a fun and healthy Halloween treat that your kids (and even adults) will love! These adorable snacks transform ordinary bananas into spooky ghosts by coating them in yogurt and adding chocolate chip eyes. They’re not only cute and perfect for Halloween parties, but they also provide a boost of potassium and calcium, making them a guilt-free indulgence to enjoy during the festivities.
Prepare the Bananas: Peel the ripe bananas and cut them in half. Insert a popsicle stick into the cut end of each banana half, ensuring that it goes at least halfway through for stability.
Freeze the Bananas: Place the banana pops on a baking sheet lined with parchment paper and put them in the freezer for about 1-2 hours, or until they are firm.
Coat with Yogurt: Once the banana halves are frozen, remove them from the freezer. Dip each banana pop into a bowl of vanilla yogurt, making sure to coat them well. You can use a spoon to help spread the yogurt evenly over the bananas.
Add the Eyes: After coating the bananas with yogurt, immediately press two mini chocolate chips into the yogurt on each banana to create the ghostly eyes.
Optional Topping: If desired, roll the yogurt-coated bananas in shredded coconut after dipping to resemble ghostly fur.
Final Freeze: Place the coated banana pops back on the baking sheet and return them to the freezer for another 30-60 minutes to allow the yogurt to set.
Serve and Enjoy: Once the yogurt has hardened, remove the banana pops from the freezer. Serve them immediately as a fun, healthy treat at your Halloween celebration! Enjoy the spooky goodness!
Spooky Avocado Brownies
Spooky Avocado Brownies are a deliciously healthy twist on the classic brownie recipe, incorporating ripe avocados for added nutrition and moisture. These fudgy treats are rich, chocolaty, and surprisingly simple to make, making them a perfect Halloween dessert that even the kids will enjoy without indulging in excessive sugar. Plus, they are a great way to sneak in some healthy fats!
Preheat the Oven: Preheat your oven to 350°F (175°C) and line an 8×8-inch baking pan with parchment paper, allowing some overhang for easy removal later.
Prepare the Avocados: Cut the ripe avocados in half, remove the pits, and scoop the flesh into a mixing bowl. Use a fork or a potato masher to mash the avocados until they are completely smooth and creamy.
Mix the Wet Ingredients: Add the maple syrup and vanilla extract to the mashed avocados. Crack the eggs into the bowl and whisk everything together until the mixture is well combined and smooth.
Combine Dry Ingredients: In a separate bowl, mix together the almond flour, cocoa powder, baking powder, and salt. Make sure no lumps remain, as this will guarantee a smooth brownie texture.
Combine Wet and Dry Mixtures: Gradually add the dry ingredients to the wet mixture, stirring continuously until the batter is well mixed and has a thick consistency. If desired, fold in the chocolate chips for added chocolaty goodness.
Pour into the Baking Pan: Scrape the brownie batter into the prepared baking pan, spreading it out evenly using a spatula.
Bake the Brownies: Place the pan in the preheated oven and bake for 20-25 minutes, or until a toothpick inserted into the center comes out with a few moist crumbs. Avoid overbaking to keep the brownies fudgy.
Cool and Cut: Once baked, remove the brownies from the oven and allow them to cool in the pan on a wire rack for 10-15 minutes. Lift them out using the parchment overhang, and let them cool completely before cutting into squares.
Serve and Enjoy: Once cooled, slice the brownies into squares and serve. These spooky green brownies are a fun and healthy treat that everyone will love this Halloween! Enjoy!
Cauliflower “Wings” With Hot Sauce
Cauliflower “Wings” With Hot Sauce are a delightful, healthier alternative to traditional chicken wings, perfect for Halloween gatherings or any cozy fall evening. These crispy bites are made from cauliflower florets coated in a flavorful batter, baked until golden, and tossed in a spicy hot sauce. They’re not only delicious but also a great way to enjoy a plant-based snack that’s low in calories and high in flavor!
Preheat the Oven: Preheat your oven to 450°F (232°C) and line a large baking sheet with parchment paper to prevent sticking.
Prepare the Cauliflower: Wash the cauliflower head, remove the leaves, and cut it into bite-sized florets. Verify all pieces are uniform to promote even cooking.
Create the Batter: In a large mixing bowl, whisk together the all-purpose flour, almond milk, garlic powder, onion powder, smoked paprika, salt, and black pepper until smooth. The batter should be thick enough to coat the cauliflower but not too thick that it doesn’t spread.
Coat the Cauliflower: Add the cauliflower florets to the batter, tossing them until they’re well coated. Allow any excess batter to drip off before placing them onto the prepared baking sheet.
Bake the Cauliflower: Spread the coated florets out into a single layer on the baking sheet. Bake in the preheated oven for about 25 minutes until they start to turn golden and crispy.
Prepare the Hot Sauce: While the cauliflower is baking, prepare your hot sauce. In a small bowl, toss the hot sauce with a bit of melted butter or olive oil for a richer flavor if desired.
Toss Cauliflower in Hot Sauce: After 25 minutes, remove the baking sheet from the oven and carefully drizzle or toss the crispy cauliflower florets in the prepared hot sauce until they are evenly coated.
Return to Oven: Put the hot sauced cauliflower back on the baking sheet and return it to the oven for an additional 5-10 minutes to crisp up further.
Garnish and Serve: Once the cauliflower “wings” are crispy and well-coated, remove them from the oven and let them cool slightly. Optionally, garnish with fresh parsley before serving. Enjoy your delicious Cauliflower “Wings” with your favorite dipping sauce!
Peanut Butter Apple Bites
Peanut Butter Apple Bites are a fun and nutritious snack, perfect for Halloween or any time of the year! Combining the sweetness of apple slices with the rich, creamy texture of peanut butter creates a perfect balance that kids and adults alike will enjoy. These bites are not only delicious but also provide a boost of energy with healthy fats, fiber, and protein.
Prepare the Apples: Start by washing the apples thoroughly. Core the apples and slice them into 1/2-inch thick rounds, discarding the seeds.
Make the Peanut Butter Mixture: In a small bowl, mix the creamy peanut butter with honey (if using) until well combined. This will add a touch of sweetness to the peanut butter, enhancing the flavors.
Spread the Peanut Butter: Take each apple slice and spread a generous layer of the peanut butter mixture on one side. Use a knife or a small spatula to guarantee an even spread.
Add Granola and Toppings: After spreading the peanut butter, sprinkle granola on top of the peanut butter layer for added crunch. If desired, you can also add a sprinkle of cinnamon or mini chocolate chips for extra flavor.
Assemble the Bites: For each apple slice, place another slice on top of the peanut butter-coated slice, creating a “sandwich.” Press gently to guarantee they stick together.
Serve and Enjoy: Arrange the assembled peanut butter apple bites on a plate or tray. Serve immediately for the best freshness, or chill in the refrigerator for a short time to let the flavors meld together before serving. Enjoy this delightful treat!
Cinnamon-Sugar Roasted Chickpeas
Cinnamon-Sugar Roasted Chickpeas are a delightful and healthy snack that combines the satisfying crunch of roasted chickpeas with a sweet cinnamon-sugar coating. This snack is not only easy to prepare, but it’s also packed with protein and fiber, making it a guilt-free treat for Halloween or any occasion. Whether you’re looking for a party snack or something to munch on during a movie night, these roasted chickpeas are sure to satisfy.
Preheat the Oven: Begin by preheating your oven to 400°F (200°C). This guarantees that the chickpeas roast evenly and become nice and crispy.
Prepare the Chickpeas: Drain and rinse the canned chickpeas under cold water. Once rinsed, place them on a clean kitchen towel or paper towel and gently pat them dry. Removing excess moisture will help them crisp up in the oven.
Season the Chickpeas: In a mixing bowl, combine the dried chickpeas with olive oil, making sure all the chickpeas are well coated. Then add the granulated sugar, ground cinnamon, and salt. If you’re using vanilla extract, add that as well. Mix everything together until the chickpeas are evenly coated with the seasoning.
Spread on Baking Sheet: Line a baking sheet with parchment paper for easy cleanup. Spread the seasoned chickpeas in a single layer on the baking sheet, making sure they are not overcrowded. This allows the air to circulate, guaranteeing they roast evenly.
Roast the Chickpeas: Place the baking sheet in the preheated oven and roast the chickpeas for about 25-30 minutes. Stir them halfway through the cooking time to guarantee they brown evenly. Keep an eye on them to avoid burning, as cooking times may vary based on your oven.
Cool and Enjoy: Once they are golden brown and crispy, remove the chickpeas from the oven and let them cool on the baking sheet for a few minutes. They will continue to harden as they cool. Once cooled, transfer them to a serving bowl and enjoy your tasty Cinnamon-Sugar Roasted Chickpeas as a satisfying snack!
Feel free to store any leftovers in an airtight container at room temperature for up to a week (if they last that long!). Enjoy!
Yogurt-Covered Pretzels
Yogurt-Covered Pretzels are a fun and healthier twist on traditional candy-coated snacks. These delightful treats combine the satisfying crunch of pretzels with a creamy, sweet yogurt coating. Perfect for Halloween or any gathering, they offer a balance of sweet and salty flavors while being easy to customize with different toppings or flavors of yogurt.
Ingredients
Quantity
Pretzels
2 cups
Yogurt (vanilla or plain)
1 cup
Honey (optional)
1 tablespoon
Sprinkles or crushed nuts (optional)
As desired
Instructions:
Prepare Your Workspace: Start by lining a baking tray with parchment paper. This will make it easier to remove the yogurt-covered pretzels once they are set.
Melt the Yogurt: If you’re using plain yogurt and want it a bit sweeter, mix in the honey until well combined. This will enhance the flavor of your yogurt coating.
Coat the Pretzels: In a mixing bowl, add the pretzels. Pour the yogurt (or the honey-sweetened yogurt) over the pretzels, ensuring they are all evenly coated. You can use a spatula or your hands to gently toss the pretzels until they are thoroughly covered.
Add Optional Toppings: If you want to make your yogurt-covered pretzels even more festive, sprinkle your choice of sprinkles or crushed nuts over the coated pretzels while the yogurt is still wet. This adds extra flavor and visual appeal.
Chill and Set: Carefully transfer the coated pretzels onto the lined baking tray, spreading them out in a single layer. Be sure they are not touching each other to prevent sticking. Place the tray in the refrigerator for about 30-60 minutes to allow the yogurt to set and firm up.
Serve and Enjoy: Once the yogurt has set and is no longer sticky, your Yogurt-Covered Pretzels are ready to enjoy! You can serve them immediately or store them in an airtight container in the refrigerator for up to a week.
Enjoy these delightful treats as a healthy Halloween snack or anytime you’re in the mood for a sweet and salty crunch!
Caramel-Covered Dates
Caramel-Covered Dates are an indulgent yet healthier treat that make for a delicious Halloween snack or dessert. These bite-sized delights feature sweet, chewy dates wrapped in a rich caramel coating, providing a delightful contrast of flavors and textures. Not only are they easy to make, but they also pack a nutritional punch, as dates are high in fiber and natural sugars.
Prepare the Dates: Begin by pitting the Medjool dates. Make a small slit down the side of each date and remove the pit. If desired, you can stuff each date with a piece of nuts such as almonds or pecans for added flavor.
Make the Caramel: In a medium saucepan over medium heat, combine the brown sugar and butter. Stir continuously until the butter melts and the mixture is well mixed and starts to bubble.
Add Cream and Flavor: Slowly pour in the heavy cream while stirring constantly. The mixture will bubble up, so be cautious. Continue to stir until the caramel becomes smooth and thickens slightly, which should take about 3-5 minutes. Remove from heat and stir in the vanilla extract and sea salt.
Coat the Dates: Using a fork or skewer, dip each pitted date into the caramel sauce, making sure it’s fully coated. Allow any excess caramel to drip off.
Set the Dates: Place the caramel-coated dates on a parchment-lined baking sheet. If you want to add a finishing touch, sprinkle some chopped nuts over the top while the caramel is still warm.
Let Them Cool: Allow the caramel-covered dates to cool at room temperature for about 15-20 minutes. Then, place them in the refrigerator for at least 30 minutes to allow the caramel to set.
Serve and Enjoy: Once the caramel has hardened, your Caramel-Covered Dates are ready to be enjoyed! They can be served immediately or stored in an airtight container in the refrigerator for up to one week.
These decadent treats are sure to please any crowd, offering a delightful balance of sweetness that feels special yet is full of wholesome ingredients.
Mini Pumpkin Muffins
Mini Pumpkin Muffins are a delightful and nutritious fall treat that’s perfect for Halloween festivities. These moist, spiced muffins are packed with the goodness of pumpkin, making them a healthier option for satisfying your sweet tooth. They’re easy to bake and can be enjoyed as a snack or dessert, all while being a hit with both kids and adults.
Preheat the Oven: Start by preheating your oven to 350°F (175°C). This guarantees the muffins bake evenly.
Prepare the Muffin Tin: Line a mini muffin tin with paper liners or lightly grease it with cooking spray to prevent sticking.
Mix Dry Ingredients: In a medium bowl, whisk together the all-purpose flour, baking powder, baking soda, ground cinnamon, ground nutmeg, and salt until evenly combined. Set this mixture aside.
Blend Wet Ingredients: In a separate large bowl, combine the sugar, brown sugar, pumpkin puree, vegetable oil, eggs, and vanilla extract. Beat the mixture with a whisk or an electric mixer until it is smooth and well-blended.
Combine Mixtures: Gradually add the dry ingredients to the wet ingredients, stirring gently until just combined. Take care not to overmix, as this can result in dense muffins. If desired, fold in the chopped walnuts at this stage.
Fill the Muffin Tins: Spoon the batter into the prepared mini muffin tin, filling each cup about ⅔ full to allow for rising.
Bake: Place the muffin tin in the preheated oven and bake for 12-15 minutes or until a toothpick inserted into the center of a muffin comes out clean.
Cool the Muffins: Once baked, remove the mini muffins from the oven and let them cool in the pan for about 5 minutes before transferring them to a wire rack to cool completely.
Serve: The Mini Pumpkin Muffins can be enjoyed warm or at room temperature. They make a wonderful treat for Halloween parties and are sure to be a crowd-pleaser!
These adorable muffins not only offer a delicious taste of fall but also provide a nutritious snack option for everyone to enjoy.
Healthy Halloween Trail Mix
Healthy Halloween Trail Mix is a fun and nutritious snack that combines the flavors of autumn with a touch of spooky flair. This energizing mix features a delightful combination of nuts, dried fruit, and seeds, making it perfect for both kids and adults. It’s not only a healthier alternative to traditional Halloween candy but also easy to customize with your favorite ingredients.
Prepare Your Ingredients: Gather all the ingredients and verify that you have them ready to mix. If you prefer, you can roughly chop the almonds and walnuts for a more bite-sized snack.
Mix Dry Ingredients: In a large mixing bowl, combine the raw almonds, walnuts, pumpkin seeds, dried cranberries, sunflower seeds, and dark chocolate chips (if using). Stir gently to verify an even distribution of the different ingredients.
Add Flavoring: Sprinkle the cinnamon and sea salt over the mixed ingredients. This adds a delicious flavor twist to your trail mix. Use a spatula or spoon to fold the spices into the mixture, making sure everything is coated evenly.
Taste and Adjust: Before finalizing, taste a small amount of your trail mix. Feel free to adjust by adding more dried fruit, nuts, or chocolate chips according to your preference.
Store or Serve: Transfer the Halloween trail mix to an airtight container for storage, or portion it into smaller bags for a grab-and-go snack. If you’re serving at a party, consider transferring it into a festive bowl for a fun presentation.
Enjoy: This Healthy Halloween Trail Mix is perfect for munching on during trick-or-treating or as a satisfying snack at Halloween gatherings. It’s both delicious and guilt-free!
Now you are all set with your Healthy Halloween Trail Mix to celebrate the spooky season in a wholesome way!
Candy Corn Fruit Cups
Candy Corn Fruit Cups are a festive and colorful treat that celebrates the spirit of Halloween while providing a deliciously healthy option. These delightful cups combine layers of fruit that mimic the classic candy corn colors—yellow, orange, and white—making them a visually appealing snack for kids and adults alike. They’re not only easy to prepare but also invigorating and nutritious, perfect for Halloween parties or as a fun dessert!
Ingredients
Quantity
Pineapple chunks
1 cup
Mandarins (or tangerines)
1 cup
Banana slices
1 cup
Greek yogurt (vanilla or plain)
1 cup
Mini candy corn (optional, for garnish)
½ cup
Instructions:
Prepare the Fruits: Start by washing your fruits thoroughly. If you’re using fresh pineapple, peel and cut it into small chunks. If using canned pineapple, drain it well. Peel the mandarin oranges and separate into segments. Slice the bananas into rounds.
Layer the Ingredients: Take clear plastic cups or small bowls for serving. Begin by adding a layer of pineapple chunks to each cup, filling them about one-third of the way full. This layer represents the yellow portion of candy corn.
Add the Middle Layer: Next, add a layer of mandarin segments on top of the pineapple. This bright orange layer should fill the cups another third of the way up.
Finish with Banana: Finally, top off each cup with banana slices, filling it to the rim. This represents the white layer of candy corn and adds a creamy texture.
Add Yogurt: Spoon a generous dollop of Greek yogurt on top of the banana layer. You can use plain yogurt or flavored yogurt (like vanilla) for added sweetness.
Garnish: If desired, sprinkle a few mini candy corn pieces on top of the yogurt as a fun and festive garnish. This step is optional, especially if you’re looking to keep it healthier.
Chill and Serve: Place the completed Candy Corn Fruit Cups in the refrigerator for about 15-30 minutes to chill. This makes them even more invigorating.
Enjoy: Serve the cups at your Halloween gathering, or pack them as a fun and healthy snack for your kids. Everyone will love this delightful twist on the classic candy corn!
Now you have a perfectly delicious and festive treat to brighten your Halloween festivities!
Chocolate-Dipped Strawberries
Chocolate-Dipped Strawberries are a delightful and healthier alternative to traditional Halloween treats. These sweet and juicy strawberries are dipped in rich dark or milk chocolate, creating a decadent yet nutritious snack that will satisfy your sweet tooth without the excess sugar and calories found in many candies. They’re easy to make, visually appealing, and a perfect addition to any Halloween gathering!
Ingredients
Quantity
Fresh strawberries
1 pound
Dark chocolate (or milk chocolate)
8 ounces
Coconut oil (optional, for smoothness)
1 teaspoon
Halloween sprinkles (optional, for garnish)
½ cup
Instructions:
Prepare the Strawberries: Start by rinsing the strawberries under cool water. Once cleaned, gently pat them dry with a paper towel. Make sure they are completely dry to guarantee the chocolate adheres well.
Melt the Chocolate: In a microwave-safe bowl, combine the chocolate and coconut oil (if using). Microwave the chocolate in 30-second intervals, stirring after each interval, until it’s fully melted and smooth. Be cautious not to overheat, as chocolate can easily burn.
Dip the Strawberries: Hold each strawberry by the green stem and dip it into the melted chocolate, swirling it around to guarantee it’s fully coated. Allow any excess chocolate to drip off before placing the strawberry on a baking sheet lined with parchment paper.
Add Sprinkles: If you want to add a festive touch, sprinkle some Halloween-themed sprinkles on the chocolate-dipped strawberries while the chocolate is still wet. This will help the sprinkles stick.
Chill to Set: Once all strawberries are dipped and garnished, place the baking sheet in the refrigerator. Allow them to chill for about 15-30 minutes, or until the chocolate has completely set.
Serve and Enjoy: After the chocolate has hardened, remove the strawberries from the refrigerator. Arrange them on a serving platter and enjoy these delicious treats at your Halloween party or as a fun spooky snack!
Now you have a simple and delightful recipe for Chocolate-Dipped Strawberries that everyone will love at your Halloween celebration!
Vanilla Almond Ghosts
Vanilla Almond Ghosts are an adorable and scrumptious Halloween treat that can add a fun and spooky flair to your festivities. These no-bake dessert ghosts are made from almond-flavored treats shaped like whimsical ghosts, drizzled with white chocolate, and adorned with chocolate chips for eyes. They are not only healthy but also incredibly easy to make and sure to delight both kids and adults alike!
Unsweetened shredded coconut (optional, for decoration)
1/2 cup
Instructions:
Prepare the Mixture: In a mixing bowl, combine the almond flour, maple syrup, vanilla extract, and melted coconut oil. Stir the mixture until it is well combined and forms a dough-like consistency. If the mixture is too crumbly, add a little more maple syrup until it holds together.
Shape the Ghosts: Take small amounts of the mixture and roll them into pea-sized balls. Then, shape each ball into a ghost form by elongating the bottom and narrowing the top, giving them a ghostly appearance. Place the shaped ghosts onto a baking sheet lined with parchment paper.
Melt the White Chocolate: In a microwave-safe bowl, melt the white chocolate chips in the microwave in 30-second intervals, stirring after each interval until fully melted and smooth. Be careful not to overheat it, as it can burn.
Coat the Ghosts: Using a fork, dip each ghost into the melted white chocolate, ensuring it is fully coated. Use the fork to lift it out and allow any excess chocolate to drip off before placing it back onto the parchment paper.
Add Eyes: While the white chocolate is still wet, gently press mini chocolate chips into the ghost’s face to create its eyes, adding personality to each spooky figure.
Chill to Set: Place the baking sheet with the chocolate-coated ghosts in the refrigerator for about 30 minutes, or until the chocolate has fully set.
Optional Decoration: If you want, sprinkle some unsweetened shredded coconut around the ghosts once they’re set for a “ghostly” appearance.
Serve and Enjoy: After the ghosts are set, remove them from the refrigerator and arrange them on a serving platter. Enjoy these delightful Vanilla Almond Ghosts during your Halloween celebrations!
Spiced Oatmeal Raisin Cookies
Spiced Oatmeal Raisin Cookies are a wholesome twist on the classic cookie, packed with fiber and flavor. Infused with warm spices like cinnamon and nutmeg, these cookies deliver a delightful chewy texture complemented by sweet raisins. They make for a perfect snack or treat during the Halloween season and can be enjoyed guilt-free!
Preheat the Oven: Start by preheating your oven to 350°F (175°C). Line a baking sheet with parchment paper to prevent the cookies from sticking.
Mix Dry Ingredients: In a large mixing bowl, combine the rolled oats, whole wheat flour, baking powder, baking soda, ground cinnamon, ground nutmeg, and salt. Stir until all the dry ingredients are evenly mixed.
Prepare Wet Ingredients: In a separate bowl, mix together the melted coconut oil, maple syrup, and vanilla extract. Whisk until you achieve a smooth consistency.
Combine Mixtures: Pour the wet mixture into the bowl containing the dry ingredients. Stir gently with a wooden spoon or spatula until just combined. Be careful not to overmix. If you’re using chopped nuts, fold them in along with the raisins at this step.
Scoop the Dough: Using a cookie scoop or tablespoon, drop the dough onto the prepared baking sheet, spacing the cookies about 2 inches apart since they will spread a little while baking.
Bake the Cookies: Place the baking sheet in the preheated oven and bake for 12 to 15 minutes, or until the edges are golden brown but the centers are still slightly soft.
Cool Down: Once baked, remove the cookies from the oven and let them cool on the baking sheet for about 5 minutes. Then, transfer them to a wire rack to cool completely.
Serve and Enjoy: After the cookies have cooled, they are ready to be enjoyed! Store any leftovers in an airtight container at room temperature for up to a week.