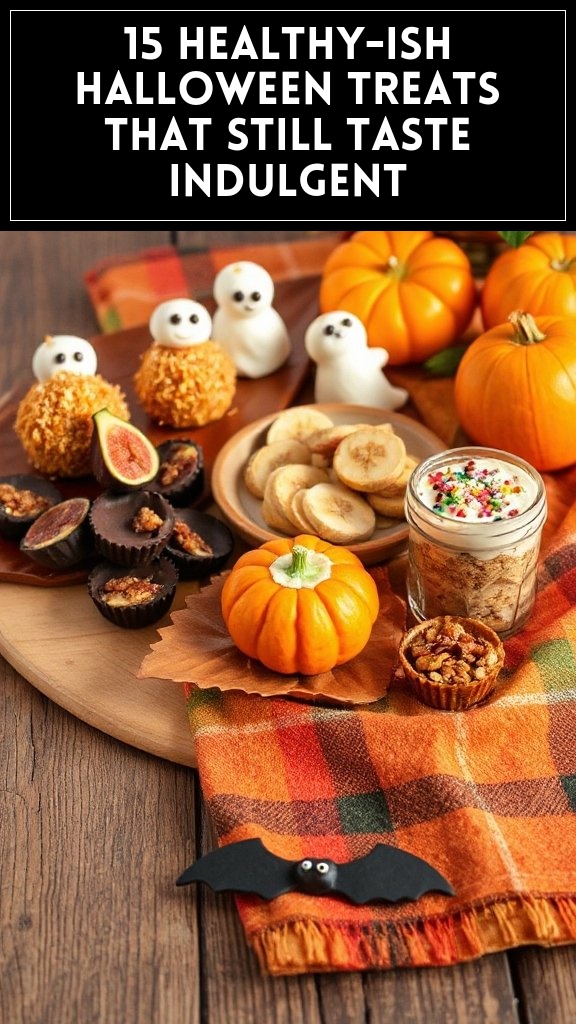
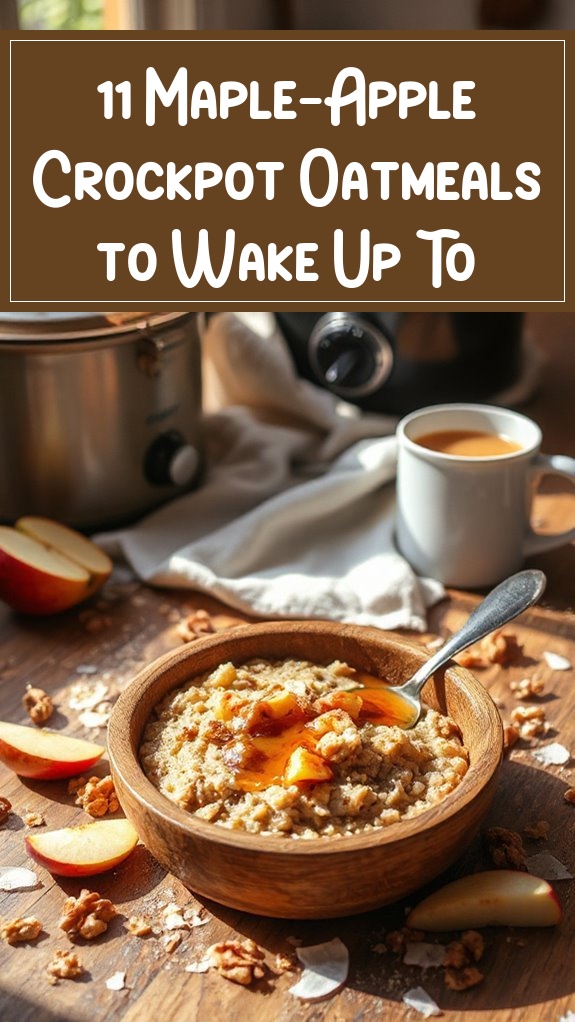
15 Better-For-You Halloween Desserts With Balanced Sweetness
Pumpkin Oatmeal Cookies
Pumpkin oatmeal cookies are a delightful twist on traditional cookies, combining the warm flavors of pumpkin with the hearty texture of oats. These cookies are not only delicious but also a healthier option for a Halloween treat, packed with fiber and the goodness of pumpkin. They are perfect for satisfying your sweet tooth while still maintaining your eating habits in check during the holiday season.
Preheat the Oven: Begin by preheating your oven to 350°F (175°C). This makes certain that your cookies bake evenly.
Prepare Baking Sheet: Line a baking sheet with parchment paper or a silicone baking mat to prevent the cookies from sticking.
Mix Wet Ingredients: In a large mixing bowl, combine the canned pumpkin puree, honey (or maple syrup), melted coconut oil, brown sugar, and vanilla extract. Stir until the mixture is well combined and smooth.
Combine Dry Ingredients: In another bowl, mix together the rolled oats, baking soda, cinnamon, nutmeg, and salt. Make sure the dry ingredients are evenly distributed.
Combine Wet and Dry Mixtures: Gradually add the dry ingredient mixture into the wet mixture, stirring gently until just combined. Be careful not to overmix.
Add Optional Ingredients: If you’re using chocolate chips or chopped nuts, fold them into the cookie dough at this point.
Scoop the Dough: Using a tablespoon or a cookie scoop, drop spoonfuls of the dough onto your prepared baking sheet, spacing them about 2 inches apart.
Bake the Cookies: Place the baking sheet in the preheated oven and bake for 12-15 minutes, or until the edges are lightly golden and the cookies are set.
Cool the Cookies: Once baked, remove the cookies from the oven and let them cool on the baking sheet for about 5 minutes before transferring them to a wire rack to cool completely.
Serve and Enjoy: Once the cookies are completely cooled, enjoy them as a tasty and healthier Halloween treat! Store any leftovers in an airtight container for up to a week.
These pumpkin oatmeal cookies are sure to be a hit with family and friends while keeping the holiday fun and delicious!
Chocolate Avocado Mousse
Chocolate avocado mousse is a rich and creamy dessert that cleverly substitutes traditional ingredients with nutrient-dense options. The avocado provides a smooth texture and healthy fats, while cocoa powder lends an indulgent chocolate flavor. This delightful mousse is not only a guilt-free treat, but it’s also quick to prepare, making it a perfect addition to your Halloween dessert table.
Prepare the Avocados: Begin by cutting the ripe avocados in half, removing the pit, and scooping the flesh into a blender or food processor.
Add Cocoa Powder and Sweetener: Add the unsweetened cocoa powder and maple syrup (or honey) to the blender with the avocados. This will provide both flavor and sweetness to your mousse.
Incorporate Vanilla and Milk: Pour in the vanilla extract and almond milk. The almond milk helps to create a creamy consistency and balance the thickness of the avocados.
Add a Pinch of Salt: Sprinkle in a pinch of salt. This enhances the chocolate flavor and balances the sweetness.
Blend Until Smooth: Blend all the ingredients together until the mixture is completely smooth and creamy. Make sure there are no lumps of avocado remaining. You may need to stop and scrape down the sides of the blender or food processor as you go.
Taste and Adjust: Once blended, taste your mousse and adjust sweetness if necessary by adding more maple syrup or honey. Blend again if you add more ingredients.
Chill the Mousse: Transfer the mousse to individual serving dishes or a larger bowl. Refrigerate the mousse for at least 30 minutes to allow it to cool and set.
Serve: Before serving, you can top the mousse with whipped coconut cream, fresh berries, or additional cocoa powder for garnishing. Serve chilled and enjoy your healthy Halloween treat!
Black Bean Brownies
Black bean brownies are a delicious and nutritious twist on traditional brownies, using pureed black beans to replace flour and boost the protein and fiber content. These fudgy treats are incredibly simple to make and provide a guilt-free indulgence that’s perfect for Halloween gatherings. With their rich chocolate flavor, you won’t even notice the beans!
Preheat the Oven: Begin by preheating your oven to 350°F (175°C). This guarantees that your brownies will bake evenly.
Prepare the Baking Dish: Grease an 8×8 inch (or similar size) baking dish with cooking spray or line it with parchment paper for easy removal later.
Blend the Black Beans: In a blender or food processor, add the drained and rinsed black beans. Blend until smooth, scraping down the sides as needed to guarantee there are no lumps.
Incorporate Chocolate Chips: If you’re using dark chocolate chips, fold them gently into the batter using a spatula for added texture and chocolate flavor.
Transfer to Baking Dish: Pour the batter into the prepared baking dish, spreading it evenly with a spatula.
Bake the Brownies: Place the baking dish in the preheated oven and bake for 20-25 minutes, or until the edges begin to pull away from the sides of the dish, and a toothpick inserted in the center comes out mostly clean.
Cool the Brownies: Once baked, remove the dish from the oven and let the brownies cool in the pan for about 10-15 minutes before transferring them to a wire rack to cool completely.
Cut and Serve: Once cooled, cut the brownies into squares and enjoy your healthier Halloween dessert! These brownies can also be stored in an airtight container for several days.
Ghostly Yogurt Parfaits
Ghostly yogurt parfaits are a fun and nutritious Halloween dessert that will delight both kids and adults alike. Layered with creamy yogurt, fruits, and a spooky topping, these parfaits are as festive as they are healthy. They are easy to prepare and can be customized with your favorite fruits, making them perfect for any Halloween gathering.
Prepare the Ingredients: Gather all the ingredients, and if you’re using mixed berries, wash and slice them as needed. If you plan to sweeten the yogurt, mix in the honey or maple syrup to incorporate it thoroughly.
Layer the Parfait: In clear cups or serving glasses, start by adding a layer of Greek yogurt at the bottom. Use about 1/4 cup for the first layer.
Add Granola: Spoon about 2 tablespoons of granola over the yogurt layer for a crunchy texture.
Add Fruit: Next, layer with a mixture of berries, adding a handful for color and flavor. You can alternate between different types of berries or use just one kind.
Repeat Layers: Continue layering the yogurt, granola, and berries until the glasses are full, usually two to three layers will work well.
Create Ghosts: For the ghostly effect, take a banana slice and use a ghost-shaped cookie cutter (if using) to make banana ghost shapes. Alternatively, you can simply use banana slices as is.
Add Chocolate Chip Eyes: Place mini chocolate chips on each banana slice to create eyes for the ghosts.
Top with More Berries: Finish off each parfait with a few berries on top and a sprinkle of granola for an appealing presentation.
Serve Immediately or Chill: You can serve the parfaits right away or refrigerate them for a short period before serving to keep them cool. However, avoid letting them sit for too long to prevent the granola from becoming soggy.
These ghostly yogurt parfaits are a delightful combination of flavors and textures, making them the perfect treat for Halloween celebrations!
Almond Flour Pumpkin Muffins
Almond flour pumpkin muffins are a delicious and healthier twist on traditional pumpkin muffins, making them perfect for the fall and Halloween season. These muffins are gluten-free and packed with pumpkin puree, almond flour, and warm spices, resulting in a moist and flavorful treat that everyone will enjoy. They are easy to make and can be enjoyed as a breakfast item or a tasty snack.
Preheat the Oven: Start by preheating your oven to 350°F (175°C). This guarantees that the muffins bake evenly.
Prepare the Muffin Tin: Line a standard muffin tin with paper liners or lightly grease it to prevent sticking.
Mix Dry Ingredients: In a large bowl, combine the almond flour, baking powder, baking soda, pumpkin spice, cinnamon, and salt. Mix these dry ingredients until well blended.
Whisk Wet Ingredients: In another bowl, whisk together the pumpkin puree, eggs, maple syrup (or honey), and melted coconut oil until smooth and well combined.
Combine Ingredients: Pour the wet mixture into the dry ingredients. Stir the mixture gently until just combined. Be careful not to over-mix; a few lumps are okay. If you’re adding chopped nuts or chocolate chips, fold them in gently at this stage.
Fill Muffin Tins: Spoon the muffin batter into the prepared muffin tin, filling each liner about 2/3 full to allow space for rising.
Bake: Place the muffin tin in the preheated oven and bake for 18-20 minutes, or until a toothpick inserted into the center of a muffin comes out clean.
Cool the Muffins: Once baked, remove the muffins from the oven and let them cool in the tin for about 5-10 minutes. Then transfer them to a wire rack to cool completely.
Serve: Enjoy your almond flour pumpkin muffins warm or at room temperature. They can be stored in an airtight container for up to a week or frozen for longer storage.
These muffins are not only flavorful but also provide a wholesome option for your Halloween festivities. Enjoy!
Cinnamon Apple Chips
Cinnamon apple chips are a delightful and nutritious snack that captures the essence of fall. These crispy, baked treats are made from fresh apples and flavored with cinnamon, making them a perfect alternative to traditional chips. Enjoy them as a healthy snack, a fun addition to salads, or a sweet topping for yogurt or oatmeal.
Preheat the Oven: Begin by preheating your oven to 200°F (95°C). This low temperature will help dehydrate the apples without burning them.
Prepare Baking Sheets: Line two baking sheets with parchment paper. This will prevent the apple chips from sticking and make for easy cleanup.
Slice the Apples: Wash and dry the apples. Core the apples and slice them very thinly (about 1/8 inch thick). A mandoline slicer works best for even slices, but a sharp knife can also do the job.
Toss with Lemon Juice: In a large bowl, gently toss the apple slices with lemon juice. This step helps prevent the apples from browning and adds a slight tartness.
Add Cinnamon and Sugar: Sprinkle the cinnamon (and coconut sugar if using) over the apple slices. Toss gently to coat the apple slices evenly with the cinnamon mixture.
Arrange on Baking Sheets: Lay the apple slices in a single layer on the prepared baking sheets, making sure they do not overlap. This helps them dry evenly and become crispy.
Bake: Place the baking sheets in the preheated oven and bake for 1.5 to 2 hours. Check the apple chips periodically, flipping them halfway through. They should be dry and crispy when finished.
Cool the Chips: Once baked, remove the sheets from the oven and let the apple chips cool on the baking sheets for about 10 minutes. They will become even crispier as they cool.
Store or Serve: Enjoy the cinnamon apple chips immediately or store them in an airtight container at room temperature for up to a week.
These apple chips make a wonderful, healthy snack and are a sweet, crunchy treat perfect for the Halloween season!
Healthy Halloween Energy Bites
Healthy Halloween Energy Bites are a fun and nutritious treat that’s perfect for the Halloween season. These bite-sized snacks are loaded with wholesome ingredients, providing a boost of energy without added sugars. They are easy to make, customizable, and great for kids and adults alike!
Prepare the Mixture: In a large mixing bowl, combine the rolled oats, nut butter, honey or maple syrup, ground flaxseed, chocolate chips, and vanilla extract. If you’re using chia seeds, add them as well. Mix all the ingredients thoroughly until well combined. The mixture should be sticky yet firm enough to hold its shape.
Chill the Mixture: Cover the mixing bowl with plastic wrap or a lid and place it in the refrigerator for about 30 minutes. Chilling will help the mixture firm up and make it easier to roll into balls.
Form the Bites: Once chilled, remove the mixture from the refrigerator. Using your hands, scoop out about a tablespoon of the mixture and roll it into a ball. Continue this process until you’ve formed all the energy bites. If desired, you can press a piece of mini candy corn into the top of each bite for a fun and festive touch.
Store the Energy Bites: Place the formed energy bites in an airtight container. You can store them in the refrigerator for up to a week or freeze them for longer storage.
Enjoy: Serve these Healthy Halloween Energy Bites as a nutritious snack during Halloween festivities or whenever you need a quick energy boost!
These energy bites are not only easy to make, but they also offer a delicious and healthy alternative to candy during the Halloween season!
Spooky Fruit Skewers
Spooky Fruit Skewers are a fun and creative way to enjoy fresh fruit during the Halloween season. These colorful and healthy treats are perfect for parties, as they can be easily customized with various fruits and spooky decorations. Not only do they look festive, but they’re also a nutritious option that kids and adults will love!
Ingredients
Quantity
Strawberries
1 pint
Green grapes
1 cup
Banana
1 large
Kiwi
2 medium
Mini marshmallows
1 cup
Plastic or wooden skewers
10-12
Edible googly eyes (for decoration)
As needed
Cooking Instructions
Prepare the Fruit: Wash all the fresh fruit thoroughly under running water. Pat them dry with a clean towel. Hull the strawberries and slice the bananas and kiwis into thick rounds. You can also cut the kiwi in half and scoop it out with a spoon to create ghost-like shapes.
Assemble the Skewers: Take a skewer and begin threading the fruit onto it. Start with a strawberry, followed by a banana slice, and then a green grape. Keep alternating the fruits until you reach the end of the skewer, leaving a small space at the top for the handle. You can choose to alternate fruit colors to create a vibrant look.
Add Spooky Faces: For an eerie touch, use mini marshmallows to create ghost faces. You can stick a mini marshmallow at the top of the skewer, and use edible googly eyes to create a spooky expression on the marshmallow. Be creative with the arrangement of eyes to give each ghost a different personality!
Prepare for Serving: Once all the skewers are assembled, place them on a large serving platter or individual cups for easy access. You can refrigerate them for a bit if you prefer them chilled.
Serve and Enjoy: Present the Spooky Fruit Skewers at your Halloween party as a fun and healthy dessert option. Watch as kids and adults enjoy these festive bites while indulging in nutritious fruit!
These Spooky Fruit Skewers are not only simple to make but also a delightful and guilt-free treat that adds a festive flair to any Halloween gathering!
Dark Chocolate Dipped Strawberries
Dark Chocolate Dipped Strawberries are a decadent yet healthier dessert that adds a touch of glam to any Halloween celebration. This delightful treat combines the juicy sweetness of fresh strawberries with rich, dark chocolate, making it a perfect balance of flavors and textures. Not only are they easy to prepare, but they also provide a nutritious option that everyone will love.
Wash and Dry the Strawberries: Start by rinsing the fresh strawberries under cool running water. Pat them dry gently with a clean paper towel. Make sure the strawberries are completely dry before dipping, as moisture can interfere with the chocolate’s ability to adhere.
Melt the Chocolate: In a microwave-safe bowl, combine the dark chocolate chips and coconut oil (if using). Microwave the mixture in 30-second intervals, stirring in between, until the chocolate is melted and smooth. Be careful not to overheat the chocolate, as it can burn.
Dip the Strawberries: Hold a strawberry by its green leafy top and dip it into the melted chocolate, ensuring that it’s fully coated. Let the excess chocolate drip off before placing it on a parchment-lined baking sheet. Repeat this step with all the strawberries.
Add Sprinkles (Optional): If you’d like to add some festive flair, immediately sprinkle your chosen toppings onto the chocolate-coated strawberries before the chocolate hardens. This will help the sprinkles stick to the chocolate.
Set the Chocolate: Once all the strawberries are dipped and decorated, place the baking sheet in the refrigerator for about 30 minutes or until the chocolate is fully set.
Serve and Enjoy: Once the chocolate has hardened, remove the strawberries from the refrigerator. Arrange them on a serving platter and enjoy your delicious Dark Chocolate Dipped Strawberries at your Halloween festivities!
These luxurious treats are easy to make and offer a festive and healthier dessert option that everyone will enjoy!
Cauliflower Rice Halloween Risotto
Cauliflower Rice Halloween Risotto is a delightful twist on the traditional risotto that combines the creamy texture of risotto with the health benefits of cauliflower rice. This Halloween-themed dish not only offers a spooky presentation with its vibrant colors, but it is also a low-carb alternative that fits perfectly into a healthier lifestyle. Perfect for a dinner party or a family gathering, this unique risotto is sure to impress while providing a flavorful and nutritious experience.
Prepare the Vegetable Broth: In a medium saucepan, heat the vegetable broth over low heat. Keep it warm throughout the cooking process as you will gradually add it to the risotto.
Sauté the Aromatics: In a large skillet, heat the olive oil over medium heat. Add the chopped onion and sauté for about 3-4 minutes, or until it becomes translucent. Then, add the minced garlic and sauté for an additional 1-2 minutes until fragrant.
Add the Cauliflower Rice: Stir in the cauliflower rice and cook for about 5 minutes, allowing it to toast slightly. This step enhances the flavor of the cauliflower.
Incorporate Pumpkin Puree: Add the pumpkin puree to the skillet and stir everything together, ensuring that the cauliflower rice is well mixed with the pumpkin.
Add the Broth Gradually: Begin adding the warm vegetable broth, one ladle at a time. Stir continuously and allow the liquid to be absorbed before adding more. This will take about 15-20 minutes. Continue this process until the cauliflower rice is tender but still slightly al dente.
Finish with Cheese and Seasoning: Once the cauliflower rice is cooked to your preference, remove the skillet from heat. If using, stir in the grated Parmesan cheese, and season with salt and black pepper to taste. Mix well to combine all the flavors.
Serve and Garnish: Scoop the pumpkin cauliflower risotto into serving bowls. Garnish each bowl with fresh sage leaves for an added festive touch. Enjoy your Cauliflower Rice Halloween Risotto warm!
This healthy risotto dish is not only delicious but adds a fun, autumn vibe to your Halloween menu. Enjoy its creamy texture without the carbs!
Baked Cinnamon Pumpkin Donuts
Baked Cinnamon Pumpkin Donuts are a delicious and healthier alternative to traditional fried donuts. These moist and flavorful treats are infused with the warm spices of cinnamon and nutmeg, while the addition of pumpkin puree adds natural sweetness and moisture. Perfect for a fall-themed gathering or as a seasonal snack, these baked donuts are not only easy to make but also a fun way to indulge without the guilt!
Preheat the Oven: Preheat your oven to 350°F (175°C) and lightly grease a donut pan with non-stick spray or a bit of coconut oil.
Mix Dry Ingredients: In a large mixing bowl, whisk together the whole wheat flour, baking powder, baking soda, ground cinnamon, ground nutmeg, and salt until evenly combined.
Combine Sugars: In a separate bowl, mix the brown sugar and granulated sugar together. This will provide a nice sweetness to the donuts.
Add Wet Ingredients: In another bowl, combine the pumpkin puree, eggs, milk, vanilla extract, and melted coconut oil. Whisk these ingredients together until smooth and well blended.
Combine Wet and Dry Mixtures: Pour the wet mixture into the bowl of dry ingredients. Gently fold the mixture together using a spatula or spoon until just combined. Be careful not to overmix; it’s okay if there are a few lumps.
Fill the Donut Pan: Transfer the batter into a piping bag or a ziplock bag (with a corner cut off) for easy filling. Fill each donut cavity about ¾ full with the batter.
Bake the Donuts: Place the donut pan in the preheated oven and bake for 15-18 minutes, or until the donuts spring back when lightly touched and a toothpick inserted into the center comes out clean.
Cool and Coat: Once baked, remove the donuts from the oven and let them cool in the pan for about 5 minutes. Carefully transfer them to a wire rack to cool completely.
Add Cinnamon Sugar Topping: Once the donuts are cool, roll them in the cinnamon sugar mixture until fully coated for an extra touch of sweetness and flavor.
Serve and Enjoy: Your baked cinnamon pumpkin donuts are now ready to be enjoyed! Serve them warm or at room temperature as a delightful treat for any occasion.
Healthy Peanut Butter Cups
Healthy Peanut Butter Cups are a delightful treat that satisfies your sweet tooth while providing wholesome ingredients. These homemade snacks are made with creamy natural peanut butter and dark chocolate, making them a nutrient-packed alternative to traditional candy. Perfect for Halloween or any time you crave a sweet indulgence, these peanut butter cups are easy to prepare and absolutely delicious!
Melt the Chocolate: In a microwave-safe bowl, melt the dark chocolate chips in the microwave. Heat in 20-30 second intervals, stirring in between until smooth and fully melted. Be careful not to overheat.
Prepare the Cupcake Liners: Place mini cupcake liners in a cupcake or muffin tin. This will keep the peanut butter cups sturdy and easy to remove after they are set.
First Layer of Chocolate: Using a spoon or a small ladle, pour a small amount of melted dark chocolate into the bottom of each cupcake liner, enough to cover the bottom completely. Use the back of the spoon to spread it evenly. Place the tray in the refrigerator for about 10 minutes to allow the chocolate to harden.
Make the Peanut Butter Filling: In a mixing bowl, combine the natural peanut butter, maple syrup, coconut flour, and salt. Stir until the mixture is well combined and slightly thick. This will serve as the filling for your cups.
Add the Peanut Butter Layer: Once the chocolate in the cupcake liners is hardened, take the tray out of the refrigerator. Using a spoon, add a dollop of the peanut butter mixture on top of the hardened chocolate in each cup. Press it down gently to ascertain it holds its shape.
Top with More Chocolate: Pour more melted dark chocolate on top of the peanut butter layer in each cup, making sure to completely cover the filling. Spread it with the back of the spoon if necessary to create an even layer.
Chill Again: Place the cupcake tray back in the refrigerator and allow the peanut butter cups to chill for at least 30 minutes, or until the chocolate is fully set.
Serve and Enjoy: Once hardened, carefully peel the cupcake liners away from the peanut butter cups. Enjoy your healthy peanut butter cups as a delightful treat or share them with friends and family! Store any leftovers in an airtight container in the refrigerator.
Halloween Themed Chia Seed Pudding
Halloween Themed Chia Seed Pudding is a fun and nutritious dessert that is perfect for the spooky season. This vibrant and creamy pudding can be made to look like a witch’s brew or a graveyard treat, making it a festive addition to your Halloween celebrations. Packed with omega-3 fatty acids and fiber, chia seeds provide a wholesome base for this delicious dessert that both kids and adults will enjoy!
Prepare the Chia Seed Base: In a mixing bowl, combine the chia seeds, almond milk, maple syrup, and vanilla extract. Whisk the mixture together until the chia seeds are evenly distributed and there are no clumps.
Add Color: If you want to create a Halloween theme, you can add a few drops of green food coloring to the mixture to achieve a vibrant green hue, reminiscent of a witch’s brew. Stir well until the color is evenly incorporated.
Refrigerate: Cover the bowl with plastic wrap or transfer the mixture into individual serving containers. Place it in the refrigerator for at least 4 hours, or overnight, to allow the chia seeds to absorb the liquid and thicken into a pudding-like consistency.
Create a Halloween Twist: If you wish to create a chocolate chia pudding, simply divide the chia seed mixture into two portions. Add cocoa powder to one portion and mix until fully combined. You can then layer the chocolate pudding with the green pudding in serving cups for an eye-catching effect.
Serve and Decorate: Once the pudding has set, remove it from the refrigerator. Spoon the pudding into cups or bowls, creating layers of green and chocolate if you went that route.
Add Toppings: Decorate the top of your chia pudding with fresh fruit to mimic Halloween themes – you can use sliced bananas to represent ghosts, strawberries for witch hats, or crushed graham crackers for a dirt effect.
Enjoy: Serve your Halloween themed chia seed pudding chilled and enjoy this nutritious and playful treat with family and friends!
Caramel Apple Nachos
Caramel Apple Nachos are a fun and indulgent twist on traditional nachos, perfect for Halloween celebrations. This dessert features crisp apple slices drizzled with gooey caramel and topped with a variety of tasty add-ons, like granola, chocolate chips, and nuts. It’s a delightful combination of sweet and crunchy that will satisfy any sweet tooth while adding a festive flair to your party.
Prepare the Apples: Wash and dry the green apples thoroughly. Using a sharp knife, slice each apple into thin wedges or rounds, removing the core as you go. Aim for uniform thickness so they are easy to layer.
Arrange the Apple Slices: On a large serving platter or a baking sheet lined with parchment paper, neatly arrange the apple slices in a single layer, overlapping slightly if necessary to create a colorful display.
Drizzle with Caramel: Heat the caramel sauce in the microwave for about 15-20 seconds or until it is warm and easy to drizzle. Using a spoon or a squeeze bottle, gently drizzle the warm caramel over the apple slices, making sure to cover them evenly.
Add Toppings: Sprinkle the mini chocolate chips and chopped nuts evenly over the caramel-drizzled apples. Then add granola on top for an extra crunch.
Optional Whipped Cream: For an extra touch, drizzle some whipped cream over the top of the assembled nachos for added sweetness and creaminess.
Decorate with Sprinkles: If desired, add a sprinkle of festive Halloween sprinkles on top to enhance the spooky theme and make it more visually appealing.
Serve: Enjoy the Caramel Apple Nachos immediately while the apples are fresh and crunchy. Serve with small plates and forks or simply let everyone dig in with their hands for a fun, casual dessert experience.
Indulge in this flavorful and festive treat at your Halloween gathering!
Ghoulishly Green Smoothie Bowl
Ghoulishly Green Smoothie Bowl is a fun, nutritious dish that brings a playful twist to breakfast or dessert, especially around Halloween. This vibrant green bowl is packed with healthy greens, fruits, and topped with spooky but delightful garnishes. It’s not only visually appealing but also offers a delicious and nutritious way to kick-start your day or enjoy a festive treat.
Blend the Base: In a blender, combine the spinach, frozen banana, frozen mango, and almond milk. Blend on high until the mixture is smooth and creamy. If you want it a bit sweeter, add honey or maple syrup to taste and blend again.
Prepare the Chia Seeds: In a small bowl, mix the chia seeds with a couple of tablespoons of water. Let them sit for about 10 minutes to thicken slightly, creating a pudding-like consistency.
Assemble the Smoothie Bowl: Pour the blended smoothie mixture into a bowl. Use the back of a spoon to create a smooth, even surface.
Add Toppings: Spoon the chia seed mixture in the center of the smoothie bowl. Then, sprinkle granola around the edges for crunch. Load up with sliced kiwi for an added pop of green, placing them in a decorative manner.
Decorate with Coconut and Eyes: Sprinkle coconut flakes over the top for some extra texture and a spooky effect. Finally, add edible candy eyes here and there to give a fun, ghoulish look.
Serve Immediately: Enjoy your Ghoulishly Green Smoothie Bowl right away while it’s fresh. Perfect for a Halloween breakfast, snack, or healthy dessert!