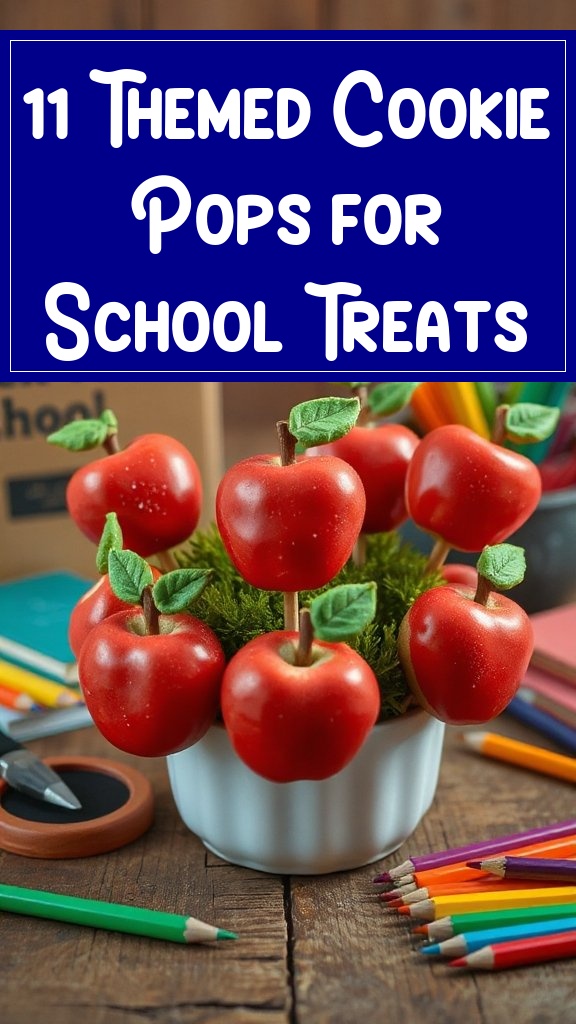
Apple-shaped cookies are a delightful and festive treat, perfect for autumn or any occasion where you want to bring a bit of cheer. These cookies not only look like apples but can also be flavored with hints of cinnamon and vanilla, making them as delicious as they are cute. Whether you plan to decorate them with royal icing, fondant, or simply with sprinkles, these cookies will be a hit for both kids and adults alike.
Gradually add the dry ingredients to the wet mixture, mixing until a dough forms.
Divide the dough, color half red for the apple body and the other half green for the leaves.
Roll out each colored dough and cut out apple shapes using a cookie cutter.
Place the cut-out cookies on a baking sheet lined with parchment paper.
Bake for 8-10 minutes or until the edges are lightly golden.
Allow the cookies to cool completely before decorating with royal icing or fondant.
Rainbow Colored Crayons
Rainbow colored crayon cookies are a fun and vibrant treat that not only look spectacular but can also spark creativity in both kids and adults. These cookies are shaped like crayons, and with a splash of colorful icing, they mimic the appearance of your favorite crayon box. Perfect for birthday parties, school events, or any gathering where a pop of color is needed, they are sure to be a hit!
In another bowl, whisk together the flour, baking powder, and salt.
Gradually incorporate the dry ingredients into the wet mixture until a dough forms.
Divide the dough and tint half with different food coloring for each crayon color.
Roll out each colored dough and shape it into crayon forms or use a crayon-shaped cookie cutter.
Place the shaped cookies on a baking sheet lined with parchment paper.
Bake for 8-10 minutes or until just set.
Cool completely and decorate with royal icing to resemble crayon wrapping and tips.
Book Stack Cookies
Book stack cookies are a delightful treat that captures the charm of a well-loved stack of books. Perfect for book lovers, these cookies can be customized with various colors and designs to resemble your favorite titles or genres. Whether for a literary-themed party, a book club meeting, or just a fun afternoon baking session, these cookies are sure to be a hit among readers of all ages!
In a separate bowl, mix the flour, baking powder, and salt, then gradually add to the wet mixture to form dough.
Divide the dough and color portions to resemble book covers or spines, then roll out and cut into rectangular shapes.
Position the cookie shapes on a parchment-lined baking sheet and bake for 8-10 minutes or until slightly golden.
Allow to cool completely before decorating with royal icing to create book titles and decorative designs.
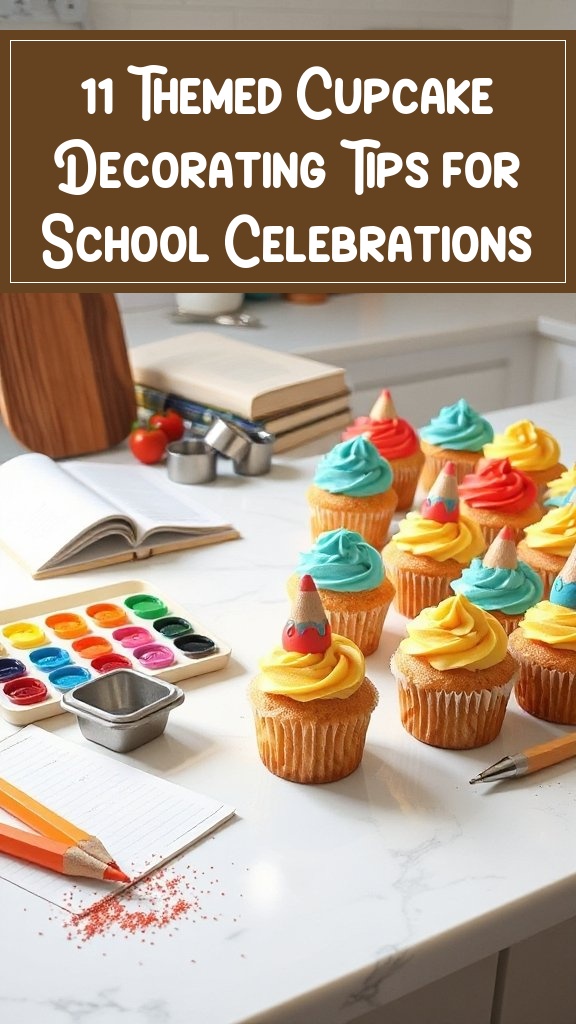
Pencil and Notebook Designs
Pencil and notebook design cookies are a fun and creative treat that will delight students and teachers alike! Perfect for back-to-school events, classroom parties, or as a unique gift, these cookies can be decorated to resemble colorful pencils and notebooks. With a little imagination and some royal icing, you can transform simple cookies into edible school supplies that are almost too cute to eat!
In a separate bowl, whisk together flour, baking powder, and salt, then combine with the wet ingredients to form a dough.
Roll out the dough and cut into shapes of pencils and notebooks; bake on a parchment-lined baking sheet for 8-10 minutes or until golden.
Once cool, decorate with royal icing to create the details of pencils and notebook covers. Enjoy your creative treats!
Classroom Supplies Inspiration
Classroom supplies-inspired cookies are a delightful way to celebrate the back-to-school season or to treat students and teachers with something sweet and memorable. These cookies can take on various fun shapes and designs, such as calculators, crayons, and glue bottles. With a dash of creativity and vibrant royal icing, you can create cookies that look just like essential classroom supplies!
Cream together softened butter and granulated sugar until light and fluffy.
Add the egg and vanilla extract, mixing until well combined.
In another bowl, combine flour, baking powder, and salt; mix with the wet ingredients to form a dough.
Roll out the dough and cut into shapes resembling classroom supplies, then bake for 8-10 minutes or until lightly golden.
Once cooled, use royal icing to decorate the cookies in colorful designs that mimic real classroom supplies. Enjoy!
School Bus Treats
School bus treats are a fun and whimsical way to celebrate any school-themed event or simply to brighten up a child’s day. These delightful cookies are crafted to resemble cheerful yellow school buses, and they are perfect for parties, classrooms, or as a sweet surprise for your favorite students.
In a bowl, cream softened butter and granulated sugar until light and fluffy, then add the egg and vanilla extract.
In a separate bowl, combine flour, baking powder, and salt; mix into the wet ingredients to form a dough.
Divide the dough and add yellow food coloring to one half, mixing until well blended.
Roll out the dough and cut into bus shapes, bake for 8-10 minutes until lightly golden.
Once cooled, use royal icing for detailing, adding brown for windows and black for wheels using licorice or chocolate chips. Enjoy!
Graduation Cap Cookies
Graduation Cap Cookies are a delightful treat to celebrate the achievement of graduates. These charming cookies are shaped like iconic graduation caps, complete with a mortarboard and tassel, making them a perfect addition to any graduation party or as a thoughtful gift for new graduates.
In a large bowl, cream together softened butter and granulated sugar until light and fluffy; add egg and vanilla extract.
In a separate bowl, whisk together flour, baking powder, and salt, then combine with the wet ingredients to form a dough.
Roll out the dough and cut it into squares for caps and triangles for mortarboards, then bake for 8-10 minutes until lightly golden.
Once cooled, use royal icing and food coloring to decorate the caps and attach chocolate squares as the top of the caps with tassels made from Twizzlers. Enjoy!
Friendly Teacher Faces
Friendly Teacher Faces are playful and whimsical cookies designed to resemble cheerful teachers, making them perfect for classroom celebrations, teacher appreciation day, or just a fun baking project with kids. These cookies can be personalized with various expressions and colors, bringing smiles to both students and educators alike.
In a large mixing bowl, cream together the softened butter and granulated sugar until light and fluffy; then add the egg and vanilla extract.
In another bowl, whisk together the flour, baking powder, and salt; combine with the wet ingredients to form a dough.
Roll out the dough and cut into large circles for faces; bake for 8-10 minutes until lightly golden.
Let the cookies cool, then use royal icing and food coloring to create friendly teacher faces including eyes, glasses, and smiling expressions with the addition of candies for decoration. Enjoy!
Globe and Map Cookies
Globe and Map Cookies are creative and educational treats that bring the world to your dessert table! These cookies are shaped like globes and maps, making them a fun baking project for geography-themed parties, classroom activities, or simply for those who love to travel. Decorated with vibrant royal icing, these cookies can inspire curiosity about different cultures and destinations.
In a large mixing bowl, cream together the softened butter and granulated sugar until fluffy; then mix in the egg and vanilla extract.
In a separate bowl, sift together the flour, baking powder, and salt; combine with the wet mixture to form a dough.
Roll out the dough and cut into globe and map shapes using cookie cutters; bake for 8-10 minutes until lightly golden.
Once cooled, use royal icing and food coloring to decorate the globes with blue for water and green for land, or create intricate map designs. Finish with edible markers for additional details. Enjoy your world cookies!
Cute Animal Mascots
Cute Animal Mascots are delightful cookies that capture the essence of various adorable creatures, making them perfect for children’s parties, baby showers, or simply to bring a smile to anyone’s face. These cookies can be shaped like animals such as bears, bunnies, or elephants, and are decorated with colorful icing and creative designs to represent the features of each animal.
In a mixing bowl, cream together the softened butter and sugar until fluffy, then add the egg and vanilla extract.
In a separate bowl, whisk together the flour, baking powder, and salt, then combine with the wet mixture to form a dough.
Roll out the dough and cut into animal shapes using cookie cutters; bake for 8-10 minutes until lightly golden.
Once cooled, use royal icing and food coloring to decorate the cookies with animal features. Optional edible glitter can be added for extra sparkle. Enjoy your cute animal cookies!
Word Art Cookies
Word art cookies are a fun and creative way to express messages or sentiments through baked treats. These cookies can be customized with words, phrases, or even quotes that hold special meaning, making them perfect for celebrations, gifts, or simply to showcase your creativity in the kitchen. Decorated with colorful icing and creative designs, these cookies are both a delightful visual treat and a delicious snack!
In a mixing bowl, cream together the softened butter and sugar until fluffy, then add the egg and vanilla extract.
In another bowl, whisk together the flour, baking powder, and salt, then combine with the wet mixture to form a dough.
Roll out the dough and cut into desired shapes. Bake for 8-10 minutes until edges are lightly golden.
Once cooled, use royal icing to outline and fill in the cookies. Write your chosen words or phrases using edible markers or food-safe pens for personalization. Enjoy your word art cookies!