11 Vegetarian Party Foods For A Boo-tiful Halloween Table
Creepy Spaghetti With Eyeball Meatballs
Creepy Spaghetti With Eyeball Meatballs is a fun and spooky vegetarian dish perfect for Halloween gatherings. The “eyeball” meatballs are made from cheese-stuffed vegetable meatballs, and they add a playful touch to the classic spaghetti dish. This delicious recipe is sure to impress both kids and adults alike, making it an ideal centerpiece for your Halloween party.
Cook the Spaghetti: Begin by bringing a large pot of salted water to a boil. Once boiling, add the spaghetti and cook according to package instructions until al dente. Drain and set aside.
Prepare the Sauce: In a large skillet, heat the olive oil over medium heat. Add the crushed garlic and sauté for about 1 minute, or until fragrant. Carefully pour in the marinara sauce, stirring to combine. Allow the sauce to simmer on low heat for about 10 minutes to enhance the flavors.
Cook the Meatballs: If you are using frozen vegetarian meatballs, follow the package instructions to heat them through. If using homemade meatballs, prepare them in advance and set them aside. Once heated, remove them from the heat.
Assemble the Eyeball Meatballs: Take each vegetarian meatball and use a small knife to create a pocket. Stuff each meatball with a cube of mozzarella cheese. Once all meatballs are stuffed, place them on a baking sheet.
Bake the Meatballs: Preheat your oven to 375°F (190°C). Bake the stuffed meatballs for about 10 minutes, or until the cheese is melted and bubbly.
Combine Ingredients: Once the spaghetti is cooked and drained, add it back to the pot. Pour the marinara sauce over the spaghetti and gently toss to coat evenly with the sauce.
Serve: Place the saucy spaghetti on serving plates. Carefully add the baked eyeball meatballs on top of the spaghetti. For the finishing touch, place a slice of black olive on top of each meatball to represent the pupil of the eyeball.
Garnish: Sprinkle fresh basil leaves around the plates for a pop of color and added flavor. Serve immediately and watch as your guests are delighted by this creepy yet tasty Halloween dish!
Preheat the Oven: Start by preheating your oven to 425°F (220°C). This high temperature will help to make the cauliflower bites crispy.
Prepare the Cauliflower: Wash and cut the cauliflower head into medium-sized florets. Make sure they’re roughly the same size to guarantee even cooking.
Season the Florets: In a large mixing bowl, combine the cauliflower florets, olive oil, salt, black pepper, and garlic powder. Toss everything together until the florets are evenly coated with the oil and seasonings.
Bake the Cauliflower: Spread the seasoned cauliflower florets in a single layer on a baking sheet. Make sure they’re not overcrowded for the best crispiness. Bake in the preheated oven for about 25-30 minutes, or until they are golden brown and tender, flipping them halfway through to guarantee even roasting.
Add Cheese (Optional): If you are using Parmesan cheese, sprinkle it over the cauliflower florets during the last 5 minutes of baking. Allow the cheese to melt and turn slightly golden.
Create Ghostly Faces: Once the cauliflower bites are out of the oven, let them cool slightly. Use the mozzarella cheese to add “eyes” on each floret. To do this, place small spoonfuls of shredded mozzarella on top of the cauliflower. Next, add a slice of black olive on top of each mozzarella piece to create the eyes.
Garnish and Serve: Transfer the ghostly cauliflower bites to a serving platter, garnishing with fresh parsley if desired. Serve them warm with your favorite dipping sauce on the side, and enjoy the spooky fun!
Witch’s Hat Nachos
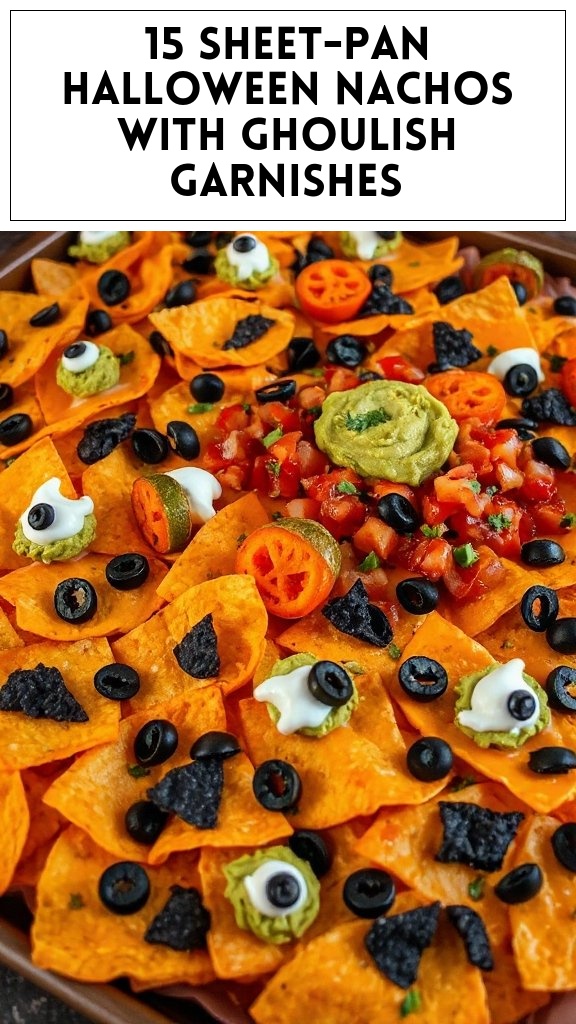
Witch’s Hat Nachos are a fun and whimsical twist on traditional nachos, perfect for your Halloween gathering! These nachos feature savory black corn tortilla chips topped with a medley of cheese, jalapeños, and black olives, all shaped like a spooky witch’s hat. They are easy to make and guaranteed to be a hit at your party.
Ingredients
Quantity
Black corn tortilla chips
1 bag (about 8 oz)
Shredded cheddar cheese
2 cups
Jalapeños (sliced)
½ cup
Black olives (sliced)
½ cup
Sour cream
1 cup
Guacamole
1 cup
Fresh cilantro (for garnish)
A handful
Optional: hot sauce
To taste
Cooking Instructions:
Preheat the Oven: Begin by preheating your oven to 350°F (175°C). This will guarantee your nachos melt perfectly without getting burnt.
Prepare the Baking Sheet: Grab a large baking sheet and layer it with parchment paper or aluminum foil. This makes for easier cleanup and prevents sticking.
Arrange Tortilla Chips: Lay out the black corn tortilla chips in a single layer on the baking sheet. Make sure they are not overlapping so that all chips can be evenly topped and crisped.
Add Cheese and Toppings: Sprinkle the shredded cheddar cheese evenly over the tortilla chips. Then, distribute the sliced jalapeños and black olives on top to create a colorful topping.
Bake the Nachos: Place the baking sheet in the preheated oven and bake for about 10-15 minutes, or until the cheese has melted and is bubbling. Keep an eye on them to prevent overcooking.
Shape the Witch’s Hats: As the nachos bake, you can shape them into witch’s hats for presentation. Use triangular shapes of tortilla chips on the outer edges to create the hat shape, and place a dollop of sour cream in the center for the “hat band”.
Garnish and Serve: Once out of the oven, let them cool for a minute before garnishing with fresh cilantro. Serve your Witch’s Hat Nachos with guacamole and hot sauce on the side for dipping. They’re not just delicious—they’re also a spooky delight for your Halloween festivities!
Pumpkin Veggie Dip
Pumpkin Veggie Dip is a festive and flavorful addition to any Halloween party, combining the delightful taste of pumpkin with a variety of fresh vegetables. This creamy dip is perfect for sharing and can be served with an assortment of dippers like crackers, veggies, or bread. Its vibrant orange color and tasty blend of spices will make it a highlight at your gathering!
Fresh vegetables (carrots, celery, bell peppers, etc.)
Assorted for dipping
Cooking Instructions:
Prepare the Ingredients: Start by gathering all your ingredients. Make sure the cream cheese is softened to room temperature to facilitate easy mixing.
Blend the Base: In a mixing bowl, combine the softened cream cheese, pure pumpkin puree, and Greek yogurt. Use a hand mixer or a whisk to blend these ingredients until they are smooth and well combined.
Add the Seasonings: Once the base is creamy, add the ranch dressing, garlic powder, onion powder, ground cinnamon, ground nutmeg, and salt. Mix thoroughly to incorporate all the flavors into the dip.
Taste and Adjust: After mixing, taste the dip to adjust the seasoning, adding more salt or spices if desired to suit your preference.
Chill the Dip: Transfer the dip to a serving bowl and cover it with plastic wrap. Place it in the refrigerator for at least 30 minutes to allow the flavors to meld and for the dip to chill.
Prepare the Dippers: While the dip is chilling, wash and cut your fresh vegetables into bite-sized pieces. Carrots, celery, and bell peppers work great and add a colorful variety to your platter.
Serve and Enjoy: After chilling, remove the dip from the refrigerator and give it a quick stir. Arrange the fresh vegetables around the dip for an appealing presentation. Serve it to your guests and enjoy this delicious and festive Pumpkin Veggie Dip!
Mummy Stuffed Peppers
Mummy Stuffed Peppers are a fun and spooky vegetarian dish that adds a creative twist to your Halloween menu. These peppers are filled with a savory mixture of grains, vegetables, and cheese, and are wrapped in crescent roll dough to resemble mummies. They are not only adorable but also packed with flavor, making them a perfect party food to delight your guests!
Prepare the Peppers: Preheat your oven to 375°F (190°C). Wash the bell peppers and cut the tops off, removing the seeds and membranes inside. Arrange them upright in a baking dish.
Cook the Filling: In a large mixing bowl, combine the cooked quinoa or rice, black beans, corn, shredded cheese, and taco seasoning. Stir well to guarantee all ingredients are evenly mixed together.
Stuff the Peppers: Spoon the filling mixture into each bell pepper, packing it in firmly and filling each pepper to the top.
Create the Mummy Wrappings: Open the can of crescent roll dough and unroll the dough sheet. Cut it into thin strips (about ½ inch wide). These will be used to create the mummy wrapping.
Wrap the Peppers: Take the strips of crescent roll dough and wrap them around the stuffed peppers. Leave small gaps to mimic a mummy’s bandages, but make sure the filling is mostly covered with the dough.
Add Eyes: Place two olive slices on the top of each pepper to serve as the mummy’s eyes.
Bake the Mummies: Place the assembled stuffed peppers in the preheated oven and bake for 25-30 minutes, or until the dough is golden brown and fully cooked.
Serve: Once out of the oven, let them cool for a few minutes. Serve your Mummy Stuffed Peppers warm and watch them disappear as your guests marvel at this adorable Halloween treat! Enjoy!
Haunted Hummus Platter
Haunted Hummus Platter is a creative and fun dish that adds an eerie touch to your Halloween festivities while still being healthy and vegetarian-friendly. This platter features a variety of colorful veggies alongside spooky-themed hummus, designed to resemble a haunted scene. It’s a great option for snacking and will definitely impress your guests with its creativity and flavor!
Create the Haunted Hummus Base: If you’re making homemade hummus, blend together chickpeas, tahini, lemon juice, garlic, olive oil, and salt in a food processor until smooth and creamy. You can add water for adjusting the consistency.
Prepare the Platter: On a large serving platter, spread the hummus evenly, creating a nice shallow well in the center to resemble a graveyard.
Make Ghosts from Red Bell Peppers: Use the red bell pepper strips to create ghost shapes by arranging them upright around the edges of the hummus. Attach black olive slices as eyes to each ghost using a small amount of hummus to adhere them.
Arrange the Veggies: Place the carrot sticks and celery sticks around the hummus to add color and crunch to the platter. Feel free to create ghost-like shapes or spooky silhouettes with the veggie arrangements.
Add Cherry Tomatoes and Cucumbers: Scatter cherry tomatoes and cucumber slices throughout the platter to enhance the visual appeal. You can also use cherry tomatoes to represent little pumpkins.
Include Pita Bread: Arrange pita bread triangles around the platter. You can lightly brush them with olive oil and sprinkle them with paprika before toasting them in the oven for added flavor (bake for 5-7 minutes at 350°F (175°C) until golden).
Final Touches: Drizzle a little olive oil over the hummus and garnish with fresh parsley or paprika if desired for extra flair.
Serve: Present your Haunted Hummus Platter at your Halloween gathering. Encourage guests to scoop up the hummus with veggie sticks, pita, and enjoy this festive, healthy treat that adds a touch of spookiness to the party!
Spooky Stuffed Mushrooms
Spooky Stuffed Mushrooms are a delightful vegetarian treat that will bring a playful yet spooky element to your Halloween party. These savory bites are filled with a mixture of cream cheese, herbs, and breadcrumbs, creating a deliciously creamy interior that contrasts perfectly with the tender mushroom caps. Decorated with spooky faces or simply served as is, they’re sure to be a hit among your guests!
Preheat the Oven: Preheat your oven to 375°F (190°C) to prepare for baking the stuffed mushrooms.
Clean the Mushrooms: Gently wipe the mushrooms with a damp paper towel to remove any dirt. Carefully remove the stems from the mushrooms and set the caps aside. Finely chop the stems for the filling.
Prepare the Filling: In a medium bowl, combine the chopped mushroom stems, cream cheese, minced garlic, chopped parsley, grated Parmesan cheese, and bread crumbs. Add the salt and mix until well combined. The mixture should be creamy and easy to spoon into the mushroom caps.
Stuff the Mushrooms: Using a small spoon, fill each mushroom cap generously with the cream cheese mixture. Don’t be afraid to pile it a little high, as the filling will not expand during baking.
Drizzle with Olive Oil: Arrange the stuffed mushrooms on a baking sheet lined with parchment paper. Drizzle a little olive oil over the top of each mushroom to help them brown and crisp while baking.
Bake the Mushrooms: Place the baking sheet in the preheated oven and bake for about 20-25 minutes, or until the mushrooms are tender and the tops are golden brown.
Create Spooky Faces: While the mushrooms are baking, slice the black olives and the red bell pepper into shapes to create spooky faces. You can use the olives for eyes and mouth and cut the red bell pepper into shapes (like fangs or eyebrows) if you choose.
Decorate and Serve: Once the mushrooms are done baking, remove them from the oven and let them cool slightly. Add the black olive and red bell pepper decorations to the stuffed mushrooms to create your spooky faces.
Garnish (Optional): If desired, sprinkle a little paprika over the mushrooms for added flavor and color.
Enjoy: Arrange the spooky stuffed mushrooms on a serving platter and serve warm as a delicious appetizer. Enjoy the eerie flavor that will delight your guests!
Monster Guacamole
Monster Guacamole is a fun and festive twist on the classic avocado dip, perfect for Halloween parties. This vibrant green dip is not only delicious but can also be transformed into an eerie monster face that will delight your guests. With a combination of ripe avocados, zesty lime juice, and a selection of vibrant toppings, you can create a spooky yet tasty dish that pairs well with tortilla chips or veggie sticks.
Ingredients
Quantity
Ripe avocados
2
Lime juice
2 tablespoons
Salt
1/2 teaspoon
Diced tomatoes
1/2 cup
Diced red onion
1/4 cup
Minced garlic
1 clove
Ground cumin
1/4 teaspoon
Black olives (for decoration)
8-10 (whole)
Sliced bell pepper (for decoration)
1 small (any color)
Tortilla chips or veggie sticks
For serving
Cooking Instructions:
Prepare the Avocados: Cut the ripe avocados in half and remove the pits. Scoop the flesh into a medium mixing bowl.
Mash the Avocados: Use a fork or potato masher to mash the avocado until smooth, leaving some chunks if you prefer a little texture.
Add Lime and Seasonings: Pour in the lime juice and sprinkle the salt over the mashed avocado. Add the minced garlic and ground cumin, mixing well until all ingredients are combined.
Incorporate Vegetables: Fold in the diced tomatoes and diced red onion to add freshness and flavor to the guacamole. Mix gently to avoid breaking the avocado too much.
Create the Monster Face: Transfer the guacamole to a serving bowl. Shape the dip into a monster face by using the black olives as eyes and mouth. Arrange the sliced bell pepper to create hair or other features to bring your monster to life.
Serve: Place the monster guacamole bowl in the center of a platter and surround it with tortilla chips or veggie sticks for dipping.
Enjoy the Spooky Delight: Invite your guests to dig in and enjoy the monstrous creation you’ve made, perfect for adding a festive flair to your Halloween party!
Zombie Flatbread Pizzas
Zombie Flatbread Pizzas are a spooky and fun dish perfect for Halloween gatherings. These easy-to-make pizzas use flatbreads as a base and are topped with a variety of ingredients to create creepy, ghoulish faces that will thrill your guests. With delicious flavors and a playful aesthetic, these pizzas are a hit for both kids and adults alike.
Preheat the Oven: Start by preheating your oven to 400°F (200°C).
Prepare the Flatbreads: Place the flatbreads on a baking sheet lined with parchment paper. This will prevent them from sticking to the sheet and make for easier cleanup.
Spread the Sauce: Evenly spread the pizza sauce over each flatbread, leaving a small border around the edges to create a “crust.”
Add Cheese: Sprinkle the shredded mozzarella cheese generously on top of the sauce on each flatbread. This will be the base of your pizzas.
Create Zombie Faces: Use sliced black olives to create eyes and mouths on the flatbreads. You can also use slices of pepperoni to create additional facial features if desired.
Add Vegetables: Arrange sliced bell peppers, cherry tomato halves, and spinach leaves on the flatbreads to create fun zombie facial features like hair and facial expressions.
Season the Pizzas: Drizzle a small amount of olive oil over the top of the pizzas, and sprinkle with Italian seasoning for extra flavor.
Bake: Place the baking sheet in the preheated oven and bake for about 10-12 minutes, or until the cheese is melted and bubbly, and the edges of the flatbreads are golden brown.
Serve: Carefully remove the Zombie Flatbread Pizzas from the oven. Let them cool for a few minutes before slicing and serving.
Enjoy the Spookiness: Serve these enticing pizzas at your Halloween party, and watch your guests enjoy both the taste and the creative presentation of these ghoulish delights!
Bat-wing Stuffed Cheesy Bread
Bat-wing Stuffed Cheesy Bread is a delightful and eerie party food perfect for Halloween festivities. This cheesy bread dish is not only visually appealing with its bat-wing shape, but it is also packed with flavor, ensuring that your guests will be excited to sink their teeth into this spooky treat. The combination of gooey cheese and savory fillings makes it an irresistible addition to your Halloween spread.
Preheat the Oven: Begin by preheating your oven to 375°F (190°C). This allows the bread to bake evenly and thoroughly.
Prepare the Dough: Roll out the pizza dough on a lightly floured surface into a large rectangle, about 1/4 inch thick. Use a pizza cutter to slice the dough into bat-wing shapes. To create the wings, you can cut the dough into a bat silhouette or simply an oval with pointed edges.
Make the Filling: In a mixing bowl, combine the shredded mozzarella cheese, cream cheese, chopped spinach, sliced black olives, garlic powder, and Italian seasoning. Mix well until all ingredients are evenly distributed.
Stuff the Breads: Take one bat-wing dough shape and place a generous spoonful of the cheese filling in the center. Fold the edges of the dough over to encase the filling and pinch shut to prevent any filling from spilling out.
Shape the Wings: Gently stretch and shape the sides of the dough to enhance the bat-wing effect. Repeat this process until all dough and filling have been used.
Prepare for Baking: Line a baking sheet with parchment paper and lightly spray it with cooking spray. Arrange the stuffed bat-wing cheesy breads on the sheet, leaving some space between them to allow for rising.
Egg Wash: In a small bowl, beat the egg to create an egg wash. Brush the tops of the stuffed breads with the egg wash to give them a beautiful golden color when baked.
Bake: Place the baking sheet in the preheated oven and bake for about 20-25 minutes, or until the breads are golden brown and cooked through.
Cool and Serve: Once baked, remove the bat-wing cheesy bread from the oven. Allow them to cool slightly on a wire rack for a few minutes before serving.
Enjoy the Scare: Present your Bat-wing Stuffed Cheesy Bread on a platter at your Halloween gathering, and watch as guests delight in both the spooky presentation and delicious taste.
Candy Corn Fruit Cups
Candy Corn Fruit Cups are a fun and festive way to enjoy healthy snacks during Halloween celebrations. These vibrant fruit cups mimic the classic Halloween candy, making them a delightful addition to any party spread. With layers of brightly colored fruits, they are not only visually appealing but also offer a burst of fresh flavor that will please guests of all ages.
Ingredients
Quantity
Pineapple chunks
1 cup
Mandarin orange segments
1 cup
Banana, sliced
1 large
Whipped cream (or yogurt)
1 cup
Black olives, sliced (for decoration)
1/4 cup
Clear plastic cups
8 cups
Cooking Instructions:
1. Prepare the Fruits: Start by washing and cutting the fruits. Drain the canned mandarin oranges and pineapple chunks if needed, and slice the banana into thin rounds.
2. Assemble the Layers:
Take clear plastic cups and begin layering the fruit. First, add a layer of pineapple chunks at the bottom of each cup, filling them about one-third of the way up.
Next, layer the mandarin orange segments on top of the pineapple. This should fill the cups to about two-thirds full.
Finally, add a layer of banana slices on top of the mandarin oranges, filling the cups to the brim.
3. Add the Whipped Cream: Scoop a generous dollop of whipped cream (or yogurt) on top of the banana layer in each cup. This represents the white section of the candy corn.
4. Decorate: For a fun finishing touch, place a few slices of black olives on top of the whipped cream to resemble the “eyes” of the Halloween theme.
5. Chill Before Serving: Place the filled cups in the refrigerator for about 30 minutes before serving. This will help keep the fruits fresh and cool.
6. Serve and Enjoy: Once chilled, serve the Candy Corn Fruit Cups at your Halloween gathering. They make for an eye-catching, healthy snack that can be enjoyed by children and adults alike!