Cheesy Ghost Puffs
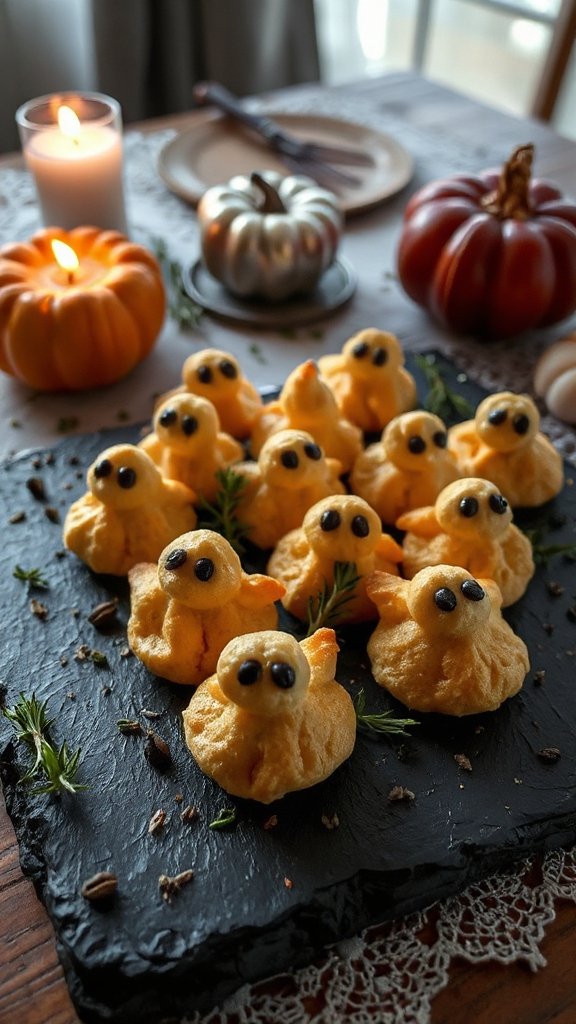
Cheesy Ghost Puffs are a delightful savory treat perfect for Halloween festivities. These puff pastries are shaped like little ghosts and packed with cheesy goodness, making them a hit for both kids and adults. Easy to make and fun to eat, they will add a whimsical touch to your Halloween spread.
| Ingredients | Quantity |
|---|---|
| Puff pastry | 1 sheet |
| Cream cheese | 4 oz (1/2 cup) |
| Shredded mozzarella | 1 cup |
| Garlic powder | 1/2 tsp |
| Salt | 1/4 tsp |
| Black olives | 4 slices |
| Egg (for egg wash) | 1 |
Cooking Instructions:
- Preheat the Oven: Preheat your oven to 400°F (200°C). Line a baking sheet with parchment paper to prevent sticking.
- Prepare the Filling: In a mixing bowl, combine the cream cheese, shredded mozzarella, garlic powder, and salt. Mix well until all ingredients are fully blended and creamy.
- Roll Out the Puff Pastry: On a lightly floured surface, roll out the puff pastry sheet to smooth it out. Use a knife or pizza cutter to cut the pastry into ghost shapes, using a ghost cookie cutter or by hand.
- Fill the Ghosts: Take half of the pastry cutouts and place about a tablespoon of the cheese mixture in the center of each one. Leave some space around the edges to seal the puffs.
- Seal the Ghosts: Place the other half of the ghost-shaped pastry cutouts on top of the filled ones. Press the edges together gently with a fork to seal them securely. This will also create a decorative edge.
- Create Ghostly Features: Cut the black olives into small circles to use as eyes. Place two olive pieces on each ghost puff before baking to give them a spooky look.
- Brush with Egg Wash: Beat the egg in a small bowl and brush it over the tops of the puff pastries using a pastry brush. This will give them a golden color when baked.
- Bake the Ghost Puffs: Place the baking sheet in the preheated oven and bake for 15-20 minutes, or until the puffs are golden brown and puffed up.
- Cool and Serve: Once done, remove the ghost puffs from the oven and let them cool for a few minutes. Serve warm and enjoy the savory treats with family and friends.
Spooky Stuffed Mushrooms
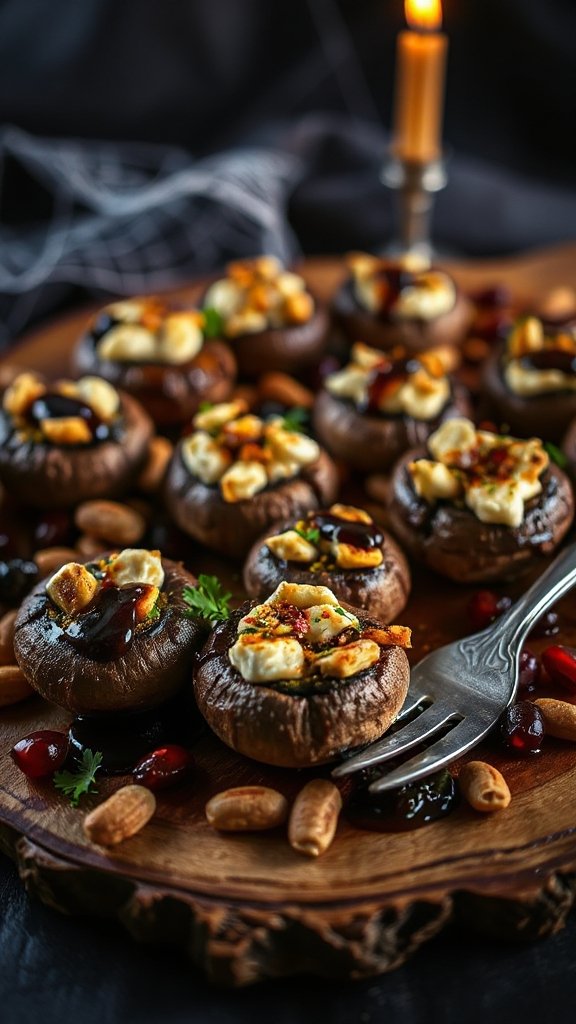
Spooky Stuffed Mushrooms are a fun and flavorful appetizer that will add an exciting touch to your Halloween gathering. These bite-sized delights are filled with a savory mixture of cream cheese, herbs, and breadcrumbs, giving them a hauntingly good taste that will leave everyone wanting more. Perfectly poppable and easy to make, they are a must-have on your festive table.
| Ingredients | Quantity |
|---|---|
| Large button mushrooms | 24 |
| Cream cheese | 8 oz (1 cup) |
| Garlic, minced | 2 cloves |
| Fresh parsley, chopped | 2 tbsp |
| Bread crumbs | 1/2 cup |
| Grated Parmesan cheese | 1/4 cup |
| Salt | 1/4 tsp |
| Black pepper | 1/4 tsp |
| Olive oil | 2 tbsp |
| Paprika | 1/2 tsp (for garnish) |
Cooking Instructions:
- Preheat the Oven: Preheat your oven to 375°F (190°C). Prepare a baking sheet by lightly greasing it with a bit of olive oil or lining it with parchment paper.
- Prepare the Mushrooms: Gently clean the mushrooms with a damp paper towel to remove any dirt. Carefully remove the stems from the mushrooms and set the caps aside. Finely chop the stems for the filling.
- Make the Filling: In a medium skillet, heat 1 tablespoon of olive oil over medium heat. Add the chopped mushroom stems and minced garlic to the skillet. Sauté for about 3-4 minutes or until the mixture is softened and fragrant.
- Combine Ingredients: In a mixing bowl, add the sautéed mushroom mixture, cream cheese, chopped parsley, breadcrumbs, grated Parmesan cheese, salt, and black pepper. Stir until all ingredients are well combined and the mixture is creamy.
- Stuff the Mushroom Caps: Using a teaspoon or your fingers, carefully fill each mushroom cap with the prepared filling. Be generous, allowing the filling to mound slightly on top of each cap.
- Drizzle with Olive Oil: Arrange the stuffed mushrooms on the prepared baking sheet. Drizzle the remaining tablespoon of olive oil over the tops of the stuffed mushrooms for extra flavor and to help them brown while baking.
- Bake the Mushrooms: Place the baking sheet in the preheated oven and bake for 20-25 minutes, or until the mushrooms are tender and the filling is golden brown on top.
- Garnish and Serve: Once baked, remove the mushrooms from the oven and let them cool slightly. Sprinkle with a pinch of paprika for a festive touch. Serve warm as a delightful Halloween appetizer, letting your guests enjoy these spooky yet scrumptious treats!
Mini Mummy Meatballs
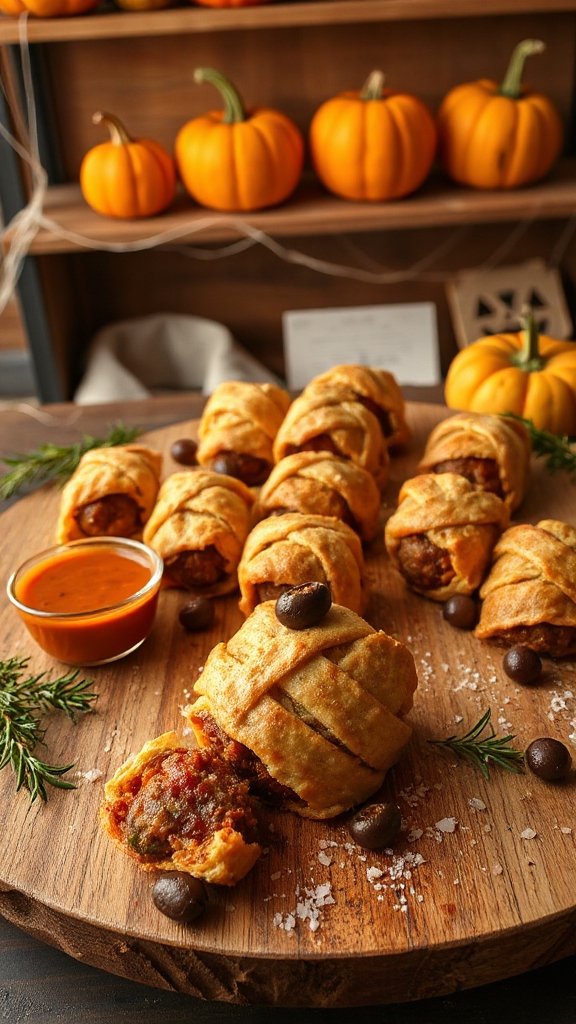
Mini Mummy Meatballs are a fun and festive twist on traditional meatballs, perfect for Halloween parties. Wrapped in strips of dough to resemble mummies, these delightful bites are packed with flavor and make for a spooky, yet delicious, appetizer that will impress your guests. Serve them with a side of marinara sauce for dipping to complete the dish!
| Ingredients | Quantity |
|---|---|
| Ground beef | 1 lb (450 g) |
| Breadcrumbs | 1/2 cup (60 g) |
| Grated Parmesan cheese | 1/4 cup (30 g) |
| Egg | 1 |
| Garlic powder | 1 tsp |
| Onion powder | 1 tsp |
| Salt | 1/2 tsp |
| Black pepper | 1/4 tsp |
| Refrigerated crescent roll dough | 1 tube |
| Olive oil | 1 tbsp |
| Black olives (for eyes) | 12 (sliced) |
| Marinara sauce (for dipping) | as desired |
Cooking Instructions:
- Preheat the Oven: Begin by preheating your oven to 375°F (190°C). Line a baking sheet with parchment paper to prevent sticking.
- Prepare the Meatball Mixture: In a large mixing bowl, combine ground beef, breadcrumbs, grated Parmesan cheese, egg, garlic powder, onion powder, salt, and black pepper. Mix well using your hands until all ingredients are thoroughly combined.
- Form the Meatballs: Using your hands, shape the meat mixture into small meatballs, about 1 inch in diameter. Place the meatballs on the prepared baking sheet, spacing them about an inch apart.
- Bake the Meatballs: Drizzle the olive oil over the meatballs. Place the baking sheet in the oven and bake for 15-20 minutes, or until the meatballs are browned and cooked through.
- Prepare the Mummy Wrapping: While the meatballs are baking, unroll the crescent roll dough. Cut the dough into thin strips, approximately 1/2 inch wide.
- Wrap the Meatballs: Once the meatballs are cooked, remove them from the oven. Wrap the strips of crescent dough around each meatball in a messy manner to create a mummy look, leaving a small section for the “eyes.”
- Bake Again: Return the wrapped meatballs to the oven and bake for an additional 10-15 minutes, or until the dough is golden brown.
- Add the Mummy Eyes: When the mini mummy meatballs are done baking, remove them from the oven and let them cool for a few minutes. Press a slice of black olive into each meatball to create spooky eyes.
- Serve: Arrange the mini mummy meatballs on a platter and serve with marinara sauce on the side for dipping. Enjoy this deliciously spooky appetizer!
Pumpkin Spice Sausage Rolls
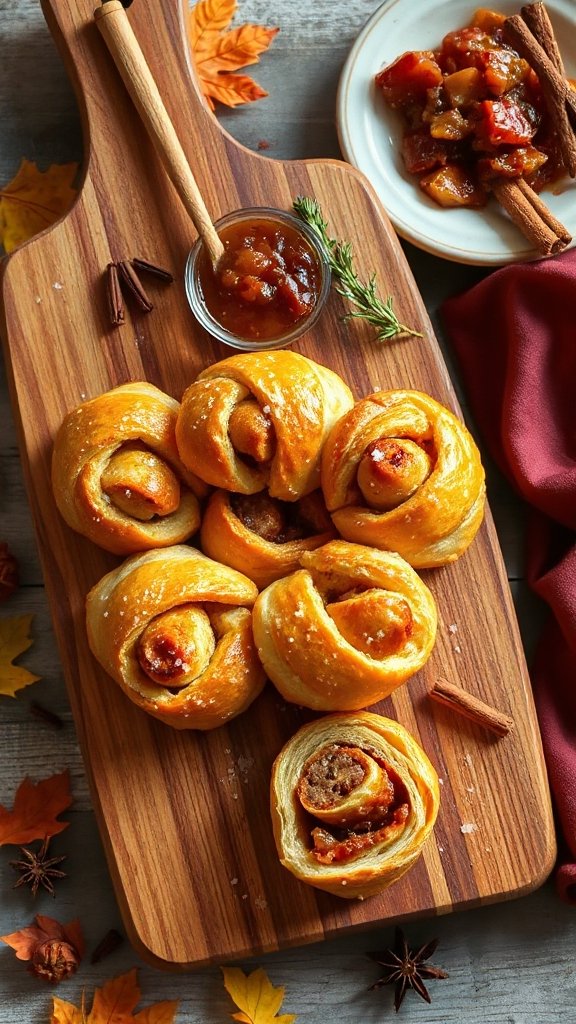
Pumpkin Spice Sausage Rolls are a delightful fall-inspired treat that combines the flavors of savory sausage with warm, aromatic spices. These mini rolls are perfect for Halloween gatherings or any autumn celebration, offering a unique twist on traditional sausage rolls. The delicious pumpkin spice filling is wrapped in flaky pastry, making them an irresistible snack that will warm your guests’ hearts.
| Ingredients | Quantity |
|---|---|
| Ground sausage | 1 lb (450 g) |
| Cooked pumpkin puree | 1/2 cup (120 g) |
| Cream cheese | 4 oz (115 g) |
| Pumpkin pie spice | 1 tsp |
| Garlic powder | 1/2 tsp |
| Salt | 1/2 tsp |
| Black pepper | 1/4 tsp |
| Puff pastry sheets | 2 sheets |
| Egg (for egg wash) | 1 |
| Sesame seeds | 1 tbsp (optional) |
Cooking Instructions:
- Preheat the Oven: Begin by preheating your oven to 400°F (200°C). Line a baking sheet with parchment paper.
- Prepare the Filling: In a large bowl, combine the ground sausage, cooked pumpkin puree, cream cheese, pumpkin pie spice, garlic powder, salt, and black pepper. Mix thoroughly until all ingredients are well incorporated.
- Roll Out the Pastry: On a lightly floured surface, unfold the puff pastry sheets and roll each sheet out to smoothen creases. Cut each sheet into rectangles, approximately 4 inches by 6 inches.
- Fill the Pastry: Spoon a portion of the sausage mixture onto the center of each pastry rectangle, leaving some space along the edges. Aim for about 2 tablespoons of filling per roll.
- Seal the Rolls: Fold the pastry over the filling to create a pocket. Press the edges together firmly to seal. You can use a fork to crimp the edges for an extra decorative touch.
- Brush with Egg Wash: In a small bowl, beat the egg and brush it over the top of each sealed roll. This will give them a beautiful golden-brown color as they bake. Optionally, sprinkle sesame seeds on top for added texture.
- Bake the Rolls: Place the prepared sausage rolls on the lined baking sheet. Bake in the preheated oven for 15-20 minutes, or until the pastry is golden and flaky.
- Cool and Serve: Once baked, remove from the oven and allow to cool slightly before serving. These Pumpkin Spice Sausage Rolls are best enjoyed warm and can be paired with a sweet dipping sauce if desired. Enjoy your festive treat!
Wickedly Delicious Spinach Feta Bites

Wickedly Delicious Spinach Feta Bites are the perfect savory treat for your Halloween festivities. These bite-sized pastries combine the freshness of spinach with the rich, tangy flavor of feta cheese, all enveloped in a flaky pastry shell. They make for a delightful appetizer or snack that guests will love to indulge in during spooky celebrations.
| Ingredients | Quantity |
|---|---|
| Fresh spinach | 1 lb (450 g) |
| Feta cheese | 4 oz (115 g) |
| Cream cheese | 4 oz (115 g) |
| Garlic, minced | 2 cloves |
| Onion, chopped | 1/2 medium |
| Puff pastry sheets | 2 sheets |
| Olive oil | 1 tbsp |
| Egg (for egg wash) | 1 |
| Salt | 1/2 tsp |
| Black pepper | 1/4 tsp |
| Nutmeg | 1/4 tsp (optional) |
Cooking Instructions:
- Preheat the Oven: Start by preheating your oven to 375°F (190°C). Line a baking sheet with parchment paper to prevent sticking.
- Sauté the Vegetables: In a skillet, heat the olive oil over medium heat. Add the chopped onion and minced garlic, and sauté until the onion is translucent, about 3-4 minutes.
- Add Spinach: Add the fresh spinach to the skillet. Cook until the spinach has wilted down, stirring occasionally, for about 2-3 minutes. Remove from heat and let it cool slightly.
- Mix the Filling: In a large bowl, combine the sautéed spinach mixture with the feta cheese, cream cheese, salt, black pepper, and nutmeg (if using). Mix until everything is well incorporated.
- Roll Out the Pastry: On a lightly floured surface, unfold the puff pastry sheets and roll each sheet out to smooth out any creases. Cut the pastry into squares, approximately 4 inches by 4 inches.
- Fill the Pastry: Spoon a heaping tablespoon of the spinach-feta mixture into the center of each pastry square.
- Seal the Bites: Fold the pastry over the filling to create a triangle or rectangle, depending on your preference. Press the edges together firmly to seal. You can use a fork to crimp the edges for a decorative touch.
- Brush with Egg Wash: In a small bowl, beat the egg and brush it over the tops of each filled pastry. This will help them achieve a golden color when baked.
- Bake: Arrange the sealed spinach feta bites on the prepared baking sheet. Bake in the preheated oven for 15-20 minutes, or until they are golden brown and flaky.
- Cool and Serve: Once baked, remove the bites from the oven and allow them to cool slightly before serving. Enjoy your Wickedly Delicious Spinach Feta Bites at your Halloween gathering!
Creepy Crawly Crab Cakes
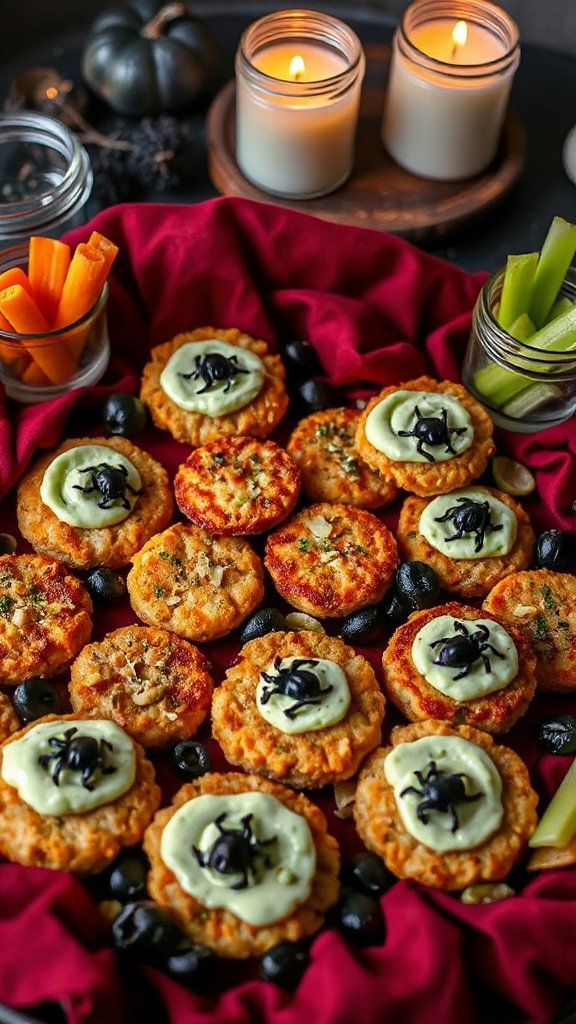
Creepy Crawly Crab Cakes are a fun and flavorful dish perfect for Halloween gatherings. These delicious crab cakes combine lump crab meat with savory spices and herbs, all pan-fried to golden perfection. Serve them with a zesty dipping sauce for a bewitchingly good appetizer that will impress your guests and add a spooky twist to your Halloween menu.
| Ingredients | Quantity |
|---|---|
| Lump crab meat | 1 lb (450 g) |
| Breadcrumbs | 1 cup |
| Mayonnaise | 1/4 cup |
| Dijon mustard | 1 tbsp |
| Worcestershire sauce | 1 tsp |
| Green onions, chopped | 2 |
| Garlic powder | 1 tsp |
| Old Bay seasoning | 1 tsp |
| Egg | 1 |
| Salt | 1/2 tsp |
| Black pepper | 1/4 tsp |
| Olive oil (for frying) | 2-3 tbsp |
Cooking Instructions:
- Prepare the Mixture: In a large mixing bowl, combine the lump crab meat, breadcrumbs, mayonnaise, Dijon mustard, Worcestershire sauce, chopped green onions, garlic powder, Old Bay seasoning, and salt and pepper. Carefully fold the mixture together until all ingredients are evenly combined, being cautious not to break up the crab meat too much.
- Bind the Mixture: Crack the egg into the bowl and mix gently until everything is coated and the mixture holds together. If the mixture feels too wet, you can add a little more breadcrumbs until it is workable.
- Form the Patties: Use your hands to form the crab mixture into small patties, about 2-3 inches in diameter and roughly 1 inch thick. Make sure to compact them well so they hold together during cooking.
- Chill the Patties: Place the formed crab cakes on a parchment-lined baking sheet and refrigerate for at least 30 minutes. This step helps them firm up and makes frying easier.
- Heat the Oil: In a large skillet, add enough olive oil to coat the bottom of the pan and heat over medium heat until the oil shimmers but is not smoking.
- Fry the Crab Cakes: Carefully place the chilled crab cakes into the hot oil, working in batches if necessary to avoid overcrowding the pan. Cook for about 4-5 minutes on each side, or until they are golden brown and crispy. Use a spatula to gently flip them midway through.
- Drain Excess Oil: Once cooked, transfer the crab cakes to a paper towel-lined plate to drain off any excess oil.
- Serve: Serve your Creepy Crawly Crab Cakes immediately with your favorite dipping sauce, such as tartar sauce or a spicy remoulade, and garnish with some fresh herbs if desired. Enjoy the spooky treat!
Fiendish Flatbread Pizza Bites

Fiendish Flatbread Pizza Bites are delightful mini pizzas that are an excellent addition to your Halloween festivities. These bite-sized treats are easy to prepare and can be topped with a variety of spooky ingredients, making them both fun and delicious. Featuring a crispy flatbread base, these pizza bites will thrill partygoers of all ages and keep the holiday spirit alive.
| Ingredients | Quantity |
|---|---|
| Flatbread (or naan) | 4 pieces |
| Pizza sauce | 1 cup |
| Shredded mozzarella cheese | 2 cups |
| Pepperoni slices | 1 cup (or more, to taste) |
| Black olives, sliced | 1/2 cup |
| Bell pepper, diced | 1/2 cup |
| Italian seasoning | 1 tsp |
| Salt | to taste |
| Olive oil | 1 tbsp |
| Fresh basil (optional, for garnish) | for garnish |
Cooking Instructions:
- Preheat the Oven: Preheat your oven to 400°F (200°C) so it’s hot and ready for baking your flatbread pizza bites.
- Prepare the Flatbread: Lay out the flatbreads or naan on a large baking sheet. Brush each piece lightly with olive oil to enhance the flavor and crispiness.
- Add Pizza Sauce: Spread a generous spoonful of pizza sauce over each flatbread, leaving a small border around the edges for a crust.
- Layer the Cheese: Sprinkle shredded mozzarella evenly over the sauce on each flatbread, ensuring good coverage for a gooey, cheesy goodness.
- Top with Toppings: Add your toppings! Place pepperoni slices, diced bell peppers, and sliced black olives on top of the cheese. Feel free to get creative with your layout to make them look extra spooky.
- Season: Sprinkle Italian seasoning and a pinch of salt over the assembled flatbreads to enhance their flavor.
- Bake: Carefully place the baking sheet in the preheated oven. Bake for about 10-15 minutes, or until the cheese is melted and bubbly and the edges of the flatbreads are golden brown.
- Garnish and Serve: Once removed from the oven, allow the flatbread pizza bites to cool for a couple of minutes. Optionally, garnish with fresh basil leaves for a pop of color and flavor. Slice into bite-sized pieces and serve warm.
Enjoy your Fiendish Flatbread Pizza Bites at your Halloween gathering—they’re sure to vanish quickly!
Halloween Cheddar and Chive Biscuits
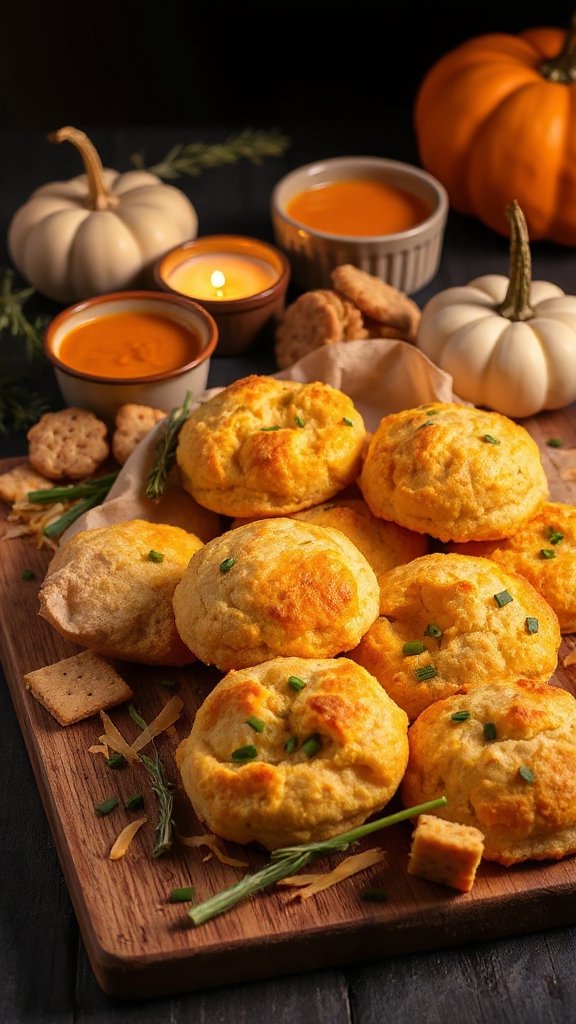
Halloween Cheddar and Chive Biscuits are the perfect savory treat to add a festive twist to your Halloween celebrations. These flaky, cheesy biscuits are infused with fresh chives and bring a delightful flavor to any spooky gathering. They can be served as appetizers or as a delicious accompaniment to your main dishes, making them a versatile addition to your Halloween menu.
| Ingredients | Quantity |
|---|---|
| All-purpose flour | 2 cups |
| Baking powder | 1 tbsp |
| Salt | 1 tsp |
| Unsalted butter, cold | 1/2 cup (1 stick) |
| Shredded sharp cheddar cheese | 1 cup |
| Fresh chives, chopped | 1/4 cup |
| Milk | 3/4 cup |
| Black pepper | 1/2 tsp |
Cooking Instructions:
- Preheat the Oven: Begin by preheating your oven to 425°F (220°C) to ascertain it’s hot and ready for the biscuits.
- Mix Dry Ingredients: In a large mixing bowl, combine the all-purpose flour, baking powder, and salt. Stir until well mixed to guarantee an even distribution of the leavening agent.
- Add Butter: Cut the cold unsalted butter into small cubes and add it to the flour mixture. Use a pastry cutter or your fingers to mix the butter into the flour until the mixture resembles coarse crumbs.
- Incorporate Cheese and Chives: Add the shredded sharp cheddar cheese and chopped fresh chives to the mixture. Toss gently to combine, making sure the cheese and chives are evenly distributed.
- Add Milk: Pour in the milk and black pepper. Stir the mixture gently until just combined. Be careful not to overmix, as this can lead to tough biscuits.
- Shape the Biscuits: Turn the dough out onto a lightly floured surface. With floured hands, gently pat the dough into a 1-inch thick rectangle. Use a biscuit cutter or a knife to cut out biscuits in your desired shape (you can use pumpkin or ghost-shaped cutters for a fun Halloween touch).
- Transfer to Baking Sheet: Place the cut biscuits onto a baking sheet lined with parchment paper, leaving space between each biscuit for expansion while baking.
- Bake: Place the baking sheet in the preheated oven and bake for 12-15 minutes, or until the biscuits are golden brown on top.
- Cool and Serve: Once baked, remove the biscuits from the oven and let them cool on the baking sheet for a few minutes. Serve warm for the best flavor and softness.
These Halloween Cheddar and Chive Biscuits are sure to be a hit at your Halloween party, offering both a festive appearance and a savory taste! Enjoy!
Macabre Meat and Cheese Hand Pies
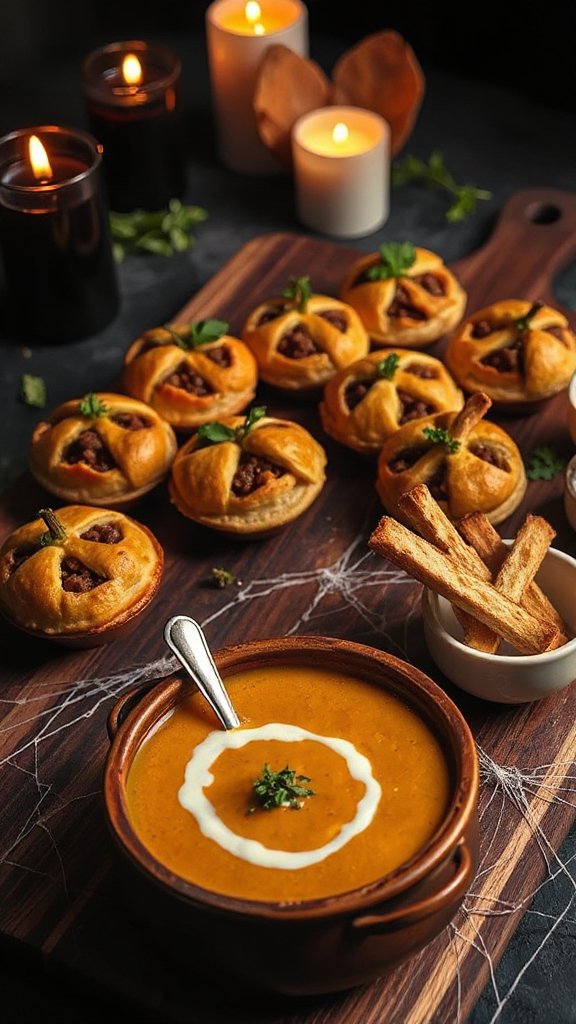
Macabre Meat and Cheese Hand Pies are a deliciously spooky addition to any Halloween gathering. These savory hand pies are filled with a mixture of seasoned ground meat and gooey cheese, all encased in a flaky crust. Perfect for serving as appetizers or party snacks, these delightful treats are sure to please both kids and adults alike.
| Ingredients | Quantity |
|---|---|
| All-purpose flour | 2 1/2 cups |
| Unsalted butter, cold | 1 cup (2 sticks) |
| Salt | 1/2 tsp |
| Ice water | 1/4 cup |
| Ground beef or turkey | 1 pound |
| Onion, finely chopped | 1 |
| Garlic, minced | 2 cloves |
| Worcestershire sauce | 1 tbsp |
| Salt and pepper | To taste |
| Cheddar cheese, shredded | 1 cup |
| Egg (for egg wash) | 1 |
Cooking Instructions:
- Make the Pastry Dough: In a large mixing bowl, combine the all-purpose flour and salt. Cut the cold unsalted butter into small cubes and add it to the flour mixture. Using a pastry cutter or your fingers, mix until the mixture resembles coarse crumbs. Gradually add the ice water, one tablespoon at a time, until the dough comes together. Divide the dough into two balls, flatten them into discs, wrap them in plastic wrap, and refrigerate for at least 30 minutes.
- Prepare the Filling: While the dough is chilling, heat a skillet over medium heat. Add the chopped onion and minced garlic, cooking until the onion is soft and translucent, about 3-4 minutes. Add the ground beef or turkey to the skillet, breaking it up with a spoon. Cook until browned and no longer pink, about 5-7 minutes. Stir in the Worcestershire sauce, and season with salt and pepper to taste. Remove from heat and stir in the shredded cheddar cheese until well combined.
- Preheat the Oven: Preheat your oven to 400°F (200°C) and line a baking sheet with parchment paper.
- Roll Out the Dough: On a lightly floured surface, roll out one of the chilled dough discs to about 1/4-inch thickness. Use a round cutter (approximately 4 inches in diameter) to cut out circles from the dough. Repeat with the second disc of dough.
- Assemble the Hand Pies: Place a generous spoonful of the meat and cheese filling in the center of each dough circle. Be careful not to overfill. Fold the dough over to form a half-moon shape. Press the edges together, then use a fork to crimp and seal the edges securely.
- Apply Egg Wash: In a small bowl, whisk the egg. Brush the tops of each hand pie with the egg wash for a golden finish.
- Bake the Hand Pies: Arrange the assembled hand pies on the prepared baking sheet, leaving space between each one. Bake in the preheated oven for 20-25 minutes, or until golden brown and crispy.
- Cool and Serve: Once baked, remove the hand pies from the oven and let them cool on a wire rack for a few minutes. Serve warm, and enjoy your Macabre Meat and Cheese Hand Pies at your Halloween festivities!
Sinister Sweet Potato and Black Bean Cups
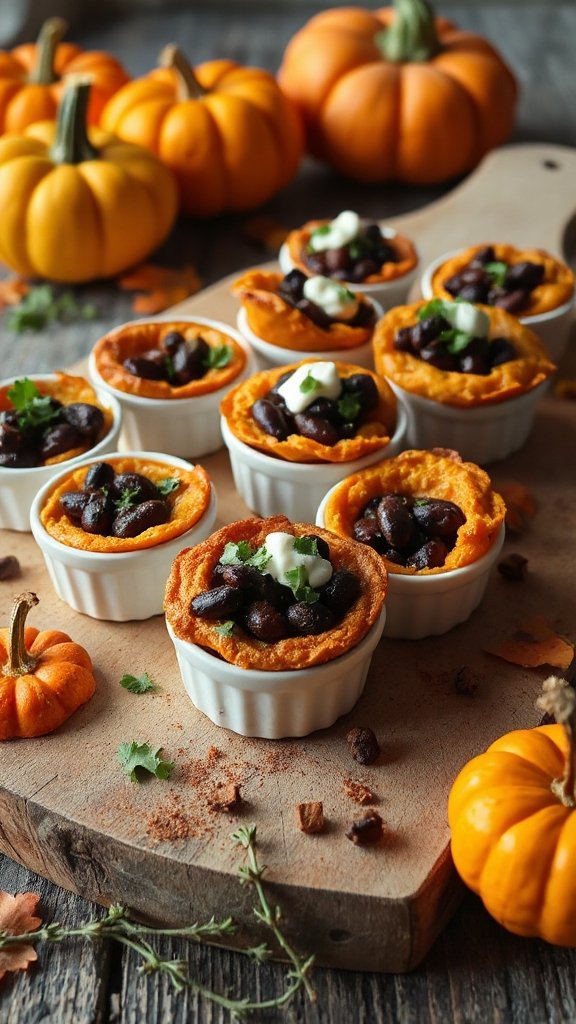
Sinister Sweet Potato and Black Bean Cups are a whimsical and nutritious Halloween treat that adds a pop of color and flavor to your festive spread. These bite-sized cups made from sweet potato and black bean filling are easy to prepare, making them a great option for a spooky gathering. Topped with cheese and served in crunchy tortilla cups, they offer a delightful combination of textures and tastes.
| Ingredients | Quantity |
|---|---|
| Sweet potatoes | 2 medium |
| Olive oil | 2 tbsp |
| Black beans, drained and rinsed | 1 can (15 oz) |
| Cumin | 1 tsp |
| Chili powder | 1/2 tsp |
| Salt and pepper | To taste |
| Shredded cheese (cheddar or Mexican blend) | 1 cup |
| Corn tortillas | 8 |
| Lime, for serving | 1 (optional) |
Cooking Instructions:
- Preheat the Oven: Preheat your oven to 400°F (200°C).
- Prepare Sweet Potatoes: Peel the sweet potatoes and cut them into small cubes. Place them on a baking sheet and toss with olive oil, salt, and pepper. Spread them out in a single layer and roast for about 25-30 minutes or until tender and lightly caramelized, flipping halfway through.
- Mash Sweet Potatoes: Once the sweet potatoes are cooked, remove them from the oven and allow them to cool slightly. Transfer them to a mixing bowl and mash them with a fork until smooth.
- Combine Filling Ingredients: To the mashed sweet potatoes, add the drained black beans, cumin, chili powder, and additional salt and pepper to taste. Mix until all ingredients are well combined.
- Prepare Tortilla Cups: While the filling cools, make the tortilla cups. Use a muffin tin to shape the tortillas. Gently press each corn tortilla into the muffin tin cups to create a bowl shape. You can cut the tortillas into smaller pieces if needed for a better fit. Bake the tortilla cups in the preheated oven for about 10-12 minutes or until they are crispy and golden brown.
- Fill the Tortilla Cups: Once the tortilla cups are baked, remove them from the muffin tin and place them on a serving platter. Spoon the sweet potato and black bean filling into each cup, generously filling them.
- Add Cheese: Top each filled tortilla cup with a sprinkle of shredded cheese.
- Final Bake: Return the filled cups to the oven and bake for an additional 5-7 minutes, or until the cheese is melted and bubbly.
- Serve: Remove from the oven and let cool slightly. Serve warm, with lime wedges on the side for an extra zesty kick. Enjoy these spooky yet delicious treats at your Halloween gathering!
Haunted Harvest Veggie Tartlets
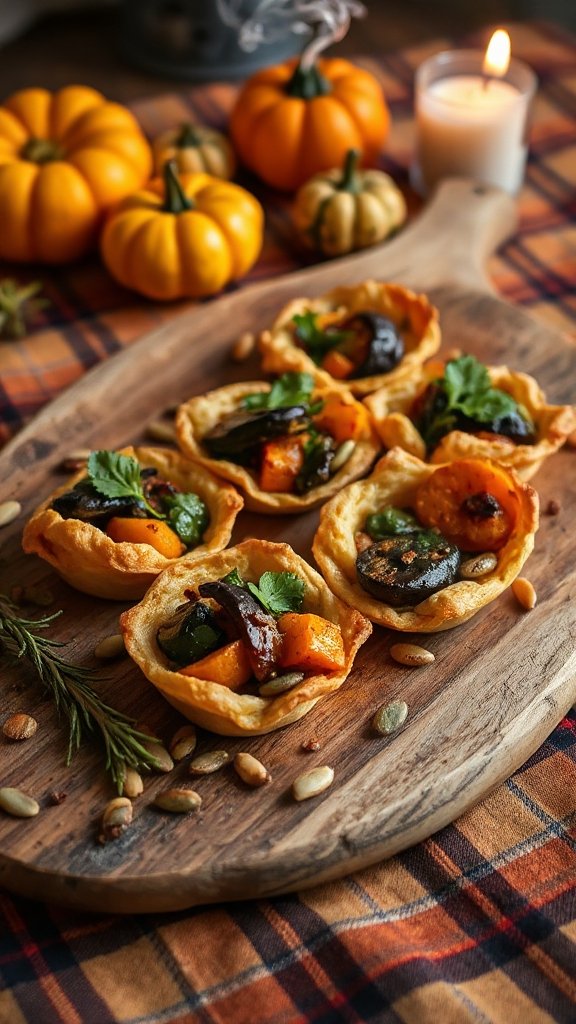
Haunted Harvest Veggie Tartlets are a perfect way to embrace the season with colorful vegetables and herbs nestled in a flaky pastry shell. These mini tarts are not only spooky in presentation, but they are also packed with flavor and nutrition, making them an ideal finger food for any Halloween gathering. With their vibrant filling and deliciously crispy base, these tartlets will delight both kids and adults alike.
| Ingredients | Quantity |
|---|---|
| Puff pastry sheets | 1 package (17.3 oz) |
| Olive oil | 2 tbsp |
| Garlic, minced | 2 cloves |
| Zucchini, diced | 1 medium |
| Red bell pepper, diced | 1 medium |
| Mushrooms, diced | 1 cup |
| Spinach, packed | 2 cups |
| Feta cheese, crumbled | 1/2 cup |
| Eggs | 2 large |
| Heavy cream | 1/2 cup |
| Salt and pepper | To taste |
| Fresh thyme, chopped | 1 tbsp |
| Pumpkin seeds (for garnish) | Optional |
Cooking Instructions:
- Preheat the Oven: Preheat your oven to 400°F (200°C).
- Prepare Puff Pastry: On a floured surface, roll out the puff pastry sheets to make them slightly thinner. Cut the pastry into 3-inch squares or circles, depending on your tartlet mold. Press the pastry into a greased muffin tin, making sure to cover the bottom and sides.
- Sauté Vegetables: In a skillet, heat olive oil over medium heat. Add minced garlic and sauté until fragrant, about 1 minute. Then add the diced zucchini, red bell pepper, and mushrooms. Cook for about 5-7 minutes or until the vegetables are tender. Stir in the spinach and cook until wilted.
- Prepare Filling: In a mixing bowl, whisk together the eggs, heavy cream, salt, pepper, and chopped thyme. Stir in the sautéed vegetables and crumble in the feta cheese. Mix until everything is well combined.
- Fill the Tartlets: Spoon the vegetable and cheese mixture into each puff pastry shell, filling them about three-quarters full. Be careful not to overfill them to prevent spilling over while baking.
- Bake Tartlets: Place the muffin tin in the preheated oven and bake for about 18-20 minutes, or until the pastry is golden brown and the filling is set.
- Cool and Garnish: Remove the tartlets from the oven and let them cool in the tin for a few minutes before transferring them to a serving platter. Optionally, sprinkle pumpkin seeds on top for a festive touch.
- Serve: These Haunted Harvest Veggie Tartlets can be served warm or at room temperature, making them a versatile option for your Halloween festivities. Enjoy!
