11 Savory Halloween Ideas When The Dessert Table Is Full
Creepy Cauliflower Witch’s Fingers
Creepy Cauliflower Witch’s Fingers are an eerie yet delicious Halloween treat that will enchant both kids and adults at your next spooky gathering. These finger-shaped cauliflower bites are seasoned to perfection, baked until crispy, and can be dipped in a range of delicious sauces. Not only are they easy to make, but they also provide a healthier option for Halloween snacking!
Preheat the Oven: Preheat your oven to 425°F (220°C). Line a baking sheet with parchment paper for easy cleanup.
Prepare the Cauliflower: Wash the cauliflower head thoroughly and pat it dry with a towel. Cut the cauliflower into separate florets, being certain each piece is roughly the same size for even cooking.
Create the Seasoning Mixture: In a large mixing bowl, combine the olive oil, garlic powder, onion powder, paprika, salt, and black pepper. Stir the mixture until well combined.
Coat the Cauliflower: Add the cauliflower florets to the bowl containing the seasoning mixture. Toss the florets in the seasoning until they are evenly coated with the oil and spices.
Shape the Fingers: Place the seasoned cauliflower florets on the lined baking sheet. For each floret, slightly shape the ends to resemble fingers by squeezing the base and creating a taper.
Add the Almond “Nails”: Press an almond slice into the tip of each cauliflower floret to represent the fingernail. This adds an extra creepy element to your dishes!
Bake: Place the baking sheet into the preheated oven and bake for about 25-30 minutes, or until the cauliflower is golden brown and crispy. Halfway through baking, flip the florets to make certain they cook evenly.
Serve: Once baked, remove the witch’s fingers from the oven and let them cool slightly before serving. Arrange them on a platter and garnish with fresh parsley if desired.
Enjoy: Serve with your favorite dips, such as ranch dressing or marinara sauce. Enjoy this spooky yet healthy Halloween snack!
2. Mummy Meatballs
Mummy Meatballs are a fun and spooky twist on a classic dish, perfect for Halloween parties or family gatherings. These adorable meatballs are wrapped in strips of crescent dough to resemble mummies, with small dots of mustard or sauce for the eyes. They’re easy to make and delicious, making them a hit among both kids and adults!
Preheat the Oven: Preheat your oven to 375°F (190°C). Line a baking sheet with parchment paper for easy cleanup.
Make the Meatball Mixture: In a large mixing bowl, combine the ground beef, breadcrumbs, egg, Parmesan cheese, garlic powder, onion powder, salt, and black pepper. Use your hands or a spoon to mix everything until well incorporated.
Form the Meatballs: Roll the meat mixture into small balls, about 1 inch in diameter. Place the meatballs on the prepared baking sheet, spacing them about an inch apart.
Prepare the Crescent Dough: While the meatballs are baking, unroll the crescent dough and separate it into triangles. Using a knife or pizza cutter, cut each triangle into thin strips, approximately 1/4 inch wide.
Wrap the Meatballs: Once the meatballs have baked for about 10 minutes, remove them from the oven. Carefully wrap each meatball with the strips of crescent dough, overlapping them slightly to create a mummy-like appearance. Leave a small space at the top for the eyes.
Return to the Oven: Place the wrapped meatballs back in the oven and bake for an additional 10-15 minutes, or until the dough is golden brown and the meatballs are cooked through (internal temperature should reach 160°F or 70°C).
Add the Eyes: Once baked, remove the mummy meatballs from the oven and let them cool for a few minutes. Using a toothpick or small piping bag, add dots of mustard or marinara sauce in the space you left at the top for the eyes.
Serve: Arrange the mummy meatballs on a platter and serve them warm. They make a wonderful party appetizer alongside your favorite dipping sauce.
Enjoy: Delight in these spooky yet savory treats with family and guests at your Halloween gathering!
3. Pumpkin Patch Hummus
Pumpkin Patch Hummus is a fun and festive twist on traditional hummus, perfect for Halloween gatherings or to enjoy as a seasonal snack. This creamy, savory dip incorporates pumpkin puree and warm spices, giving it a seasonal flair while staying true to the classic flavor profile of hummus. Serve it with fresh veggies, pita chips, or crackers for a delightful party appetizer.
Prepare Ingredients: Gather all the ingredients and have them ready for blending. Drain and rinse the canned chickpeas under cold water to remove excess sodium.
Blend Until Smooth: Start the food processor and blend the mixture on high speed until it becomes smooth and creamy. If the hummus is too thick, gradually add water, one tablespoon at a time, until you’ve reached your desired consistency.
Taste and Adjust: Stop the blender and taste the hummus. Adjust the seasoning if necessary, adding more salt, lemon juice, or spices according to your preference.
Serve: Transfer the pumpkin patch hummus to a serving bowl. If desired, drizzle a little olive oil on top and sprinkle with pumpkin seeds for garnish.
Chill (optional): For the best flavor, refrigerate the hummus for about 30 minutes before serving. It allows the flavors to meld together.
Enjoy: Serve the hummus alongside fresh vegetables, pita chips, or crackers. Enjoy this seasonal and festive treat with family and friends!
4. Spooky Stuffed Peppers
Spooky Stuffed Peppers are a festive and fun dish that is perfect for Halloween celebrations. These colorful bell peppers are hollowed out and filled with a delicious mixture of ground meat, rice, and spices, then baked to perfection. Their unique look, resembling a monster’s face, makes them an exciting addition to any Halloween menu!
Preheat Oven: Begin by preheating your oven to 375°F (190°C).
Prepare Peppers: Wash the bell peppers and slice off the tops (around the stem) to create a “lid.” Remove the seeds and membranes from inside the peppers and set them aside.
Cook Meat Mixture: In a large skillet, heat the olive oil over medium heat. Add the chopped onion and minced garlic, sautéing until they are fragrant and softened, about 3-4 minutes.
Add Meat and Seasoning: Add the ground beef or turkey to the skillet. Break it apart with a spoon and cook until browned, about 5-7 minutes. Drain any excess fat, if necessary. Stir in the cooked rice, tomato sauce, Italian seasoning, salt, and black pepper. Mix well and let it simmer for an additional 5 minutes.
Stuff Peppers: Spoon the meat and rice mixture into each hollowed-out pepper, packing it in gently. If desired, sprinkle shredded cheese on top of the filling.
Place in Baking Dish: Arrange the stuffed peppers upright in a baking dish. Pour a small amount of water (about 1/4 cup) into the bottom of the dish to help steam the peppers and keep them moist.
Bake: Cover the dish with aluminum foil to prevent the tops from burning, and bake in the preheated oven for 30 minutes.
Uncover and Finish Baking: After 30 minutes, remove the foil and bake for an additional 10-15 minutes, or until the peppers are tender and the tops are slightly golden.
Add Eyes: For a spooky touch, slice the black olives in half and place them on top of the cheesy filling to resemble eyes.
Serve and Enjoy: Carefully remove the peppers from the oven and let them cool slightly before serving. Enjoy these spooky creations at your Halloween gathering!
5. Eyeball Pasta Salad
Eyeball Pasta Salad is a fun and playful dish perfect for Halloween celebrations! This pasta salad features small meatballs that resemble eyeballs, nestled among colorful veggies and a tangy dressing, making it a delightful addition to a spooky buffet or potluck. Kids and adults alike will be amused by the ghoulish appearance and delicious flavors!
Cook Pasta: Begin by cooking the pasta according to the package instructions. Bring a large pot of salted water to a boil, add the pasta, and cook until al dente. Once cooked, drain the pasta and rinse it under cold water to cool it down. Drain again and set aside.
Prepare Meatballs: If you haven’t done so already, cook the meatballs according to your preferred method (baking, frying, or boiling) and allow them to cool. Once cooled, you can slice a small piece off each meatball to create a flat “eye” surface.
Mix Ingredients: In a large mixing bowl, combine the cooled pasta, halved cherry tomatoes, diced green bell pepper, and sliced black olives.
Add Dressing: Pour the ranch dressing over the pasta salad mixture. Sprinkle in the Italian seasoning, salt, and black pepper. Stir everything together gently until all the ingredients are evenly coated in the dressing.
Assemble Eyeballs: Take each meatball and place a halved cherry tomato on top, using a toothpick if necessary to secure it in place. These will represent the ‘eyeballs’.
Combine and Chill: Gently fold the eyeball meatballs into the pasta salad, being careful not to break them. Once combined, cover the salad with plastic wrap and refrigerate for at least 30 minutes to allow the flavors to meld together and the salad to chill.
Garnish and Serve: Prior to serving, sprinkle fresh parsley over the top for a pop of color. Serve the Eyeball Pasta Salad in a large bowl, ensuring everyone can see the creepy yet irresistible eyeballs peeking out from the colorful pasta mix!
Enjoy this spooky dish at your Halloween gathering and watch your guests delight in the creepy fun!
6. Ghostly Guacamole and Chips
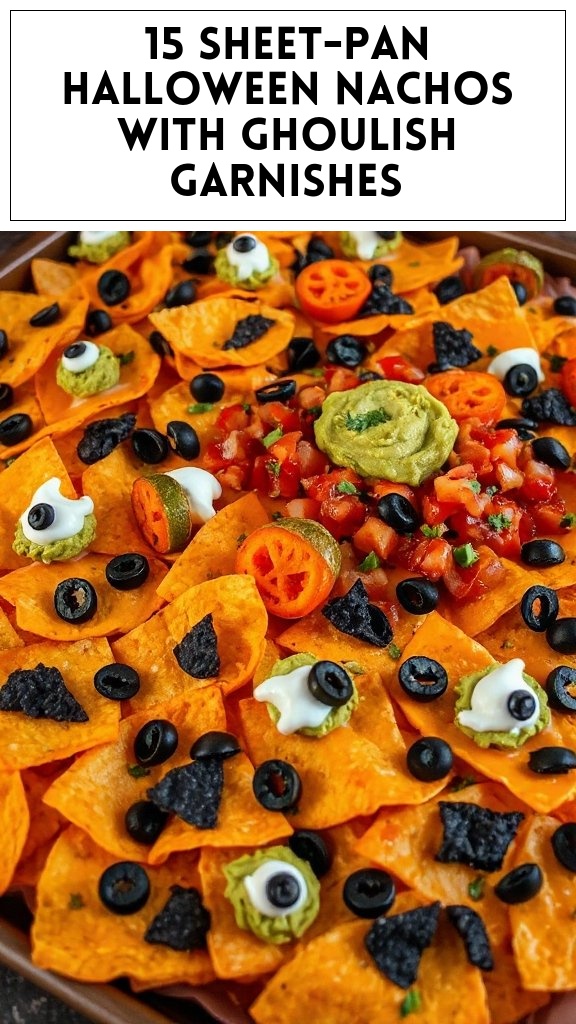
Ghostly Guacamole and Chips is a delightful twist on a classic appetizer, featuring creamy avocado guacamole shaped like spooky ghosts, served with crispy tortilla chips. This fun and tasty dish is perfect for Halloween parties, certain to impress both children and adults alike with its eerie aesthetic and wonderful flavors!
Ingredients
Quantity
Ripe avocados
2 medium
Lime juice
2 tablespoons
Garlic powder
1/2 teaspoon
Salt
1/4 teaspoon
Pepper
1/4 teaspoon
Red onion, finely chopped
1/4 cup
Fresh cilantro, chopped
1/4 cup
Tortilla chips
1 bag (about 10 oz)
Black olives (for eyes)
8-10 olives
Cooking Instructions:
Prepare Avocados: Start by slicing the ripe avocados in half. Remove the pits and scoop the flesh into a mixing bowl.
Mash Avocados: Using a fork or a potato masher, mash the avocado until it reaches your desired consistency—smooth or slightly chunky.
Add Flavorings: Pour in the lime juice to prevent the avocado from browning. Add garlic powder, salt, and pepper to taste. Mix everything well to confirm the flavors are evenly distributed.
Incorporate Vegetables: Gently fold in the finely chopped red onion and fresh cilantro into the mashe g avocado mixture, combining them evenly without over-mashing.
Shape Ghosts: Scoop out spoonfuls of the guacamole mixture and shape them into ghost-like figures on a serving platter. Use your hands or a spoon to mold them into a pointy shape at the top and a wider base.
Add Eyes: Cut the black olives in half and carefully place them on each guacamole ghost to form eyes, giving them a delightful and spooky appearance.
Arrange Chips: Place a generous amount of tortilla chips around the guacamole ghosts for a festive serving style.
Serve Immediately: Enjoy your Ghostly Guacamole with chips right away while it’s fresh, or cover it lightly with plastic wrap and refrigerate for up to an hour before serving to keep it from browning. Enjoy the festive flavors with your guests!
Prepare the Chicken Wings: Rinse the chicken wings under cold water and pat them dry with paper towels. Place them in a large mixing bowl.
Make the Marinade: In a separate bowl, whisk together the soy sauce, olive oil, brown sugar, garlic powder, smoked paprika, black food coloring (if using), salt, and pepper until well combined.
Marinate the Wings: Pour the marinade over the chicken wings, ensuring each wing is evenly coated. Cover the bowl with plastic wrap and refrigerate for at least 1 hour, preferably 2-4 hours for best flavor.
Preheat the Oven: Preheat your oven to 400°F (200°C). Line a baking sheet with aluminum foil for easy cleanup, and place a wire rack on top of it. This will help the wings cook evenly.
Arrange the Wings: Remove the marinated chicken wings from the refrigerator and arrange them in a single layer on the wire rack. Discard any excess marinade.
Bake the Wings: Place the baking sheet in the preheated oven and bake the wings for about 35-40 minutes, flipping them halfway through. They should be crispy and cooked through, reaching an internal temperature of 165°F (74°C).
Prepare Spicy Sauce: While the wings are baking, prepare your spicy sauce by mixing hot sauce with your preferred level of heat in a small bowl. Adjust to taste.
Serve: Once cooked, remove the wings from the oven and place them on a serving platter. Drizzle the spicy sauce over the wings, or serve it on the side for dipping. Enjoy the eerie yet delicious Bat Wings at your Halloween party!
8. Zombie Veggie Platter
This Zombie Veggie Platter is a fun and creative way to serve a variety of vegetables at your Halloween gathering. Arranged in a grotesque way to resemble a zombie face, this dish is both visually striking and healthy. Perfect for parties, it encourages guests to dig in and enjoy their greens while celebrating the eerie spirit of Halloween!
Ingredients
Quantity
Carrots
4 large
Celery stalks
3 large
Cucumber
1 large
Cherry tomatoes
1 pint
Black olives
1 cup
Red bell pepper
1 large
Hummus or ranch dip
1 cup
Green bell pepper
1 large
Cooking Instructions:
Prepare the Vegetables: Rinse all the vegetables under cold water. Peel the carrots and cut them into long sticks. Cut the cucumber into slices or sticks, as desired. Remove the ends of the celery stalks and cut them into bite-sized pieces.
Create the Zombie Face Shape: On a large serving platter or cutting board, arrange the carrot sticks in a way that they form the outline of a zombie’s head. You can create a circular or oval shape based on your preference.
Add Eyes and Mouth: For the eyes, cut two slices of cucumber and place them in the upper part of the carrot outline. Add black olives on top for pupils. Next, use the cherry tomatoes to create a spooky, open mouth by arranging them in a line at the bottom. You could also use pieces of red bell pepper for a more gruesome look.
Use Celery and Bell Peppers for Features: Cut the celery into shorter pieces and arrange them around the face as if they are arms or hair. You can also use strips of green bell pepper to add some more features like a nose or hair by placing them strategically around the zombie’s face.
Fill the Eyes: Add a dollop of hummus or ranch dip inside the cucumber slices to give your zombie eyes some ‘cream’ filling. Alternatively, you can use small amounts of other dips to enhance the look.
Final Touches: Stand back and assess your creation! Make any adjustments or add more vegetables to fill in gaps and enhance the overall look. This platter should not only look like a zombie but should also be inviting and colorful.
Serve: Set the Zombie Veggie Platter out on a table at your Halloween party, alongside extra hummus or ranch dip for dipping. Watch as guests enjoy the spooky presentation while munching on healthy snacks!
9. Gruesome Guacamole Hand
The Gruesome Guacamole Hand is a delightfully eerie appetizer that is sure to impress your guests at any Halloween gathering. This dish combines the creamy goodness of guacamole with an unexpected and spooky twist: it takes the shape of a creepy hand, complete with fingernails made from tortilla chips. Perfect for scooping with additional chips, it’s both delicious and a real conversation starter!
Ingredients
Quantity
Ripe avocados
3 large
Lime juice
2 tablespoons
Salt
1 teaspoon
Chopped red onion
1/2 cup
Diced tomatoes
1 cup
Chopped cilantro
1/4 cup
Jalapeño (optional)
1 small
Tortilla chips (for nails)
10-12 chips
Black olives (for details)
1/2 cup
Cooking Instructions:
Prepare the Avocados: Slice the avocados in half, remove the pits, and scoop the flesh into a large mixing bowl.
Mash the Avocados: Using a fork or a potato masher, mash the avocados to your desired level of smoothness. You can keep it chunky or make it creamy, based on your preference.
Add Flavorings: Squeeze in the lime juice to prevent browning and enhance the flavor. Season with salt. Stir well to combine.
Mix in Additional Ingredients: Add the chopped red onion, diced tomatoes, chopped cilantro, and, if desired, diced jalapeño for some heat. Mix everything together until well combined.
Form the Hand Shape: On a large serving platter, use a spatula or your hands to shape the guacamole into a hand. Make sure to create a palm and five fingers, pressing the guacamole firmly into a hand shape.
Add Tortilla Chip Nails: Take the tortilla chips and press them into the tips of each finger to resemble fingernails. You can angle them slightly to create a more dramatic effect.
Create Details with Black Olives: Slice a few black olives and use them to create spooky details, such as knuckles or fingernails on the chips, to make the hand look more lifelike.
Final Touches: If desired, you can sprinkle additional cilantro or other toppings around the hand for garnish.
Serve Immediately: Set out the Gruesome Guacamole Hand with a bowl of tortilla chips on the side for dipping. Enjoy as your guests marvel at this creepy yet delicious dish!
10. Witch’s Brew Soup
Witch’s Brew Soup is a wonderfully hearty and spooky dish that captures the essence of Halloween with its vibrant colors and flavors. This cauldron-like soup combines a mix of seasonal vegetables and warming spices, creating a delicious and comforting dish that will delight your guests while adding an enchanting touch to your Halloween festivities.
Heat Oil: In a large pot or Dutch oven, heat the olive oil over medium heat.
Sauté the Vegetables: Add the diced onion and minced garlic to the pot. Sauté for 2-3 minutes, stirring occasionally, until the onion becomes translucent and fragrant.
Add Remaining Vegetables: Stir in the diced carrots, celery, and bell pepper. Cook for an additional 5-7 minutes, allowing the vegetables to soften slightly.
Incorporate Pumpkin and Broth: Pour in the vegetable broth and add the canned pumpkin puree. Stir well to combine the ingredients.
Season the Soup: Add the ground cinnamon, nutmeg, salt, and black pepper to the pot. Stir to incorporate the spices evenly throughout the soup.
Simmer: Bring the mixture to a gentle boil, then reduce the heat to low and let it simmer uncovered for about 20-25 minutes. This will allow the flavors to meld together.
Add Spinach: Stir in the chopped spinach during the last 5 minutes of cooking, allowing it just enough time to wilt.
Blend for Creaminess (Optional): If you prefer a creamier soup, use an immersion blender to puree the soup to your desired consistency. If using a standard blender, blend in batches, being cautious of the hot liquid.
Finish with Cream (Optional): If you’d like to make your soup richer, stir in the heavy cream just before serving and heat through.
Serve: Ladle the Witch’s Brew Soup into bowls and garnish each serving with pumpkin seeds for added texture and presentation. Enjoy this hauntingly delicious soup as part of your Halloween feast!
11. Skull-Shaped Cheese Ball
The Skull-Shaped Cheese Ball is a fun and festive appetizer that adds a spooky touch to any Halloween gathering. This creamy, flavorful cheese ball can be shaped into a skull, making it not only delicious but also visually appealing. It pairs well with crackers, veggies, or bread, allowing your guests to get creative at the snack table while getting into the Halloween spirit.
Mix the Cheese: In a mixing bowl, combine the softened cream cheese and shredded cheddar cheese. Use a spatula or a hand mixer to blend them together until it’s smooth and well combined.
Add Seasonings: Add garlic powder, onion powder, Worcestershire sauce, chopped chives, salt, and black pepper to the cheese mixture. Stir thoroughly to guarantee that the spices are evenly distributed throughout the cheese mixture.
Shape the Cheese Ball: Using your hands, take a portion of the cheese mixture and form it into a skull shape. You can create the skull shape by rolling the cheese mixture into a sphere and then elongating it slightly for the skull’s jaw. You may want to refrigerate the cheese ball for about 30 minutes to make shaping easier if it’s too soft.
Chill: Once shaped, place the skull cheese ball on a serving platter and refrigerate for at least 1-2 hours. This will help it hold its shape and enhance the flavors.
Decorate: Once chilled, remove the cheese ball from the refrigerator. Use chopped pecans to create texture on the skull and place them on the surface as desired. For eyes, place the black olives where they would go on your skull, and use a piece of cheese or a nut to form a nose.
Serve: Arrange an assortment of crackers and veggies around the cheese ball on the platter. Encourage guests to dig in and enjoy the festive treat!
Store Leftovers: Any leftover cheese ball can be wrapped in plastic wrap and stored in the refrigerator for up to a week. Enjoy it again with your favorite snacks!