7 Savory Halloween Finger Foods To Balance The Sweets
Mummy Meatballs
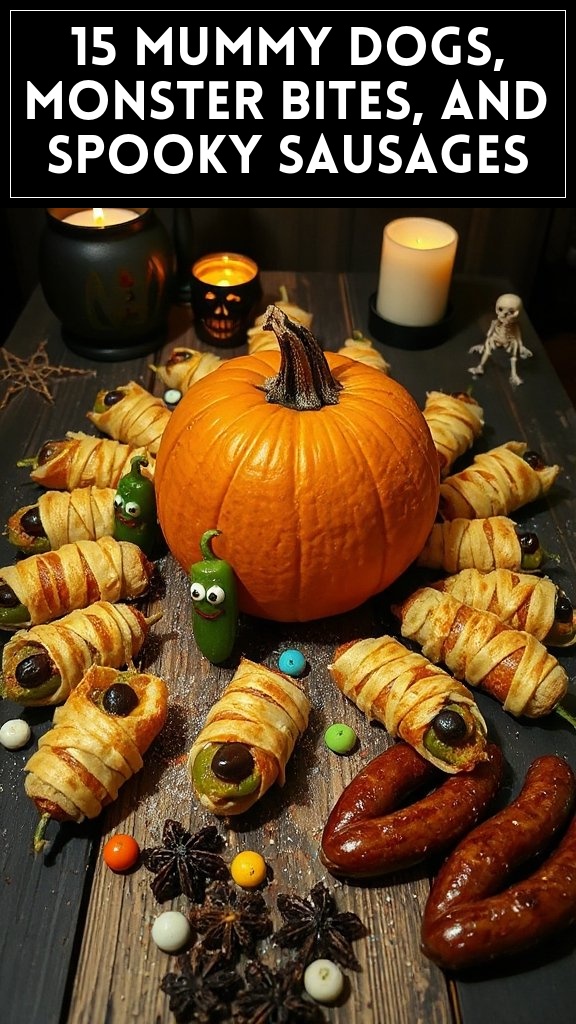
Mummy Meatballs are a fun and festive finger food perfect for Halloween gatherings. These meatballs, wrapped in strips of dough to resemble little mummies, are not only delicious but also add a spooky ambiance to your festivities. The melted cheese or olive eyes give them a charming touch that’s sure to delight both kids and adults alike.
Ingredients
Quantity
Ground beef
1 pound
Breadcrumbs
1/2 cup
Egg
1 large
Garlic powder
1 teaspoon
Onion powder
1 teaspoon
Salt
1/2 teaspoon
Pepper
1/4 teaspoon
String cheese sticks
1 package
Puff pastry sheets
1 package (thawed)
Egg (for egg wash)
1 large
Black olives
For eyes (optional)
Cooking Instructions:
Preheat the Oven: Begin by preheating your oven to 400°F (200°C) so it’s ready when you need to bake the meatballs.
Prepare the Meatball Mixture: In a large mixing bowl, combine the ground beef, breadcrumbs, 1 egg, garlic powder, onion powder, salt, and pepper. Mix until well combined but avoid over-mixing to keep the meatballs tender.
Form the Meatballs: Take a portion of the meat mixture and roll it into balls of about one inch in diameter. Place the meatballs on a baking sheet lined with parchment paper.
Cook the Meatballs: Place the baking sheet in the preheated oven and bake the meatballs for about 15-20 minutes, or until they reach an internal temperature of 160°F (70°C). Once cooked, remove from the oven and let them cool slightly.
Prepare the Pastry: While the meatballs are cooling, take the puff pastry sheets and roll them out on a lightly floured surface. Cut the dough into thin strips, about 1/2 inch wide.
Wrap the Meatballs: Take a meatball and start wrapping the strips of puff pastry around it, leaving a small portion of the meatball exposed at the top to resemble a mummy’s head. Continue wrapping until the meatball is sufficiently covered, using more strips if necessary.
Add Eyes: Before baking, you can place small pieces of string cheese or sliced olives on top of the exposed part of the meatball to create eyes.
Apply Egg Wash: Beat the additional egg in a small bowl and brush it over the pastry-wrapped meatballs for a golden finish.
Bake the Mummy Meatballs: Return the wrapped meatballs to the baking sheet, and bake in the preheated oven for an additional 10-15 minutes or until the pastry is golden brown and puffed.
Serve and Enjoy: Allow the Mummy Meatballs to cool slightly before serving. Present them on a platter with a side of marinara sauce for dipping. Enjoy your spooky treat!
Witch’s Broomstick Snacks
Witch’s Broomstick Snacks are a whimsical and easy-to-make finger food that will enchant your Halloween party guests. These fun treats consist of cheese sticks and pretzel rods, cleverly arranged to resemble broomsticks used by witches. They’re not only delicious but also serve as a playful, themed snack that kids and adults alike will love.
Ingredients
Quantity
Cheese sticks
10 sticks
Pretzel rods
10 rods
Chives (or green onions)
10 pieces
Optional: mustard or ranch dressing
For dipping
Cooking Instructions:
Prepare the Cheese Sticks: Begin by unwrapping the cheese sticks. You can choose any flavor of cheese that you like; string cheese is a classic choice.
Cut the Cheese: Use a knife to carefully cut each cheese stick into half if you want smaller broomsticks, or leave them whole for a more substantial snack.
Assemble the Broomsticks: Take a pretzel rod and insert one of the cheese stick pieces into one end, pushing it in gently until it holds. This will form the main body of the broomstick.
Create the Broom Bristles: Take a few chives or green onion tops and cut them into small pieces, roughly 2-3 inches long. This will mimic the bristles of the broom.
Attach the Bristles: Take a small bunch of the chives and insert them into the other end of the cheese stick, fanning them out to resemble the broom’s bristles. You can use a toothpick to help secure them in place if necessary.
Repeat the Process: Continue assembling the broomsticks until all cheese sticks and pretzel rods are used up.
Serve: Arrange the Witch’s Broomstick Snacks on a platter. Optionally, serve with a side of mustard or ranch dressing for dipping.
Enjoy your spooky treats as they’re sure to be a hit at your Halloween celebration!
Stuffed Jack-O’-Lantern Peppers
Stuffed Jack-O’-Lantern Peppers are a delightful and colorful dish perfect for Halloween celebrations. These cheerful peppers are hollowed out and filled with a savory mixture of ground meat, rice, and spices, then topped with their own little “faces” to resemble jack-o’-lanterns. They are not only visually appealing but also packed with flavor, making them an ideal finger food for your festive gathering.
Prepare the Peppers: Begin by preheating your oven to 375°F (190°C). While the oven is heating, wash the orange bell peppers and slice off the tops, keeping the tops intact as they will act as lids. Remove the seeds and membranes from the inside, making sure to create enough space for the stuffing.
Cook the Filling: In a large skillet, heat olive oil over medium heat. Add the chopped onion and minced garlic, sautéing until the onions are translucent and fragrant, about 3-4 minutes. Add the ground beef (or turkey) to the skillet and cook until browned, breaking it up with a wooden spoon as it cooks. Drain excess fat if necessary.
Mix the Stuffing: Once the meat is cooked, stir in the cooked rice and tomato sauce. Season the mixture with chili powder and salt to taste. Mix well to combine all ingredients thoroughly. Remove the skillet from the heat and stir in half of the shredded cheese.
Stuff the Peppers: Carefully fill each hollowed-out pepper with the meat and rice mixture, pressing down lightly to confirm they are packed well. Leave a little room at the top for the “lid” to fit.
Create Jack-O’-Lantern Faces: To make the peppers look like jack-o’-lanterns, use a small knife to carefully cut out eyes and a mouth on the front of each pepper. Be creative with the shapes; triangular eyes and jagged mouths are classic!
Bake the Peppers: Place the stuffed peppers upright in a baking dish. If you like, you can add a splash of water to the bottom of the dish to create steam, helping the peppers cook evenly. Cover the dish with aluminum foil and bake in the preheated oven for about 25 minutes.
Add Cheese and Finish Baking: After 25 minutes, remove the foil and sprinkle the remaining shredded cheese on top of the stuffed peppers. Bake uncovered for an additional 10-15 minutes, or until the cheese is melted and bubbly, and the peppers are tender.
Garnish and Serve: Remove the stuffed peppers from the oven and let them cool slightly. Use black olives to place pupils in the eyes, and if desired, garnish with fresh parsley. Serve warm and enjoy these spooky but delicious treats at your Halloween party!
Spider Deviled Eggs
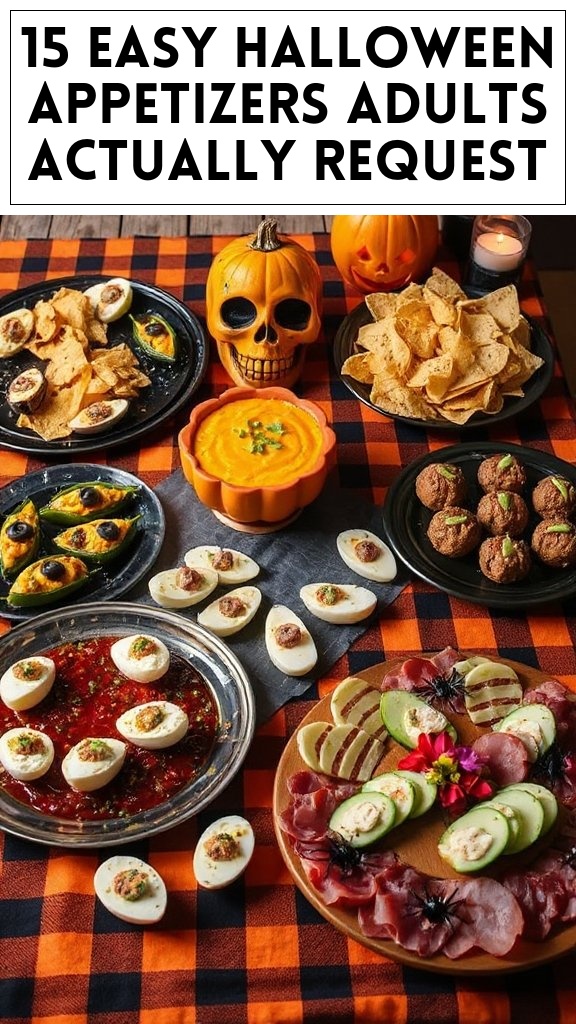
Spider Deviled Eggs are a spooky and delicious twist on the classic deviled egg appetizer, making them a perfect finger food for Halloween gatherings. These treats are made by transforming traditional deviled eggs into creepy spiders using olives, giving them a fun and festive appearance that will delight your guests.
Prepare the Eggs: Begin by placing the eggs in a pot and covering them with cold water. Bring the water to a boil over medium-high heat. Once boiling, reduce the heat to low and cover the pot. Let the eggs simmer for about 10-12 minutes.
Cool the Eggs: After the cooking time is up, carefully transfer the eggs to a bowl filled with ice water. This will help stop the cooking process and make peeling easier. Let them cool for at least 5 minutes.
Peel and Slice the Eggs: Once cooled, gently tap each egg on a hard surface to crack the shell, then peel under running water for easier removal. Slice the peeled eggs in half lengthwise and carefully remove the yolks, placing them in a mixing bowl.
Prepare the Filling: Mash the yolks with a fork, then mix in the mayonnaise, Dijon mustard, salt, and black pepper until smooth and well combined. Adjust seasoning to taste, if needed.
Fill the Egg Whites: Using a spoon or piping bag, evenly distribute the yolk mixture back into the hollowed-out egg whites.
Create the Spiders: For each spider, take one whole black olive and cut it in half lengthwise to create the body. Position the two halves of the olive on top of the filled egg, then slice the remaining black olives into smaller pieces to create 8 legs for each spider. Arrange the legs around the body on the egg.
Garnish: Lightly sprinkle the filled eggs with paprika for an extra touch of flavor and color.
Chill and Serve: Refrigerate the spider deviled eggs for at least 20 minutes to firm up the filling. Serve them chilled on a platter to frighten and delight your Halloween guests!
Pumpkin Hummus With Crudités
Pumpkin Hummus with Crudités is a festive and nutritious dip that perfectly captures the essence of fall. This creamy hummus combines the rich flavor of pumpkin with the traditional ingredients of chickpeas, tahini, and spices, creating a dip that’s not only delicious but also eye-catching for your Halloween gatherings. Serve it alongside an array of colorful vegetables for a healthy finger food option that your guests will love.
Blend the Mixture: Secure the lid on the food processor and blend the mixture until it’s completely smooth and creamy. You may need to pause and scrape down the sides with a spatula to guarantee everything gets blended evenly.
Adjust Consistency: If the hummus is too thick, you can add a little water (1 tablespoon at a time) and blend again until you reach your desired consistency.
Taste and Season: Taste the pumpkin hummus and adjust the seasoning if necessary, adding more salt, pepper, or lemon juice according to your preference.
Serve the Hummus: Transfer the hummus to a serving bowl, and use the back of a spoon to create a swirl on the top for presentation.
Garnish: Sprinkle paprika on top of the hummus for a pop of color, and drizzle a little extra olive oil if desired.
Prepare Crudités: Wash and cut your assorted raw vegetables into bite-sized pieces for easy dipping. Arrange them in a colorful platter around the hummus bowl.
Enjoy: Serve the pumpkin hummus with crudités at your Halloween gathering for a tasty and healthy finger food option. Enjoy dipping and celebrating the season!
Garlic Pumpkin Seeds
Garlic Pumpkin Seeds are a crunchy, savory snack that make for an excellent finger food at your Halloween festivities. Roasted to perfection with garlic and seasonings, these seeds embody the flavors of fall while providing a healthy alternative to traditional party snacks. Easy to make and absolutely delicious, they are sure to be a hit with your guests.
Preheat the Oven: Preheat your oven to 350°F (175°C). This guarantees that the pumpkin seeds roast evenly and become nice and crispy.
Rinse the Pumpkin Seeds: If you’re using fresh pumpkin seeds, rinse them under cold water to remove any pulp or stringy bits. Pat them dry with a paper towel.
Dry the Seeds: Spread the rinsed seeds on a clean kitchen towel or paper towels and let them air dry for about 10-15 minutes. This helps achieve a better roast.
Prepare a Baking Sheet: Line a baking sheet with parchment paper for easier cleanup and to prevent the seeds from sticking.
Mix Ingredients: In a mixing bowl, combine the dried pumpkin seeds with olive oil, garlic powder, paprika, salt, black pepper, and cayenne pepper if you like a little heat. Stir until all seeds are fully coated with the oil and seasonings.
Spread on Baking Sheet: Spread the seasoned pumpkin seeds in a single layer on the prepared baking sheet. Make sure they’re not overcrowded to promote even roasting.
Roast the Seeds: Place the baking sheet in the preheated oven and roast for about 20-25 minutes. Stir the seeds every 10 minutes to promote even browning and prevent burning.
Check for Doneness: The seeds are done when they are golden brown and crispy. Remove them from the oven and let them cool on the baking sheet.
Store or Serve: Once cooled, you can either serve them immediately or store them in an airtight container at room temperature to enjoy later. These Garlic Pumpkin Seeds make for a perfect Halloween snack that everyone will love!
Creepy Cheese and Cracker Platter
A Creepy Cheese and Cracker Platter is the perfect centerpiece for your Halloween gathering, offering a delightful array of cheeses, artisan crackers, and spooky garnishes. This dish not only provides a variety of flavors and textures but can also be artfully arranged to evoke the festive spirit of Halloween. Whether you go for goblin-inspired shapes or ghostly decorations, this platter is sure to intrigue and satisfy your guests.
Ingredients
Quantity
Assorted cheeses (cheddar, brie, gouda)
1 pound total
Artisan crackers
1 box
Black olives (for spider decorations)
½ cup
Thinly sliced salami or pepperoni
½ pound
Grape or cherry tomatoes (for a blood-like effect)
Prepare the Cheese: Begin by removing your chosen cheeses from the refrigerator and allowing them to come to room temperature for about 30 minutes. This helps enhance their flavors.
Cut the Cheese: Using a sharp knife, cut your cheeses into a variety of shapes and sizes. For a spooky touch, consider cutting one of the cheeses into a ghost shape using a cookie cutter or a knife.
Arrange the Crackers: On a large serving platter or cheese board, create a base layer using the assorted crackers. Start by placing them around the outer edges, leaving space in the center for the cheeses.
Place the Cheese: Position your cut cheese pieces on the platter, making sure to distribute them evenly among the crackers. You can stack some pieces for height and visual appeal.
Add Salami/Pepperoni: Arrange the thinly sliced salami or pepperoni among the cheeses and crackers. You can roll the slices into small rosettes or fold them for a more decorative look.
Include the Olives: Use the black olives to create spooky spider decorations. Place two or three olives together to form the body and head of the spiders, and you can use smaller pieces of sliced vegetables for legs or leave them as they are.
Add the Tomatoes: Toss the grape or cherry tomatoes onto the platter. Their red color adds a dramatic effect and can be arranged in clusters to mimic a pool of ‘blood’ for a gory touch.
Garnish with Herbs: Sprinkle fresh herbs like rosemary or parsley around the edges of the platter for a touch of color and flavor. They can also help to create a more earthy, Halloween feel.
Final Touches: If you have edible spooky decorations, such as plastic spiders or Halloween-themed picks, scatter them across the platter for an extra seasonal flare.
Serve and Enjoy: Set the platter on your party table and enjoy the compliments from your guests as they dig into this creepy yet delicious cheese and cracker spread. Make sure to provide toothpicks for easy serving!