Spooky Skeleton Veggie Platter
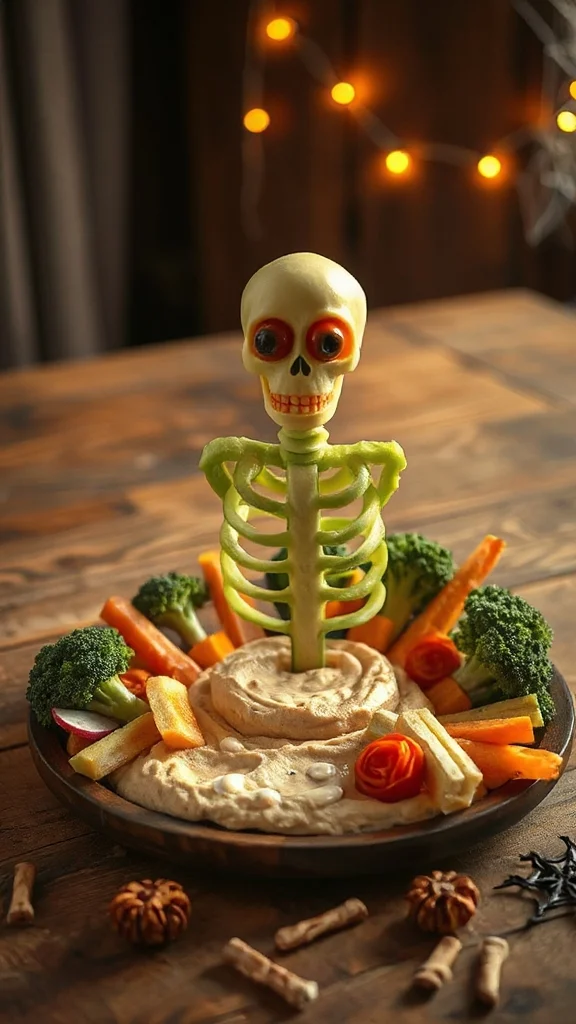
The Spooky Skeleton Veggie Platter is a fun and healthy appetizer that’s perfect for any Halloween gathering. This festive and visually striking arrangement features a variety of colorful vegetables styled to resemble a spooky skeleton. It’s great for potlucks, offering a crunchy snack option that’s both appealing and nutritious, while also serving as a conversation starter!
| Ingredients | Quantity |
|---|---|
| Carrots | 3 large |
| Celery sticks | 5 stalks |
| Cherry tomatoes | 1 pint |
| Cauliflower florets | 1 medium head |
| Cucumber | 1 large |
| Black olives | 1 small can |
| Hummus or ranch dip | 1 cup (for serving) |
| Bell peppers (varied colors) | 2 (for decoration) |
Cooking Instructions:
- Prepare the Veggies: Start by washing all the vegetables thoroughly under cold water. Peel the carrots and cut them into long sticks of about 3-4 inches in length. Chop the celery into similar lengths.
- Cut the Cucumber: Slice the cucumber in half lengthwise, then cut it into long spears or slices, depending on your preference. You can also use a round cutter to create fun shapes.
- Create the Skeleton Base: On a large serving platter or a cutting board, begin arranging the vegetable pieces to form the shape of a skeleton. Use the carrot sticks to create the backbone of the skeleton by lining them up vertically in the center of the platter.
- Shape the Ribcage: Place additional carrot sticks horizontally on either side of the backbone to mimic the ribs. You can bend them slightly for a more realistic shape.
- Attach the Head: Take a cauliflower floret and place it at the top of the carrot sticks to serve as the skeleton’s head. You can cut a small piece of the floret’s stem to help it sit securely.
- Create the Arms and Legs: Use celery sticks to extend outward from the skeleton’s backbone to represent arms. For the legs, place carrot sticks pointing downward from the waist area, creating a spooky stance.
- Add Eyes and Mouth: Use black olives to create eyes on the cauliflower head and a small piece or slices for the mouth. This adds a fun and creepy element to the skeleton.
- Decorate with Bell Peppers: Slice the bell peppers into strips or shapes and place them around the veggie skeleton. These can represent ghostly figures or cauldrons, adding to the festive vibe.
- Serve with Dips: Place a small bowl of hummus or ranch dip at the base of the skeleton to serve as a delicious accompaniment for dipping the veggies.
- Final Touch: Make any adjustments to the arrangement to guarantee that it looks visually appealing, and then cover with plastic wrap until ready to serve at the potluck.
Enjoy your Spooky Skeleton Veggie Platter—it’s sure to be a hit at your Halloween festivities!
Monster Meatballs
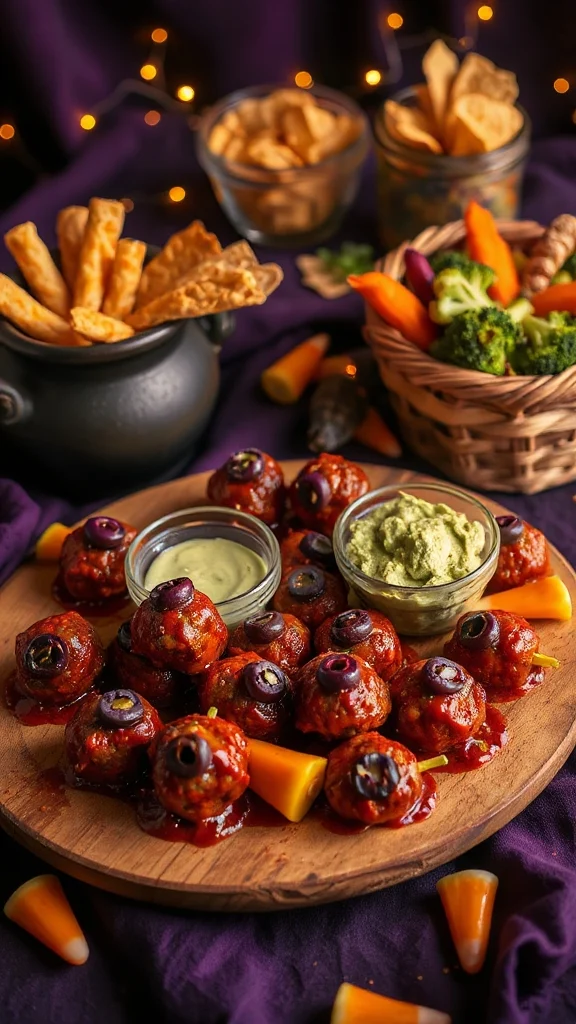
Monster Meatballs are a fun and spooky twist on traditional meatballs, making them a perfect addition to any Halloween potluck. These adorable, monster-inspired meatballs are not only tasty but also a hit among guests of all ages. Topped with googly eyes and served with a side of marinara sauce, they are sure to add a festive flair to your Halloween spread.
| Ingredients | Quantity |
|---|---|
| Ground beef or turkey | 1 lb |
| Breadcrumbs | 1 cup |
| Parmesan cheese | ½ cup, grated |
| Egg | 1 large |
| Garlic, minced | 2 cloves |
| Onion, chopped | ½ medium |
| Italian seasoning | 1 tsp |
| Salt | 1 tsp |
| Black pepper | ½ tsp |
| Mozzarella balls | 1 cup (for eyes) |
| Black olives | 1 small can (for eyes) |
| Marinara sauce | 2 cups (for serving) |
Cooking Instructions:
- Preheat the Oven: Begin by preheating your oven to 375°F (190°C), ensuring it’s ready for the monster meatballs to bake.
- Mix the Ingredients: In a large mixing bowl, combine the ground beef (or turkey), breadcrumbs, grated Parmesan cheese, egg, minced garlic, chopped onion, Italian seasoning, salt, and black pepper. Use your hands or a spoon to mix the ingredients together until they are well incorporated.
- Form the Meatballs: Once the mixture is well-blended, take a small portion of the mixture (about 2 tablespoons) and roll it into a ball, about the size of a golf ball. Place the meatballs on a baking sheet lined with parchment paper or lightly greased.
- Add Mozzarella Eyes: Take the mozzarella balls and press them lightly into the top of each meatball to create the monster’s eyes. If you’re using whole black olives, you can cut them in half and place a half olive on top of each mozzarella ball for a spooky effect.
- Bake the Meatballs: Place the baking sheet in the preheated oven and bake the meatballs for 20-25 minutes, or until they are fully cooked through and golden on the outside. An internal temperature of 160°F (71°C) indicates that they’re done.
- Prepare the Marinara Sauce: While the meatballs are baking, heat the marinara sauce in a small saucepan over medium heat until warmed through. Keep it warm until you are ready to serve.
- Serve: Once the monster meatballs are cooked, remove them from the oven and allow them to cool for a few minutes. Transfer them to a serving platter, and serve with the warm marinara sauce on the side for dipping.
- Enjoy: Invite your guests to enjoy these deliciously spooky Monster Meatballs, and don’t forget to encourage them to get creative with additional garnishes if desired!
Witch’s Broomstick Cheese Sticks
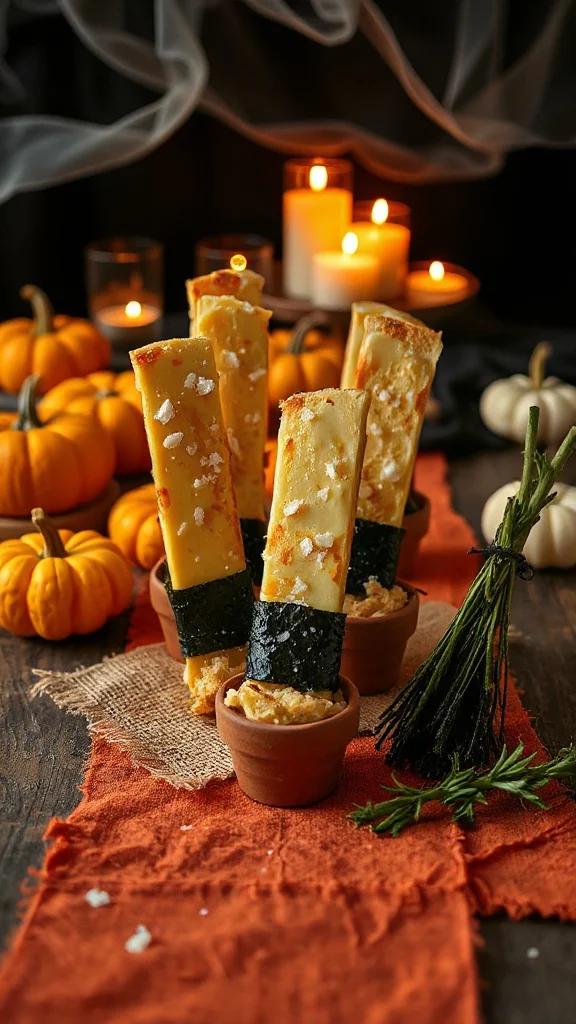
Witch’s Broomstick Cheese Sticks are a delightful and playful snack perfect for Halloween gatherings. Made with gooey cheese and wrapped in pretzel dough, these fun treats resemble miniature broomsticks that are sure to enchant guests—especially the little ones. They are easy to make and even easier to devour!
| Ingredients | Quantity |
|---|---|
| String cheese sticks | 10 sticks |
| Pretzel dough (store-bought or homemade) | 1 lb |
| Egg (for egg wash) | 1 large |
| Coarse sea salt | To taste |
| Chives or green onion (for broom bristles) | 1 bunch (optional) |
Cooking Instructions:
- Preheat the Oven: Start by preheating your oven to 375°F (190°C). This will prepare the oven for baking the broomstick cheese sticks.
- Prepare the Pretzel Dough: If you are using store-bought pretzel dough, take it out and allow it to soften slightly at room temperature as per package instructions. If you are making homemade dough, follow your recipe to prepare it.
- Cut the Cheese Sticks: Take your string cheese sticks and cut them in half, creating two shorter “broom” pieces from each stick.
- Wrap the Cheese: Take a piece of pretzel dough and flatten it slightly in your hands. Then, start wrapping the dough around one end of a cheese stick, leaving the top exposed to display the cheese. Make sure to wrap it tightly but not too thick; the pretzel dough should cover the cheese stick evenly.
- Prepare for Baking: As you finish wrapping each cheese stick, place it onto a baking sheet lined with parchment paper. Repeat the wrapping process until all cheese sticks are wrapped in dough.
- Apply the Egg Wash: In a small bowl, beat the egg to create an egg wash. Using a pastry brush, gently brush the egg wash over the wrapped cheese sticks to give them a golden-brown finish while baking.
- Sprinkle with Salt: After applying the egg wash, sprinkle coarse sea salt over the top of each broomstick cheese stick for added flavor.
- Bake the Cheese Sticks: Place the baking sheet in the preheated oven and bake the cheese sticks for 12-15 minutes or until the dough is golden brown and cooked through.
- Add Chive Bristles: If desired, once the cheese sticks have cooled slightly, you can use chives or green onion pieces to simulate the broom bristles. Simply poke a few pieces into the exposed top of the cheese stick.
- Serve: Remove from the oven, let them cool for a couple of minutes, and serve your Witch’s Broomstick Cheese Sticks warm. Enjoy them with a side of marinara sauce or your favorite dip!
Mummy Wrapped Hot Dogs
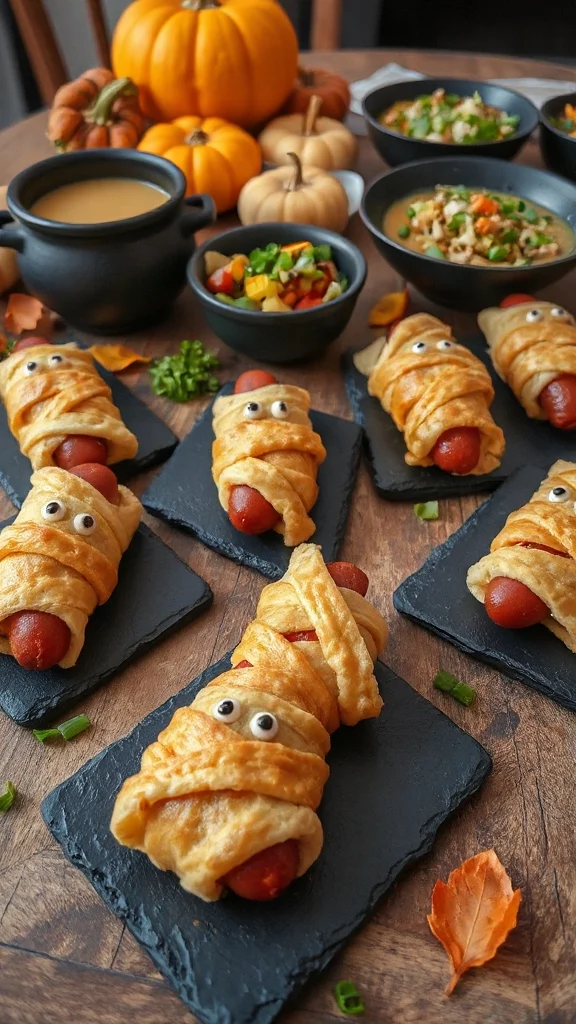
Mummy Wrapped Hot Dogs are a fun and festive Halloween treat that are sure to make a statement at any potluck or gathering. These adorable little “mummies” are created by wrapping hot dogs in crescent roll dough, giving them the appearance of a wrapped mummy, and then baking them to perfection. Great for kids and adults alike, they make for a delicious finger food that is quick to prepare and enjoyable to eat!
| Ingredients | Quantity |
|---|---|
| Hot dogs | 8 hot dogs |
| Refrigerated crescent roll dough | 2 cans (8 oz each) |
| Mustard or ketchup (for serving) | To taste |
Cooking Instructions:
- Preheat the Oven: Begin by preheating your oven to 375°F (190°C). This will guarantee that your mummies cook evenly and become nice and crispy.
- Prepare the Dough: Open the cans of crescent roll dough and unroll the sheets onto a clean surface. Use a pizza cutter or knife to cut the dough into thin strips, about ½-inch wide. This will create the “bandages” for your mummies.
- Wrap the Hot Dogs: Take a hot dog and start wrapping it with the strips of crescent dough, leaving a small opening for the “face” to show. Be sure to overlap the strips as you wrap to mimic the look of bandages. Repeat this process for all hot dogs.
- Bake the Mummies: Line a baking sheet with parchment paper and place the wrapped hot dogs on the sheet. Make sure there is a little space between each mummy to allow for spreading. Place the baking sheet in the preheated oven.
- Cooking Time: Bake the wrapped hot dogs for 12-15 minutes, or until the dough is golden brown and puffed.
- Add Faces (Optional): Once your mummies are out of the oven and have cooled slightly, use mustard or ketchup to dot eyes on each mummy for a spooky touch.
- Serve: Plate the Mummy Wrapped Hot Dogs and serve with extra mustard or ketchup on the side for dipping. Enjoy this fun Halloween snack!
Creepy Crawly Spider Deviled Eggs
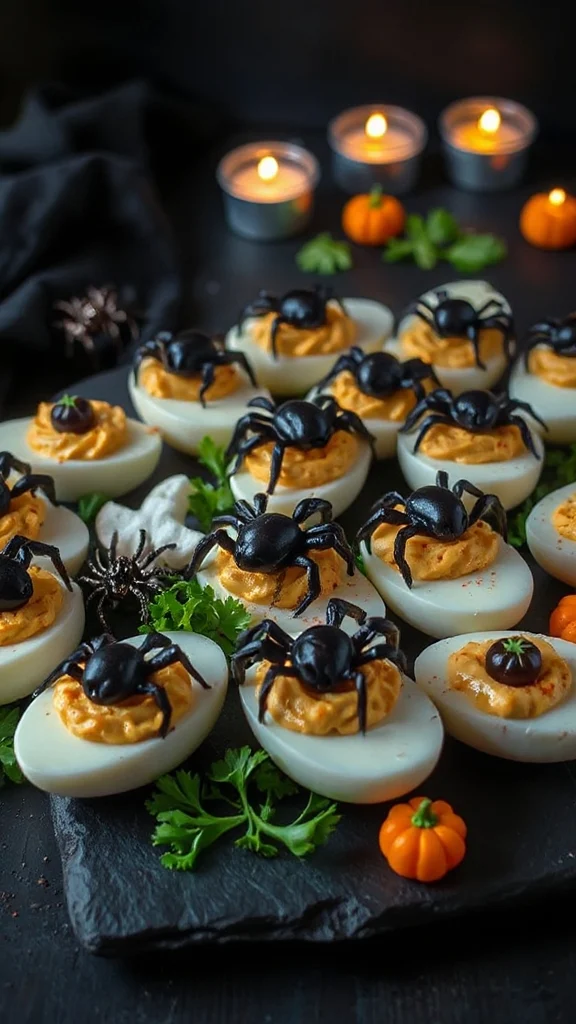
Creepy Crawly Spider Deviled Eggs are a spooky twist on a classic appetizer, adding a Halloween flair to your potluck table. These fun and easy-to-make deviled eggs not only taste delicious, but their creepy spider decoration will have everyone impressed. Perfect for both adults and kids, these delightful treats are sure to be a hit at any Halloween gathering!
| Ingredients | Quantity |
|---|---|
| Eggs | 6 large eggs |
| Mayonnaise | 3 tablespoons |
| Mustard | 1 teaspoon |
| Salt | 1/4 teaspoon |
| Black pepper | 1/8 teaspoon |
| Paprika | For sprinkling |
| Black olives | 6-12 (depending on spider decoration) |
Cooking Instructions:
- Hard Boil the Eggs: Place the eggs in a saucepan and cover them with water. Bring the water to a boil over medium-high heat. Once boiling, cover the pot and remove it from the heat. Let the eggs sit for 12-15 minutes.
- Cool the Eggs: After the sitting time, transfer the eggs to a bowl of ice water or run cold water over them to cool them down quickly. This will make the peeling process easier. Let the eggs cool for about 5-10 minutes.
- Peel the Eggs: Once cooled, gently tap each egg on a hard surface until the shell cracks. Start peeling from the wider end to avoid damaging the egg white. Rinse the eggs under cool water to remove any shell fragments and pat dry with a paper towel.
- Slice the Eggs: Carefully slice each egg in half lengthwise and scoop out the yolks into a mixing bowl. Place the egg whites on a serving platter.
- Make the Filling: Add the mayonnaise, mustard, salt, and black pepper to the yolks in the mixing bowl. Mash everything together with a fork until the mixture is creamy and well combined. Taste and adjust seasoning if necessary.
- Fill the Egg Whites: Spoon the yolk mixture back into the hollowed out egg whites. You can also use a piping bag for a more decorative look.
- Create the Spiders: To make the spider decoration, slice the black olives in half. Use one half as the body of the spider and cut the other half into strips to create the legs. Place the “body” of the spider on top of a stuffed egg half and arrange the “legs” around it.
- Garnish: Lightly sprinkle the tops of the deviled eggs with paprika for added color.
- Serve: Arrange the Creepy Crawly Spider Deviled Eggs on a platter and serve immediately or refrigerate until ready to serve. Enjoy this ghoulishly delightful snack!
Ghoulish Guacamole and Tortilla Chips
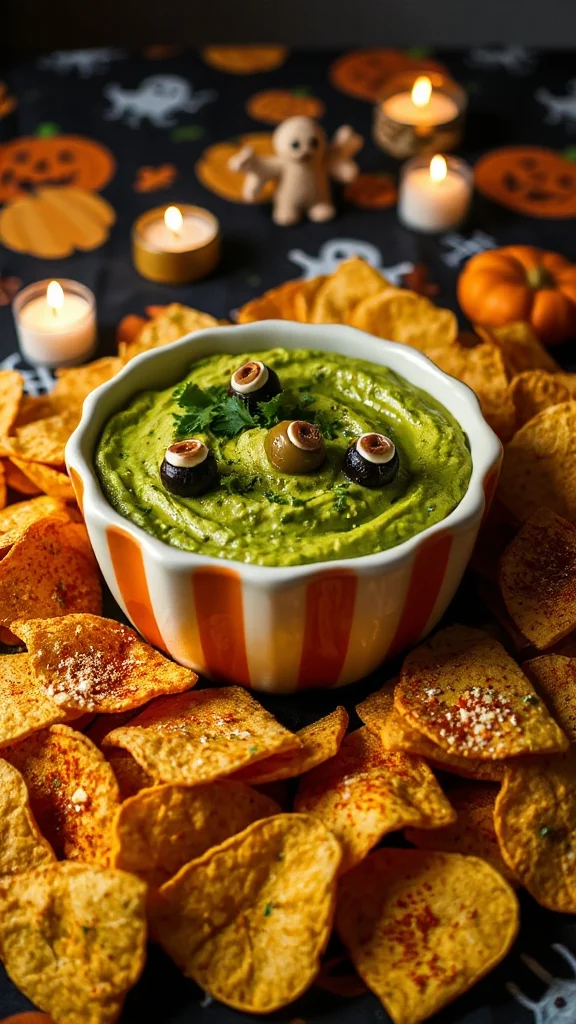
Ghoulish Guacamole and Tortilla Chips is a fun and festive dip that adds a spooky touch to any Halloween potluck. This creamy and flavorful guacamole is perfect for scooping with crispy tortilla chips, making it a hit with both kids and adults. With just the right amount of seasoning and a few decorative touches, it not only tastes fantastic but also looks the part for your Halloween festivities!
| Ingredients | Quantity |
|---|---|
| Ripe avocados | 3 large |
| Lime juice | 2 tablespoons |
| Garlic powder | 1 teaspoon |
| Onion powder | 1 teaspoon |
| Salt | 1/2 teaspoon |
| Black pepper | 1/4 teaspoon |
| Cherry tomatoes | 1 cup, diced |
| Fresh cilantro | 1/4 cup, chopped |
| Tortilla chips | 1 bag (12 oz) |
| Tortilla or cheese skeletons (optional) | for decoration |
Cooking Instructions:
- Prepare the Avocados: Cut the ripe avocados in half, remove the pits, and scoop the flesh into a mixing bowl.
- Mash the Avocados: Using a fork or a potato masher, mash the avocados to your desired level of creaminess, leaving some chunks for texture if you prefer.
- Add Lime Juice: Pour in the lime juice to the mashed avocados. This will add flavor and help prevent browning.
- Season the Guacamole: Add the garlic powder, onion powder, salt, and black pepper to the mashed avocados. Stir well to combine.
- Incorporate Vegetables: Gently fold in the diced cherry tomatoes and chopped cilantro until evenly distributed throughout the guacamole.
- Taste and Adjust: Give the guacamole a taste and adjust the seasoning by adding more salt, lime juice, or spices as needed.
- Prepare the Serving Dish: Transfer the guacamole to a spooky serving bowl, and if desired, add decorative tortilla or cheese skeletons on top for an extra Halloween touch.
- Serve with Tortilla Chips: Place the tortilla chips in a separate bowl or arrange them around the guacamole for easy dipping. Serve immediately to enjoy the guacamole at its freshest!
Eyeball Pasta Salad
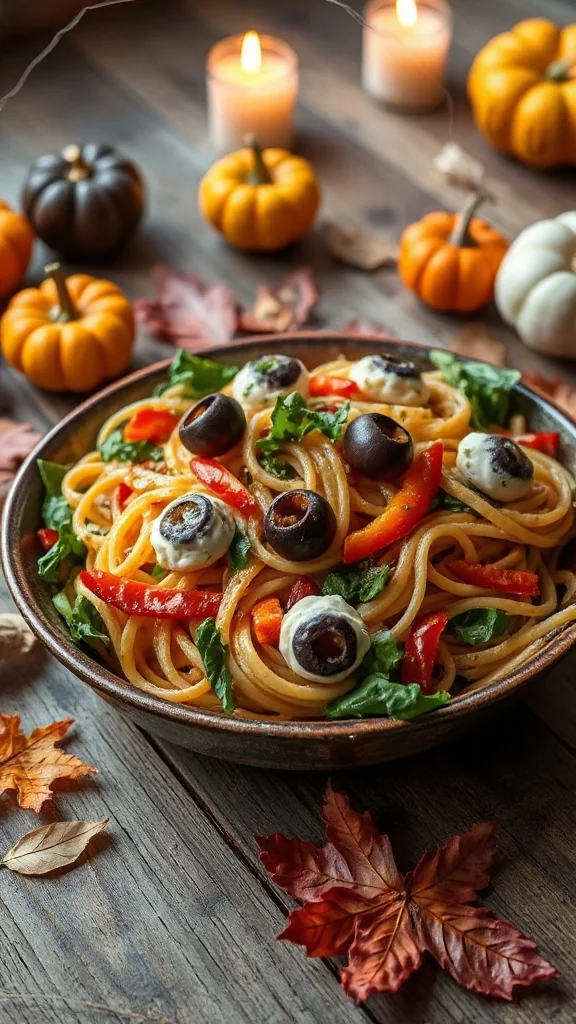
Eyeball Pasta Salad is a quirky and delightful dish that adds a playful twist to your Halloween potluck. Made with colorful pasta, veggies, and mozzarella “eyeballs,” this salad not only tastes delicious but looks visually striking, making it a perfect centerpiece for your spooky feast. It’s easy to prepare and can be served cold or at room temperature, making it a great option for gatherings.
| Ingredients | Quantity |
|---|---|
| Rotini pasta | 12 oz (340g) |
| Cherry tomatoes | 1 cup |
| Fresh mozzarella balls | 1 cup |
| Black olives | 1/2 cup |
| Green bell pepper | 1 medium |
| Red onion | 1 small |
| Italian dressing | 1/2 cup |
| Fresh basil | 1/4 cup |
| Salt | to taste |
| Black pepper | to taste |
Cooking Instructions:
- Cook the Pasta: In a large pot, bring salted water to a boil. Add the rotini pasta and cook according to package instructions until al dente. Drain the pasta and rinse under cold water to stop the cooking process. Set aside to cool.
- Prepare the Vegetables: While the pasta is cooling, wash the cherry tomatoes and slice them in half. Dice the green bell pepper and finely chop the red onion. Set all the vegetables aside.
- Prepare the Mozzarella Eyeballs: Take the fresh mozzarella balls and cut them in half. Place one half of a black olive on top of each mozzarella ball half to create the appearance of eyeballs.
- Combine the Ingredients: In a large mixing bowl, combine the cooled pasta, cherry tomatoes, diced green bell pepper, chopped red onion, and the mozzarella eyeballs.
- Add Dressing: Pour the Italian dressing over the pasta salad and gently toss all the ingredients together until they are well coated.
- Season to Taste: Sprinkle salt and black pepper over the salad to taste, mixing again to incorporate the seasoning.
- Fold in Fresh Basil: Chop the fresh basil and gently fold it into the salad for added flavor and a fresh touch.
- Chill and Serve: Cover the bowl with plastic wrap or a lid and place it in the refrigerator to chill for at least 30 minutes. This allows the flavors to meld together. Serve chilled or at room temperature, and enjoy your spooky Eyeball Pasta Salad!
Pumpkin Patch Hummus
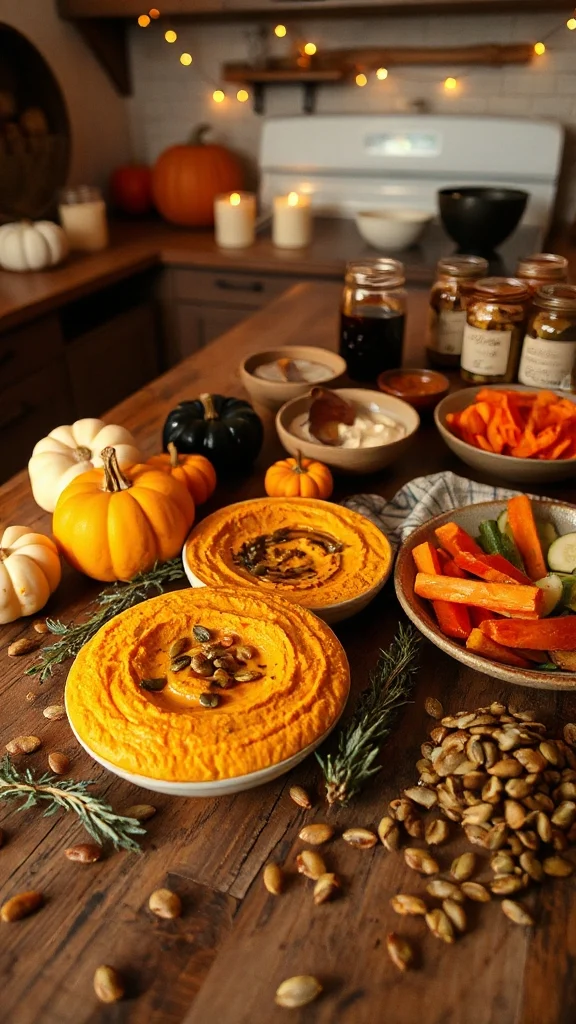
Pumpkin Patch Hummus is a festive and healthy dip that embodies the spirit of Halloween. With a creamy texture and a combination of pumpkin and tahini, this hummus is not only delicious but also visually appealing, resembling a patch of pumpkins. It’s perfect for spreading on crackers, veggies, or pita bread, making it an ideal addition to your Halloween potluck.
| Ingredients | Quantity |
|---|---|
| Canned pumpkin puree | 1 cup |
| Tahini | 1/4 cup |
| Garlic cloves | 2, minced |
| Olive oil | 2 tbsp |
| Lemon juice | 2 tbsp |
| Ground cumin | 1 tsp |
| Ground cinnamon | 1/2 tsp |
| Salt | to taste |
| Water | as needed |
| Paprika (for garnish) | 1 tsp |
| Carrot sticks and pita chips | for serving |
Cooking Instructions:
- Combine Ingredients: In a food processor, combine the canned pumpkin puree, tahini, minced garlic, olive oil, lemon juice, ground cumin, ground cinnamon, and salt.
- Blend Until Smooth: Pulse the mixture in the food processor until it is smooth and creamy. You may need to stop occasionally to scrape down the sides to guarantee everything is evenly mixed.
- Adjust Consistency: If the hummus is too thick, gradually add water, one tablespoon at a time, while blending until you reach your desired consistency.
- Taste and Adjust Seasoning: Taste the hummus and adjust the seasoning as needed by adding more salt, lemon juice, or spices according to your preference.
- Serve the Hummus: Transfer the pumpkin patch hummus to a serving bowl. Drizzle a little olive oil on top and sprinkle with paprika for an added pop of color and flavor.
- Accompany with Dippers: Serve the hummus alongside carrot sticks and pita chips for dipping. Arrange them around the bowl for an appealing presentation.
- Enjoy: Invite your guests to dig in and enjoy this delightful and festive treat at your Halloween potluck!
Black Cat Brownies
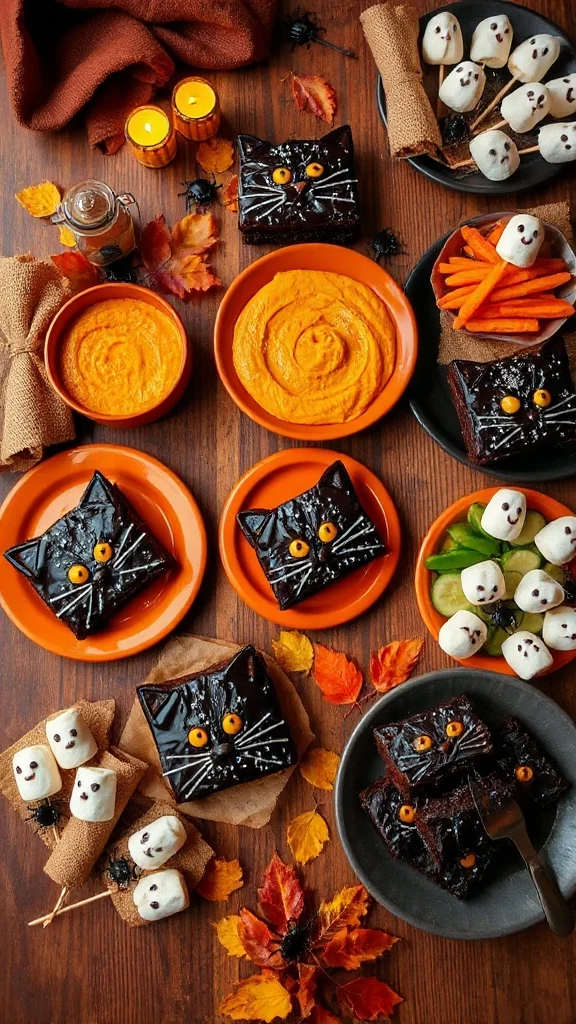
Black Cat Brownies are a fun and spooky treat that will surely impress your fellow potluck attendees this Halloween. These rich and fudgy brownies are transformed into adorable black cats with the help of simple decorations, making them the perfect dessert for the occasion. With their deliciously soft center and playful presentation, Black Cat Brownies are sure to be a hit at any Halloween gathering.
| Ingredients | Quantity |
|---|---|
| Unsweetened cocoa powder | 1/2 cup |
| All-purpose flour | 1/2 cup |
| Granulated sugar | 1 cup |
| Brown sugar | 1/2 cup |
| Salt | 1/4 tsp |
| Baking powder | 1/2 tsp |
| Eggs | 2 large |
| Vanilla extract | 1 tsp |
| Unsalted butter (melted) | 1/2 cup |
| Semi-sweet chocolate chips | 1 cup |
| Black icing gel | for decoration |
| Candy eyes | for decoration |
| Optional: Halloween sprinkles | for decoration |
Cooking Instructions:
- Preheat the Oven: Preheat your oven to 350°F (175°C). Grease a 9×9 inch baking pan or line it with parchment paper for easy removal.
- Mix Dry Ingredients: In a medium bowl, whisk together the unsweetened cocoa powder, all-purpose flour, granulated sugar, brown sugar, salt, and baking powder until well combined.
- Combine Wet Ingredients: In a separate large bowl, beat the eggs and then add the melted unsalted butter and vanilla extract. Mix until well blended.
- Combine Wet and Dry Ingredients: Gradually add the dry ingredient mixture to the wet ingredients, stirring until just combined. Be careful not to overmix. Fold in the semi-sweet chocolate chips if desired.
- Bake the Brownies: Pour the brownie batter into the prepared pan, spreading it evenly. Bake in the preheated oven for 25-30 minutes or until a toothpick inserted into the center comes out with a few moist crumbs (not wet batter).
- Cool the Brownies: Once done, remove the pan from the oven and let the brownies cool in the pan on a wire rack. Allow them to cool for about 15-20 minutes before trying to cut them.
- Cut into Cat Shapes: Once cooled, cut the brownies into squares or use a cat-shaped cookie cutter if you want fun shapes.
- Decorate the Brownies: Use black icing gel to pipe whiskers, mouths, and ears on each brownie square or cat shape. Place candy eyes on top to bring your black cats to life. You can also sprinkle Halloween-themed sprinkles for extra flair, if desired.
- Serve and Enjoy: Arrange the decorated brownies on a platter and serve them at your Halloween potluck, inviting everyone to enjoy these cute and delicious Black Cat Brownies!
These adorable brownies not only taste great but also add a spooky vibe to your Halloween celebration.
Haunted Graveyard Cupcakes
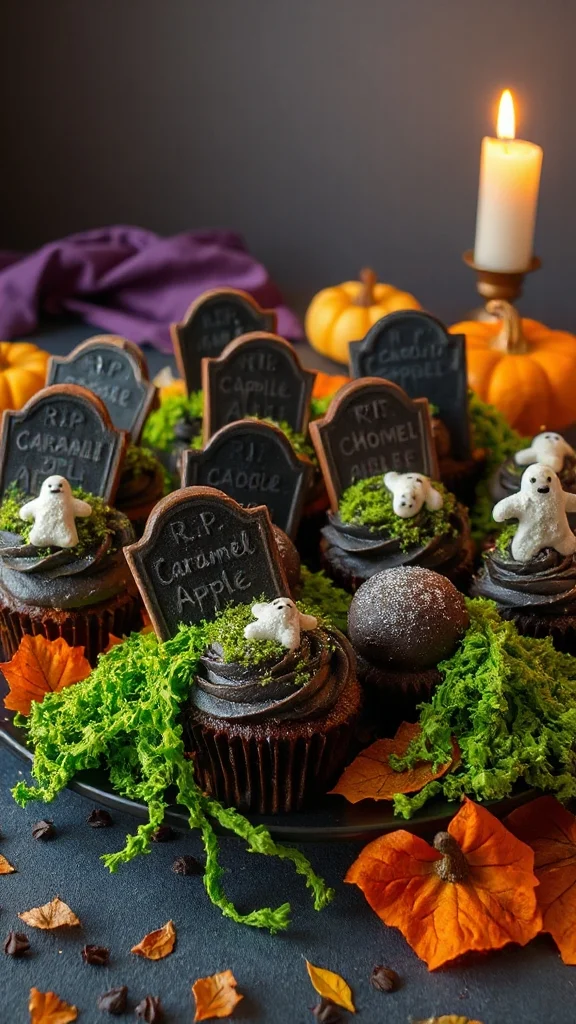
Haunted Graveyard Cupcakes are a delightful and spooky treat perfect for Halloween gatherings and potlucks. These rich chocolate cupcakes are topped with a creamy frosting and adorned with crushed cookies to mimic dirt, gummy worms for an added fright, and tombstone-shaped cookies, creating a fun and festive look that is sure to impress your guests!
| Ingredients | Quantity |
|---|---|
| All-purpose flour | 1 cup |
| Unsweetened cocoa powder | 1/3 cup |
| Granulated sugar | 1 cup |
| Baking powder | 1 tsp |
| Baking soda | 1/2 tsp |
| Salt | 1/4 tsp |
| Eggs | 2 large |
| Milk | 1/2 cup |
| Vegetable oil | 1/2 cup |
| Vanilla extract | 1 tsp |
| Chocolate frosting | 2 cups (store-bought or homemade) |
| Chocolate cookies (like Oreos) | 1 cup (crushed) |
| Gummy worms | 10 pieces |
| Tombstone-shaped cookies | for decoration |
Cooking Instructions:
- Preheat the Oven: Begin by preheating your oven to 350°F (175°C). Line a standard muffin pan with cupcake liners.
- Mix Dry Ingredients: In a large bowl, sift together the all-purpose flour, unsweetened cocoa powder, granulated sugar, baking powder, baking soda, and salt. Whisk until well combined.
- Combine Wet Ingredients: In another bowl, beat together the eggs. Then add the milk, vegetable oil, and vanilla extract. Mix until everything is well blended.
- Combine Wet and Dry Ingredients: Gradually pour the wet ingredients into the dry ingredients, stirring gently until just combined. Be careful not to overmix; a few lumps are fine.
- Fill the Cupcake Liners: Using a scoop or a spoon, fill each cupcake liner about two-thirds full with the batter.
- Bake the Cupcakes: Place the muffin pan in the preheated oven and bake for about 18-20 minutes or until a toothpick inserted into the center comes out clean.
- Cool the Cupcakes: Once baked, remove the cupcakes from the oven and allow them to cool in the pan for about 5 minutes. Then transfer them to a wire rack to cool completely.
- Frost the Cupcakes: Once the cupcakes are completely cool, generously frost each one with chocolate frosting using a piping bag or spatula.
- Create the Graveyard Effect: Sprinkle the crushed chocolate cookies on top of the frosted cupcakes to create the appearance of dirt.
- Add Decorations: Stick a gummy worm into some of the cupcakes for a funny touch. Finally, place a tombstone-shaped cookie into each cupcake to complete the haunted graveyard look.
- Serve and Enjoy: Arrange the Haunted Graveyard Cupcakes on a platter and serve them at your Halloween potluck. Enjoy the spooky treat with your friends and family!
Ghostly Marshmallow Treats

Ghostly Marshmallow Treats are a fun and easy no-bake dessert that is perfect for Halloween gatherings. These adorable ghost-shaped treats combine sweet marshmallows with a light coating of white chocolate, making them not only festive but delicious too. Kids and adults alike will love these spooky little snacks that are sure to steal the show at any potluck!
| Ingredients | Quantity |
|---|---|
| Large marshmallows | 15-20 pieces |
| White chocolate chips | 2 cups |
| Mini chocolate chips (for eyes) | As needed |
| Lollipop sticks or skewers | Optional, for presentation |
Cooking Instructions:
- Prepare Your Work Area: Start by covering a baking sheet with parchment paper. This will prevent the marshmallow treats from sticking once they are coated and allow for easy cleanup.
- Melt the White Chocolate: In a microwave-safe bowl, add the white chocolate chips. Microwave them in 30-second intervals, stirring after each until completely melted and smooth. Be careful not to overheat, as chocolate can burn.
- Dip the Marshmallows: Take a large marshmallow and carefully dip it into the melted white chocolate, ensuring it’s fully coated. Use a fork or a skewer to help lift it out and gently shake off any excess chocolate.
- Place on the Parchment: Squeeze the bottom of the marshmallow slightly and place it upright on the prepared baking sheet. This helps create the ghostly shape. Repeat with the remaining marshmallows.
- Add Eyes: While the chocolate is still wet, press mini chocolate chips into the marshmallows to create eyes. You can adjust their positioning to give each ghost a fun expression.
- Let the Treats Set: Allow the white chocolate to set at room temperature for about 30 minutes or place the baking sheet in the refrigerator for 10-15 minutes to speed up the process.
- Presentation (Optional): If using lollipop sticks or skewers, carefully insert one into the bottom of each marshmallow ghost for easy handling and display.
- Serve and Enjoy: Once the chocolate has firmed up and the treats are stable, they’re ready to be served! Arrange them on a platter or in a fun Halloween-themed container for your potluck. Enjoy the haunted fun!
Candy Corn Fruit Cups
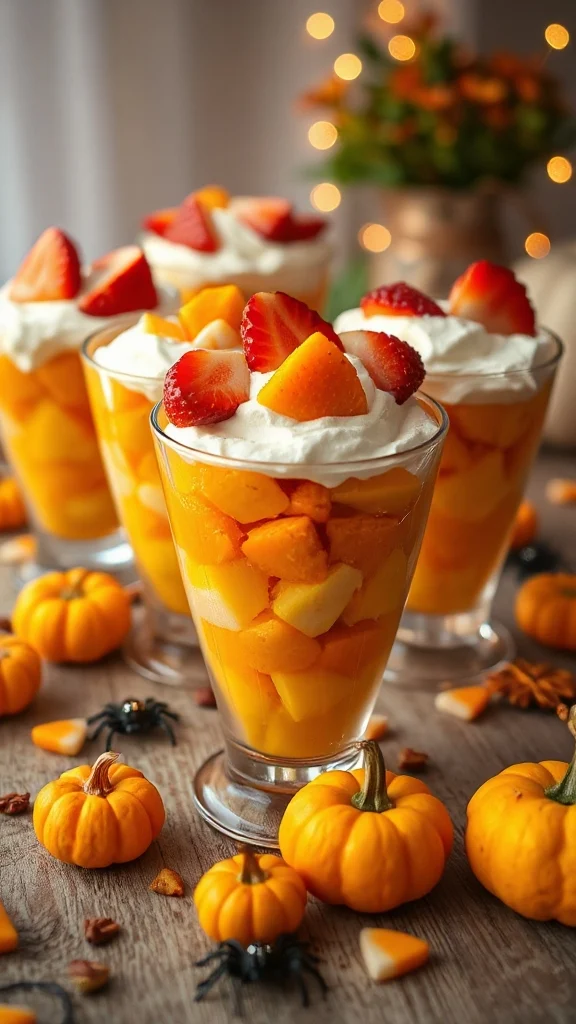
Candy Corn Fruit Cups are a vibrant and fun way to celebrate Halloween while keeping things healthy! These charming fruit cups mimic the iconic candy corn colors, featuring layers of delicious fruit that not only look festive but also taste great. Perfect for potlucks or parties, these cups are a delightful way to offer a nutritious treat that kids and adults will enjoy.
| Ingredients | Quantity |
|---|---|
| Pineapple (diced) | 2 cups |
| Mandarin oranges (drained) | 2 cups |
| Bananas (sliced) | 2 large |
| Whipped cream (optional) | 1 cup |
| Clear plastic cups | 12-16 cups |
| Fresh mint leaves (for garnish) | As needed |
Cooking Instructions:
- Prepare the Fruit: Start by washing and cutting the fruits as necessary. Dice the pineapple into small cubes, drain the mandarin oranges if using canned, and slice the bananas into thin rounds.
- Layer the Ingredients: Take a clear plastic cup and begin by adding a layer of diced pineapple at the bottom. Pack it in gently, guaranteeing an even layer. This will represent the yellow base of candy corn.
- Add the Mandarins: Next, layer the mandarin oranges on top of the pineapple. This layer will be orange and should also be packed gently. Confirm the oranges are evenly distributed to create a colorful contrast.
- Finish with Bananas: Finally, add a layer of banana slices on top of the mandarin oranges. This will represent the white tip of the candy corn. Make sure the banana layer is smooth and even.
- Top with Whipped Cream (Optional): If desired, add a dollop of whipped cream on top of the banana layer for added sweetness and a decorative touch.
- Garnish: For a final touch, add a fresh mint leaf on top of each cup to enhance presentation and give a revitalizing flavor.
- Chill and Serve: Refrigerate the fruit cups for at least 30 minutes before serving to keep them fresh and cool. Serve them at your potluck and enjoy the healthy, festive treat!
These Candy Corn Fruit Cups not only provide a burst of color to your table but also give everyone a revitalizing option among the other sweet Halloween treats!
Witch’s Brew Punch
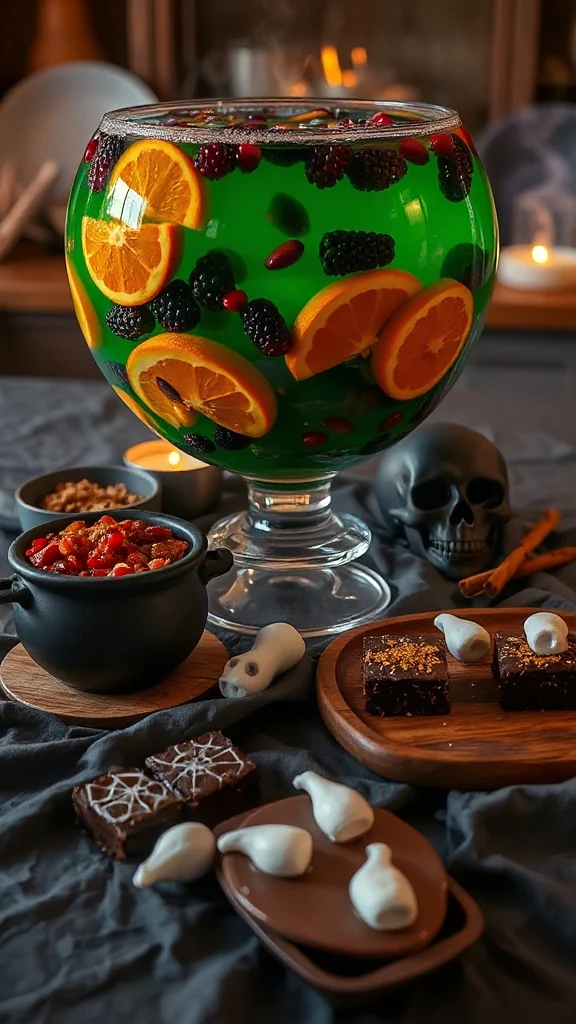
Witch’s Brew Punch is a festive and fun drink that will be the highlight of any Halloween gathering. This vibrant, bubbling concoction combines fruit juices and soda with a spooky twist, making it a perfect potluck item for both kids and adults. With its eerie green color and floating “eyeball” garnishes, this punch will not only quench thirst but also add a whimsical touch to your Halloween festivities.
| Ingredients | Quantity |
|---|---|
| Green fruit punch | 2 liters |
| Lemon-lime soda | 2 liters |
| Pineapple juice | 1 cup |
| Lime sherbet | 1 quart |
| Gummy eyeballs (or grapes) | 1 cup |
| Fresh mint leaves | For garnish |
| Ice cubes | As needed |
Cooking Instructions:
- Prepare the Punch Base: In a large punch bowl, combine 2 liters of green fruit punch, 2 liters of lemon-lime soda, and 1 cup of pineapple juice. Stir gently to mix the ingredients without losing the carbonation of the soda.
- Add Lime Sherbet: Scoop the lime sherbet into the punch bowl. As it melts, it will create a frothy, bubbling effect, adding to the “witch’s brew” aesthetic.
- Float the Eyeballs: If using gummy eyeballs, drop them into the punch for a spooky effect. If you prefer using grapes, slice them in half and float them in the punch for a similar look.
- Chill the Punch: Add ice cubes to the punch for extra chill and keep the drink invigorating. You can either add the ice directly to the bowl or serve the punch over ice in individual cups.
- Garnish: To elevate the presentation, add fresh mint leaves into the punch as a garnish. This adds a pop of color and a refreshing aroma.
- Serve: Ladle the punch into cups and enjoy your Witch’s Brew Punch at the potluck. Watch as your guests delight in this spooky, tasty, and festive drink!
This Witch’s Brew Punch not only looks enticing but tastes invigorating, making it a perfect addition to your Halloween potluck spread!
Halloween Cheesecake Bars
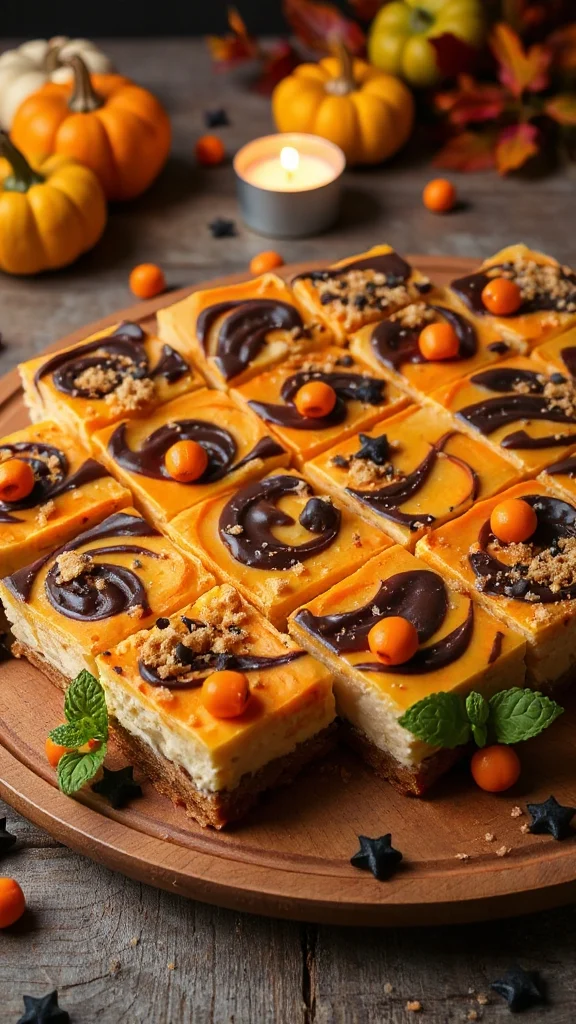
Halloween Cheesecake Bars are a delightful and spooky dessert perfect for any Halloween gathering. These creamy, rich cheesecake bars feature a graham cracker crust and a subtle hint of pumpkin and spices, making them a seasonal favorite. Their festive orange color and optional chocolate spider web topping make them an eye-catching addition to your potluck spread.
| Ingredients | Quantity |
|---|---|
| Graham cracker crumbs | 1 1/2 cups |
| Unsalted butter, melted | 1/2 cup |
| Granulated sugar | 1 cup |
| Cream cheese, softened | 16 ounces |
| Pumpkin puree | 1 cup |
| Eggs | 2 large |
| Vanilla extract | 1 teaspoon |
| Ground cinnamon | 1 teaspoon |
| Ground nutmeg | 1/2 teaspoon |
| Salt | 1/4 teaspoon |
| Chocolate syrup (for topping) | As needed |
Cooking Instructions:
- Preheat the Oven: Preheat your oven to 325°F (160°C). Grease a 9×9-inch baking pan with cooking spray or line it with parchment paper for easy removal.
- Make the Crust: In a mixing bowl, combine the graham cracker crumbs, melted butter, and 1/4 cup of granulated sugar. Mix until the crumbs are well coated and resemble wet sand. Press the mixture evenly into the bottom of the prepared baking pan. Bake the crust in the preheated oven for about 10 minutes, or until lightly golden. Remove from the oven and set aside to cool.
- Prepare the Cheesecake Filling: In a large mixing bowl, beat the softened cream cheese with an electric mixer until creamy and smooth. Gradually add the remaining 3/4 cup of granulated sugar and mix until well blended.
- Add Pumpkin and Spices: Add the pumpkin puree, eggs, vanilla extract, ground cinnamon, ground nutmeg, and salt to the cream cheese mixture. Beat on low speed until all ingredients are combined and the mixture is smooth. Avoid overmixing to keep the filling light and fluffy.
- Pour and Bake: Pour the cheesecake filling over the cooled graham cracker crust in the baking pan. Spread the filling evenly using a spatula. Bake in the preheated oven for 30-35 minutes, or until the edges are set and the center has a slight jiggle.
- Cool and Chill: Remove the cheesecake bars from the oven and allow them to cool in the pan on a wire rack. Once cooled to room temperature, cover the pan with plastic wrap and refrigerate for at least 4 hours or overnight for better cutting.
- Serve: Once chilled, lift the cheesecake out of the pan using the parchment paper (if lined). Cut into squares. For a spooky touch, drizzle chocolate syrup on top in a spider web pattern before serving.
These Halloween Cheesecake Bars are not only delicious but also add a festive flair to your potluck table, making them sure to please your guests!
Frighteningly Festive Cookie Platter

Frighteningly Festive Cookie Platter is an assortment of spooky-themed cookies that are perfect for Halloween gatherings. This colorful and fun cookie platter includes decorated sugar cookies, pumpkin-shaped cookies, and eerily delicious chocolate chip cookies. With creative decorations using frosting and sprinkles, these cookies will surely delight your guests both young and old!
| Ingredients | Quantity |
|---|---|
| All-purpose flour | 3 cups |
| Granulated sugar | 1 1/2 cups |
| Unsalted butter, softened | 1 cup |
| Eggs | 2 large |
| Vanilla extract | 1 teaspoon |
| Baking powder | 1 teaspoon |
| Salt | 1/2 teaspoon |
| Powdered sugar (for icing) | 2 cups |
| Milk (for icing) | 3-4 tablespoons |
| Food coloring (various colors) | As needed |
| Halloween-themed sprinkles | As needed |
| Chocolate chips | 1 cup |
Cooking Instructions:
- Preheat the Oven: Preheat your oven to 350°F (175°C) and line baking sheets with parchment paper.
- Make the Cookie Dough: In a large bowl, cream together the softened butter and granulated sugar until light and fluffy. Add the eggs one at a time, mixing well after each addition. Stir in the vanilla extract.
- Combine Dry Ingredients: In a separate bowl, whisk together the all-purpose flour, baking powder, and salt. Gradually add the dry ingredients to the wet mixture, stirring until just combined.
- Form Cookies: For sugar cookies, scoop tablespoon-sized amounts of dough, roll them into balls, and place them on the prepared baking sheets, leaving space for spreading. For pumpkin-shaped cookies, use cookie cutters to cut out shapes before baking.
- Add Chocolate Chips: If making chocolate chip cookies, fold in the chocolate chips into half of the prepared dough before scooping onto the sheets.
- Bake: Bake in the preheated oven for 8-10 minutes, or until the edges are lightly golden. Remove from the oven and allow the cookies to cool on the baking sheets for a few minutes before transferring them to wire racks to cool completely.
- Make the Icing: In a medium bowl, combine the powdered sugar and milk until you reach a smooth, pourable consistency. Divide the icing into separate bowls and add food coloring to create different colors for decorating.
- Decorate: Once the cookies have completely cooled, use piping bags or a small spatula to decorate the cookies with the colorful icing. Add Halloween-themed sprinkles to enhance the festive appearance.
- Assemble the Platter: After decorating, arrange the assorted cookies on a large platter. Mix shapes and colors for a vibrant and inviting display.
Enjoy your Frighteningly Festive Cookie Platter at your Halloween potluck, leaving everyone excited for a sweet treat!