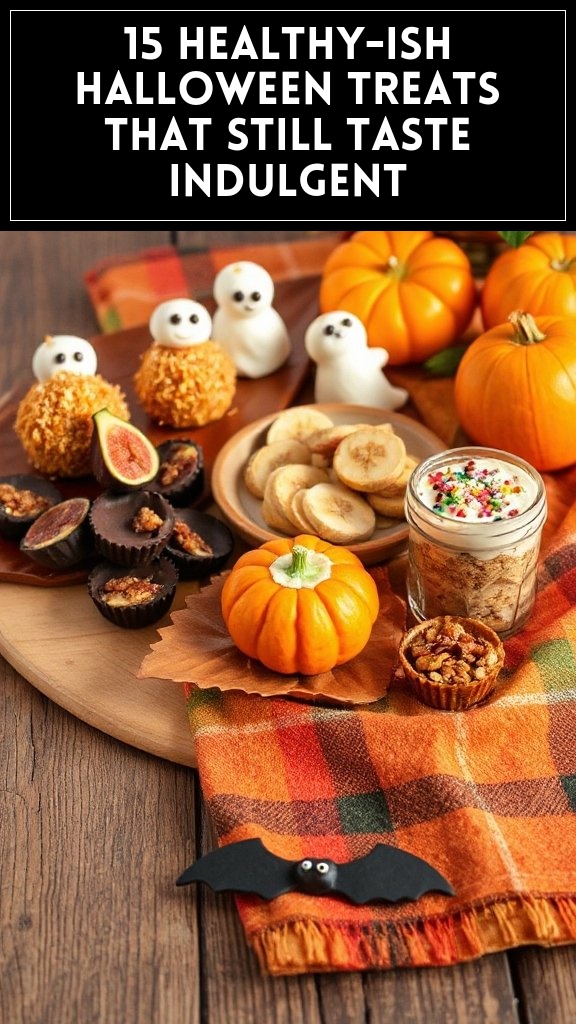
Pumpkin Spice Energy Bites are a healthy and delicious option for a Halloween treat. These no-bake snacks are packed with nutritious ingredients and bursting with the comforting flavors of pumpkin spice. Perfect for an afternoon pick-me-up or a fun addition to your Halloween festivities, these energy bites are easy to make ahead of time and enjoy on the go.
Combine Wet Ingredients: In a large mixing bowl, combine the pumpkin puree, nut butter, honey (or maple syrup), and vanilla extract. Mix well until the ingredients are fully blended and smooth.
Add Dry Ingredients: To the wet mixture, add the rolled oats, ground cinnamon, ground ginger, ground nutmeg, and chia seeds (or flaxseeds). If you’re using mini chocolate chips, add them to the mixture as well. Stir everything together until all the ingredients are evenly incorporated.
Chill: Once everything is mixed thoroughly, cover the bowl with plastic wrap and place it in the refrigerator for about 30 minutes. This will make the mixture easier to handle when forming the energy bites.
Form the Bites: After chilling, remove the bowl from the refrigerator. Use your hands to scoop out about 1 tablespoon of the mixture and roll it into a ball. Repeat this process until all the mixture is used. You should have around 12-16 energy bites, depending on the size you make.
Store: Place the energy bites in an airtight container. You can store them in the refrigerator for up to a week or in the freezer for up to a month.
Serve: Enjoy your Pumpkin Spice Energy Bites as a snack at any time or serve them at Halloween gatherings for a festive treat!
Mummy Hot Dogs
Mummy Hot Dogs are a fun and easy Halloween treat that will delight both kids and adults alike! These adorable little mummies are made from hot dogs wrapped in crescent dough, creating a spooky yet delicious dish perfect for Halloween parties or family gatherings. They are quick to prepare and can be served with a side of mustard or ketchup for dipping.
Ingredients
Quantity
Hot dogs
8
Crescent roll dough
1 can (8 oz)
Mustard or ketchup (for serving)
As needed
Instructions:
Preheat Oven: Begin by preheating your oven to 375°F (190°C). This will guarantee that the Mummy Hot Dogs bake to a crispy golden brown.
Prepare Crescent Dough: Open the can of crescent roll dough and unroll it onto a clean surface. Do not separate the triangles just yet. Instead, use a pizza cutter or sharp knife to cut the dough into thin strips, about 1/4 inch wide, to create the “bandages” for mummies.
Wrap the Hot Dogs: Take one hot dog and start wrapping the thin strips of dough around it, leaving a small gap for the “face.” Continue wrapping until the hot dog is mostly covered, resembling a mummy. Repeat this with the remaining hot dogs.
Place on Baking Sheet: Line a baking sheet with parchment paper or lightly grease it. Carefully place the wrapped hot dogs on the sheet, guaranteeing they don’t touch each other.
Bake: Once all the Mummy Hot Dogs are on the baking sheet, place them in the preheated oven and bake for 12-15 minutes, or until the crescent dough is golden brown and cooked through.
Add Eyes: Once baked, remove the Mummy Hot Dogs from the oven and let them cool slightly. Use small dots of mustard or ketchup to create eyes on each mummy for a fun, spooky touch.
Serve: Arrange the Mummy Hot Dogs on a plate and serve them warm alongside additional mustard or ketchup for dipping. Enjoy your festive and delicious Halloween treat!
Spooky Ghost Cheese Balls
Spooky Ghost Cheese Balls are an entertaining and delicious Halloween appetizer that will surprise and delight your guests. Shaped like little ghosts and covered with cream cheese and spices, these cheese balls are perfect for snacking with crackers, chips, or veggies. They’re easy to make ahead of time and will add a fun touch to your Halloween festivities!
Ingredients
Quantity
Cream cheese
8 oz
Cheddar cheese (shredded)
1 cup
Garlic powder
1/2 teaspoon
Onion powder
1/2 teaspoon
Salt
1/4 teaspoon
Black olives (sliced)
8 slices
Fresh herbs (for garnish)
Optional
Crackers or vegetable sticks
For serving
Instructions:
Mix Ingredients: In a medium-sized mixing bowl, combine the cream cheese, shredded cheddar cheese, garlic powder, onion powder, and salt. Using a spatula or a hand mixer, blend the ingredients together until smooth and well combined.
Shape into Balls: Once the cheese mixture is well-mixed, use your hands to scoop out about 1-2 tablespoons of the mixture and roll it into a small ball. Repeat this process until you have formed all the cheese balls, about 8-10, depending on your desired size.
Chill in the Fridge: Place the cheese balls on a plate or baking sheet and refrigerate for at least 30 minutes. Chilling will help them hold their shape better when decorating.
Decorate as Ghosts: Once the cheese balls are firm, remove them from the refrigerator. To create the ghostly appearance, you can use a small knife or toothpick to create a ghostly texture on the surface.
Add Eyes: Cut the black olives into halves or quarters and place them on the cheese balls to form the ghosts’ eyes. You can arrange them however you like for the perfect spooky look!
Garnish and Serve: If desired, sprinkle fresh herbs around the plate for a festive touch. Arrange the Spooky Ghost Cheese Balls on a serving platter alongside crackers or vegetable sticks for dipping. Enjoy these festive bites at your Halloween celebration!
These playful ghost cheese balls are not only a treat for the taste buds but also bring a fun visual element to your holiday spread!
Wicked Witch Guacamole
Wicked Witch Guacamole is a playful twist on the classic avocado dip, perfect for your Halloween party! This vibrant green dip is enhanced with unexpected ingredients to give it an eerie, witchy appearance and delightful flavor. It pairs perfectly with chips, veggies, or can be used as a spread. Plus, it’s easy to make ahead of time!
Ingredients
Quantity
Ripe avocados
3
Fresh lime juice
2 tablespoons
Garlic (minced)
2 cloves
Red onion (finely chopped)
1/4 cup
Jalapeño (seeds removed and diced)
1 small
Salt
1/2 teaspoon
Black olives (sliced)
1/3 cup
Fresh cilantro (chopped)
2 tablespoons
Green food coloring
1-2 drops (optional)
Instructions:
Prepare the Avocados: Cut the ripe avocados in half, remove the pits, and scoop the flesh into a mixing bowl.
Mash the Avocados: Using a fork or a potato masher, mash the avocado until it reaches your desired level of creaminess. Leave some chunks for texture if you prefer.
Add Lime Juice and Seasonings: Pour the fresh lime juice over the mashed avocado. This will not only add flavor but also prevent the avocado from browning. Add the minced garlic, chopped red onion, diced jalapeño, and salt. Mix well to combine all the ingredients thoroughly.
Incorporate Olives and Cilantro: Fold in the sliced black olives and chopped cilantro, reserving a few olives for decoration. Mix until evenly distributed throughout the guacamole.
Adjust Color (Optional): If you’d like to enhance the ‘wicked witch’ look, add 1-2 drops of green food coloring and stir until the desired color is achieved.
Chill: Transfer the Wicked Witch Guacamole to an airtight container and refrigerate for at least 30 minutes. This allows the flavors to meld and helps it firm up.
Serve with Style: Before serving, top the guacamole with the reserved olive slices to create a spooky face or eyes. Serve your Wicked Witch Guacamole in a festive bowl alongside tortilla chips, veggie sticks, or spread on sliders to add a Halloween touch to your snack table!
This guacamole is not just a delicious dip; it’s a fun, thematic addition to your Halloween spread that your guests will love!
Frankenstein Rice Krispie Treats
Frankenstein Rice Krispie Treats are a fun and festive twist on the classic marshmallow treat, perfect for Halloween celebrations. These delightful snacks feature the iconic green color of Frankenstein’s monster and are topped with chocolate and candy eyes, making them an irresistible addition to your spooky snack table. They not only taste amazing but also add a playful touch to your Halloween festivities. Plus, they’re easy to make ahead of time!
Prepare the Pan: Start by greasing a 9×13 inch baking dish with non-stick spray or butter. This will prevent the Rice Krispie treats from sticking to the pan.
Melt the Butter and Marshmallows: In a large saucepan, melt the butter over low heat. Once the butter is melted, add the mini marshmallows to the pan. Stir constantly until the marshmallows are completely melted and the mixture is smooth.
Add Food Coloring: Remove the saucepan from heat and add 1-2 drops of green food coloring to the melted marshmallow mixture. Stir well until the color is evenly distributed throughout the mixture.
Combine with Rice Krispies: Gradually add the Rice Krispies cereal to the green marshmallow mixture, stirring gently until all the cereal is well coated with the gooey mixture.
Transfer to Pan: Pour the mixture into the prepared baking dish. Using a spatula or your greased hands, press the mixture firmly and evenly into the dish.
Cool and Cut: Allow the Rice Krispie treats to cool completely at room temperature for about 30 minutes. Once cooled, use a sharp knife to cut them into rectangular pieces.
Melt Chocolate: While the treats are cooling, melt the chocolate melts or candy coating according to package instructions until smooth.
Decorate: Dip the top of each Rice Krispie treat into the melted chocolate to create the “Frankenstein” hair effect. Alternatively, you can drizzle the chocolate over the top with a spoon for a more stylized look.
Add Candy Eyes: While the chocolate is still wet, place 2 candy eyes on each treat. If desired, use an edible black marker to draw on a mouth or additional details to enhance the Frankenstein look.
Let Set: Allow the chocolate to set at room temperature or refrigerate for a short while to speed up the hardening process.
Serve and Enjoy: Once the chocolate has hardened, your Frankenstein Rice Krispie Treats are ready to be served! Place them on a festive platter and watch your guests enjoy this playful Halloween treat.
These treats are not only a delight to eat but also a great way to get creative in the kitchen this Halloween!
Candy Corn Fruit Cups
Candy Corn Fruit Cups are a colorful and healthy Halloween treat that plays on the classic candy corn look. These fun, festive cups are layered with vibrant fruits and are not only visually appealing but also packed with nutrients. They make for a perfect snack for kids and adults alike, especially when you want to offer something a bit lighter among the usual Halloween sweets. Enjoy making these delightful fruit cups ahead of time for easy serving during Halloween gatherings!
Ingredients
Quantity
Pineapple chunks
1 cup
Orange segments
1 cup
Banana slices
1 cup
Whipped cream (optional)
1 cup
Clear plastic cups
4 to 6 cups
Candy corn (for garnish)
1/2 cup
Instructions:
Prepare the Cups: Gather your clear plastic cups and set them aside. These will serve as the individual serving containers for the fruit cups.
Layer the Fruit: Begin by adding 1/3 cup of pineapple chunks to the bottom of each plastic cup. This will be the yellow layer, resembling the bottom of a candy corn piece.
Add Orange Segments: Next, gently layer 1/3 cup of orange segments on top of the pineapple in each cup. This orange layer will sit in the middle and mimic the classic candy corn color.
Top with Banana Slices: Finally, add 1/3 cup of banana slices to the top of each cup. This will represent the white portion of the candy corn.
Add Whipped Cream (Optional): If desired, you can finish off each fruit cup with a dollop of whipped cream on top for added sweetness and decoration.
Garnish with Candy Corn: Scatter a few pieces of candy corn on the whipped cream (if using) or on top of the banana layer as a fun and festive garnish.
Chill and Serve: Place the cups in the refrigerator to chill for at least 30 minutes before serving. This will help keep the fruits fresh and allow for easy serving at your Halloween gathering.
Enjoy: When ready to serve, simply take the cups out of the refrigerator and enjoy the colorful and tasty Candy Corn Fruit Cups with your guests!
Halloween Popcorn Mix
Halloween Popcorn Mix is a fun and festive treat that brings together sweet and salty flavors, perfect for snacking while watching spooky movies or entertaining at Halloween parties. With a mix of popcorn, candy, and festive sprinkles, this treat is easy to make ahead of time and guaranteed to be a hit among kids and adults alike. Customize it with your favorite candies or include seasonal colors to make it even more Halloween-themed!
Prepare the Popcorn: If using unpopped kernels, pop them according to the package instructions to yield about 8 cups of popped popcorn. If using pre-popped popcorn, make sure it’s fresh and unsalted.
Melt the Chocolate: In a microwave-safe bowl, add the white chocolate chips. Microwave in 30-second intervals, stirring in between, until completely melted and smooth. Be careful not to overheat the chocolate.
Mix Ingredients: In a large mixing bowl, combine the popped popcorn, candy corn, pretzel sticks, and M&M’s. Mix gently to combine without crushing the popcorn.
Add White Chocolate: Pour the melted white chocolate over the popcorn mixture. Use a spatula or wooden spoon to carefully fold the chocolate into the mix until everything is evenly coated.
Season the Mix: If desired, melt the butter and drizzle it over the popcorn mix for added flavor. Sprinkle with salt to taste and mix gently again to incorporate.
Add Sprinkles: Before the chocolate sets, add in the Halloween sprinkles, mixing lightly to distribute them throughout the popcorn mixture.
Cool the Mix: Spread the popcorn mix out onto a large baking sheet lined with parchment paper. Allow it to cool for about 30 minutes until the chocolate hardens.
Store and Serve: Once the chocolate is fully set, break the popcorn mix into clusters and transfer it into a serving bowl or individual treat bags. Store in an airtight container until ready to serve.
Enjoy: This spooky Halloween Popcorn Mix is now ready to share with friends and family, perfect for indulging during the Halloween festivities!
Spider Web Pizza Bites
Spider Web Pizza Bites are a delightful and easy-to-make Halloween treat that will thrill both kids and adults alike. These mini pizzas are perfect for parties or as a spooky snack, featuring a delicious combination of melted cheese and savory toppings, all topped off with a whimsical spider web of cheese that adds an extra festive touch.
Preheat the Oven: Begin by preheating your oven to 375°F (190°C). This will guarantee that your pizza bites cook evenly.
Prepare the Muffins: Slice the English muffins in half, placing them cut side up on a baking sheet. If desired, you can lightly brush each muffin half with olive oil to enhance the flavor and crispness.
Add Pizza Sauce: Spoon a generous amount of pizza sauce onto each muffin half, spreading it evenly across the surface. Be sure to leave a small border around the edges to prevent overflow.
Layer Toppings: Sprinkle shredded mozzarella cheese liberally over the sauce on each muffin. Then, add your choice of toppings, such as sliced black olives and pepperoni. Get creative with the arrangement, making it as spooky or fun as you like.
Create the Spider Web: To make the spider web effect, take a small amount of the remaining mozzarella cheese and place it in a microwave-safe bowl. Melt it in the microwave in 15-second increments until just melted. Using a spoon, drizzle the melted cheese in a circular pattern over the pizza bites, then use a toothpick to draw lines from the center to the edge to create a web effect.
Season and Bake: Sprinkle a bit of Italian seasoning over the top of each pizza bite. Place the baking sheet in the oven and bake for about 10-12 minutes, or until the cheese is bubbly and golden brown.
Cool and Garnish: Once done, remove the baking sheet from the oven and allow the pizza bites to cool for a few minutes. If desired, garnish with fresh basil for an extra pop of color and flavor.
Serve and Enjoy: Serve your Spider Web Pizza Bites warm and watch as they disappear at your Halloween gathering. Enjoy this fun and spooky twist on a classic favorite!
Creepy Crawly Chocolate-Covered Pretzels
Creepy Crawly Chocolate-Covered Pretzels are a fun and festive Halloween treat that combines the salty crunch of pretzels with the sweetness of chocolate. Perfect for parties or as a spooky snack, these treats are easy to make and can be customized with a variety of toppings to give them an extra creepy touch. The chocolatey coating and creepy crawly decorations make them a hit with both kids and adults.
Prepare the Workspace: Begin by covering a baking sheet with parchment paper. This will prevent the chocolate-covered pretzels from sticking and make for easier clean-up.
Melt the Chocolate: In a microwave-safe bowl, combine the semi-sweet chocolate chips. Heat in the microwave in 30-second intervals, stirring after each interval, until fully melted and smooth. Be careful not to overheat the chocolate to prevent it from seizing.
Dip the Pretzels: Take a pretzel rod and dip it into the melted semi-sweet chocolate, ensuring it is fully coated. Allow the excess chocolate to drip off before placing the pretzel on the prepared baking sheet.
Add Creepy Crawly Decorations: Before the chocolate sets, sprinkle black sprinkles over the chocolate-covered pretzel. You can also add candy eyeballs to give them a creepy look. Be creative and design different patterns with the toppings.
Melt the White Chocolate: In a separate bowl, melt the white chocolate chips using the same method as before. Once melted, drizzle the white chocolate over the chocolate-covered pretzels using a fork or a piping bag, creating a spider web effect.
Chill the Pretzels: Place the baking sheet in the refrigerator for about 20-30 minutes, or until the chocolate has fully set and hardened.
Serve and Enjoy: Once the chocolate is firm, remove the pretzels from the refrigerator. Arrange them on a platter, and sprinkled additional orange and black sugar sprinkles if desired. Serve them at your Halloween party, and watch them disappear!
Monster Halloween Cupcakes
Monster Halloween Cupcakes are a delightful and spooky treat perfect for Halloween celebrations. These fun cupcakes boast vibrant colors and playful monster decorations that will excite both kids and adults alike. With a simple vanilla cupcake base and colorful frosting, these cupcakes can be topped with candy eyes, chocolate sprinkles, and any other creepy embellishments you can think of!
Preheat the Oven: Preheat your oven to 350°F (175°C) and line a standard cupcake tin with cupcake liners.
Mix Dry Ingredients: In a large mixing bowl, whisk together the all-purpose flour, granulated sugar, baking powder, baking soda, and salt until well combined.
Cream Butter: In another bowl, cream the unsalted butter using a hand mixer or stand mixer on medium speed for about 2-3 minutes until light and fluffy.
Add Eggs and Vanilla: Add the eggs, one at a time, beating well after each addition. Then, mix in the vanilla extract.
Combine Wet and Dry Ingredients: Gradually add the dry ingredients to the creamed butter mixture, alternating with the milk, starting and ending with the dry ingredients. Mix until just combined; be careful not to overmix.
Add Food Coloring: Divide the batter into separate bowls for different colors if desired. Add food coloring to achieve your desired shades (e.g., green and purple). Mix until the colors are well incorporated.
Fill the Cupcake Liners: Using a scoop or spoon, fill each cupcake liner about 2/3 full with the colored batter.
Bake: Place the cupcake tin in the preheated oven and bake for 18-20 minutes, or until a toothpick inserted into the center comes out clean.
Cool the Cupcakes: Once baked, remove the cupcakes from the oven and allow them to cool in the tin for about 5 minutes. Then transfer them to a wire rack to cool completely.
Frost the Cupcakes: Once the cupcakes have cooled, use a piping bag fitted with a decorative tip to swirl on the buttercream frosting in colorful, monster-like designs.
Add Monster Features: To create monster faces, place candy eyes on top of the frosting and sprinkle chocolate sprinkles around for added texture and fun.
Serve and Enjoy: Arrange the Monster Halloween Cupcakes on a festive platter and enjoy celebrating Halloween with these delightful treats!
Ghoulish Sugar Cookies
Ghoulish Sugar Cookies are whimsical and festive treats that add a touch of fun to your Halloween festivities. These delightful cookies can be cut into spooky shapes such as ghosts, bats, and pumpkins, and are often decorated with colorful icing, sprinkles, and edible glitter to make them truly ghoulish. They are perfect for parties, school events, or simply to enjoy at home with family and friends.
Prepare the Oven: Preheat your oven to 350°F (175°C) and line a baking sheet with parchment paper or a silicone baking mat.
Combine Dry Ingredients: In a large mixing bowl, whisk together the all-purpose flour, baking powder, baking soda, and salt until evenly mixed.
Cream Butter and Sugar: In another large bowl, cream the softened unsalted butter and granulated sugar with a hand mixer or stand mixer on medium speed for about 2-3 minutes, until the mixture is light and fluffy.
Add Egg and Vanilla: Beat in the large egg and the vanilla extract to the butter mixture, mixing well until fully incorporated.
Mix Dry Ingredients into Wet: Gradually add the dry ingredients to the butter mixture, mixing on low speed until the dough starts to come together. If the dough is too crumbly, add the milk one tablespoon at a time until it forms a cohesive dough.
Chill the Dough: Divide the cookie dough into two equal portions, shape each into a disk, wrap in plastic wrap, and refrigerate for at least 30 minutes. This helps the cookies maintain their shape while baking.
Roll Out the Dough: On a floured surface, roll out one disk of dough to about ¼ inch thickness. Cut out desired shapes using cookie cutters.
Bake Cookies: Place the cut-out cookies on the prepared baking sheet, spacing them about 1 inch apart. Bake in the preheated oven for 8-10 minutes, or until the edges are lightly golden.
Cool the Cookies: Once baked, remove the baking sheet from the oven and allow the cookies to cool on the pan for about 5 minutes before transferring them to a wire rack to cool completely.
Decorate the Cookies: Once the cookies are completely cool, decorate with royal icing, sprinkles, or any decorations you like to make them ghoulish and perfect for Halloween!