11 Kid-Approved Halloween Snacks With Smart Add-Ins
Spooky Banana Ghosts
Spooky Banana Ghosts are a fun and healthy Halloween snack that kids will love! These adorable little treats are made using bananas and chocolate chips or mini chocolate chips to create ghostly faces. They’re not only simple to prepare but also make for a nutritious option that fits perfectly into the Halloween spirit.
Prepare the Bananas: Start by peeling the bananas and placing them on a cutting board. Cut each banana in half crosswise so you have two equal pieces from each banana.
Position the Bananas: Place the banana pieces upright on a serving platter, with the flat cut side resting on the plate. This will give them a stable base and keep them from tipping over.
Create the Eyes and Mouth: Using the semi-sweet chocolate chips, gently press two chips into each banana half to create the eyes. For the mouth, you can either use a mini chocolate chip tilted sideways or use a small piece of chocolate to make a spooky smile.
Final Presentation: Once all the banana halves have eyes and mouths, arrange them on the platter to create a spooky scene. You can even add some Halloween-themed decorations like fake spider webs or small plastic spiders around them for an extra festive touch.
Serve and Enjoy: Serve your Spooky Banana Ghosts immediately or refrigerate them for up to an hour before serving. Enjoy these playful treats at your Halloween party or as a festive snack for your little ghouls and goblins!
Mummy-Wrapped Hot Dogs
Mummy-Wrapped Hot Dogs are a fun and savory Halloween treat that combines the classic hot dog with flaky crescent roll dough, creating a spooky yet delicious dish that’s certain to be a hit with kids and adults alike. These adorable mummies are quick to prepare and can be served with your favorite dipping sauces, making them the perfect finger food for Halloween festivities.
Ingredients
Quantity
Hot dogs
8
Refrigerated crescent roll dough
1 can
Mustard or ketchup (for serving)
As needed
Cooking Steps:
Preheat the Oven: Begin by preheating your oven to 375°F (190°C). This will guarantee that your mummy-wrapped hot dogs cook evenly and become golden brown.
Prepare the Crescent Dough: Open the can of refrigerated crescent roll dough. Unroll the dough and separate it into triangles along the perforated lines. You will need to stretch each triangle slightly to make it longer, as this will help you wrap the hot dogs effectively.
Wrap the Hot Dogs: Take a hot dog and place it at the wide end of a crescent triangle. Starting from the wide end, wrap the dough around the hot dog, overlapping the edges slightly as you go. Leave a small section at the top of the hot dog exposed to create a “face” for the mummy. Repeat this process for all the hot dogs.
Arrange on a Baking Sheet: Place the wrapped hot dogs on a baking sheet lined with parchment paper. Leave some space between each one to allow for even cooking.
Bake: Place the baking sheet in the preheated oven and bake for about 12-15 minutes, or until the crescent dough is golden brown and puffed up.
Add Eyes (Optional): If you want to add some extra fun, you can dot some mustard or small pieces of olives on the exposed ends of the hot dogs for eyes once they are done baking. This adds a spooky touch to your mummy hot dogs!
Serve and Enjoy: Remove the mummy-wrapped hot dogs from the oven and let them cool for a minute before serving. Pair them with dipping sauces like mustard or ketchup and enjoy this spooky snack at your Halloween gathering!
Monster Apples
Monster Apples are a fun and healthy Halloween snack that kids will love! These playful treats transform ordinary apples into spooky monsters by adding a few simple ingredients to create fun faces. They not only taste great but also add a festive flair to any Halloween gathering, making them an excellent choice for parents looking for nutritious yet exciting snacks for their little ghouls and goblins.
Prepare the Apples: Start by washing the apples thoroughly under running water. Pat them dry with a towel. Choose apples that are firm and fresh for the best results.
Slice the Apples: Using a sharp knife, slice the apples into wedges. You can cut each apple into four or six wedges, depending on the size of the apples and how large you want the monster faces to be.
Spread the Peanut Butter: Take a butter knife and spread a generous layer of peanut butter on one side of each apple slice. This will act as the adhesive for attaching the monster features.
Create the Monster Faces: Now it’s time to get creative! Using mini marshmallows, place a few on the peanut butter side of each apple slice to create eyeballs. You can use chocolate chips or candy eyes for the pupils.
Add the Teeth: To give your monsters a fierce look, insert a few almond slices or other nuts into the peanut butter spread at the bottom of each apple wedge to resemble sharp teeth.
Finish with Details: If desired, add more mini marshmallows or chocolate chips around the monster’s face for extra fun decorations, making them as silly or scary as you’d like!
Serve and Enjoy: Arrange the monster apples on a serving platter and let the kids dig in! Enjoy this delightful and healthy Halloween snack that’s sure to bring smiles and giggles.
These whimsical Monster Apples are sure to be a hit at your Halloween festivities, combining health with spooky fun in every bite!
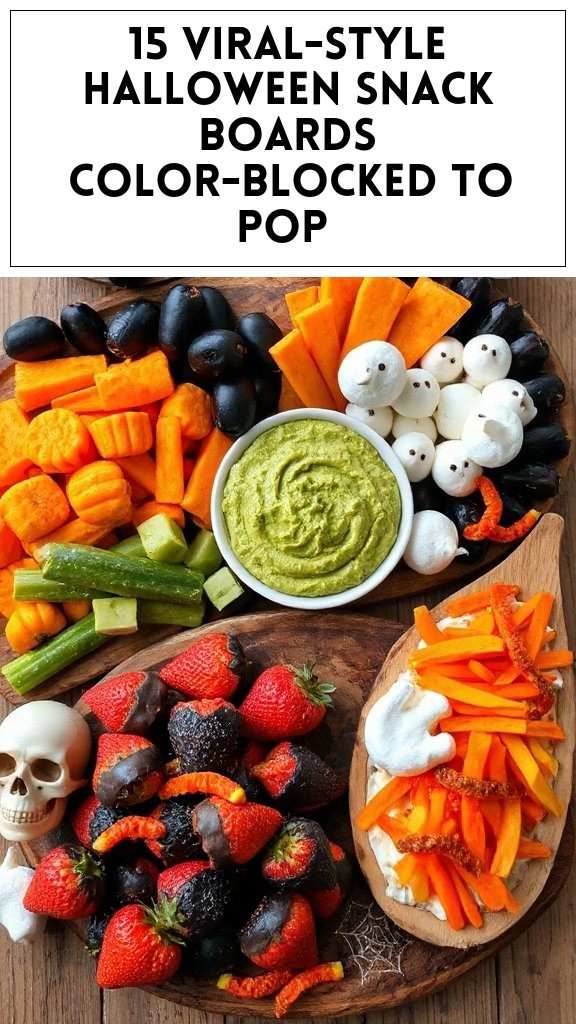
Pumpkin Patch Hummus
Pumpkin Patch Hummus is a fun and festive spin on traditional hummus, making it a perfect snack for Halloween gatherings. This creamy and nutritious dip combines the earthy flavors of chickpeas and pumpkin, along with a blend of spices to create a savory treat that kids and adults alike will enjoy. It pairs wonderfully with fresh veggies, crackers, or pita chips, bringing a splash of autumn to your Halloween festivities.
Prepare the Ingredients: Start by gathering all ingredients on a clean countertop. Make sure to drain the canned chickpeas thoroughly and set them aside.
Blend the Base: In a food processor, combine the drained chickpeas, canned pumpkin, tahini, olive oil, lemon juice, and minced garlic. This mixture forms the base of your hummus.
Add Spices: Sprinkle in the ground cumin, ground cinnamon, salt, and black pepper. These spices will infuse the hummus with a delightful autumn flavor.
Process Until Smooth: Secure the lid on the food processor and blend the mixture on high speed until it becomes creamy and smooth. If the hummus is too thick, gradually add water, one tablespoon at a time, while continuing to blend until you reach your desired consistency.
Taste and Adjust: Taste the hummus and adjust the seasoning as needed. You can add more salt, lemon juice, or spices to suit your preference.
Serve the Hummus: Transfer the pumpkin patch hummus into a serving bowl. For a festive touch, garnish the top with pumpkin seeds to resemble a pumpkin patch.
Chill and Enjoy: If possible, let the hummus chill in the refrigerator for about 30 minutes prior to serving for the flavors to meld together. Serve it with an assortment of fresh veggies, crackers, or pita chips.
This delightful Pumpkin Patch Hummus will not only provide a healthy snacking option but also inspire creative conversations about Halloween and the changing season!
Witch’s Brew Smoothie
The Witch’s Brew Smoothie is a spooky yet delicious way to kick off your Halloween celebrations. This vibrant green smoothie is packed with nutritious ingredients, making it both good for you and fun for kids. With a blend of spinach, banana, and a dash of spooky, it’s not only eye-catching but also a great way to sneak in some vitamins and minerals before the candy festivities begin.
Prepare the Ingredients: Begin by gathering all the ingredients on a clean countertop. Make sure to peel the frozen banana if it isn’t already, as this will be blended into the smoothie.
Combine Greens and Liquid: In a blender, add the fresh spinach and almond milk. Blend on high speed for about 30 seconds, or until the spinach is thoroughly blended and there are no green flecks.
Add the Remaining Ingredients: Next, add the frozen banana, Greek yogurt, honey or maple syrup (for sweetness), and ice cubes to the blender. If you want to make the smoothie even more nutritious, sprinkle in the chia seeds at this point.
Blend Until Smooth: Secure the lid on the blender and blend the mixture on high speed until it reaches a creamy, smooth consistency. This should take about 1-2 minutes. If the smoothie is too thick, you can add a little more almond milk until you reach your desired consistency.
Taste and Adjust: After blending, taste the smoothie. You can add more honey or syrup if you prefer it sweeter, and blend again for a few seconds.
Serve in Spooky Cups: Pour the Witch’s Brew Smoothie into fun Halloween-themed cups or glasses. If desired, add a sprinkle of Halloween-themed sprinkles on top for a festive touch.
Enjoy Immediately: Serve the smoothie right away for the best texture and flavor. Enjoy this healthy treat that’s perfect for Halloween gatherings!
This Witch’s Brew Smoothie is a delightful way to bring some healthy fun to your Halloween menu, curating spooky vibes with every sip!
Cheesy Cauliflower Halloween Popcorn
Cheesy Cauliflower Halloween Popcorn is a fun and healthy twist on the classic snack. This dish combines air-popped popcorn with roasted cauliflower florets, all seasoned with a cheesy flavoring that kids will love. It’s a great way to sneak in some veggies while still enjoying a crunchy, munchable treat, perfect for a Halloween movie night or party.
Preheat the Oven: Begin by preheating your oven to 425°F (220°C). This will guarantee that your cauliflower gets nicely roasted.
Prepare Popcorn: Air pop the popcorn kernels according to your popcorn maker’s instructions. If you don’t have an air popper, you can pop the kernels on the stove in a small pot with a lid, shaking occasionally until popping slows. Place the freshly popped popcorn in a large bowl and set aside.
Roast the Cauliflower: In a mixing bowl, toss the cauliflower florets with olive oil, making certain they are evenly coated. Sprinkle nutritional yeast, garlic powder, onion powder, salt, paprika, and black pepper over the cauliflower. Mix until well combined. Spread the cauliflower in a single layer on a baking sheet lined with parchment paper.
Bake the Cauliflower: Roast the cauliflower in the preheated oven for about 20-25 minutes, or until they are golden and slightly crispy, stirring halfway through for even cooking.
Combine with Popcorn: Once the cauliflower is roasted, remove it from the oven and allow it to cool slightly. Then, add the crispy cauliflower florets to the bowl of popcorn and toss gently to combine, making sure the cheesy seasoning sticks to both the popcorn and cauliflower.
Serve and Garnish: Transfer the Cheesy Cauliflower Halloween Popcorn to a large serving bowl. If desired, sprinkle with chopped parsley for an added touch of color. Serve warm and enjoy this delightfully spooky snack at your Halloween festivities!
This Cheesy Cauliflower Halloween Popcorn is sure to be a hit among kids and adults alike, providing a tasty way to enjoy Halloween treats without too much guilt!
Ghostly Yogurt Cups
Ghostly Yogurt Cups are a fun and nutritious Halloween treat that kids will love. These spooky snacks feature creamy yogurt topped with fruit and a playful ghostly appearance created using whipped cream and chocolate chips. Perfect for a festive gathering or a healthy addition to the Halloween party spread, these yogurt cups are both delicious and visually appealing.
Prepare the Cups: Start by taking your clear plastic cups or jars and placing them upright on a clean surface. Make sure they are clean and dry, as you will be layering the ingredients in them.
Layer the Yogurt: Spoon the Greek yogurt into each cup until they are about halfway full. If you’re using flavored yogurt, choose a flavor that your kids enjoy. You can alternate between plain and flavored yogurt for added variety.
Add Fruit Layer: Next, add a layer of sliced strawberries or banana on top of the yogurt. This not only adds some fruity flavor but also gives a nice colorful contrast to the ghostly appearance.
Top with Whipped Cream: Using a piping bag or a simply spoon, generously top each cup with whipped cream. This will create the “ghost” effect. Aim to make the whipped cream fluffy and high, resembling a ghost shape.
Create Ghost Faces: To make the faces of the ghosts, carefully place mini chocolate chips onto the whipped cream for eyes and a mouth. You can get creative with different expressions for added fun!
Add Optional Decorations: If desired, place a gummy worm on the side of each cup for an extra Halloween touch. This will add a creepy but fun element to your ghostly yogurt cups.
Serve and Enjoy: Place the finished Ghostly Yogurt Cups on a platter and serve them as a delightful Halloween treat. These cups can be made a few hours in advance and stored in the refrigerator until you are ready to enjoy them.
These Ghostly Yogurt Cups are an easy and delightful treat that kids can help make, adding to the fun of your Halloween festivities!
Creepy Crawly Veggie Cups
Creepy Crawly Veggie Cups are a fun and healthy Halloween snack that kids will love. With a playful twist, these veggie cups feature a variety of colorful vegetables served in small cups, topped with a deliciously creamy dip to create a spooky appearance. Perfect for serving at parties or as after-school snacks, these veggie cups make healthy eating a lot more fun!
Ingredients
Quantity
Mixed vegetables (carrots, celery, bell peppers, cucumbers)
2 cups (chopped)
Creamy ranch or yogurt dip
1 cup
Olives (for decoration)
1/2 cup
Cherry tomatoes (optional)
1 cup
Clear plastic cups or jars
4-6 cups
Cooking Steps:
Prepare the Vegetables: Start by washing and chopping your mixed vegetables into bite-sized pieces. Choose a variety of colors and shapes, such as carrot sticks, celery sticks, bell pepper strips, and cucumber slices. This variety will make the veggie cups visually appealing.
Prepare the Cups: Take your clear plastic cups or jars and place them upright on a clean surface. Confirm they are clean and dry as you will be layering the ingredients in them.
Add the Dip Layer: Spoon a generous amount of creamy ranch or yogurt dip into the bottom of each cup. This will act as the “ground” for your creepy crawly scene.
Layer the Vegetables: Carefully place a variety of your chopped vegetables upright in each cup, allowing them to stick out above the dip. Arrange them creatively; you can create clusters of veggies or mix them for a colorful display.
Create Creepy Crawly Creatures: To add a fun Halloween twist, use olives to create “creepy crawly” creatures. Cut the olives in halves or quarters and place them on the vegetable layers to resemble bugs or spiders. You can also use cherry tomatoes as bodies or heads for an extra creepy effect.
Garnish and Serve: Give your veggie cups a final touch by adding any additional vegetables or designs you enjoy. Once decorated, these cups are ready to serve! Display them on a platter and let the kids enjoy a nutritious and fun Halloween snack.
Store Leftovers: If you have any leftover veggie cups, they can be stored in the refrigerator for a day or two, but it’s best to consume them fresh for the most delightful crunch.
These Creepy Crawly Veggie Cups not only taste great but also promote kids to eat their veggies while joining in on the Halloween fun!
Peanut Butter Pumpkin Energy Bites
Peanut Butter Pumpkin Energy Bites are a delicious and nutritious snack perfect for Halloween. These bite-sized treats combine the rich flavor of peanut butter with the seasonal taste of pumpkin and spices, making them a favorite among kids and adults alike. They are easy to prepare and provide a quick energy boost, making them great for after school or a Halloween-themed gathering.
Prepare the Mixing Bowl: Start by gathering a large mixing bowl and a spatula or wooden spoon for stirring.
Combine the Wet Ingredients: In the mixing bowl, add the pumpkin puree, peanut butter, honey (or maple syrup), and vanilla extract. Use your spatula to mix thoroughly until the wet ingredients are well combined into a smooth mixture.
Add the Dry Ingredients: Next, add the rolled oats, ground cinnamon, salt, and chia seeds (if using) into the mixing bowl. Stir the mixture until all the dry ingredients are evenly coated with the wet ingredients.
Incorporate Chocolate Chips: Gently fold in the mini chocolate chips into the mixture, ensuring they are evenly distributed throughout.
Chill the Mixture: Cover the mixing bowl with plastic wrap or a lid and place it in the refrigerator for about 30 minutes. Chilling the mixture makes it easier to roll into balls.
Form the Energy Bites: After chilling, remove the bowl from the refrigerator. Use your hands to scoot a small amount of the mixture and roll it into bite-sized balls, about 1 inch in diameter. Continue until all the mixture has been rolled into energy bites.
Store the Bites: Place the finished energy bites in an airtight container and store them in the refrigerator. They will keep well for up to a week.
These Peanut Butter Pumpkin Energy Bites are not only tasty but also packed with nutrients, making them an ideal Halloween snack to satisfy your little ghouls’ cravings!
Frankenstein Avocado Toast
Frankenstein Avocado Toast is a fun and creative twist on traditional avocado toast, perfect for Halloween celebrations. This spooky snack not only looks the part but is also nutritious and delicious, making it a hit with kids and adults alike. With vibrant green avocado spread and playful garnish, this dish is super simple to prepare and can be customized to fit younger taste buds.
Toast the Bread: Begin by placing the slices of whole grain bread in a toaster or on a baking sheet under the broiler. Toast them until they are golden brown and crispy, then set aside to cool slightly.
Prepare the Avocado Spread: While the bread is toasting, slice the ripe avocados in half, remove the pits, and scoop the flesh into a mixing bowl. Add lemon juice, salt, and pepper to taste. Mash the avocado mixture with a fork until it reaches a creamy consistency.
Assemble the Toasts: Once the bread is toasted, generously spread the avocado mixture on each slice, ensuring an even layer covers the surface.
Create Frankenstein’s Face: Cut the cherry tomatoes in half to create eyes. Place two halves on each piece of avocado toast for the eyes. Next, use the sliced black olives to create pupils inside each tomato half, positioning them carefully to add a whimsical look.
Add the Mouth: For the mouth, take a thin slice of cucumber and cut it into a zig-zag shape to resemble teeth, then place it below the eyes on each toast.
Final Touches: Use the remaining black olives to create hair by cutting them into various shapes and sticking them along the top of the avocado-covered bread. If desired, add fresh parsley sprigs to resemble Frankenstein’s neck or collar.
Serve Immediately: Once assembled, serve the Frankenstein Avocado Toast immediately to enjoy the freshness of the ingredients. These visually appealing creations are sure to be a hit at your Halloween gathering!
Enjoy your spooky and tasty Frankenstein Avocado Toast, perfect for scaring away afternoon munchies!
Candy Corn Fruit Cups
Candy Corn Fruit Cups are a delightful and healthy Halloween treat that kids will love! These colorful layers of fruit mimic the classic candy corn design and provide a nutritious alternative to traditional Halloween snacks. Perfect for parties or as a festive dessert, these fruit cups are not only visually appealing but also easy to make.
Ingredients
Quantity
Pineapple chunks
1 cup
Mandarin oranges
1 cup
Banana, sliced
1 large
Whipped cream
1 cup
Clear plastic cups
4 (9-ounce)
Optional: green grapes
1 cup (for garnish)
Cooking Steps:
Prepare Your Ingredients: Start by gathering all your ingredients and washing any fruit as necessary. Make sure to cut the pineapple chunks and bananas into smaller pieces if they are not already bite-sized.
Layer the Pineapple: Place a layer of pineapple chunks at the bottom of each clear plastic cup. Aim for about 1/3 of the cup filled with pineapple so it resembles the white base of the candy corn.
Add the Mandarin Oranges: Next, layer in the mandarin oranges on top of the pineapple layer. Fill this layer about 1/3 of the way up the cup with the oranges, creating a bright orange section reminiscent of candy corn.
Top with Banana Slices: Add banana slices as the final layer on top of the mandarin oranges. Fill the remaining space in the cup with the banana, creating the yellow tip of the candy corn.
Add Whipped Cream: Spoon a dollop of whipped cream on top of each cup to add a fluffy finish and to enhance the candy corn effect.
Optional Garnish: If desired, add a few green grapes on top of the whipped cream for a fun and healthy touch that resembles a decoration. These grapes can also represent leaves or grass.
Chill and Serve: Place the completed fruit cups in the refrigerator for about 30 minutes to chill if you prefer them cold. Once ready, serve these colorful Candy Corn Fruit Cups at your Halloween gathering, and watch them disappear!