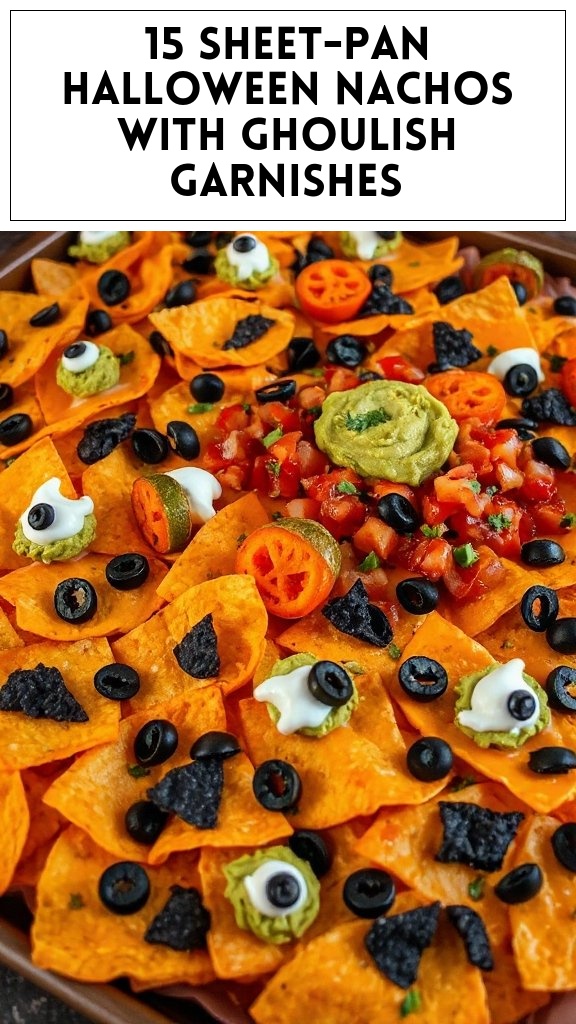
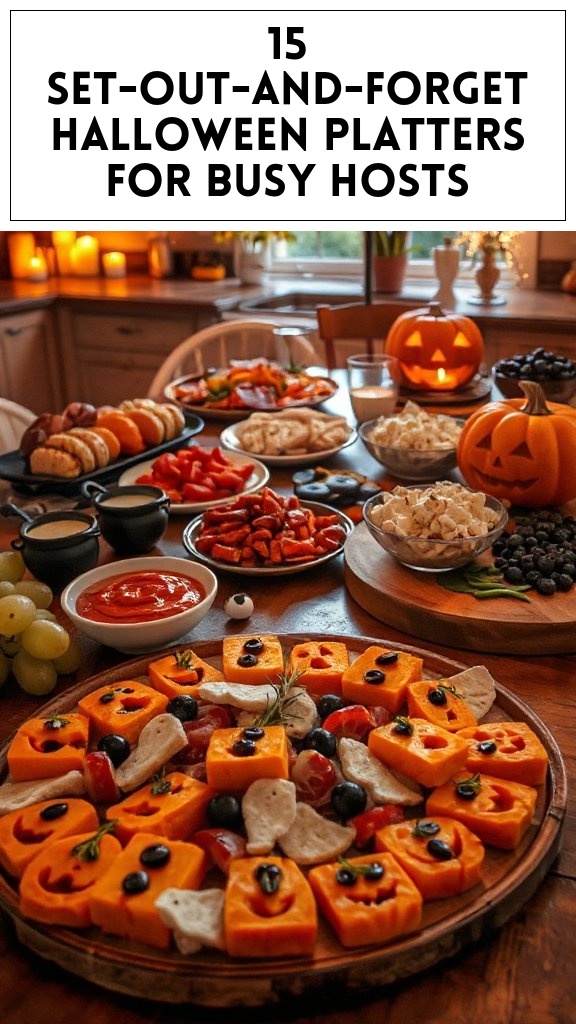
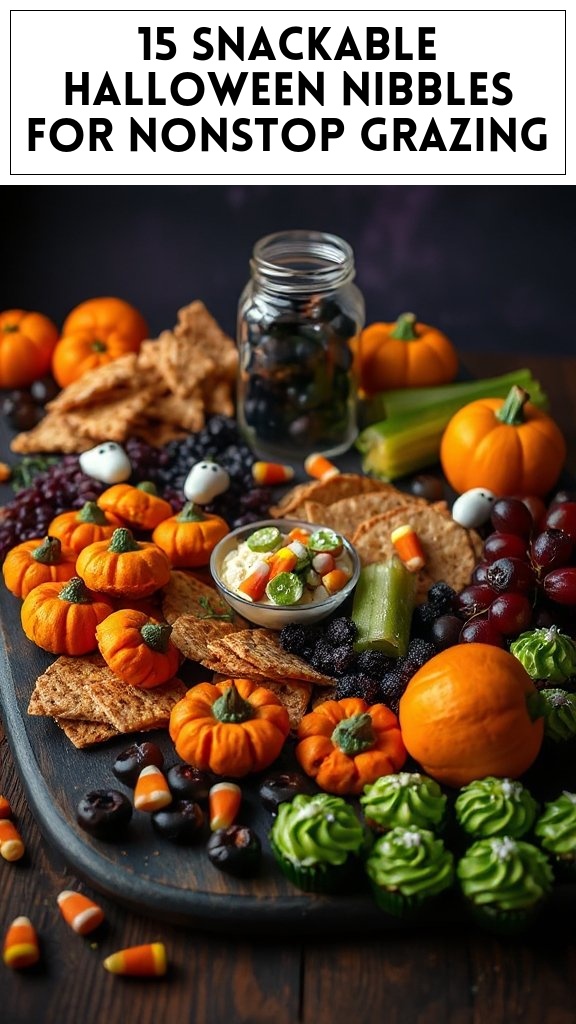
Creepy Crawly Nachos are a fun and festive twist on traditional nachos, perfect for Halloween gatherings! This dish features crispy tortilla chips topped with gooey melted cheese, black olives as creepy crawly insects, and a variety of other toppings to create a spooky yet delicious treat that everyone will love. Get ready to impress your guests with this unique and appetizing Halloween snack!
Ingredients
Quantity
Tortilla chips
1 large bag
Shredded cheese (cheddar)
2 cups
Black olives (sliced)
1 cup
Jalapeños (sliced)
1/2 cup
Guacamole
1 cup
Sour cream
1 cup
Salsa
1 cup
Fresh cilantro (chopped)
1/4 cup
Spooky plastic spiders
Optional for garnish
Cooking Steps Instructions:
Preheat the Oven: Begin by preheating your oven to 350°F (175°C).
Prepare the Baking Tray: Line a large baking sheet with parchment paper for easy cleanup.
Layer the Tortilla Chips: Spread half of the tortilla chips evenly across the prepared baking sheet. This will create the base layer for your nachos.
Add Cheese: Sprinkle 1 cup of shredded cheese evenly over the chips, making sure to cover them nicely.
Add Toppings: Layer half of the sliced black olives and half of the sliced jalapeños over the cheese.
Repeat Layers: Add the remaining tortilla chips on top of this mixture. Then repeat the layering with the remaining cheese, black olives, and jalapeños.
Bake the Nachos: Place the baking tray in the preheated oven and bake for about 10-15 minutes, or until the cheese has melted and is bubbly.
Remove from Oven: Once the cheese is melted, carefully take the baking sheet out of the oven.
Add Final Touches: Finish off your Creepy Crawly Nachos by dolloping guacamole and sour cream over the top, then drizzle with salsa. Sprinkle fresh cilantro on top for an added pop of color.
Garnish with Spiders: If desired, add some spooky plastic spiders on top before serving to enhance the Halloween theme.
Serve & Enjoy: Serve the Creepy Crawly Nachos immediately, and watch your guests enjoy the delicious flavors alongside their fun and creepy presentation!
Mummy Hot Dogs
Mummy Hot Dogs are a delightfully spooky twist on a classic favorite, perfect for Halloween parties or themed gatherings. These fun little bites feature hot dogs wrapped in crescent dough resembling mummies, and they’re topped with spooky eyes made from mustard or small pieces of cheese. Not only are they adorable, but they’re also quick and easy to make, ensuring that you can whip up a batch in no time to impress your guests!
Ingredients
Quantity
Hot dogs
8
Crescent roll dough
1 can (8 oz)
Mustard or small pieces of cheese
for eyes
Cooking spray or parchment paper
for baking
Cooking Steps Instructions:
Preheat the Oven: Start by preheating your oven to 375°F (190°C).
Prepare the Baking Sheet: Line a baking tray with parchment paper, or lightly coat it with cooking spray to prevent sticking.
Roll Out the Dough: Open the can of crescent roll dough and unroll it on a clean surface. Press the seams of the triangles together to create a solid sheet of dough.
Cut the Dough: Using a pizza cutter or sharp knife, cut the dough into thin strips, about 1/4 inch wide.
Wrap the Hot Dogs: Take one hot dog at a time and wrap the dough strips around it, leaving small gaps to resemble mummy bandages. Be sure to leave space at the top for the “eyes.”
Place on Baking Sheet: Lay the wrapped hot dogs onto the prepared baking sheet with the end of the dough tucked underneath to prevent unraveling during baking.
Bake: Place the baking tray in the preheated oven and bake for about 12-15 minutes, or until the dough is golden brown and cooked through.
Add the Eyes: Once baked, remove from the oven and let them cool for a minute. Use mustard or small pieces of cheese to create eyes on each mummy by placing them at the top of the hot dogs.
Serve & Enjoy: Arrange the Mummy Hot Dogs on a serving platter and enjoy them with your favorite dipping sauces. Watch as your guests delight in these creepy yet tasty treats!
Witch’s Brew Soup
Witch’s Brew Soup is a fun and whimsical Halloween dish that will charm both children and adults alike. This vibrant, green soup is made with fresh vegetables and flavorful broth, and it’s the perfect way to set a spooky mood at your Halloween gathering. Garnish it with a sprinkle of creepy “eyeball” cheese balls or herb croutons for an added treat!
Heat the Oil: In a large pot, heat the olive oil over medium heat.
Sauté the Aromatics: Add the chopped onion and minced garlic to the pot. Sauté for about 3-4 minutes until the onion becomes translucent and fragrant.
Add the Vegetables: Stir in the diced carrot and celery. Cook for another 5 minutes, allowing the vegetables to soften.
Incorporate Zucchini and Greens: Add the diced zucchini and chopped spinach (or kale) to the pot. Cook for an additional 2-3 minutes until the greens are wilted and the zucchini is slightly tender.
Pour in the Broth: Pour in the vegetable broth and add the bay leaf. Bring the mixture to a boil.
Simmer the Soup: Once boiling, reduce the heat to low and let the soup simmer for about 15-20 minutes, allowing the flavors to meld together.
Season: After simmering, remove the bay leaf and season the soup with salt and black pepper to taste.
Blend the Soup: For a smooth texture, use an immersion blender to puree the soup until it’s creamy. If you prefer it chunky, you can skip this step.
Serve: Ladle the Witch’s Brew Soup into bowls. If desired, drizzle cream or sour cream on top for a spooky effect, and add any fun garnish like “eyeball” cheese balls or croutons.
Enjoy: Serve hot and enjoy this eerie yet delicious Witch’s Brew Soup at your Halloween celebration!
Eyeball Pasta
Eyeball Pasta is a creative and spooky Halloween dish that is sure to frighten and delight guests of all ages. This whimsical meal features spaghetti topped with a rich tomato sauce, meatballs designed to look like eyeballs, and garnished with a sprinkle of mozzarella cheese to add to the eerie effect. Perfect as a centerpiece for your Halloween dinner, it’s both fun and delicious!
Cook the Spaghetti: In a large pot of boiling salted water, cook the spaghetti according to package instructions until al dente. Drain and set aside.
Prepare the Meatballs: In a mixing bowl, combine the ground beef, Italian seasoning, breadcrumbs, egg, and salt. Mix well until all ingredients are evenly incorporated.
Form Eyeball Meatballs: Shape the meat mixture into golf-ball-sized balls. Once formed, press a slice of a black olive into the center of each meatball to create the appearance of an eyeball.
Cook the Meatballs: In a large skillet, heat the olive oil over medium heat. Add the eyeball meatballs to the skillet and cook for about 5-7 minutes, turning occasionally until they are browned on all sides and cooked through.
Add Tomato Sauce: Once the meatballs are cooked, pour the tomato sauce over the meatballs in the skillet. Lower the heat and let simmer for about 10 minutes, allowing the flavors to meld together.
Combine Pasta and Sauce: In a large serving bowl, toss the cooked spaghetti with the meatball and sauce mixture, ensuring the pasta is well coated.
Garnish: Sprinkle shredded mozzarella cheese over the top of the Eyeball Pasta for a cheesy touch.
Serve: Divide the Eyeball Pasta among plates or bowls, and enjoy this spooky yet scrumptious dish at your Halloween feast!
Enjoy: Gather friends and family, and revel in the fun of serving Eyeball Pasta this Halloween while savoring every bite!
Graveyard Dirt Cups
Graveyard Dirt Cups are a delightful and spooky treat perfect for your Halloween festivities. These layered desserts mimic the look of soil-filled graves, complete with gummy worms and cookie crumbles, making them a fun and easy dessert option that invites creativity from both kids and adults alike.
Ingredients
Quantity
Chocolate pudding
2 cups
Milk
2 cups
Instant chocolate pudding mix
1 box (3.9 oz)
Whipped topping
1 cup
Oreos, crushed
1 package (15 oz)
Gummy worms
1 bag (5 oz)
Plastic cups or small bowls
(as needed)
Optional: Edible decorations (e.g., candy tombstones or ghosts)
(as desired)
Cooking Steps Instructions:
Prepare the Pudding: In a medium bowl, mix the instant chocolate pudding mix with 2 cups of cold milk. Whisk together until smooth and well combined. Let it sit for about 5 minutes until it thickens.
Fold in Whipped Topping: Once the pudding has set, gently fold in the whipped topping until it’s fully combined. This will create a light and fluffy mixture that resembles dirt.
Crush the Oreos: Place the Oreos in a plastic zip-top bag and crush them into fine crumbs using a rolling pin or your hands. These crumbs will act as the ‘dirt’ in your cups.
Layer the Cups: In your plastic cups or small bowls, begin layering the dessert. Start with a layer of the chocolate pudding mixture at the bottom, followed by a layer of crushed Oreos. Repeat the layers until you reach the top of the cup, finishing with a layer of crushed Oreos to create a ‘dirt’ appearance.
Add Gummy Worms: Insert gummy worms into the top layer of crushed Oreos. You can place some of the worms resting on the edge of the cup to make it look like they are crawling out of the dirt.
Decorate (Optional): If desired, add additional edible decorations like candy tombstones, ghosts, or Halloween-themed sprinkles to give your Graveyard Dirt Cups an even spookier effect.
Chill and Serve: Refrigerate the cups for about 30 minutes to set further, if desired. Serve chilled for a perfect Halloween treat that’s both creepy and delicious!
Enjoy: Gather friends and family to enjoy these fun Graveyard Dirt Cups and share some spooky stories as you dig in!
Pumpkin Patch Cupcakes
Pumpkin Patch Cupcakes are a festive and adorable treat that perfectly captures the spirit of Halloween. These moist, spiced cupcakes are topped with a rich cream cheese frosting and decorated to look like a charming pumpkin patch, complete with candy pumpkins and green icing vines. They are an excellent addition to any Halloween celebration and are sure to delight both children and adults.
Preheat the Oven: Start by preheating your oven to 350°F (175°C). Line a standard muffin tin with cupcake liners to prepare for baking.
Mix Dry Ingredients: In a medium bowl, combine the all-purpose flour, granulated sugar, baking powder, baking soda, ground cinnamon, ground nutmeg, and salt. Whisk them together until well blended.
Mix Wet Ingredients: In a large bowl, mix together the vegetable oil, eggs, pumpkin puree, and vanilla extract until smooth and well combined.
Combine Mixtures: Gradually add the dry ingredient mixture to the wet ingredients, stirring gently. Mix until just combined to avoid overmixing. The batter should be moist and somewhat thick.
Fill Cupcake Liners: Using a spoon or an ice cream scoop, fill each cupcake liner about two-thirds full with the batter. This will allow room for the cupcakes to rise.
Bake: Place the muffin tin in the preheated oven and bake for 18-20 minutes or until a toothpick inserted into the center comes out clean.
Cool Cupcakes: Once baked, remove the tin from the oven and let the cupcakes cool in the pan for about 5 minutes. Then, transfer them to a wire rack to cool completely.
Prepare Frosting: In a medium bowl, beat together the softened cream cheese and unsalted butter until creamy and smooth. Gradually add the powdered sugar, adjusting until you reach the desired sweetness and consistency. If needed, add milk one tablespoon at a time for a smoother frosting.
Frost Cupcakes: Once the cupcakes are completely cooled, use a knife or piping bag to frost each cupcake generously with the cream cheese frosting.
Decorate: To create the pumpkin patch effect, add candy pumpkins on top of each frosted cupcake. Then use green decorating icing to pipe vines and leaves around the pumpkins, giving your cupcakes a festive look.
Serve: Arrange your Pumpkin Patch Cupcakes on a serving platter and get ready to enjoy a delicious Halloween treat that everyone will love!
Share and Enjoy: Gather your family and friends for a delightful Halloween celebration and enjoy these festive cupcakes together!
Ghostly Chocolate Bark
Ghostly Chocolate Bark is a fun and easy Halloween treat that combines the richness of chocolate with the spooky charm of ghostly figures. This delightful confection features layers of white and dark chocolate, adorned with playful ghost shapes made from candy melts and chocolate chips. Perfect for sharing at parties, these sweet bites are sure to be a hit with both kids and adults alike.
Prepare Pan: Start by lining a baking sheet with parchment paper or wax paper. This will prevent the chocolate from sticking and makes for easier removal once it hardens.
Melt Dark Chocolate: In a microwave-safe bowl, add the dark chocolate chips. Heat in the microwave on medium power for 30 seconds, then stir. Continue heating in 15-second increments, stirring between each, until fully melted and smooth. If desired, mix in a teaspoon of shortening to achieve a smoother consistency.
Spread Dark Chocolate: Pour the melted dark chocolate onto the prepared baking sheet and use a spatula to spread it into an even layer. Aim for about ¼ inch thickness. Set aside to cool slightly, but do not let it harden completely.
Melt White Chocolate: In another microwave-safe bowl, melt the white chocolate chips using the same method as with the dark chocolate. If necessary, add a teaspoon of shortening for a smoother blend.
Combine Layers: Once the white chocolate is melted, pour it on top of the slightly cooled dark chocolate layer. Use a spatula to spread it gently, creating a marbled effect by swirling the white chocolate into the dark chocolate.
Add Ghosts: Melt the candy melts in a microwave-safe bowl, following the same melting process. Once melted, transfer the candy melts to a piping bag or a small zip-top bag with the corner snipped off. Pipe small ghost shapes onto the chocolate layers.
Add Mini Chocolate Chips: While the candy melts are still soft, press mini chocolate chips into the ghost shapes to create eyes.
Chill: Place the baking sheet into the refrigerator for about 30 minutes, or until the chocolate is fully set and hard.
Break Into Pieces: Once the chocolate is firm, remove it from the fridge and pull the bark off the parchment paper. Break or cut it into irregular pieces.
Serve and Enjoy: Your Ghostly Chocolate Bark is now ready to serve! Enjoy this delicious treat at Halloween parties or as a fun snack. Store any leftovers in an airtight container at room temperature.