As an Amazon Associate I earn from qualifying purchases.
Editorial Policy | Disclosure Policy
Mummy Meatballs
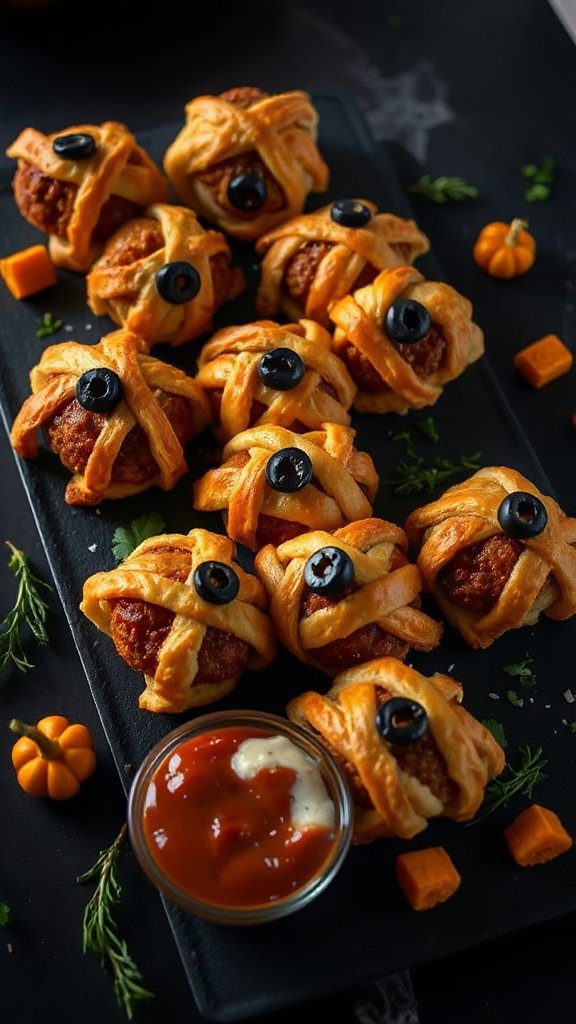
Mummy Meatballs are a fun and festive Halloween finger food that combines delicious homemade meatballs with a spooky twist. Wrapped in strips of crescent roll dough to resemble mummies, these tasty bites are perfect for Halloween parties or family gatherings. They are sure to delight both kids and adults alike with their whimsical appearance and hearty flavor.
| Ingredients | Quantity |
|---|---|
| Ground beef | 1 pound |
| Bread crumbs | 1/2 cup |
| Egg | 1 large |
| Garlic powder | 1 teaspoon |
| Onion powder | 1 teaspoon |
| Salt | 1/2 teaspoon |
| Black pepper | 1/2 teaspoon |
| Shredded mozzarella cheese | 1 cup |
| Crescent roll dough | 1 can (8 oz) |
| Olive oil (for brushing) | 1 tablespoon |
| Candy eyes | Optional, for garnish |
Cooking Instructions:
- Preheat Oven: Start by preheating your oven to 375°F (190°C).
- Prepare Meatball Mixture: In a large mixing bowl, combine the ground beef, bread crumbs, egg, garlic powder, onion powder, salt, and black pepper. Mix everything together using your hands or a spoon until evenly blended.
- Form Meatballs: Shape the mixture into small meatballs, approximately 1-inch in diameter. You should end up with about 20-25 meatballs.
- Bake Meatballs: Place the meatballs on a baking sheet lined with parchment paper. Bake them in the preheated oven for 15-20 minutes, or until they are cooked through and browned, reaching an internal temperature of 160°F (71°C).
- Prepare Crescent Roll Dough: While the meatballs are baking, open the can of crescent roll dough and unroll it. Using a pizza cutter or knife, cut the dough into thin strips (about 1/4 inch wide).
- Wrap the Meatballs: Once the meatballs are cooked, allow them to cool slightly. Take a strip of the crescent roll dough and wrap it around each meatball, leaving a small space for the “eyes” at the top. Make sure to create an overlapping wrap to enhance the mummy effect.
- Bake Mummy Meatballs: Once all meatballs are wrapped, place them back on the baking sheet. Brush the tops lightly with olive oil to help them brown and crisp up. Bake in the oven for an additional 10-12 minutes or until the dough is golden brown.
- Add Eyes: After removing the mummy meatballs from the oven, place candy eyes on each meatball where you left the unwrapped space. You can use a small dot of melted cheese or a dab of sauce to help the eyes stick.
- Serve and Enjoy: Transfer the Mummy Meatballs to a serving platter and enjoy! They can be served with marinara sauce for dipping, adding an extra layer of flavor to these spooky treats.
Witch’s Broomsticks

Witch’s Broomsticks are a charming and playful Halloween finger food that’s sure to be a hit at any spooky gathering. These delightful treats are made using pretzel sticks, cheese slices, and chives, creating an easy and fun snack that resembles witch brooms. They’re a perfect accompaniment to any Halloween spread, offering a savory option that everyone will love.
| Ingredients | Quantity |
|---|---|
| Pretzel sticks | 1 bag (about 10-12 sticks) |
| String cheese or cheese slices | 10 pieces |
| Fresh chives | 10-12 sticks |
Cooking Instructions:
- Prepare Cheese: If using string cheese, cut each piece into thirds to create smaller broom heads. If you are using cheese slices, cut them into thin strips (about 1/2 inch wide).
- Assemble the Broomsticks: Take one pretzel stick and place a piece of cheese at one end. This will be the bristles of your broomstick. If you’re using cheese slices, create a small bundle of cheese strips and wrap them tightly around the end of the pretzel.
- Secure with Chives: Once the cheese is attached to the pretzel stick, take a piece of chive and wrap it around the point where the cheese meets the pretzel. Tie a knot to secure it in place, making it resemble the tie of a broom.
- Repeat: Continue this process for all pretzel sticks, creating a fun set of Witch’s Broomsticks.
- Serve: Arrange the Witch’s Broomsticks on a platter and enjoy them as a festive Halloween snack. They can be served at room temperature and are great for dipping into your favorite sauces if desired.
Stuffed Eyeball Jalapeños
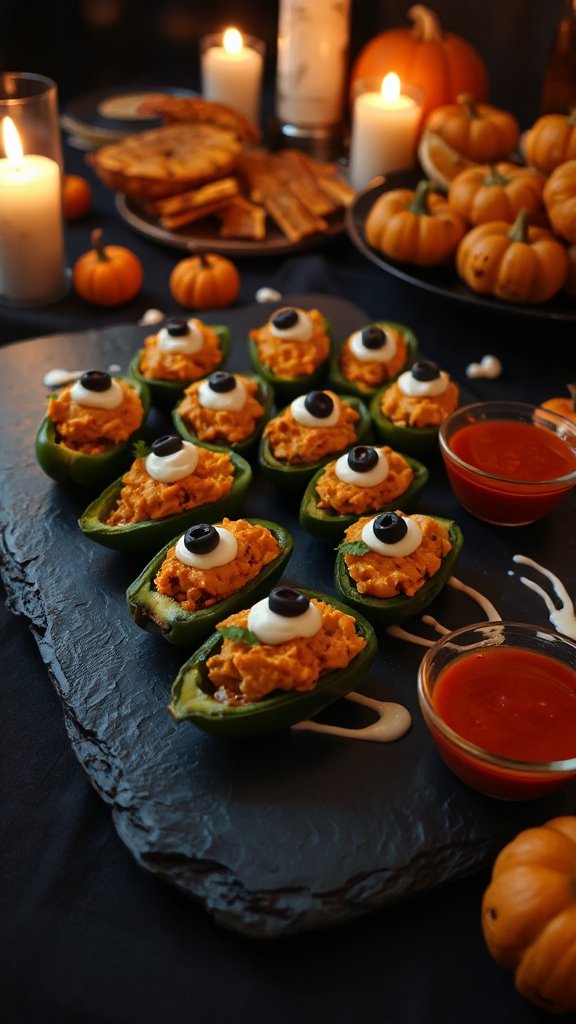
Stuffed Eyeball Jalapeños are a spooky yet delicious Halloween finger food that will be the star of your party! These spicy jalapeños are halved and filled with a cheesy, savory mixture that is topped with olives to resemble creepy eyeballs. They are a fun way to add some heat and fright to your Halloween festivities.
| Ingredients | Quantity |
|---|---|
| Fresh jalapeños | 10 large |
| Cream cheese | 8 oz |
| Cheddar cheese | 1 cup (shredded) |
| Garlic powder | 1 tsp |
| Onion powder | 1 tsp |
| Salt | 1/2 tsp |
| Black olives | 10 whole |
| Paprika (for garnish) | Optional |
Cooking Instructions:
- Preheat the Oven: Start by preheating your oven to 375°F (190°C).
- Prepare Jalapeños: Wash the jalapeños thoroughly. Carefully slice each jalapeño in half lengthwise and remove the seeds and membranes to reduce the heat level (you can wear gloves for this if you prefer to avoid the spiciness).
- Make the Filling: In a mixing bowl, combine the cream cheese, shredded cheddar cheese, garlic powder, onion powder, and salt. Mix thoroughly until all the ingredients are well incorporated and form a creamy filling.
- Stuff the Jalapeños: Using a spoon or a piping bag, fill each jalapeño half generously with the cheese mixture. Confirm that they are well-packed to hold their shape during cooking.
- Add Eyeballs: Slice the black olives in half and place one half on top of each stuffed jalapeño to create the appearance of an eyeball.
- Arrange on Baking Sheet: Place the stuffed jalapeños on a baking sheet lined with parchment paper or aluminum foil for easy cleanup.
- Bake: Bake in the preheated oven for about 20 minutes, or until the cheese is melted and the jalapeños are tender.
- Garnish and Serve: Once out of the oven, you can sprinkle a little paprika on top for added color if desired. Serve the Stuffed Eyeball Jalapeños warm and enjoy this creepy, tasty treat at your Halloween gathering!
Pumpkin Deviled Eggs
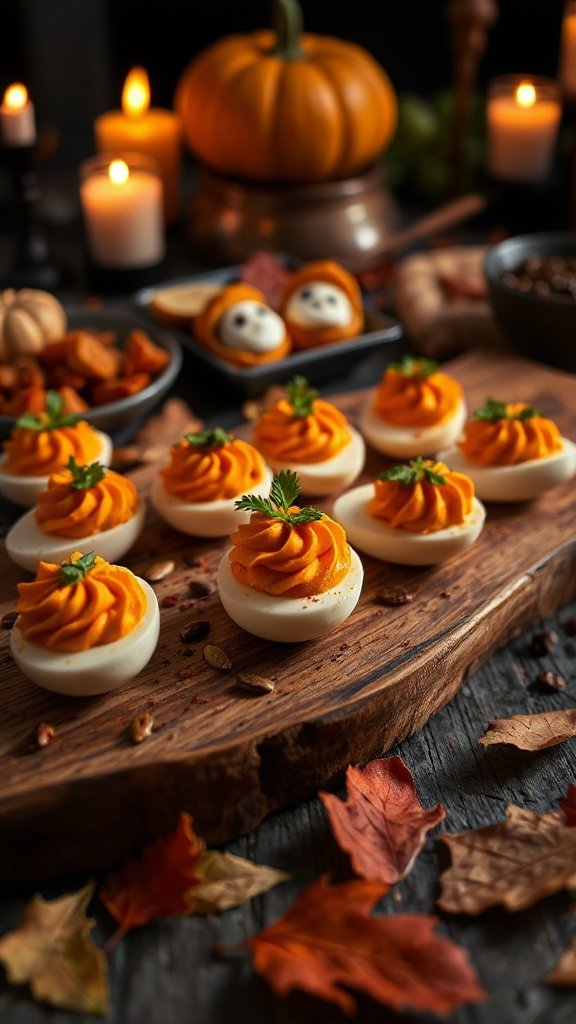
Pumpkin Deviled Eggs are a creative and festive twist on a classic appetizer, perfect for Halloween gatherings. With their vibrant orange color and clever presentation, these deviled eggs look like adorable little pumpkins and are sure to be a hit among guests of all ages.
| Ingredients | Quantity |
|---|---|
| Hard-boiled eggs | 6 large |
| Mayonnaise | 3 tbsp |
| Dijon mustard | 1 tsp |
| Salt | 1/4 tsp |
| Ground black pepper | 1/8 tsp |
| Paprika | 1/4 tsp |
| Green onions (chopped) | 2 tbsp |
| Carrot (shredded) | For garnish |
| Fresh chives (optional) | For garnish |
Cooking Instructions:
- Prepare Hard-Boiled Eggs: Start by hard-boiling the eggs. Place the eggs in a saucepan and cover them with water. Bring to a boil and then cover the pan, turning off the heat. Let the eggs sit for 12-15 minutes. Afterward, transfer the eggs to an ice bath to cool for 5-10 minutes, then peel and set aside.
- Slice the Eggs: Once the eggs are completely cool, carefully slice each egg in half lengthwise. Gently remove the yolks and place them in a mixing bowl, making sure to keep the egg whites intact.
- Make the Filling: To the bowl with the yolks, add the mayonnaise, Dijon mustard, salt, black pepper, and paprika. Mash the yolk mixture with a fork until it is smooth and creamy, blending all the ingredients well.
- Color the Filling: To achieve the pumpkin color, add a small amount of orange food coloring to the yolk mixture and mix until the desired shade of orange is reached.
- Fill the Egg Whites: Using a spoon or a piping bag, carefully fill each egg white half with the orange yolk mixture. You can pile it high to resemble the top of a pumpkin for an added effect.
- Garnish: Sprinkle the shredded carrots on top of each filled egg as the “pumpkin stem”. If desired, you can use chopped green onions or chives to add more color and a touch of elegance around the filling.
- Chill and Serve: Place the Pumpkin Deviled Eggs on a serving platter and refrigerate them for at least 30 minutes before serving. This allows the flavors to meld together and makes them invigorating to eat.
Enjoy your festive Pumpkin Deviled Eggs at your Halloween celebration!
Spooky Spider Sandwiches
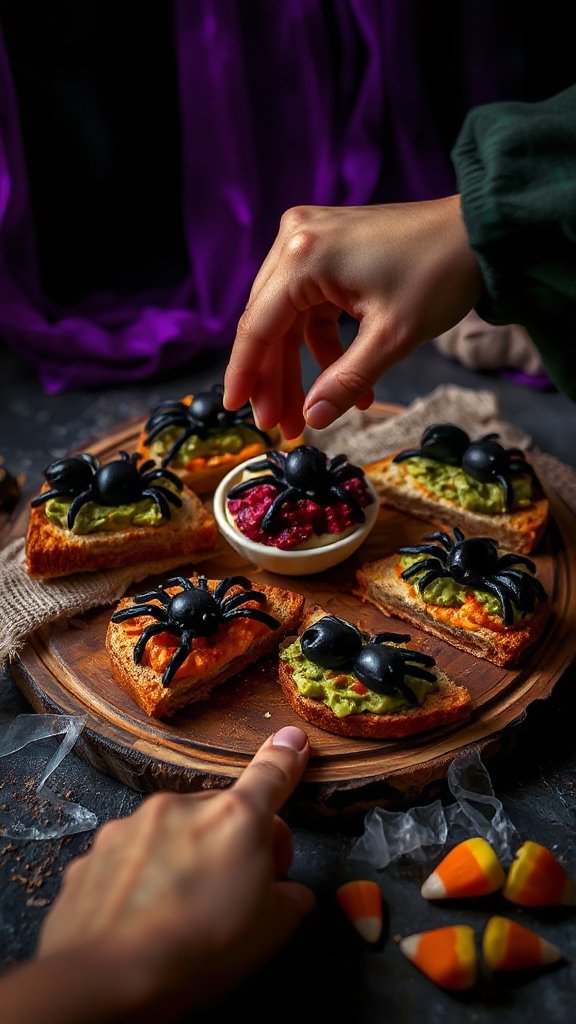
Spooky Spider Sandwiches are a fun and creepy addition to any Halloween party or gathering. These edible creations feature classic sandwich fillings transformed into spiders that will both intrigue and delight your guests. They’re easy to make and can be customized with your favorite fillings, making them a perfect finger food for Halloween festivities.
| Ingredients | Quantity |
|---|---|
| Bread (white or whole grain) | 4 slices |
| Cream cheese | 1/2 cup |
| Black olives | 8 large |
| Sliced cucumbers | 1/2 cup |
| Sliced deli meat (ham or turkey) | 4 slices |
| Lettuce leaves | 4 pieces |
| Toothpicks | 8 (optional) |
Cooking Instructions:
- Prepare the Bread: Start by cutting the crusts off the slices of bread. You can choose to either leave the bread whole or cut the slices in half to create smaller sandwiches.
- Make the Sandwich Filling: Spread a generous layer of cream cheese on each slice of bread. This will serve as both the filling and the glue to hold everything together.
- Add Filling: Place a slice of deli meat on top of the cream cheese and add a layer of sliced cucumbers. Then, place a lettuce leaf on top of the cucumbers for added crunch.
- Assemble the Sandwiches: Place another slice of bread on top of each sandwich to create a complete sandwich. If you cut your slices in half, make sure to place the filling in the middle before placing the second half on top.
- Create Spider Legs: Slice the black olives in half and place the halves on the sides of each sandwich to resemble spider legs. Use four halves for each sandwich to create a total of eight legs.
- Add Spider Eyes: Use whole black olives for the eyes. Position two of these on top of each sandwich, securing them with toothpicks if necessary to keep them in place.
- Final Touches: Optionally, you can cut the sandwiches into smaller, more manageable pieces or leave them whole for a larger presentation. Arrange the Spooky Spider Sandwiches on a serving platter and chill in the refrigerator for about 15 minutes before serving to allow the ingredients to meld together.
Enjoy these fun and creepy Spooky Spider Sandwiches at your Halloween celebration!
Ghostly Cheese Wedges
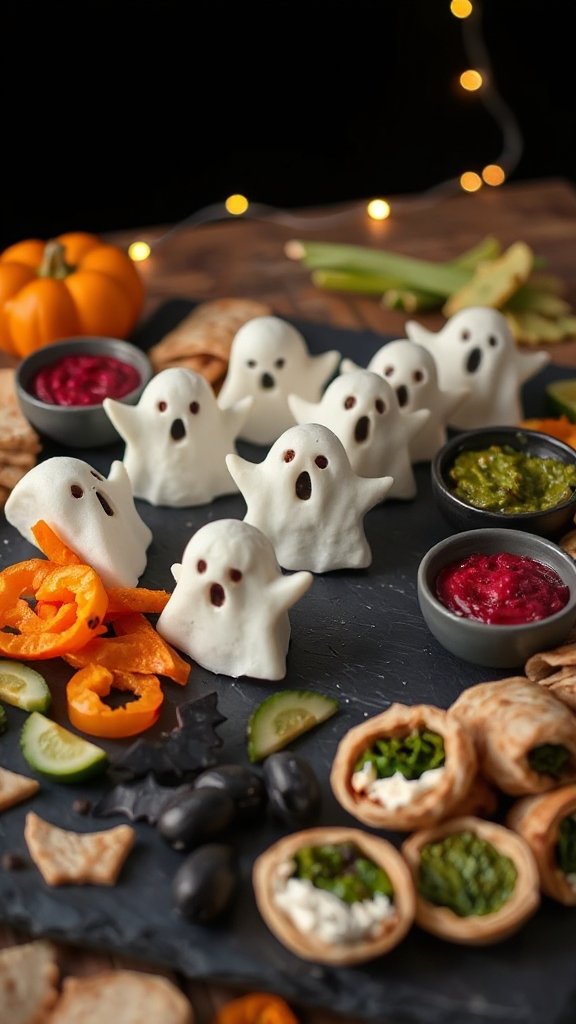
Ghostly Cheese Wedges are a delightful and eerily charming finger food perfect for Halloween parties. These creamy cheese snacks are shaped like ghosts and can be served with a variety of dippers. They are simple to create, making them a great treat for both kids and adults alike, sure to add a spooky flair to your festive spread.
| Ingredients | Quantity |
|---|---|
| Cream cheese | 8 oz |
| Cheddar cheese (shredded) | 1 cup |
| Garlic powder | 1/2 tsp |
| Onion powder | 1/2 tsp |
| Black olives | 8 (sliced) |
| Tortilla chips (or crackers) | 1 bag |
| Fresh herbs (for garnish) | Optional |
Cooking Instructions:
- Mix the Cheeses: In a medium-sized bowl, combine the cream cheese and shredded cheddar cheese. Mix well until thoroughly blended. You want the mixture to be smooth and creamy.
- Flavor the Mixture: Add garlic powder and onion powder to the cheese mixture. Stir until the seasonings are evenly distributed. This enhances the flavor of your cheese wedges.
- Shape the Ghosts: Using your hands, take a small amount of the cheese mixture (about 1-2 tablespoons) and shape it into ghost-like figures on a plate or cutting board. You can create varying sizes, but make sure they are manageable for finger food.
- Add Eyes: Use sliced black olives to create eyes for the cheese ghosts. Place two olive slices on each ghost to give them a spooky look.
- Chill the Cheese Wedges: Once all the ghost shapes have been formed, place them on a serving platter and refrigerate for about 30 minutes. This will help them firm up and hold their shape better when served.
- Serve with Dippers: Arrange tortilla chips or crackers around the cheese ghosts on the platter. You can also add fresh herbs as garnish for a pop of color.
Enjoy your Ghostly Cheese Wedges as a whimsical addition to your Halloween festivities!
Caramel Apple Slices
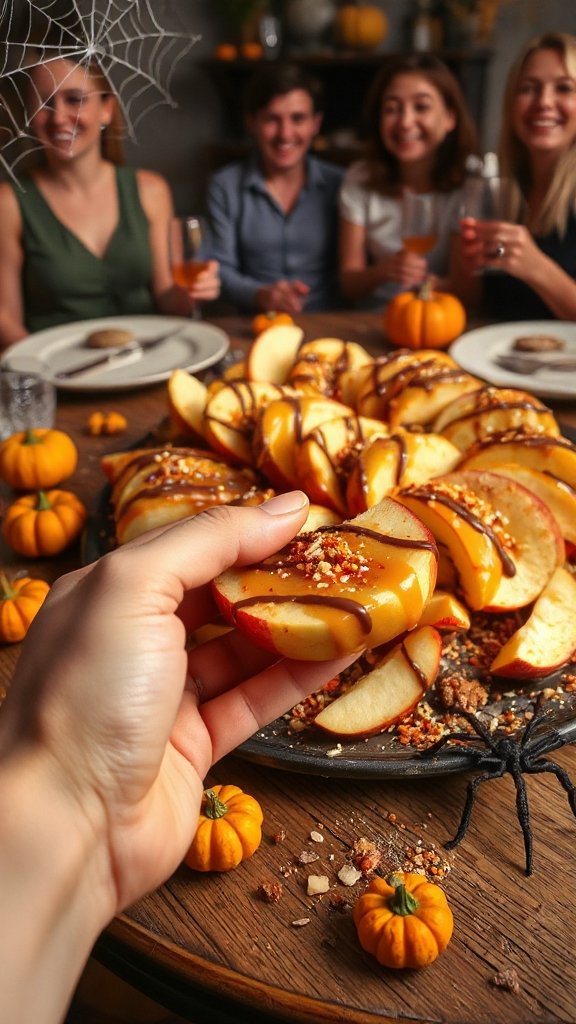
Caramel Apple Slices are a fun and festive finger food for Halloween parties, combining the sweet and tart flavors of fresh apples with rich, gooey caramel. These treats are easy to make and can be customized with various toppings, making them a delightful addition to your Halloween spread. Perfectly portioned as bite-sized snacks, they are sure to please both kids and adults alike.
| Ingredients | Quantity |
|---|---|
| Apples (medium, firm) | 2 |
| Caramel candies (wrapped) | 14 oz |
| Heavy cream | 2 tbsp |
| Nuts (chopped, optional) | 1 cup |
| Sprinkles (optional) | 1 cup |
| Chocolate chips (melted, optional) | 1/2 cup |
| Popsicle sticks or skewers | 10 |
Cooking Instructions:
- Prepare the Apples: Start by rinsing the apples under cold water. Pat them dry with a clean towel. For easier handling, slice the apples into even wedges or rounds, removing the core. If you prefer, you can leave the skin on for added texture and color.
- Melt the Caramel: In a microwave-safe bowl or a double boiler, combine the unwrapped caramel candies with the heavy cream. If using a microwave, heat in 30-second intervals, stirring in between, until the mixture is smooth and fully melted. Be careful not to overheat and scorch the caramel.
- Dip the Apple Slices: Once the caramel is melted, take each apple slice with a popsicle stick or skewer and dip it into the warm caramel, ensuring both sides are well-coated. Allow any excess caramel to drip off.
- Add Toppings: Place the caramel-coated apple slices on a parchment-lined baking sheet. Before the caramel sets, sprinkle your choice of toppings on top (chopped nuts, sprinkles, or drizzle with melted chocolate) to add texture and flavor.
- Cool and Set: Let the apple slices sit at room temperature or refrigerate them for about 30 minutes. This will allow the caramel to firm up and stick well to the apple.
- Serve and Enjoy: Once the caramel is set, arrange the apple slices on a serving platter. These delightful treats are best served fresh but can be stored in an airtight container in the refrigerator for a couple of days.
Enjoy your Caramel Apple Slices as a sweet and satisfying Halloween finger food!
