As an Amazon Associate I earn from qualifying purchases.
Editorial Policy | Disclosure Policy
Spooky Spider Cookies
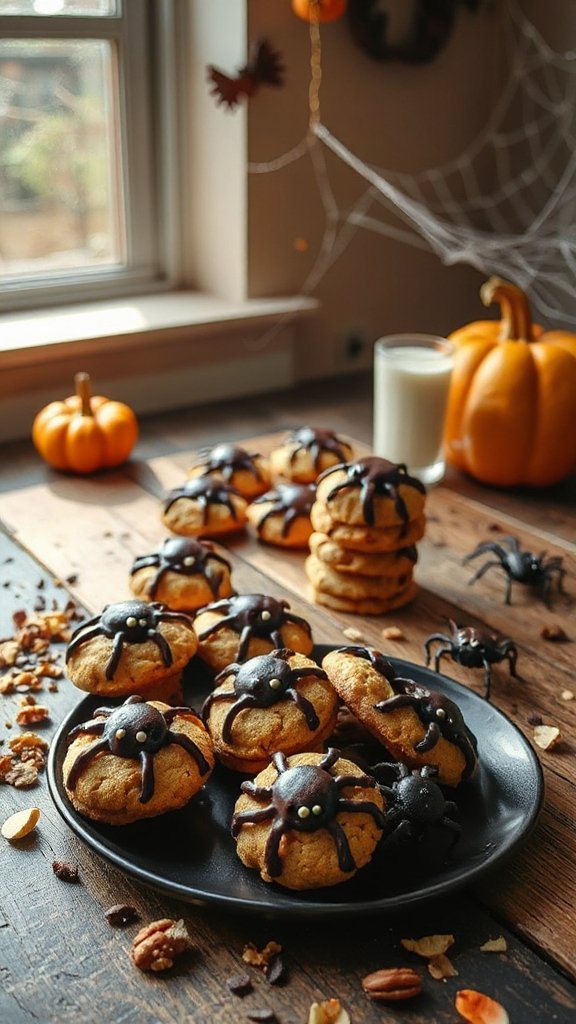
Spooky Spider Cookies are a fun and festive addition to any gluten-free Halloween celebration! Made with a soft, chewy cookie base and topped with delectable chocolate, these treats are shaped into creepy little spiders that are sure to delight kids and adults alike. Perfect for a spooky gathering, you can customize them with different toppings to make your spiders as creative and eerie as you want.
| Ingredients | Quantity |
|---|---|
| Gluten-free all-purpose flour | 1 ½ cups |
| Unsweetened cocoa powder | 1/3 cup |
| Baking soda | ½ tsp |
| Salt | ¼ tsp |
| Butter (softened) | ½ cup (1 stick) |
| Brown sugar | ¾ cup |
| Granulated sugar | ½ cup |
| Egg | 1 large |
| Vanilla extract | 1 tsp |
| Semi-sweet chocolate chips | 1 cup |
| Mini chocolate candies (for eyes) | 20-24 pieces |
| Pretzel sticks | 10 pieces |
Cooking Steps:
- Preheat Oven: Preheat your oven to 350°F (175°C). Line a baking sheet with parchment paper to prevent the cookies from sticking.
- Combine Dry Ingredients: In a medium bowl, whisk together the gluten-free all-purpose flour, cocoa powder, baking soda, and salt. Set this mixture aside for later use.
- Cream Butter and Sugars: In a large mixing bowl, beat the softened butter, brown sugar, and granulated sugar together using a hand mixer or stand mixer until the mixture is light and fluffy, about 2-3 minutes.
- Add Egg and Vanilla: Add in the egg and vanilla extract to the creamed mixture. Beat until the ingredients are fully combined.
- Incorporate Dry Ingredients: Gradually add the dry ingredients to the wet mixture, mixing until just combined. Be careful not to over-mix; the dough should be soft but not sticky.
- Shape Cookies: Using a tablespoon or cookie scoop, drop rounded balls of dough onto the prepared baking sheet, leaving about 2 inches of space between each cookie. Gently press down the tops of the dough balls to flatten slightly.
- Bake: Place the baking sheet in the preheated oven and bake the cookies for about 10-12 minutes or until they are set around the edges but still soft in the center. Remove from the oven and let them cool on the baking sheet for about 5 minutes before transferring to a wire rack to cool completely.
- Decorate with Chocolate: Once the cookies are cool, melt the semi-sweet chocolate chips in a microwave-safe bowl in 30-second intervals, stirring in between until smooth.
- Create Spider Bodies: Use a spoon or piping bag to drizzle the melted chocolate over the cookies, forming a circle in the center as the spider body.
- Add Eyes and Legs: Place two mini chocolate candies on top of the melted chocolate for the spider eyes. Break pretzel sticks into smaller pieces and insert four pieces into each side of the cookie to create the spider legs.
- Let Set: Allow the chocolate to set completely before serving. Enjoy your spooky spider cookies at your Halloween celebration!
Witch’s Brew Brownies
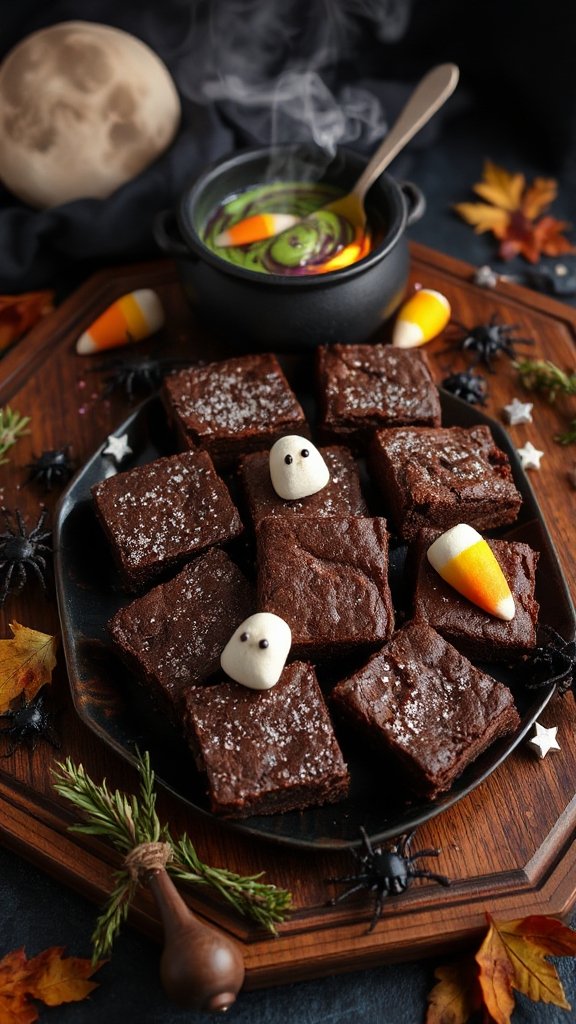
Witch’s Brew Brownies are a rich and fudgy gluten-free dessert that captures the essence of Halloween with their dark, mysterious appearance and fun mix of colorful toppings. These brownies are sure to be a hit at any spooky gathering, providing a delicious treat that satisfies chocolate cravings while being friendly to those with gluten sensitivities. With a gooey texture and an irresistible flavor, these brownies are perfect for satisfying your sweet tooth this Halloween.
| Ingredients | Quantity |
|---|---|
| Gluten-free all-purpose flour | 1 cup |
| Unsweetened cocoa powder | ½ cup |
| Baking powder | ½ tsp |
| Salt | ¼ tsp |
| Butter (melted) | ½ cup (1 stick) |
| Granulated sugar | 1 cup |
| Brown sugar | ½ cup |
| Eggs | 3 large |
| Vanilla extract | 1 tsp |
| Semi-sweet chocolate chips | 1 cup |
| Food coloring (green or purple) | A few drops (optional) |
| Assorted Halloween candies (for topping) | As desired |
Cooking Steps:
- Preheat Oven: Preheat your oven to 350°F (175°C). Grease an 8×8-inch baking dish or line it with parchment paper, allowing some overhang for easy removal later.
- Mix Dry Ingredients: In a medium bowl, combine the gluten-free all-purpose flour, cocoa powder, baking powder, and salt. Whisk well to guarantee there are no lumps, and set aside.
- Combine Wet Ingredients: In a large mixing bowl, whisk together the melted butter, granulated sugar, and brown sugar until the mixture is smooth. Add the eggs one at a time, mixing well after each addition. Stir in the vanilla extract.
- Combine Wet and Dry Ingredients: Gradually add the dry mixture to the wet ingredients, stirring gently with a spatula until just combined. Avoid over-mixing. If desired, add a few drops of food coloring to create a fun, spooky color for your brownies.
- Add Chocolate Chips: Fold in the semi-sweet chocolate chips until evenly distributed throughout the batter.
- Pour Batter into the Dish: Transfer the batter into the prepared baking dish. Spread it out evenly to guarantee even baking.
- Bake: Place the baking dish in the preheated oven and bake for 25-30 minutes, or until a toothpick inserted into the center comes out with a few moist crumbs (not wet batter). Be careful not to overbake, as you want the brownies to remain fudgy.
- Cool and Decorate: Once baked, remove the brownies from the oven and let them cool in the baking dish for about 10 minutes. Then use the parchment overhang to lift them out onto a wire rack to cool completely. Once cool, top with assorted Halloween candies for a festive touch, or drizzle with additional melted chocolate.
- Serve: Cut the brownies into squares, serve them up, and enjoy the spooky treats with your friends and family!
Ghostly Meringue Kisses
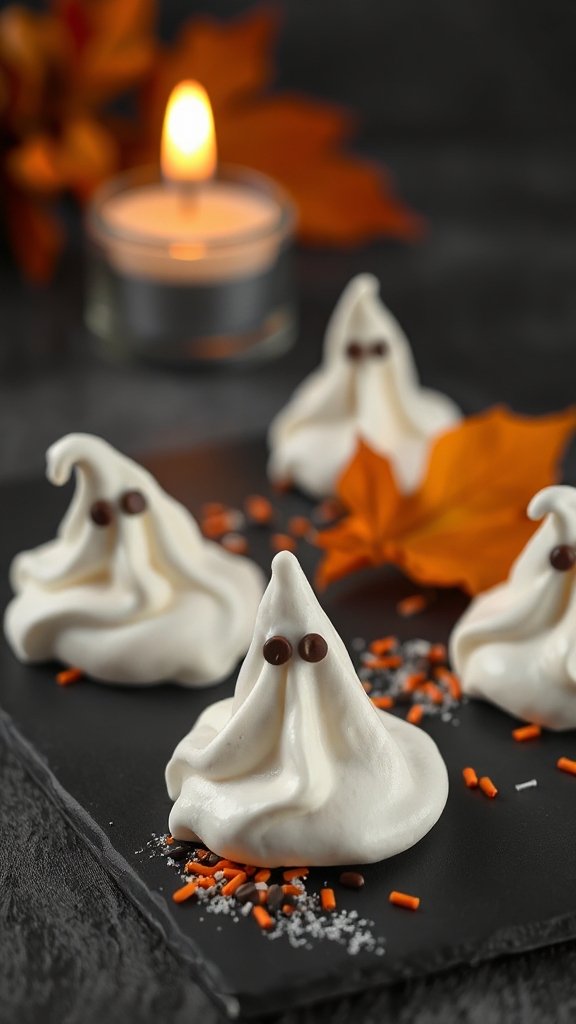
Ghostly Meringue Kisses are light and airy confections that make for a delightful and whimsical gluten-free treat for Halloween. These adorable little meringues are shaped like ghosts and can be adorned with chocolate chips or food coloring to create spooky faces, offering a fun way to celebrate the season while indulging in a sweet, guilt-free snack.
| Ingredients | Quantity |
|---|---|
| Egg whites | 3 large |
| Granulated sugar | 1 cup |
| Cream of tartar | 1/2 tsp |
| Vanilla extract | 1 tsp |
| Semi-sweet chocolate chips | For decoration (as desired) |
Cooking Steps:
- Preheat Oven: Preheat your oven to 200°F (93°C). Line a baking sheet with parchment paper.
- Prepare Egg Whites: Confirm your mixing bowl and beaters are completely clean and dry. Separate the egg whites from the yolks, placing the whites in the mixing bowl. Make sure no yolk gets into the egg whites, as this can hinder the whipping process.
- Beat Egg Whites: Using an electric mixer, beat the egg whites on medium speed until they start to become frothy. This usually takes about 1-2 minutes.
- Add Cream of Tartar: Once frothy, add the cream of tartar. Increase the mixer speed to high and continue to beat until soft peaks form.
- Add Sugar Gradually: With the mixer still running, begin adding the granulated sugar one tablespoon at a time. Make sure to add the sugar slowly to allow it to dissolve completely. Continue beating until you achieve stiff, glossy peaks, which generally takes around 5-7 minutes.
- Add Vanilla: Gently fold in the vanilla extract using a spatula until just combined. Be careful not to deflate the meringue.
- Pipe Meringue Kisses: Transfer the meringue mixture into a piping bag fitted with a star tip or round tip. Pipe small dollops (about 1-2 inches) onto the prepared baking sheet. Aim for a peak on top of each dollop to resemble a ghost shape.
- Bake: Place the baking sheet in the preheated oven and bake for 1 to 1.5 hours, or until the meringues are dry and can easily lift off the parchment paper. They should feel crisp to the touch.
- Cool: Turn off the oven and leave the meringue kisses inside for at least 30 minutes to cool completely. This will help confirm they remain crisp.
- Decorate: Once cool, place small chocolate chips onto the meringues as eyes to create ghostly faces. You can also use melted chocolate to draw faces for added fun.
- Serve and Enjoy: Serve your Ghostly Meringue Kisses at your Halloween gathering or give them as a spooky gift. These treats can be stored in an airtight container at room temperature for up to a week. Enjoy!
Cauldron Cake Pops
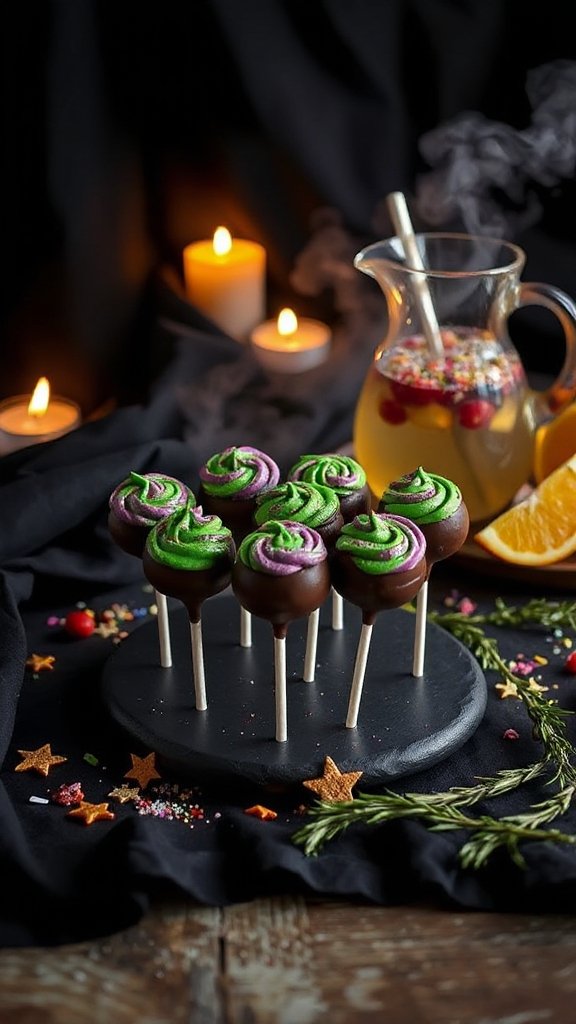
Cauldron Cake Pops are a fun and festive Halloween treat that kids and adults alike will enjoy. These bite-sized cake pops are shaped like little cauldrons, perfect for spooky celebrations. They’re made with gluten-free cake mix, coated in chocolate, and can be decorated with colorful candy melts or sprinkles to resemble bubbling potions. These eye-catching treats are sure to steal the show at any Halloween gathering.
| Ingredients | Quantity |
|---|---|
| Gluten-free cake mix | 1 box (15.25 oz) |
| Eggs | 3 large |
| Water | 1 cup |
| Vegetable oil | 1/2 cup |
| Chocolate frosting | 1 can (16 oz) |
| Semi-sweet chocolate chips | 12 oz (for coating) |
| Lollipop sticks | 12 |
| Green candy melts | 8 oz |
| Edible sparkles/sprinkles | For decoration |
Cooking Steps:
- Bake the Cake: Preheat your oven according to the instructions on the gluten-free cake mix box. Prepare a cake pan by greasing it or lining it with parchment paper. Prepare the cake batter by mixing the cake mix, eggs, water, and vegetable oil in a bowl as directed on the box. Pour the batter into the prepared pan and bake according to the package instructions.
- Cool the Cake: Once baked, allow the cake to cool in the pan for 10 minutes before transferring it to a wire rack. Let it cool completely before breaking it apart.
- Crumb the Cake: Once the cake is cool, crumble it into a large bowl using your hands or a fork until it achieves a fine crumb texture.
- Mix with Frosting: Add the chocolate frosting to the crumbled cake, starting with half the can and mixing until combined. Continue adding frosting little by little until the mixture holds together but is not overly moist.
- Form the Pops: Take a small amount of the cake mixture (about 1 tablespoon) and roll it into a ball. Slightly flatten the ball to give it a cauldron shape at the top. Place the shaped cake pops onto a baking sheet lined with parchment paper.
- Insert Lollipop Sticks: Melt a small portion of the chocolate chips in the microwave (about 30 seconds, stirring until smooth). Dip one end of each lollipop stick into the melted chocolate, then insert it into the center of each cake pop to help them stick together. Let the cake pops set in the fridge for about 20 minutes.
- Melt the Chocolate Coating: In a microwave-safe bowl, melt the remaining semi-sweet chocolate chips in 30-second intervals, stirring in between until smooth.
- Coat the Cake Pops: Dip each cake pop into the melted chocolate, making sure to coat the entire cake pop. Allow any excess chocolate to drip off before placing the pop back on the parchment-lined sheet.
- Prepare the Candy Coating: Melt the green candy melts in a separate bowl according to the package instructions. Once melted, dip the tops of each cake pop to create the cauldron effect.
- Decorate: While the candy coating is still wet, sprinkle edible sparkles or sprinkles on top to resemble a bubbling potion. Let the cake pops rest until the coating hardens completely.
- Serve: Once set, display your Cauldron Cake Pops on a festive platter. Enjoy the spooky goodness!
Pumpkin Spice Rice Crispy Treats
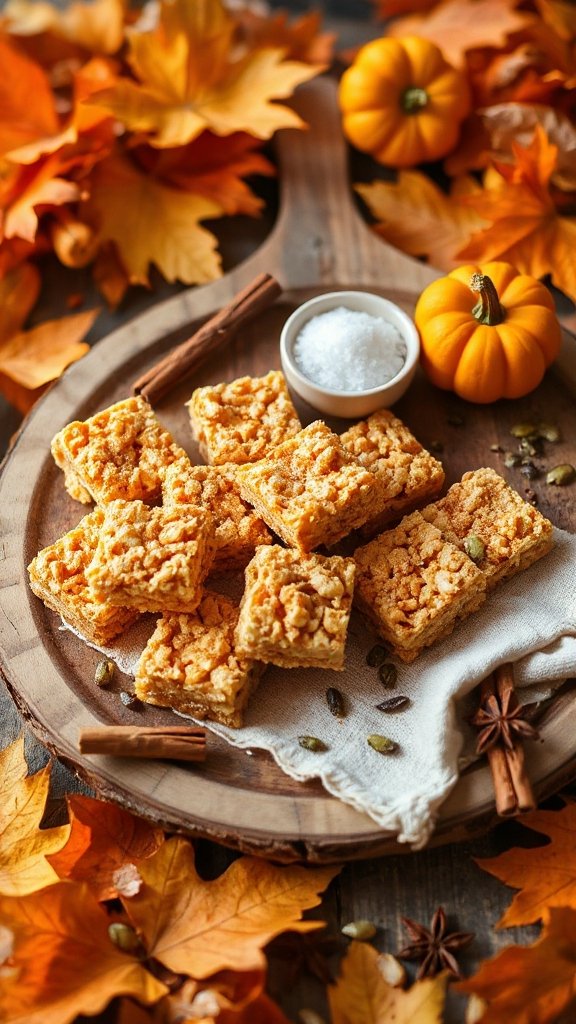
Pumpkin Spice Rice Crispy Treats are a delightful twist on a classic favorite, perfect for Halloween festivities. These treats combine the familiar crunch of rice cereals with the warm, comforting flavors of pumpkin spice, making them a seasonal favorite for both kids and adults. They are incredibly easy to make and can be cut into fun shapes or served in decorative wrappers for a festive touch.
| Ingredients | Quantity |
|---|---|
| Rice cereal | 6 cups |
| Mini marshmallows | 10 oz bag |
| Unsalted butter | 1/4 cup (1/2 stick) |
| Pumpkin puree | 1/2 cup |
| Pumpkin pie spice | 1 tsp |
| Vanilla extract | 1 tsp |
| Optional: orange food coloring | A few drops |
Cooking Steps:
- Prepare the Pan: Begin by greasing a 9×13 inch baking dish with butter or non-stick cooking spray. This will help the treats release easily once they are set.
- Melt Butter and Marshmallows: In a large saucepan over medium heat, melt the unsalted butter. Once melted, add the mini marshmallows while stirring continuously. Continue to stir until the marshmallows are completely melted and the mixture is smooth.
- Add Pumpkin and Spice: Remove the saucepan from heat and stir in the pumpkin puree, pumpkin pie spice, vanilla extract, and optional orange food coloring if desired. Mix until well combined.
- Incorporate Rice Cereal: Gradually add the rice cereal to the marshmallow mixture. Stir gently but thoroughly to coat all the cereal evenly with the sticky mixture.
- Transfer to the Pan: Pour the mixture into the prepared baking dish. Using a greased spatula or your hands (with a little butter to prevent sticking), press the mixture down firmly and evenly into the pan.
- Cool the Treats: Allow the rice crispy treats to cool at room temperature for about 30 minutes or until they are set.
- Cut and Serve: Once cooled, cut the treats into squares or fun shapes using cookie cutters. You can wrap them individually in wax paper or serve them on a festive platter.
Enjoy these delicious Pumpkin Spice Rice Crispy Treats as a fun and seasonal addition to your Halloween celebration!
Gummy Worm Dirt Cups
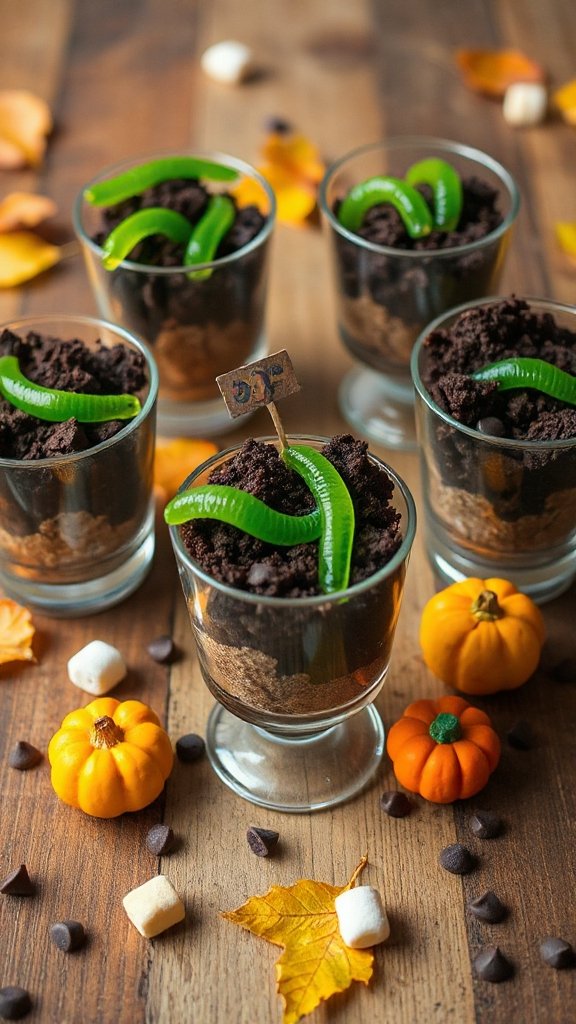
Gummy Worm Dirt Cups are a fun and visually appealing dessert that is perfect for Halloween parties or family gatherings. These cups combine layers of chocolate pudding, crushed chocolate cookies, and gummy worms to create a playful “dirt” effect that kids will absolutely love. Not only are they cute, but they are also easy to assemble, making them a favorite among both kids and adults alike!
| Ingredients | Quantity |
|---|---|
| Instant chocolate pudding | 2 cups (prepared) |
| Milk | 2 cups |
| Crushed chocolate sandwich cookies | 1 cup |
| Gummy worms | 1 bag (10 oz) |
| Whipped cream (optional) | For topping |
| Small cups or containers | 6-8 |
Cooking Steps:
- Prepare Pudding: In a mixing bowl, combine the instant chocolate pudding mix with 2 cups of milk. Whisk together for about 2 minutes, or until the pudding thickens. Let it sit for a few minutes to set properly.
- Crush Cookies: Take the chocolate sandwich cookies and place them in a resealable plastic bag. Using a rolling pin or your hands, crush the cookies into fine crumbs. Set aside a small amount for garnish, if desired.
- Layer the Ingredients: In each individual cup or container, start by adding a layer of the prepared chocolate pudding at the bottom, filling each cup about halfway.
- Add Cookie Crust: Next, sprinkle a generous layer of crushed chocolate cookies on top of the pudding. This will represent the ‘dirt’ on top of the pudding.
- Repeat Layers: Add another layer of pudding on top of the crushed cookies, filling the cup to about three-quarters full. Follow this with another layer of crushed cookies on top.
- Top with Gummy Worms: To finish, take a gummy worm and either lay it on top of the cookie layer or bury part of it into the pudding for a fun look. You can also add a dollop of whipped cream on top if desired, and sprinkle some reserved cookie crumbs for added texture.
- Chill and Serve: Place the completed dirt cups in the refrigerator for at least 15-30 minutes to chill. Serve them cold, and enjoy watching the smiles appear as everyone digs into their ‘dirt’!
These Gummy Worm Dirt Cups are a whimsical treat that’s not only tasty but also encourages a bit of fun and creativity in your Halloween dessert offerings!
Chocolate-Covered Pretzel Bats
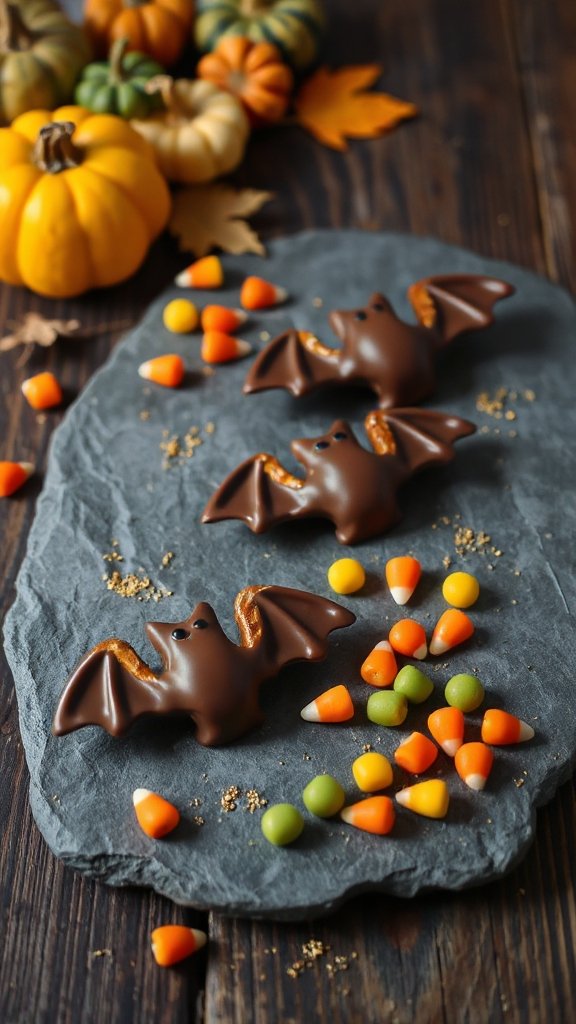
Chocolate-Covered Pretzel Bats are a delightful and spooky snack that combines the crunchiness of pretzels with the sweetness of chocolate, making them perfect for Halloween festivities. These adorable treats can be made in no time, and are great for kids to help with—whether it’s dipping, decorating, or simply enjoying the final result. They not only taste amazing, but also add a fun flair to your Halloween celebrations!
| Ingredients | Quantity |
|---|---|
| Pretzel rods | 1 bag (8 oz) |
| Semi-sweet chocolate chips | 1 cup |
| Black candy melts | 1 cup |
| Mini chocolate chips | For eyes (optional) |
| Almond slivers (bat wings) | 1/2 cup |
| Wax paper or parchment paper | For drying |
Cooking Steps:
- Prepare the Work Area: Start by lining a baking sheet with wax or parchment paper. This will be where you place the dipped pretzels to cool and set.
- Melt the Chocolate: In a microwave-safe bowl, combine the semi-sweet chocolate chips. Heat them in the microwave for 30-second intervals, stirring in between, until completely melted and smooth. Be careful not to overheat.
- Dip the Pretzels: Take each pretzel rod and dip it into the melted chocolate. Use a fork or your fingers to help remove the excess chocolate by gently tapping it on the side of the bowl.
- Add the Bat Wings: While the chocolate is still wet, press two almond slivers into each side of the pretzel to create the wings of the bat. Arrange them so they stick out, giving the appearance of fluttering wings.
- Place on Baking Sheet: Carefully lay the dipped pretzel bat on the prepared baking sheet. Repeat this process until all pretzels have been dipped and decorated with wings.
- Melt the Candy Melts: Using the same method, melt the black candy melts in a separate microwave-safe bowl. Once melted, use a fork or piping bag to drizzle the black chocolate over each pretzel bat for added detail.
- Create Bat Eyes (Optional): If using mini chocolate chips, place them on the chocolate-covered end of the pretzel to create the bat’s eyes while the chocolate is still warm.
- Cool and Set: Allow the pretzel bats to cool and the chocolate to set completely, which should take about 30 minutes. You can also place them in the refrigerator to speed up the process.
- Serve and Enjoy: Once set, carefully remove the pretzel bats from the parchment paper and serve them on a festive platter. Enjoy your adorable and delicious Chocolate-Covered Pretzel Bats with family and friends this Halloween!
These treats are not only easy to make, but they are also a hit at any Halloween gathering with their fun shape and delicious taste!
