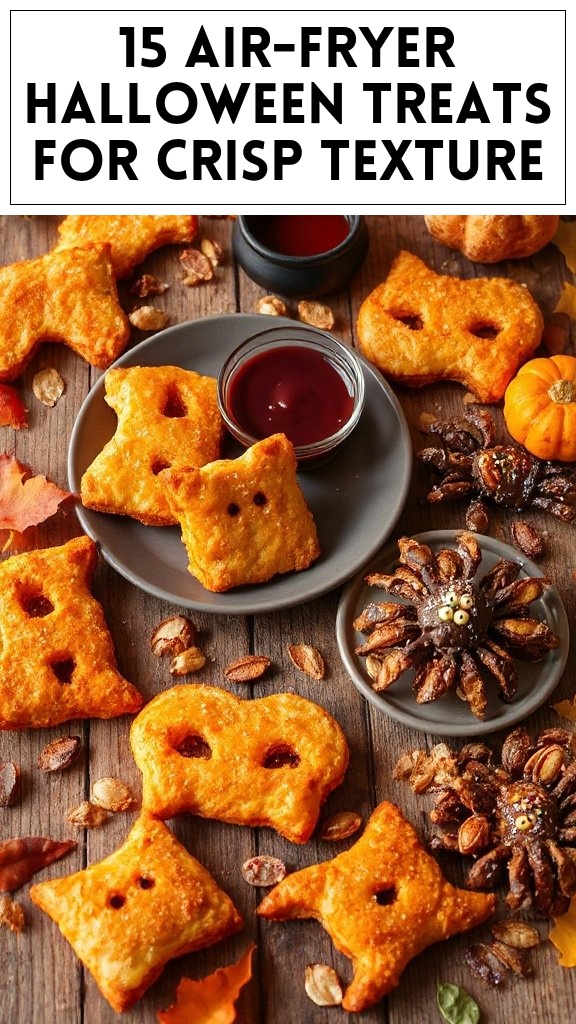
11 Flavor-Forward Halloween Finger Foods With Zero Fuss
Witch’s Brew Popcorn
Witch’s Brew Popcorn is a fun and festive snack perfect for Halloween gatherings or movie nights. This vibrant treat combines popcorn with colorful candy, spooky sprinkles, and a hint of spooky magic that will delight both kids and adults. Easy to make, it adds the perfect whimsical touch to your Halloween festivities.
Prepare the Popcorn: Start by popping your popcorn, either using an air popper or stovetop method. Once popped, place the popcorn in a large mixing bowl. Make certain to remove any unpopped kernels.
Melt the Chocolates: In separate microwavable bowls, melt the white chocolate chips and green candy melts. For each, heat in the microwave in 30-second intervals, stirring between each interval until completely smooth and melted.
Combine Popcorn with Chocolates: Drizzle the melted white chocolate over the popped popcorn, followed by the green candy melts. Use a spatula or large spoon to gently toss the popcorn to evenly coat it with the melted chocolate.
Add Candy Corn and Marshmallows: Consider adding a fun mix of candy corn and mini marshmallows. Sprinkle them over the coated popcorn and gently mix again to guarantee they’re evenly distributed.
Sprinkle with Sea Salt and Sprinkles: Lightly sprinkle sea salt over the popcorn mixture to enhance its sweetness. Then, generously add Halloween-themed sprinkles for a festive touch.
Let it Set: Spread the popcorn mixture onto a baking sheet lined with parchment paper to cool and harden. Allow it to set for about 30 minutes at room temperature.
Serve and Enjoy: Once the mixture has set, break it into clusters and transfer it to a serving bowl or individual bags. Enjoy your Witch’s Brew Popcorn at your Halloween party or as a fun snack!
Mummy Hot Dogs
Mummy Hot Dogs are a fun and spooky twist on a classic snack that kids and adults alike will love. These adorable mini mummies are made by wrapping hot dogs in crescent dough and baking them until golden brown, creating a delightful finger food that’s perfect for Halloween parties. Serve them with some mustard or ketchup for dipping, and watch as everyone enjoys this easy-to-make treat!
Ingredients
Quantity
Hot dogs
8
Refrigerated crescent dough
1 tube
Mustard or ketchup (for serving)
As needed
Cooking Instructions:
Preheat the Oven: Start by preheating your oven to 375°F (190°C). This guarantees that your Mummy Hot Dogs will bake evenly and get a nice golden brown color.
Prepare the Crescent Dough: Open the tube of refrigerated crescent dough and unroll it on a clean, flat surface. Carefully separate the dough into triangles.
Cut Dough Strips: Using a sharp knife or pizza cutter, cut each crescent triangle into thin strips, about 1/2 inch wide. These strips will be used to wrap around the hot dogs to create the mummy effect.
Wrap the Hot Dogs: Take a hot dog and begin wrapping it with the strips of crescent dough. Start at one end and spiral the dough around the hot dog, leaving a small section at the top bare for the mummy’s “eyes.” Make sure to leave some gaps between the strips to give the appearance of bandages.
Place on Baking Sheet: Once wrapped, place the mummy hot dogs on a baking sheet lined with parchment paper, spacing them about an inch apart to allow for even cooking.
Bake in the Oven: Place the baking sheet in the preheated oven and bake for 12-15 minutes, or until the crescent dough is golden brown and cooked through.
Add Eyes: After removing the Mummy Hot Dogs from the oven, allow them to cool slightly. Use a small dot of mustard or ketchup to create the mummy’s eyes on the exposed part of the hot dog.
Serve: Arrange the Mummy Hot Dogs on a serving platter with extra mustard or ketchup for dipping. Enjoy this spooky and delicious treat at your Halloween gathering!
Pumpkin Deviled Eggs
Pumpkin Deviled Eggs are a delightful and festive finger food that adds a creative twist to the traditional deviled egg recipe, making them perfect for Halloween gatherings. By using a little food coloring and a sprinkle of paprika, these eggs are transformed into mini pumpkins, complete with a green bell pepper top. They are not only adorable but also tasty, making them a hit with both kids and adults.
Ingredients
Quantity
Hard-boiled eggs
6
Mayonnaise
3 tablespoons
Mustard
1 teaspoon
Salt
1/4 teaspoon
Ground paprika
1/4 teaspoon
Orange food coloring
A few drops
Green bell pepper (for tops)
1
Cooking Instructions:
Prepare the Eggs: Start by peeling the hard-boiled eggs and slicing each egg in half lengthwise. Carefully remove the yolks and place them in a bowl, setting the egg whites aside.
Make the Filling: In the bowl with the egg yolks, add the mayonnaise, mustard, salt, and ground paprika. Mix everything together using a fork until the mixture is smooth and creamy.
Color the Filling: Add a few drops of orange food coloring to the yolk mixture. Mix well until the desired pumpkin-like color is achieved. You can adjust the color to your preference by adding more food coloring if necessary.
Fill the Egg Whites: Using a spoon or a piping bag, carefully fill the hollowed-out egg whites with the orange yolk mixture. Fill them generously to create a domed shape.
Create the Pumpkin Tops: Take the green bell pepper and cut it into small pieces or thin strips to resemble the pumpkin stems. You can either cut out small squares or triangles—whatever shape you prefer for your “pumpkin tops.”
Assemble the Pumpkin Deviled Eggs: Place a piece of green bell pepper on top of each filled egg to represent the stem of the pumpkin.
Serve: Arrange the Pumpkin Deviled Eggs on a platter and serve them at your Halloween gathering. Enjoy this whimsical and tasty treat with family and friends!
Ghostly Cheese Balls
Ghostly Cheese Balls are a fun and creative appetizer perfect for Halloween parties. These savory snacks are made from cream cheese and various seasonings, shaped into ghostly figures, and adorned with olive “eyes.” They are not only delicious but also add a playful touch to your Halloween spread.
Ingredients
Quantity
Cream cheese
8 ounces
Shredded cheddar cheese
1 cup
Garlic powder
1 teaspoon
Onion powder
1 teaspoon
Salt
1/2 teaspoon
Black olives
8
Chives (for decoration)
Optional
Tortilla chips (for serving)
Optional
Cooking Instructions:
Prepare the Cheese Mixture: In a large mixing bowl, combine the cream cheese, shredded cheddar cheese, garlic powder, onion powder, and salt. Use a spatula or fork to mix the ingredients until they are well combined and smooth.
Shape the Cheese Balls: With clean hands, take about 2 tablespoons of the cheese mixture and roll it into a ball shape. Repeat this process until the entire cheese mixture is formed into small balls, approximately the size of a golf ball.
Create Ghostly Shapes: Transform the cheese balls into ghost shapes by gently flattening the bottom of each ball. Then, taper the top slightly to create a ghostly figure. You may adjust the shapes as desired to achieve a more whimsical look.
Add Olive Eyes: Cut the black olives in half and press two half-olives onto each cheese ball to create spooky ghost eyes. You can use whole olives for a more dramatic effect if desired.
Chill the Ghostly Cheese Balls: Place the decorated cheese balls on a plate and cover with plastic wrap. Refrigerate for at least 30 minutes to allow the flavors to meld and the cheese to firm up slightly.
Serve: Once chilled, arrange the Ghostly Cheese Balls on a platter. Optionally, you can garnish them with chives for added decoration. Serve with tortilla chips for a delightful and festive appetizer, and enjoy the spooky fun with your guests!
Spooky Stuffed Peppers
Spooky Stuffed Peppers are a festive and delightful Halloween finger food that will impress your guests with their fun appearance and delicious flavor. These mini bell peppers are hollowed out and filled with a savory mixture of ground meat, rice, and spices, making them a hearty and tasty treat perfect for any Halloween gathering. Their vibrant colors and creative presentation add an exciting element to your party spread.
Preheat Oven: Start by preheating your oven to 375°F (190°C). This will guarantee that your stuffed peppers are baked evenly and thoroughly.
Prepare the Mini Peppers: Wash the mini bell peppers thoroughly. Slice off the tops and remove the seeds and membranes from the inside, creating a hollow cavity for the stuffing. Arrange the cleaned peppers upright in a baking dish.
Cook the Filling: In a large skillet, heat the olive oil over medium heat. Add the finely chopped onion and minced garlic, sautéing until the onions become translucent, about 3-4 minutes. Add the ground beef or turkey to the skillet, breaking it apart with a spatula. Cook until the meat is browned and cooked through, approximately 5-7 minutes.
Mix in Seasonings: Once the meat is cooked, stir in the cooked rice, taco seasoning, and diced tomatoes. Mix everything together well, allowing the flavors to combine. Let it cook for an additional 2-3 minutes. Taste the mixture and season with salt as needed.
Stuff the Peppers: Using a spoon, carefully fill each hollowed-out mini pepper with the meat and rice mixture. Fill them generously to confirm they are well-stuffed.
Add Cheese and Bake: Once all the peppers are stuffed, sprinkle the shredded cheese evenly on top of each pepper. Place the baking dish in the preheated oven and bake for 20-25 minutes, or until the peppers are tender and the cheese is melted and bubbly.
Decorate (Optional): If desired, you can slice the black olives to create little “eyes” and place them on top of the cheese once the peppers are out of the oven to add some spooky flair.
Serve and Enjoy: Allow the stuffed peppers to cool for a few minutes before serving. Offer sour cream on the side for dipping, and watch as your guests enjoy this playful and delicious Halloween appetizer!
Creepy Crawly Nachos
Creepy Crawly Nachos are a spooky twist on the classic party favorite, making them perfect for any Halloween gathering. This fun and festive dish features tortilla chips layered with melted cheese, black beans, jalapeños, and topped with creepy crawlies that are sure to delight and surprise your guests. It’s an easy and interactive dish that combines delicious flavors with a playful presentation, perfect for sharing.
Preheat Oven: Begin by preheating your oven to 350°F (175°C). This guarantees a perfectly melted and bubbly cheese topping for your nachos.
Arrange the Chips: On a large baking sheet or oven-safe platter, spread out the tortilla chips evenly. Make sure to cover the surface without overlapping too much so all the chips can become crispy.
Layer with Ingredients: Sprinkle half of the shredded cheese over the chips, followed by the black beans and jalapeño slices. Add a few more tortilla chips on top if desired, and then sprinkle the remaining cheese over the whole tray. This layering technique will guarantee every bite has a variety of flavors.
Bake the Nachos: Place the prepared nachos into the preheated oven. Bake for about 10-15 minutes, or until the cheese is fully melted and bubbling. Keep an eye on them to prevent burning.
Add the Olives: Once the nachos are out of the oven, immediately sprinkle the sliced olives on top while the cheese is still melting. This adds a delightful flavor and an eerie visual element.
Serve and Decorate: Serve the nachos hot and place dollops of sour cream and guacamole around the platter for dipping. Just before serving, decorate the nachos with plastic creepy crawlies, placing them strategically for a spooky effect.
Enjoy your Creepy Crawly Nachos at your Halloween gathering, and watch your guests’ reactions as they dig into this festive treat!
Vampire Salsa
Vampire Salsa is a fang-tastic addition to your Halloween party spread, combining fresh ingredients with a hauntingly delicious twist. This spicy, chunky salsa is not only visually striking with its vibrant red color, but it also packs a punch with an array of flavors that will leave your guests howling for more. Perfect when served with tortilla chips, this salsa adds a fun and festive element to any fall gathering.
Prepare the Ingredients: Start by washing all your vegetables and herbs. Dice the tomatoes into small pieces and place them in a mixing bowl. Finely chop the red onion and add it to the bowl alongside the diced tomatoes.
Add Heat: If you enjoy a bit of spice, take the jalapeño pepper, remove the seeds if you prefer less heat, and mince it finely. Add the minced jalapeño to the bowl for that extra kick.
Flavor It Up: Mince the garlic cloves and mix them into the bowl. Then, add the fresh cilantro, lime juice, salt, and black pepper. If you like a hint of sweetness to balance the acidity, sprinkle in the optional sugar.
Combine Ingredients: Gently stir all the ingredients together until well combined. Taste the salsa and adjust the seasoning if needed, adding more salt, pepper, or lime juice according to your preference.
Final Touches: Just before serving, stir in the sliced black olives to add a creepy yet delicious finishing touch to the salsa. This not only enhances the flavor but gives your salsa a visual twist fitting for Halloween.
Chill and Serve: For the best flavor, let the salsa sit for at least 30 minutes at room temperature to allow the flavors to meld. Serve chilled or at room temperature with your choice of tortilla chips or as a topping on other Halloween dishes.
Enjoy this Vampire Salsa as part of your Halloween feast and watch your guests plunge into it with excitement!
Monster Meatballs
Monster Meatballs are a fun and spooky twist on a classic dish that will delight both kids and adults at your Halloween celebration. These meatballs are not only packed with flavor but also feature some creepy elements, making them a perfect finger food that can be served on toothpicks for easy snacking. With a rich marinara sauce and whimsical garnishes, these Monster Meatballs will be the star of your Halloween party!
Preheat the Oven: Begin by preheating your oven to 400°F (200°C). This will guarantee that your meatballs cook evenly and develop a delicious crust.
Mix the Meatball Ingredients: In a large mixing bowl, combine the ground beef, bread crumbs, grated Parmesan cheese, chopped parsley, egg, garlic powder, onion powder, salt, and black pepper. Mix everything together until just combined—be careful not to overmix, as this can make the meatballs tough.
Shape the Meatballs: Using your hands, take small portions of the meat mixture and shape them into balls about 1-1.5 inches in diameter. Place the meatballs onto a baking sheet lined with parchment paper for easier cleanup.
Bake the Meatballs: Once all the meatballs are shaped and placed on the baking sheet, bake them in the preheated oven for about 20-25 minutes, or until they are cooked through and browned on the outside. You can check their doneness with a meat thermometer; they should reach an internal temperature of 165°F (74°C).
Prepare the Marinara Sauce: While the meatballs are baking, heat the marinara sauce in a saucepan over medium heat until warmed through. Stir occasionally to prevent sticking.
Combine Meatballs and Sauce: Once the meatballs are fully cooked, carefully remove them from the oven and add them to the warmed marinara sauce. Gently toss the meatballs in the sauce to coat them evenly.
Add the Monster Touch: Assemble your monster meatballs by placing them on a serving platter. Insert strips of mozzarella cheese into each meatball to mimic “fangs.” Finally, place a sliced black olive on top of each meatball to create spooky eyes.
Serve and Enjoy: Serve the Monster Meatballs warm with toothpicks for easy snacking. Watch as your guests enjoy these creative and tasty treats at your Halloween gathering!
With these Monster Meatballs, your Halloween party will have a deliciously frightful flair that everyone will love!
Frightening Fruit Skewers
Frightening Fruit Skewers are a fun and festive way to bring some healthy treats to your Halloween party! These visually striking skewers combine a variety of colorful fruits arranged in spooky shapes, perfect for both kids and adults. With a little creativity, you can turn ordinary fruit into creepy and exciting finger foods that add a playful touch to your Halloween gathering.
Prepare the Fruit: Start by washing all your fruits thoroughly. Hull and halve the strawberries, peel and slice the banana, and cut the pineapple into bite-sized cubes. Rinse the grapes and set them aside.
Assemble the Skewers: Take a wooden skewer and start threading the fruit pieces onto it. Begin with a grape, followed by a pineapple cube, a halved strawberry, a banana slice, and end with another grape to secure everything in place. Repeat this process for each skewer until all ingredients are used up. You can mix and match fruit combinations as desired.
Create Spooky Faces: To transform the fruit skewers into Frightening Fruit Skewers, use mini marshmallows and chocolate chips to create spooky faces on the banana slices. Using a tiny dab of melted chocolate or a bit of icing, attach two chocolate chips as eyes on each banana slice. If you have edible eyes, you can use those as well for a fun touch!
Add the Final Touch: Once all the skewers are assembled and decorated, you can stick some of the additional mini marshmallows onto the skewer ends as ghostly “heads” for added spookiness.
Serve and Enjoy: Arrange the finished Frightening Fruit Skewers on a platter and serve them chilled or at room temperature. Enjoy these delightful treats at your Halloween party, and watch as guests admire their spooky appearance before indulging in the fruity goodness!
Haunted Hummus Platter
Haunted Hummus Platter is a spooktacular way to bring a deliciously healthy option to your Halloween festivities! This colorful and creative platter features creamy hummus served with a variety of fresh vegetables and fun garnishes that transform an ordinary dip into a hauntingly delightful centerpiece. Perfect for dipping and sharing, this dish is sure to be a hit at any Halloween gathering!
Prepare the Hummus: If you’re making homemade hummus, blend cooked chickpeas, tahini, lemon juice, garlic, olive oil, and salt in a food processor until smooth. If using store-bought, simply scoop it into a serving dish.
Create the Haunted Face: To give your hummus a spooky touch, use a spatula to smooth the surface of the hummus into a flat shape. Take black olives and cut them in half to create eyes, placing two halves on the hummus to form eyes. Use an additional olive or two, if desired, to create a mouth. For added fun, you can use edible googly eyes for a quirky look!
Prepare the Vegetables: Wash and slice the bell peppers into thin strips. Cut the mini cucumbers into rounds or sticks, and clean the baby carrots. For the cherry tomatoes, leave them whole.
Arrange the Platter: On a large serving platter, place the hummus in the center. Neatly arrange the prepared vegetables around the hummus in a colorful fashion. You can place the bell pepper strips standing up, create a border of baby carrots, and have cucumber sticks extending from the sides.
Pita Chips: Slice the pita bread into wedges and arrange them on the platter as well, surrounding the hummus. For an extra touch, you can brush the pita wedges lightly with olive oil and sprinkle them with paprika before toasting them in the oven at 350°F (175°C) for about 5-7 minutes, until slightly crispy.
Final Touches: Optionally drizzle a bit of olive oil over the hummus and sprinkle paprika for added flavor and visual appeal. Add any remaining olives or googly eyes as fun embellishments.
Serve and Enjoy: Your Haunted Hummus Platter is ready to impress! Serve it with a variety of dippers, encouraging guests to grab their favorite veggies or pita wedges and indulge in the festive flavors. Enjoy the spook-tacular treat at your Halloween gathering!
Eyeball Caprese Bites
Eyeball Caprese Bites are a fun and festive take on the classic Caprese salad, perfect for adding a creepy touch to your Halloween spread. These bite-sized appetizers feature fresh mozzarella balls, basil, and cherry tomatoes, cleverly assembled to resemble ghoulish eyeballs. Not only do they look adorable, but they also offer a revitalizing and delicious option for guests to enjoy while getting into the Halloween spirit!
Prepare the Ingredients: Rinse the cherry tomatoes and basil leaves under cold water and pat them dry with a paper towel. Use a sharp knife to slice the black olives in half, creating two round “pupil” pieces.
Assemble the Eyeballs: Take one mozzarella ball and thread it onto a skewer or toothpick. Next, slide on one cherry tomato, followed by one fresh basil leaf. This combination should resemble the eye’s white part (mozzarella), the red eye (tomato), and the iris (basil).
Add the Pupils: Insert a half of a black olive into the center of the cherry tomato, positioning it so that it resembles the pupil of an eye. Repeat this process for all the mozzarella, tomatoes, and basil.
Season: Once all the eyeball bites are assembled, lightly sprinkle them with salt and pepper to enhance their flavor.
Optional Step (Balsamic Drizzle): If desired, drizzle some balsamic glaze over the assembled Eyeball Caprese Bites for added flavor and a beautiful presentation.
Serve: Arrange the Eyeball Caprese Bites on a platter, and serve immediately to your guests. Enjoy the delightful looks and even better tastes as they enjoy this spooky treat!