As an Amazon Associate I earn from qualifying purchases.
Editorial Policy | Disclosure Policy
Spooky Sweet Candy Corn Delight
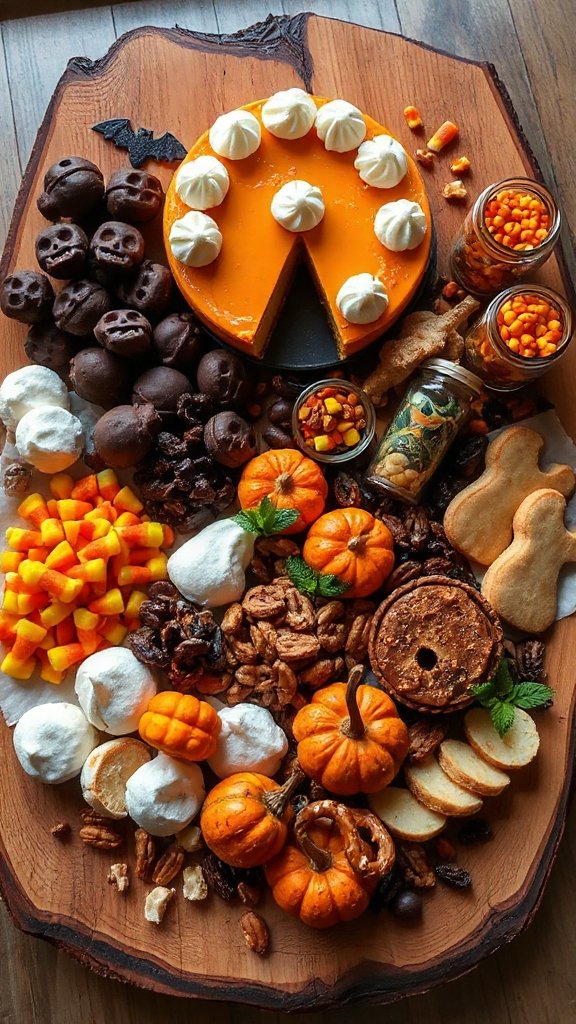
The Spooky Sweet Candy Corn Delight is a fun and festive dessert that captures the spirit of Halloween while satisfying your sweet tooth. This colorful treat combines layers of candy corn, creamy layers, and a crunchy base, making it a perfect addition to any dessert charcuterie board. It’s an easy-to-make treat that’s certain to impress both kids and adults alike at your next spooky gathering!
| Ingredients | Quantity |
|---|---|
| Candy corn | 2 cups |
| Cream cheese | 8 oz (1 package) |
| Powdered sugar | 1 cup |
| Whipped cream | 1 cup |
| Vanilla extract | 1 tsp |
| Graham cracker crumbs | 1 cup |
| Butter (melted) | 4 tbsp |
| Yellow food coloring | 1-2 drops |
| Orange food coloring | 1-2 drops |
| Sprinkles (optional) | For decoration |
Instructions
- Prepare the Base: In a medium bowl, combine the melted butter and graham cracker crumbs. Mix until the crumbs are well coated with the butter. Press this mixture firmly into the bottom of a 9-inch square pan to create an even base. Set it aside.
- Make the Cream Layer: In a large mixing bowl, beat the cream cheese until smooth using an electric mixer. Gradually add the powdered sugar and continue mixing until combined.
- Add Vanilla and Whipped Cream: Pour in the vanilla extract and gently fold in the whipped cream until the mixture is light and fluffy. Divide this mixture into two separate bowls.
- Color the Cream Mixtures: In one bowl, add a couple of drops of yellow food coloring and mix until the desired shade is reached. In the other bowl, add a couple of drops of orange food coloring and mix until you achieve the desired color.
- Layer the Mixtures: Spread the yellow cream layer evenly over the graham cracker base. After that, carefully add the orange cream layer on top, spreading it gently to avoid mixing the two layers.
- Add Candy Corn: Sprinkle the candy corn generously over the top of the orange layer, pressing them down slightly to guarantee they stick.
- Chill: Cover the pan with plastic wrap and refrigerate for at least 2 hours to allow the layers to set properly.
- Serve and Enjoy: Once chilled, remove from the refrigerator, cut into squares, and if desired, top with sprinkles for an extra festive touch. Serve your Spooky Sweet Candy Corn Delight as a delightful addition to your dessert charcuterie board and watch it disappear!
Ghostly Marshmallow Treats
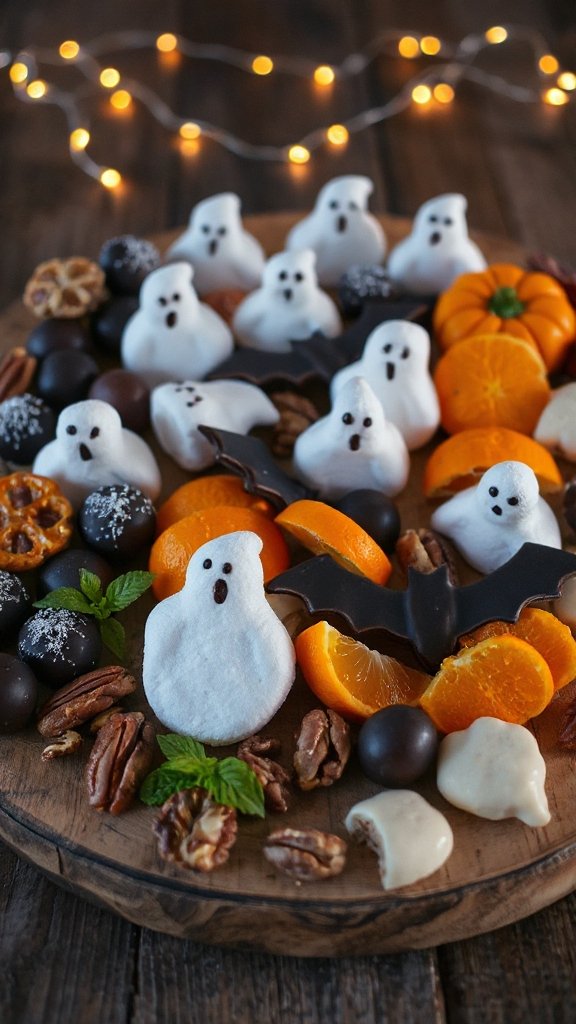
Ghostly Marshmallow Treats are a fun and easy dessert that adds a whimsical touch to any Halloween gathering. These delightful treats combine the sweetness of marshmallows with the creativity of ghostly decorations, making them both adorable and delicious. Perfect for kids and adults alike, these treats are sure to be a hit at your next Halloween party!
| Ingredients | Quantity |
|---|---|
| Large marshmallows | 10 |
| White chocolate chips | 1 cup |
| Black edible markers | 1 (for decorating) |
| Lollipop sticks | 10 |
| Parchment paper | For lining baking sheet |
Instructions
- Prepare Your Workspace: Line a baking sheet with parchment paper to prevent the marshmallows from sticking once dipped in chocolate.
- Melt White Chocolate: In a microwave-safe bowl, add the white chocolate chips. Heat in the microwave in 30-second intervals, stirring between each interval, until completely melted and smooth. Be careful not to overheat.
- Skewer Marshmallows: Take a lollipop stick and carefully insert it into the bottom of each large marshmallow, pushing it about halfway through. This will help you dip the marshmallows easily.
- Dip Marshmallows: Hold the marshmallow by the stick and dip it into the melted white chocolate, ensuring that the entire marshmallow is covered. Allow any excess chocolate to drip off.
- Set on Baking Sheet: Place the dipped marshmallow on the prepared parchment paper. Repeat this process for all marshmallows.
- Chill to Set: Once all marshmallows are dipped, place the baking sheet in the refrigerator for about 15-20 minutes, or until the chocolate has fully set.
- Decorate Your Ghosts: After the chocolate has hardened, use the black edible marker to draw ghostly eyes and mouths on each marshmallow. Get creative with the expressions for a fun variety!
- Serve and Enjoy: Your Ghostly Marshmallow Treats are now ready to impress! Arrange them on a serving tray or platter for everyone to enjoy at your Halloween celebration.
Haunted Halloween Cookies
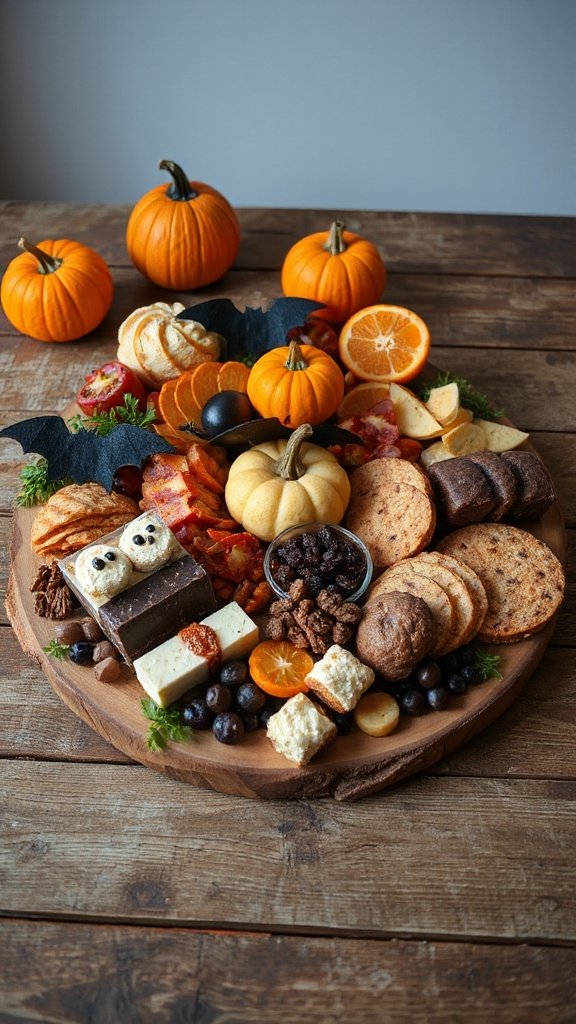
Haunted Halloween Cookies are a delightful and spooky treat that adds a touch of fun to your Halloween festivities. These cookies are not only delicious but also allow for creativity in decoration, making them perfect for kids and adults alike. With simple ingredients, you can whip up a batch of these eerie delights that will grab everyone’s attention at your Halloween gathering.
| Ingredients | Quantity |
|---|---|
| Unsalted butter | 1 cup |
| Granulated sugar | 1 cup |
| Brown sugar | 1/2 cup |
| Eggs | 2 |
| Vanilla extract | 1 teaspoon |
| All-purpose flour | 3 cups |
| Baking soda | 1 teaspoon |
| Baking powder | 1 teaspoon |
| Salt | 1/2 teaspoon |
| Chocolate chips (optional) | 1 cup |
| Icing (for decoration) | Assorted colors |
Instructions
- Preheat Oven: Start by preheating your oven to 350°F (175°C) to make certain it’s ready for baking.
- Mix Wet Ingredients: In a large mixing bowl, combine the unsalted butter, granulated sugar, and brown sugar. Cream together using an electric mixer until the mixture is light and fluffy. Add the eggs one at a time, mixing well after each addition. Then stir in the vanilla extract.
- Combine Dry Ingredients: In a separate bowl, whisk together the all-purpose flour, baking soda, baking powder, and salt until evenly mixed.
- Combine Mixtures: Gradually add the dry ingredients to the wet ingredients, mixing on low speed until just combined. Be careful not to overmix. If desired, fold in the chocolate chips for added sweetness.
- Shape Cookies: Use a cookie scoop or tablespoon to drop rounded balls of dough onto a baking sheet lined with parchment paper. Leave some space between each cookie as they will spread while baking.
- Bake the Cookies: Place the baking sheet in the preheated oven and bake for 10-12 minutes or until the edges are lightly golden. The centers may look soft but will firm up as they cool.
- Cool the Cookies: Remove the cookies from the oven and allow them to cool on the baking sheet for about 5 minutes before transferring them to a wire rack to cool completely.
- Decorate Your Cookies: Once the cookies are cooled, use assorted colored icing to create spooky designs such as ghosts, pumpkins, or spider webs. Let the icing set before serving.
- Serve and Enjoy: Display your Haunted Halloween Cookies on a festive serving platter and enjoy them with friends and family at your Halloween celebration!
Creepy Crawly Chocolate-Dipped Pretzels
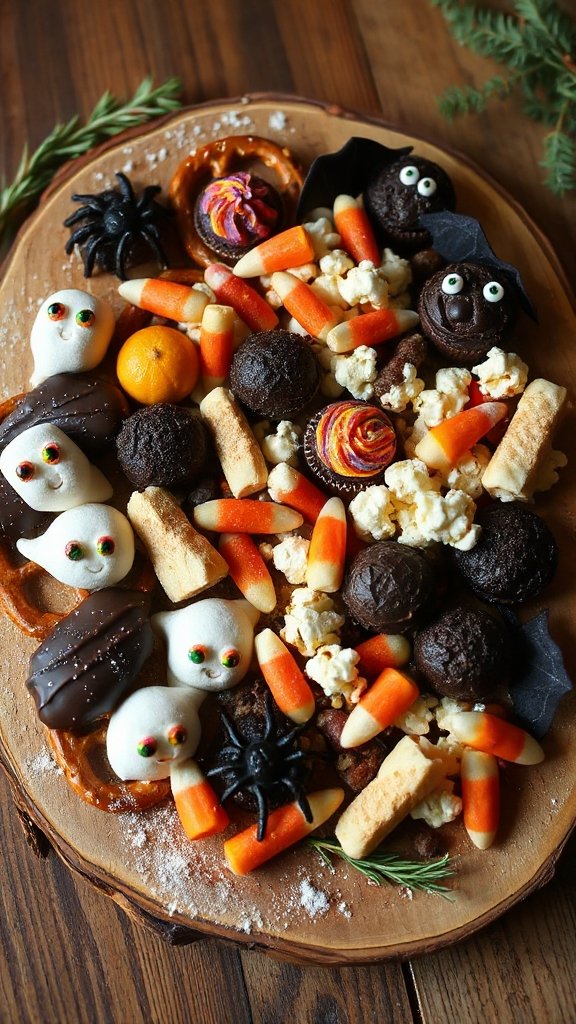
Creepy Crawly Chocolate-Dipped Pretzels are a fun and easy treat to make for Halloween or any spooky occasion. These delicious snacks combine the salty crunch of pretzels with the sweetness of chocolate, and they can be decorated in a variety of creepy designs, making them a hit for both kids and adults alike. With just a few ingredients, you’ll have a hauntingly delicious treat that’s perfect for snacking or as a party favor.
| Ingredients | Quantity |
|---|---|
| Pretzel rods | 10-12 |
| Dark chocolate chips | 1 cup |
| White chocolate chips (optional) | 1/2 cup |
| Assorted edible decorations (e.g., candy eyes, sprinkles) | As needed |
Instructions
- Melt Dark Chocolate: Begin by placing the dark chocolate chips in a microwave-safe bowl. Microwave the chocolate in 30-second intervals, stirring after each interval, until completely melted and smooth. Be careful not to overheat, as chocolate can burn easily.
- Dip the Pretzels: Take each pretzel rod and carefully dip it into the melted dark chocolate, covering about two-thirds of the pretzel. Let the excess chocolate drip off before placing the pretzel rod onto a baking sheet lined with parchment paper.
- Sprinkle Decorations: While the chocolate is still wet, sprinkle your desired edible decorations on top. If you’re using candy eyes, press them into the chocolate so they stick.
- Melt White Chocolate (optional): If you’d like to add a contrasting drizzle, melt the white chocolate chips in a separate bowl using the same microwave method as before.
- Drizzle White Chocolate: Using a fork or a piping bag, drizzle the melted white chocolate over the dipped pretzels to create a spooky effect. You can do zig-zags or any pattern you like.
- Allow to Set: Place the baking sheet in the refrigerator for about 15-20 minutes, or until the chocolate is fully set and hardened.
- Serve and Enjoy: Once set, the Creepy Crawly Chocolate-Dipped Pretzels are ready to be served. Arrange them on a platter for a festive touch or package them as treats for guests to take home. Enjoy!
Pumpkin Pie Bites
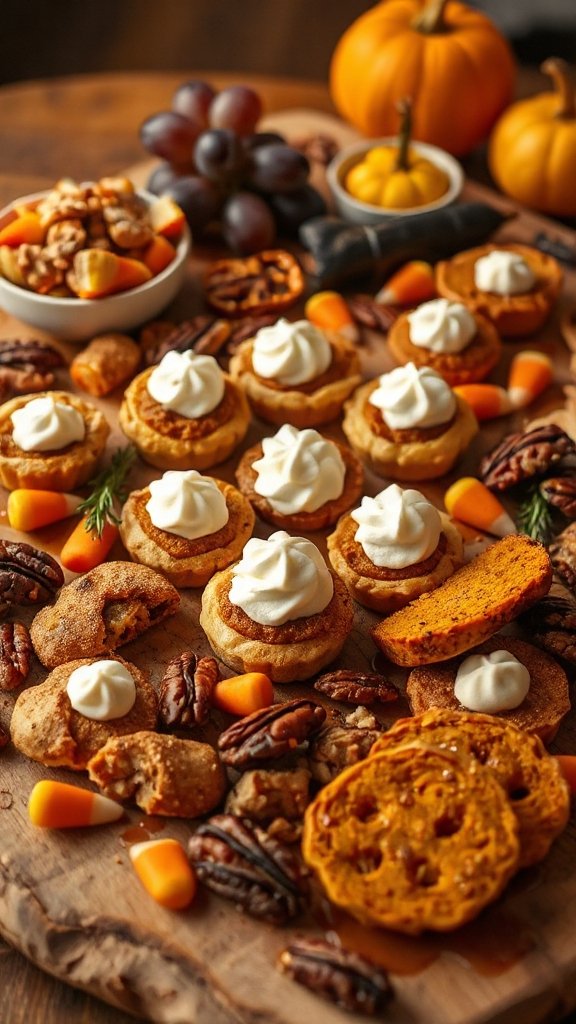
Pumpkin Pie Bites are a delightful and bite-sized twist on the classic pumpkin pie, perfect for holiday gatherings or a seasonal treat. These mini desserts capture all the warm, spiced flavors of traditional pumpkin pie in a convenient and adorable form, making them a hit at any celebration.
| Ingredients | Quantity |
|---|---|
| Crescent roll dough | 1 can (8 oz) |
| Pumpkin puree | 1 cup |
| Granulated sugar | 1/3 cup |
| Pumpkin pie spice | 1 tsp |
| Vanilla extract | 1 tsp |
| Egg | 1 large |
| Whipped cream (for serving) | Optional |
| Cinnamon sugar (for sprinkling) | Optional |
Instructions
- Preheat Oven: Begin by preheating your oven to 375°F (190°C). This guarantees that your Pumpkin Pie Bites will bake evenly and come out fluffy and golden.
- Prepare the Dough: Open the can of crescent roll dough and unroll it. Separate the dough into individual triangles along the perforated lines.
- Make the Pumpkin Filling: In a mixing bowl, combine the pumpkin puree, granulated sugar, pumpkin pie spice, vanilla extract, and egg. Whisk the ingredients together until smooth and well combined. This will be the delicious filling for your bites.
- Assemble the Bites: Take each triangle of dough and place about 1 tablespoon of the pumpkin filling near the wide end of the dough. Be careful not to overfill them, as they need to be able to seal properly.
- Fold and Seal: Starting from the wide end, roll the dough over the filling towards the point, creating a crescent shape. Pinch the edges to seal each bite securely, making sure the filling doesn’t leak out during baking.
- Arrange on Baking Sheet: Place the filled Pumpkin Pie Bites on a baking sheet lined with parchment paper, leaving some space between each one for expansion during baking.
- Bake: Put the baking sheet in the preheated oven and bake for about 12-15 minutes, or until the bites are golden brown and puffed up.
- Cool and Serve: Once baked, remove the Pumpkin Pie Bites from the oven and let them cool slightly. If desired, sprinkle with cinnamon sugar for added sweetness. Serve warm with a dollop of whipped cream on the side.
- Enjoy: These delightful bites can be enjoyed as a snack, dessert, or at special gatherings. They’ll surely be a seasonal favorite!
Monster Munch Snack Mix
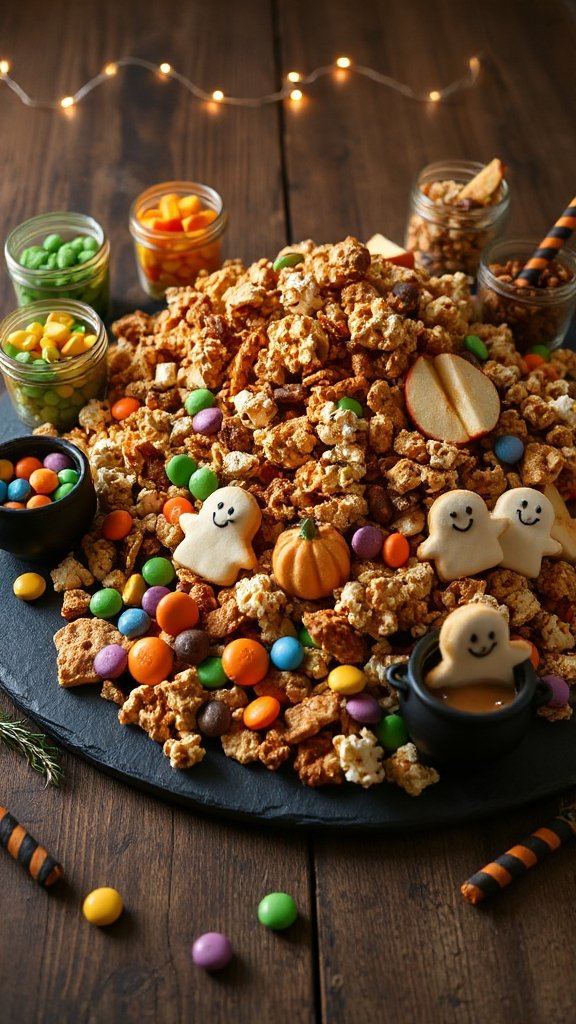
Monster Munch Snack Mix is a whimsical and festive treat that’s perfect for Halloween celebrations or any fun gathering. This chewy and crunchy snack mix combines a variety of colorful ingredients, including popcorn, pretzels, and candies, to create a delightful blend that’s as vibrant to look at as it is to eat. It’s a great party snack that kids and adults alike will love, plus it’s easy to customize with your favorite mix-ins!
| Ingredients | Quantity |
|---|---|
| Popcorn (popped) | 10 cups |
| Pretzel sticks | 2 cups |
| Candy corn | 1 cup |
| M&M’s or candy-coated chocolate | 1 cup |
| Peanuts (optional) | 1 cup |
| White chocolate chips | 1 cup |
| Halloween sprinkles | 1/4 cup |
| Butter (for melting) | 1/2 cup (1 stick) |
| Salt | 1/2 tsp |
Instructions
- Prepare Your Ingredients: Measure out all your ingredients ahead of time. Pop your popcorn and let it cool. If you are using peanuts, make sure they are unsalted and roasted.
- Melt the Chocolate: In a microwave-safe bowl, add the white chocolate chips and butter. Microwave in 30-second intervals, stirring in between, until completely melted and smooth. Be careful not to overheat.
- Combine the Base Ingredients: In a large mixing bowl, combine the popped popcorn, pretzel sticks, candy corn, M&M’s, and peanuts (if using). Toss them gently to mix everything together without crushing the popcorn.
- Add the Melted Chocolate: Drizzle the melted white chocolate mixture over the snack mix. Use a spatula or wooden spoon to gently stir and coat all the ingredients with the chocolate evenly.
- Add the Sprinkles and Seasoning: Sprinkle Halloween sprinkles and salt over the mixture and toss it again to distribute evenly. The sprinkles will add a fun festive touch while the salt will enhance the flavors.
- Cool and Harden: Spread the Monster Munch Snack Mix onto a baking sheet lined with parchment paper. Let the mix cool at room temperature for about 30 minutes to allow the chocolate to set up.
- Serve or Store: Once cooled, break the mix into clusters. You can serve it immediately or store it in an airtight container for up to a week. It’s perfect for parties, movie nights, or just as a sweet snack!
- Enjoy: Grab a handful of this colorful Monster Munch Snack Mix and enjoy the sweet and salty flavors. It’s sure to be a hit with everyone!
Witch’s Brew Cupcakes
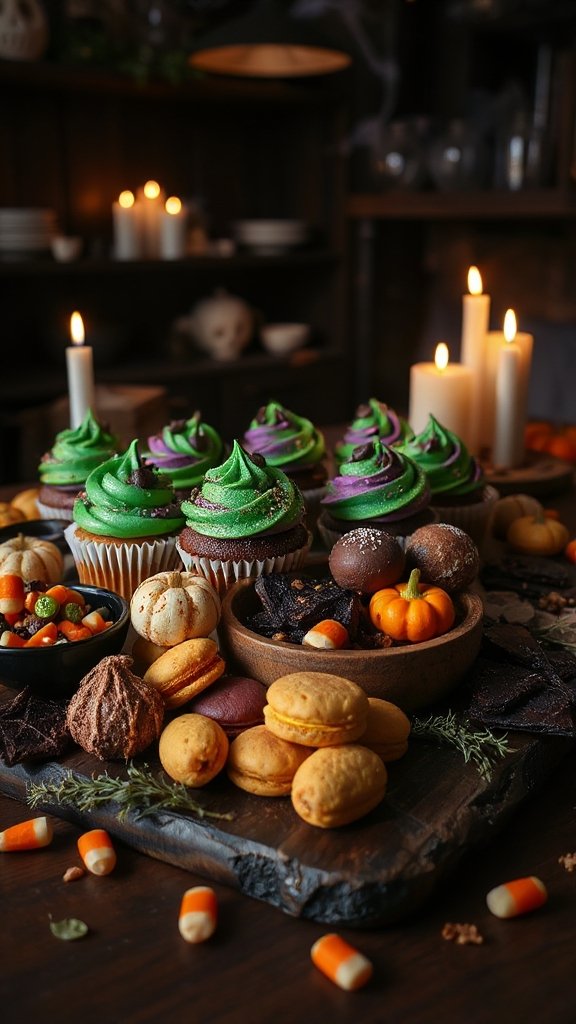
Witch’s Brew Cupcakes are a fun and spooky twist on traditional cupcakes, perfect for Halloween gatherings, costume parties, or any festive occasion. These cupcakes are moist and flavorful, topped with green-tinted buttercream frosting that resembles a magical potion. The addition of edible glitter and quirky candy decorations makes them a hit with both kids and adults!
| Ingredients | Quantity |
|---|---|
| All-purpose flour | 1 ½ cups |
| Granulated sugar | 1 cup |
| Unsweetened cocoa powder | ½ cup |
| Baking powder | 1 tsp |
| Baking soda | ½ tsp |
| Salt | ½ tsp |
| Eggs | 2 large |
| Milk | 1 cup |
| Vegetable oil | ½ cup |
| Vanilla extract | 2 tsp |
| Green food coloring | 1-2 tsp (to desired color) |
| Unsalted butter (for frosting) | 1 cup (2 sticks) |
| Powdered sugar | 4 cups |
| Heavy cream | 2-4 tbsp |
| Edible glitter (optional) | as needed |
| Candy decorations (eyeballs, spiders, etc.) | as needed |
Instructions
- Preheat Your Oven: Begin by preheating your oven to 350°F (175°C). Line a cupcake pan with cupcake liners.
- Mix Dry Ingredients: In a large mixing bowl, whisk together the flour, sugar, cocoa powder, baking powder, baking soda, and salt until well combined.
- Combine Wet Ingredients: In another mixing bowl, beat together the eggs, milk, vegetable oil, and vanilla extract. Add the green food coloring and adjust to your desired shade of green.
- Combine Dry and Wet Mixtures: Pour the wet mixture into the bowl of dry ingredients. Mix gently until just combined; do not overmix. The batter should be somewhat thick and smooth.
- Fill Cupcake Liners: Using a cupcake scoop or spoon, fill each cupcake liner about two-thirds full with the batter.
- Bake the Cupcakes: Place the pan in the preheated oven and bake for 18-20 minutes, or until a toothpick inserted in the center comes out clean. Allow the cupcakes to cool in the pan for about 5 minutes before transferring them to a wire rack to cool completely.
- Make the Frosting: In a large mixing bowl, beat the unsalted butter until light and fluffy. Gradually add in the powdered sugar, mixing until combined. Add heavy cream one tablespoon at a time until you reach your desired consistency. Mix in green food coloring until the frosting is the desired shade of green.
- Frost the Cupcakes: Once the cupcakes have completely cooled, use a piping bag or spatula to generously frost each cupcake with the green buttercream.
- Decorate: Finish off the cupcakes by adding edible glitter and fun candy decorations like eyeballs and spiders on top to create a spooky effect.
- Serve and Enjoy: Arrange the Witch’s Brew Cupcakes on a platter and serve them at your Halloween gathering. Enjoy the looks of delight and surprise from your guests!
Candy Apple Caramel Dippers
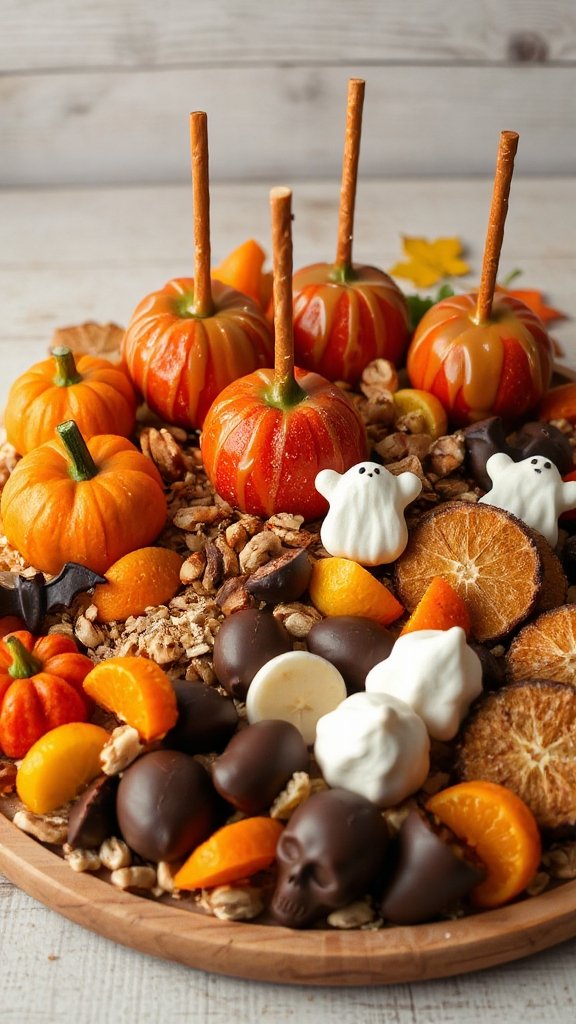
Candy Apple Caramel Dippers are a delightful treat that combines the fresh crunch of apples with a rich and creamy caramel coating. Fun to make and even more fun to eat, these sweet dippers are perfect for fall gatherings, Halloween parties, or just a cozy night in. Whether enjoyed plain or adorned with toppings like nuts or sprinkles, Candy Apple Caramel Dippers are guaranteed to please both kids and adults!
| Ingredients | Quantity |
|---|---|
| Firm apples (Granny Smith or Honey Crisp) | 4 large |
| Granulated sugar | 1 cup |
| Brown sugar | 1/2 cup |
| Unsalted butter | 1/4 cup (1/2 stick) |
| Heavy cream | 1/2 cup |
| Vanilla extract | 1 tsp |
| Sea salt | 1/4 tsp |
| Wooden sticks or skewers | 4 |
| Optional toppings (chopped nuts, sprinkles, etc.) | as desired |
Instructions
- Prepare the Apples: Wash and dry the apples thoroughly. Remove any wax coating by rubbing them with a cloth if necessary. Insert a wooden stick into the core of each apple, pushing it about halfway down.
- Prepare Your Topping Station: If you plan to use toppings, set up a workspace with small bowls of chopped nuts, sprinkles, or other desired toppings. Set them aside for later use.
- Make the Caramel: In a medium-sized saucepan over medium heat, combine the granulated sugar, brown sugar, butter, and heavy cream. Stir continuously until the mixture comes to a boil. Allow it to boil without stirring for about 4-5 minutes until the mixture reaches a thick consistency and a light caramel color.
- Add Flavorings: Remove the saucepan from heat and stir in the vanilla extract and sea salt until thoroughly combined. The caramel may bubble a bit, so be cautious.
- Dip the Apples: Once the caramel is ready, let it cool for a minute. Dip each apple into the caramel, making sure it is fully coated. Allow any excess caramel to drip off before placing the apple upright.
- Add Toppings (Optional): If desired, immediately roll or sprinkle the caramel-coated apples in your choice of toppings to make sure they stick.
- Cool the Apples: Place the dipped apples on a parchment-lined baking sheet or a silicone mat. Let them sit at room temperature for about 30 minutes or until the caramel has set.
- Serve and Enjoy: After the caramel has set, your Candy Apple Caramel Dippers are ready to enjoy! Serve them as a fun treat at parties or package them for friends and family.
Black Cat Oreo Truffles
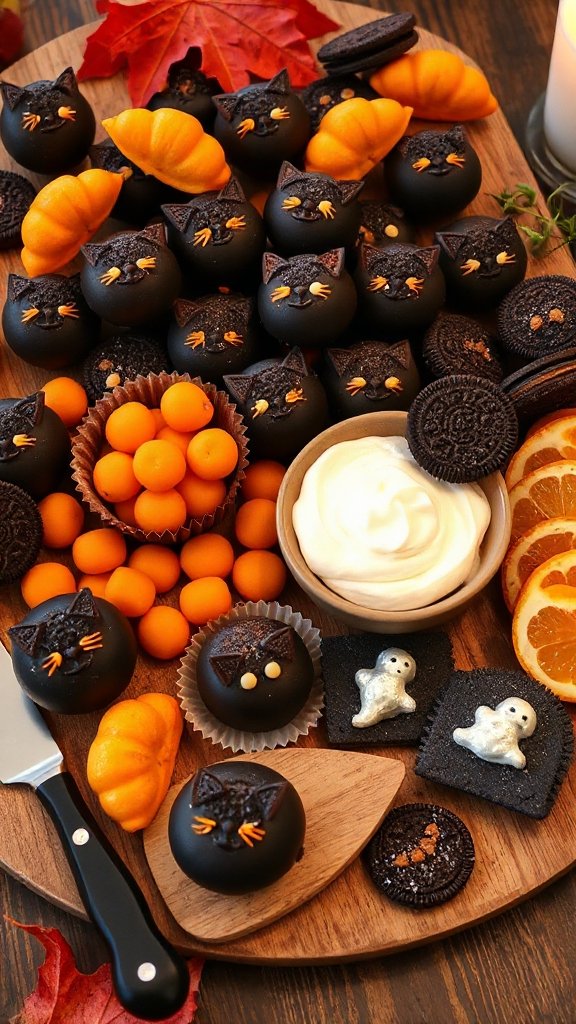
Black Cat Oreo Truffles are a fun and festive dessert that combines the classic flavors of Oreos and cream cheese, beautifully shaped and decorated to resemble adorable black cats. These truffles are not only a sweet treat but also make for delightful Halloween-themed snacks suitable for parties or gatherings. With their rich chocolatey taste and cute appearance, they are sure to be a hit among both kids and adults.
| Ingredients | Quantity |
|---|---|
| Oreo cookies | 18 large cookies |
| Cream cheese | 1 (8 oz) package |
| Semi-sweet chocolate chips | 1 1/2 cups |
| Black candy melts | 1 cup |
| Yellow candy melts | 1 cup |
| Edible eyes | 24 pieces |
| Mini chocolate chips | 24 pieces |
Instructions
- Crush the Oreos: In a food processor, combine the Oreo cookies and pulse until they are finely crushed into crumbs. Alternatively, you can place the cookies in a sealed plastic bag and crush them with a rolling pin.
- Mix in the Cream Cheese: In a large bowl, combine the crushed Oreos with the cream cheese. Mix until the ingredients are well blended and form a cohesive dough-like mixture. You can use a spatula or your hands to guarantee everything is combined evenly.
- Shape the Truffles: Using a tablespoon, scoop out portions of the mixture and roll them into balls, about 1 inch in diameter. Place the rolled truffles on a baking sheet lined with parchment paper. Once all the mixture is shaped, refrigerate the truffles for about 30 minutes to firm them up.
- Melt the Coating: In a microwave-safe bowl, melt the semi-sweet chocolate chips in 30-second intervals, stirring in between, until completely smooth. Next, melt the black candy melts in a separate bowl using the same method.
- Coat the Truffles: Once the truffles are firm, dip each one into the melted black candy melts, guaranteeing they are fully coated. Use a fork to lift them out and allow any excess to drip off, then return them to the parchment-lined baking sheet.
- Add Features: While the coating is still wet, place two edible eyes and two mini chocolate chips on each truffle to resemble a cat’s eyes and nose, making sure they stick.
- Let the Coating Set: Allow the coated truffles to sit at room temperature until the candy melts harden, which should take about 30 minutes.
- Decorate with Yellow Candy Melts: For an extra touch, melt the yellow candy melts and use a small piping bag or a toothpick to create whiskers on each truffle.
- Serve and Enjoy: Once fully set, your Black Cat Oreo Truffles are ready to be enjoyed! Serve them on a decorative platter for a festive Halloween touch.
Frankenstein Fruit Kabobs
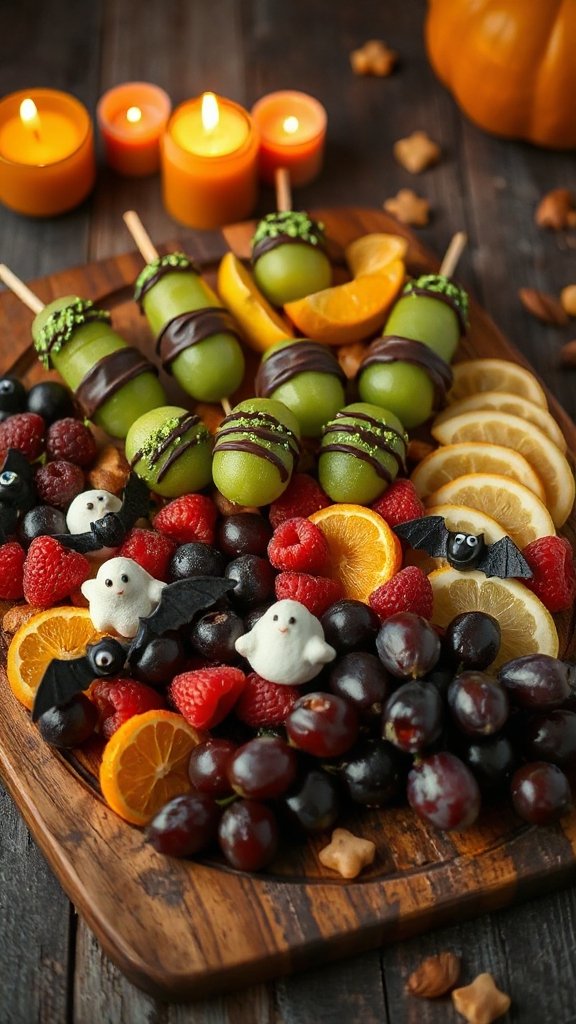
Frankenstein Fruit Kabobs are a fun and healthy dessert that combines fresh fruit with a spooky twist, perfect for Halloween parties or themed gatherings. These vibrant and colorful kabobs feature a mix of fruits that can be arranged on skewers to resemble Frankenstein’s iconic monster look, using chocolate and candy elements for added character. They are not only visually appealing but also a nutritious treat that kids and adults can enjoy together.
| Ingredients | Quantity |
|---|---|
| Green grapes | 1 pound |
| Banana | 2 large |
| Honeydew melon | 1 small |
| Blackberries | 1 cup |
| Mini marshmallows | 1 cup |
| Wooden skewers | 10-12 skewers |
| Semi-sweet chocolate chips | 1/2 cup |
| Candy eyes | 24 pieces |
| Green candy melts | 1 cup |
Instructions
- Prepare the Fruit: Start by washing the green grapes and blackberries under cold water. Pat them dry with a clean kitchen towel. Peel the bananas and cut them into 1-inch thick slices. Cut the honeydew melon into 1-inch squares.
- Melt the Chocolate: In a microwave-safe bowl, melt the semi-sweet chocolate chips by microwaving in 30-second increments, stirring in between until smooth. Alternatively, melt the green candy melts in a separate bowl using the same method.
- Assemble the Kabobs: Take a wooden skewer and start by threading on 2-3 green grapes to represent the body. Next, add a slice of banana, which will be the head. Stick 2 mini marshmallows onto the banana slices for the ears, if desired. Follow with a piece of honeydew melon and finish with a blackberry to create a fun monster design.
- Decorate the Monsters: Once the kabobs are assembled, dip the top end of the banana slice in the melted semi-sweet chocolate to create hair. While the chocolate is still wet, place 2 candy eyes on each banana slice to give your Frankenstein kabobs some character.
- Drizzle with Green Melts: Use a spoon or a piping bag to drizzle melted green candy melts over the assembled kabobs for added color and to enhance the monster theme.
- Chill and Serve: Place the finished kabobs on a platter and refrigerate them for about 15-20 minutes to set the chocolate and candy melts. Serve cold and enjoy the spooky yet delicious Frankenstein Fruit Kabobs!
Mummy Rice Krispie Treats
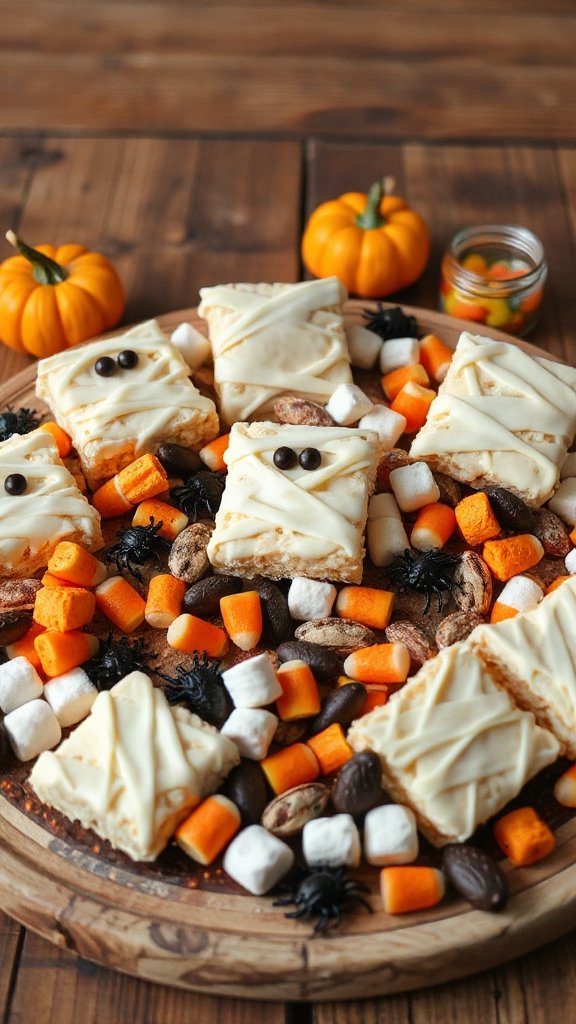
Mummy Rice Krispie Treats are a delightful and easy dessert that puts a fun and spooky spin on the classic Rice Krispie treat, making them perfect for Halloween celebrations. These gooey, marshmallow-based treats are shaped like mummies and decorated with a drizzle of white chocolate and sweet candy eyes to bring them to life. They are simple to make and sure to be a hit with both kids and adults alike.
| Ingredients | Quantity |
|---|---|
| Rice Krispies cereal | 6 cups |
| Mini marshmallows | 4 cups |
| Unsalted butter | 1/4 cup (1/2 stick) |
| White chocolate chips | 1 cup |
| Candy eyes | 24 pieces |
| Vegetable oil (for drizzling) | Optional |
Instructions
- Prepare the Pan: Begin by greasing a 9×13 inch baking dish with butter or non-stick cooking spray to prevent the Rice Krispie treats from sticking.
- Melt Butter and Marshmallows: In a large pot over medium heat, add the unsalted butter and let it melt completely. Once melted, add the mini marshmallows and stir continuously until they are completely melted and smooth, about 2-3 minutes.
- Combine with Cereal: Once the marshmallows are smooth, remove the pot from heat. Immediately add the Rice Krispies cereal to the pot and gently fold it into the marshmallow mixture using a spatula until all the cereal is evenly coated.
- Form the Treats: Pour the mixture into the prepared baking dish. Using buttered hands or a spatula, press the mixture down firmly into an even layer. Allow the treats to cool for about 30 minutes.
- Cut into Mummy Shapes: Once cooled, turn the mixture out onto a cutting board. Using a sharp knife, cut the Rice Krispie treats into rectangles or mummy shapes, depending on your preference.
- Melt the Chocolate: In a microwave-safe bowl, melt the white chocolate chips by microwaving in 30-second increments, stirring in between until the chocolate is smooth. If the chocolate is too thick, you can add a small amount of vegetable oil to thin it out for easier drizzling.
- Drizzle the Chocolate: Transfer the melted white chocolate into a piping bag or a plastic sandwich bag with a corner snipped off. Drizzle the melted chocolate over each Rice Krispie treat to create a mummy wrap effect.
- Add the Eyes: Immediately place 2 candy eyes on each treat while the chocolate is still wet, so they adhere properly.
- Let Set: Allow the chocolate to set at room temperature or place the treats in the refrigerator for a quicker firm-up, about 10-15 minutes.
- Serve and Enjoy: Once the chocolate has hardened, your Mummy Rice Krispie Treats are ready to be served! Display them on a festive platter and enjoy the spooky fun!
This combination of treats is not only delicious but also a great activity for Halloween parties, ensuring everyone gets into the spirit of the season.
