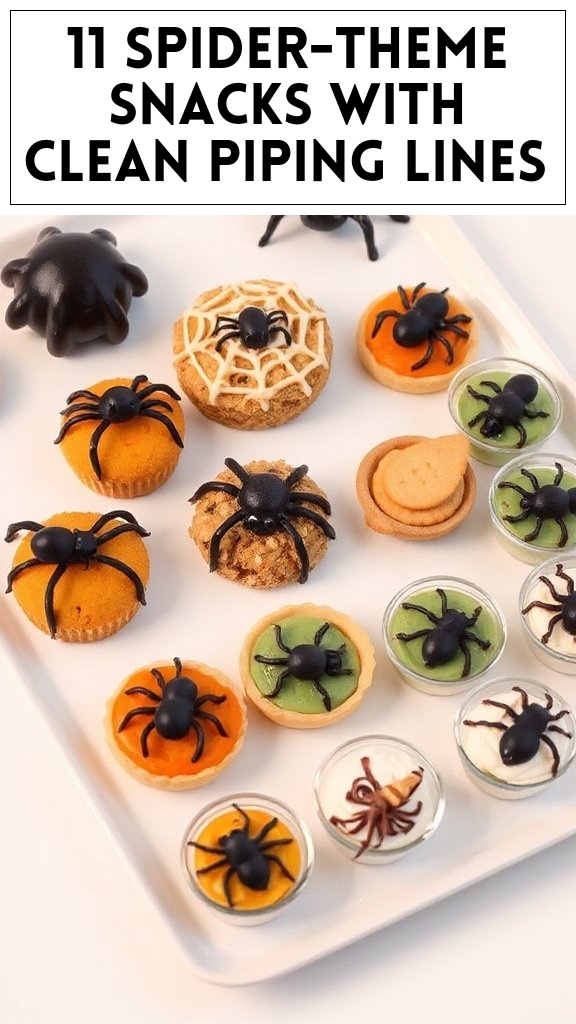
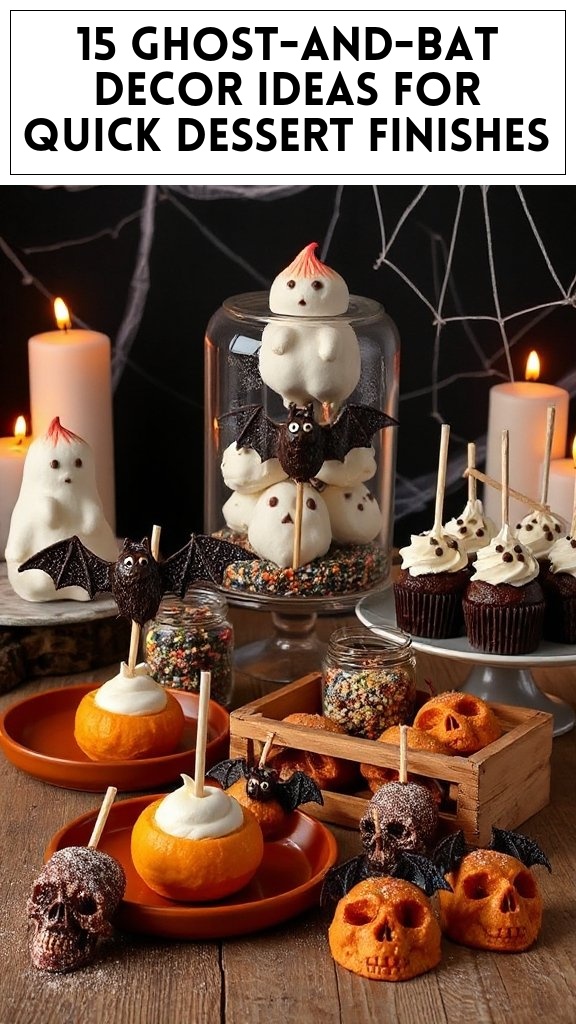
Spooky Spider Cookies are a fun and festive treat perfect for any Halloween celebration! These delightful dairy-free cookies are not only delicious but also easy to make. With their charming spider design, they are sure to be a hit among kids and adults alike. Let’s get started on creating these spooky snacks!
Preheat the Oven: Start by preheating your oven to 350°F (175°C). Line baking sheets with parchment paper to prevent the cookies from sticking.
Mix Dry Ingredients: In a medium bowl, whisk together the all-purpose flour, baking soda, and salt. This will guarantee that the leavening agent is evenly distributed throughout the flour.
Prepare Flax Egg: In a small bowl, combine the flaxseed meal and water. Stir well and let it sit for about 5 minutes until it becomes gelatinous. This will act as a binder in place of eggs.
Cream the Vegan Butter and Sugars: In a large mixing bowl, use a hand mixer or stand mixer to beat the vegan butter, brown sugar, and granulated sugar together until the mixture is light and fluffy, about 2-3 minutes.
Add Vanilla and Flax Egg: Add the vanilla extract and the prepared flax egg to the butter-sugar mixture. Mix until well combined.
Combine Dry and Wet Ingredients: Gradually add the dry ingredient mixture to the wet ingredients. Mix until just combined; be careful not to overmix. Fold in the dairy-free chocolate chips.
Shape the Cookies: Using a tablespoon or cookie scoop, drop rounds of dough onto the prepared baking sheets, leaving about 2 inches of space between each cookie. Gently flatten them to form a slightly thicker disc shape.
Bake the Cookies: Place the baking sheets in the preheated oven and bake for 10-12 minutes, or until the edges start to turn golden brown. The centers may look slightly underdone; they will continue to set as they cool.
Cool the Cookies: Once baked, remove the cookies from the oven and let them cool on the baking sheets for about 5 minutes before transferring them to a wire rack to cool completely.
Create Spider Designs: Once the cookies are completely cool, stick two edible black candy eyes on top of each cookie. Cut the dairy-free licorice into 2-3 inch pieces and place them into the sides of the cookies as spider legs, creating your spooky spider look.
Enjoy your delightful Spooky Spider Cookies at your Halloween festivities and watch as they become a ghoulish favorite among your guests!
Pumpkin Spice Energy Bites
Pumpkin Spice Energy Bites are a delicious and nutritious no-bake treat, perfect for a quick snack or a festive Halloween-inspired delight. Packed with wholesome ingredients, these bites are not only dairy-free but also full of pumpkin flavor and warming spices, making them an excellent choice for both kids and adults during the spooky season.
Prepare the Mixing Bowl: In a large mixing bowl, combine the rolled oats, pumpkin puree, maple syrup, and almond butter. These are your base ingredients, and they will hold everything together.
Add Spices and Seasoning: Sprinkle in the ground cinnamon, nutmeg, ginger, and salt. These spices give the energy bites their warm, cozy flavor. Mix well until all the ingredients are evenly incorporated.
Incorporate Flaxseed Meal: Add the flaxseed meal to the mixture. This ingredient not only adds nutrition but also helps bind the energy bites together.
Enhance with Add-ins: If desired, fold in the dairy-free chocolate chips and chopped walnuts or coconut flakes for additional texture and flavor. Mix until well distributed throughout the mixture.
Form the Bites: Using clean hands or a small cookie scoop, portion out the mixture and roll it into bite-sized balls, about 1 inch in diameter. You should get around 20-24 bites depending on the size you make them.
Chill in the Refrigerator: Place the formed energy bites on a parchment-lined baking sheet or plate. Refrigerate for at least 30 minutes to help them firm up. This step enhances the flavor and makes them easier to handle.
Store for Later: Once chilled, transfer the pumpkin spice energy bites to an airtight container. They can be stored in the fridge for up to a week or frozen for longer storage—just make sure to separate layers with parchment paper to prevent sticking.
Enjoy these tasty Pumpkin Spice Energy Bites as a healthy treat during the Halloween festivities!
Creepy Crawly Gummy Worm Cups
Creepy Crawly Gummy Worm Cups are a fun and playful dessert perfect for Halloween celebrations. These adorable treats feature a rich, creamy base made from dairy-free ingredients, topped with colorful gummy worms for a spooky twist. Easy to make and delightful to eat, they are sure to delight both kids and adults alike.
Prepare the Pudding: Start by making the dairy-free vanilla pudding according to the package instructions. You can use store-bought or homemade pudding mix, ensuring it’s dairy-free.
Crush the Cookies: In a separate bowl, take the chocolate cookies and crush them into fine crumbs. These will act as the “dirt” layer in your dessert cups.
Assemble the Cups: In small clear cups or bowls, begin by adding a layer of the crushed chocolate cookies at the bottom (about 2-3 tablespoons).
Add the Pudding: Once the cookie layer is in place, spoon about 1/4 cup of the prepared dairy-free vanilla pudding over the cookie layer, smoothing it out with the back of the spoon.
Layer the Whipped Cream: Top the pudding layer with a generous dollop of coconut whipped cream, adding about 2 tablespoons on top of the pudding.
Add the “Dirt”: If you’re using crushed almond flour mixed with cocoa powder to create “edible dirt”, sprinkle it on top of the whipped cream layer for a spooky touch.
Final Touch with Gummy Worms: Take a handful of gummy worms and gently place them on top of the whipped cream and dirt layer, allowing some to drape over the sides for added effect.
Chill Before Serving: Place the completed cups in the refrigerator for at least 30 minutes to allow the flavors to meld and to chill the dessert.
Serve and Enjoy: Once chilled, your Creepy Crawly Gummy Worm Cups are ready to serve! They make a fun addition to any Halloween gathering, and guests will enjoy discovering the “worms” hidden in their “dirt.”
Ghostly Banana Pops
Ghostly Banana Pops are a fun and delightful treat that perfectly captures the Halloween spirit while being completely dairy-free. These adorable banana pops are coated in a creamy dairy-free chocolate and adorned with spooky ghostly faces, making them a hit at any Halloween gathering. They are not only cute but also healthy, providing a tasty way to enjoy fruit during the holiday.
Prepare the Bananas: Begin by peeling the ripe bananas and cutting them in half. Insert a lollipop stick into the flat end of each banana half, pushing it in about halfway.
Melt the Chocolate: In a microwave-safe bowl, combine the dairy-free dark chocolate chips and coconut oil. Heat in the microwave in 30-second intervals, stirring between each interval, until the chocolate is fully melted and smooth.
Coat the Bananas: Dip each banana pop into the melted chocolate, making certain it is well-coated. Use a spoon to help cover any areas that aren’t fully submerged. Allow any excess chocolate to drip off.
Add the Ghost Faces: While the chocolate is still wet, place two mini dairy-free chocolate chips on each banana pop to create the ghost eyes. You can also sprinkle decorated sprinkles on top if you desire a fun touch.
Set the Pops: Place the coated banana pops upright in a cup or on a baking sheet lined with parchment paper. Ensure that they do not touch one another to avoid sticking.
Chill Until Firm: Put the banana pops in the freezer for at least 30 minutes. This will help the chocolate set and make them easier to eat.
Serve and Enjoy: Once the chocolate has hardened, your Ghostly Banana Pops are ready to be served! They can be kept in the freezer until you’re ready to enjoy them, making a spooky yet nutritious treat that everyone will love.
Celebrate Halloween with these delightful banana pops – they’re sure to be a hit!
Chocolate Avocado Mousse
Chocolate Avocado Mousse is a rich and creamy dessert that offers all the decadence of traditional mousse without any dairy. This delightful treat blends ripe avocados with cocoa powder and a natural sweetener, creating a luscious dessert that is not only indulgent but also packed with healthy fats. Perfect for Halloween, it can be garnished with spooky decorations or served in fun cups for a festive flair.
Prepare the Avocados: Begin by cutting the ripe avocados in half. Remove the pit and scoop the green flesh into a blending bowl or food processor.
Add Ingredients: To the bowl with the avocado, add the unsweetened cocoa powder, maple syrup, vanilla extract, almond milk, and a pinch of salt.
Blend Until Smooth: Using a blender or food processor, blend all the ingredients until you reach a smooth and creamy consistency. You may need to stop and scrape down the sides of the bowl to guarantee everything is well combined.
Taste and Adjust Sweetness: After blending, taste the mousse. If you prefer it sweeter, feel free to add more maple syrup and blend again until incorporated.
Chill the Mousse: Once the mousse is blended to your liking, transfer it to individual cups or a large serving bowl. Cover it with plastic wrap and refrigerate for at least 30 minutes. This chilling step helps the flavors meld and enhances the mousse’s texture.
Serve and Garnish: After chilling, remove the mousse from the refrigerator. If desired, top with coconut whipped cream, chocolate shavings, or any other fun Halloween-themed decorations to enhance the presentation.
Enjoy: Your Chocolate Avocado Mousse is now ready to be enjoyed! Serve it as a spooky dessert at your Halloween gathering, and watch as everyone delights in this rich, dairy-free treat.
This chocolate mousse is not only delicious but also a healthier alternative that everyone will love!
Haunted Chocolate Bark
Haunted Chocolate Bark is a fun and creative Halloween treat that is both simple to make and delightfully spooky. This dessert combines melted dairy-free chocolate with an assortment of toppings that evoke the spirit of Halloween. With just a few ingredients, you can create a colorful bark filled with ghoulish delights, perfect for sharing at parties or handing out as sweet treats.
Prepare Your Workspace: Line a baking sheet with parchment paper, allowing some overhang on the sides for easy removal later.
Melt the Chocolate: In a microwave-safe bowl, add the dairy-free dark chocolate chips. Microwave in 30-second intervals, stirring between each interval, until the chocolate is fully melted and smooth. Alternatively, you can melt the chocolate using a double boiler on the stove.
Spread the Chocolate: Once melted, carefully pour the chocolate onto the prepared baking sheet. Using a spatula, spread the chocolate evenly to form a rectangle or square about 1/4 inch thick.
Add Toppings: While the chocolate is still melted, sprinkle the pumpkin seeds, dried cranberries or raisins, and ghost-shaped candies or edible eyes over the top. Feel free to get creative with the placement to make it as spooky as you like!
Finish with Sea Salt: Lightly sprinkle a pinch of sea salt over the toppings for an extra flavor boost.
Chill to Set: Place the baking sheet in the refrigerator for about 30 minutes, or until the chocolate is firm and set.
Break Into Pieces: Once set, remove the bark from the refrigerator. Use your hands or a sharp knife to break it into irregular pieces.
Serve and Enjoy: Arrange the haunted chocolate bark on a festive platter or package it in treat bags to share with friends and family. Enjoy this deliciously spooky treat at your Halloween celebrations!
This Haunted Chocolate Bark is not only fun to make, but it’s also a versatile treat that can be adapted with your favorite toppings. Enjoy the thrill of creating this delightful dessert!
Witch’s Cauldron Dirt Cups
Witch’s Cauldron Dirt Cups are a delightful and fun Halloween dessert that will enchant both kids and adults alike. These eerie-looking cups combine layers of creamy dairy-free pudding and crushed cookies, resembling a spooky cauldron filled with “dirt” topped with gummy worms and edible decorations. This easy-to-make treat is perfect for Halloween parties, classroom celebrations, or just a tasty way to get into the Halloween spirit.
Ingredient
Quantity
Dairy-free chocolate pudding mix
1 package (3.9 oz)
Dairy-free milk
2 cups
Chocolate sandwich cookies (crushed)
1 cup
Gummy worms
1 package
Edible green sprinkles or candy eyes
As desired
Cups or small jars
6-8
Cooking Instructions:
Prepare the Pudding: In a medium-sized mixing bowl, combine the dairy-free chocolate pudding mix with the dairy-free milk. Whisk vigorously for about 2 minutes until the mixture is smooth and thickened. Allow the pudding to sit for a few minutes to set further.
Crush the Cookies: Take the chocolate sandwich cookies and place them in a resealable plastic bag. Use a rolling pin or your hands to crush the cookies into fine crumbs, resembling dirt. Set aside.
Layer the Cups: Take your cups or small jars and begin layering. Start by adding a few tablespoons of the prepared chocolate pudding to the bottom of each cup.
Add the “Dirt” Layer: Next, add a generous layer of crushed chocolate cookies on top of the pudding. Press down gently to form a solid layer.
Repeat the Layers: Continue to alternate between the layers of pudding and crushed cookies. Aim for at least two layers of each, finishing with a top layer of crushed cookies to create the finished “dirt” effect.
Decorate for Spookiness: Once you have filled the cups, insert gummy worms into the top layer of cookie crumbs, letting them appear as if they are wriggling through the dirt. Feel free to sprinkle edible green sprinkles or place candy eyes on top for extra Halloween flair.
Chill Time: Place the cups in the refrigerator and chill for at least 30 minutes to allow the pudding to firm up and the flavors to meld together.
Serve and Enjoy: Once chilled, serve the Witch’s Cauldron Dirt Cups chilled. They can be displayed on a festive table or served individually for guests to enjoy. Watch the delight on everyone’s faces as they plunge into these spooky treats!
These Witch’s Cauldron Dirt Cups are an exciting and tasty way to celebrate Halloween, making them a must-have dessert for your festivities!
Vampire Blood Pudding Cups
Vampire Blood Pudding Cups are a spooky yet delicious dairy-free dessert that’s perfect for Halloween. These cups feature a rich and creamy dairy-free chocolate pudding that’s served in clear cups to showcase a deep red “blood” topping made from blended fruits like strawberries or raspberries. With their gory appearance and delightful taste, these treats are sure to impress and entertain guests of all ages.
Ingredient
Quantity
Dairy-free chocolate pudding mix
1 package (3.9 oz)
Dairy-free milk
2 cups
Ripe strawberries or raspberries
1 cup (fresh or frozen)
Sugar or sweetener (optional)
To taste
Edible vampire teeth or gummy bats
As desired
Cups or small jars
6-8
Cooking Instructions:
Prepare the Pudding: In a medium-sized mixing bowl, whisk together the dairy-free chocolate pudding mix and dairy-free milk for about 2 minutes until smooth and thickened. Let the pudding sit for a few more minutes to firm up.
Prepare the Blood Topping: If using fresh strawberries or raspberries, rinse them under cold water and remove any stems. If they’re frozen, let them thaw slightly. Place the berries in a blender or food processor. Blend until smooth. If desired, sweeten the mixture with sugar or your preferred sweetener to taste. Set aside.
Layer the Cups: Take your cups or small jars and start by spooning a few tablespoons of the prepared chocolate pudding into the bottom of each cup, filling them about halfway.
Add the “Blood” Layer: After adding the pudding, spoon the blended berry mixture on top of the chocolate pudding layer. This will create a striking “blood” effect.
Repeat the Layers: If desired, you can add another layer of chocolate pudding on top of the blood layer. Just be careful to add the pudding gently to maintain the layers’ visibility.
Decorate for a Spooky Touch: Top off your pudding cups with edible vampire teeth or gummy bats for a fun Halloween decoration that captures the essence of the vampire theme.
Chill Time: Place the cups in the refrigerator to chill for at least 30 minutes. This will help the layers set and enhance the flavors.
Serve and Enjoy: Once chilled, serve the Vampire Blood Pudding Cups and watch the delight on your guests’ faces as they dig into this eerie yet delightful dessert.
These pudding cups make for a fun and frightening addition to any Halloween celebration!
Mummy Chocolate-Covered Apples
Mummy Chocolate-Covered Apples are a creative and playful dairy-free dessert that adds a fun twist to your Halloween festivities. These enchanting treats feature crisp, tart apples wrapped in creamy dairy-free chocolate, then decorated with thin strips of white chocolate to resemble mummy wrappings. With their spooky appearance and delicious taste, these chocolate-covered apples are sure to be a hit at any Halloween gathering.
Prepare the Apples: Wash the apples thoroughly under cold water to remove any wax and dirt. Pat them dry with a paper towel. If you want, you can insert a wooden stick into the top of each apple, pushing it about halfway through for easy handling.
Melt the Dairy-Free Chocolate: In a microwave-safe bowl, combine the dairy-free chocolate chips and coconut oil. Microwave the mixture in 30-second intervals, stirring well after each interval, until the chocolate is completely melted and smooth.
Coat the Apples: Dip each apple into the melted chocolate mixture, swirling to coat completely. Allow any excess chocolate to drip off and place the apples on a parchment-lined baking sheet to set.
Melt the White Chocolate: Using a similar method as before, melt the dairy-free white chocolate chips in a microwave-safe bowl with a bit of coconut oil (1 teaspoon should suffice). Stir until smooth.
Create the Mummy Wrappings: Transfer the melted white chocolate into a piping bag or a sandwich bag with a small corner snipped off. Drizzle the white chocolate over the chocolate-coated apples in a zigzag pattern to resemble mummy wrappings.
Add Edible Eyes: If you’re using edible eyes, place them on the front of the apple while the white chocolate is still wet so they stick.
Set the Mummy Apples: Allow the apples to sit at room temperature for about 30 minutes to let the chocolate set completely. Alternatively, you can place them in the refrigerator for a quicker set.
Serve and Enjoy: Once the chocolate is firm, your Mummy Chocolate-Covered Apples are ready to be served. Arrange them on a platter for a delightful and spooky treat that your guests will love!
Frankenstein’s Monster Cupcakes
Frankenstein’s Monster Cupcakes are a fun and festive dairy-free dessert perfect for Halloween celebrations. These vibrant green cupcakes are topped with a rich dairy-free chocolate frosting and decorated with adorable monster features, making them a delightful treat for kids and adults alike. With their playful design and delicious flavor, they are sure to be a crowd-pleaser at any spooky gathering.
Preheat the Oven: Preheat your oven to 350°F (175°C) and line a cupcake tin with cupcake liners.
Mix Dry Ingredients: In a large bowl, whisk together the all-purpose flour, cocoa powder, baking powder, baking soda, salt, granulated sugar, and brown sugar until well combined.
Combine Wet Ingredients: In a separate bowl, mix the dairy-free milk, vegetable oil, apple cider vinegar, vanilla extract, and a few drops of green food coloring until fully combined. Adjust the green food coloring according to your desired level of brightness.
Combine Wet and Dry Ingredients: Pour the wet ingredients into the dry ingredients and stir gently with a spatula until just combined; be careful not to overmix the batter.
Fill Cupcake Liners: Divide the batter evenly among the cupcake liners, filling each about 2/3 full to give them room to rise.
Bake the Cupcakes: Place the cupcake tin in the preheated oven and bake for 18-20 minutes or until a toothpick inserted in the center comes out clean. Once done, remove from the oven and let the cupcakes cool in the tin for 5 minutes, then transfer them to a wire rack to cool completely.
Prepare the Frosting: In a bowl, combine the melted dairy-free chocolate with the powdered sugar and coconut milk. Mix until smooth and creamy. If needed, add more powdered sugar to reach your desired thickness.
Frost the Cupcakes: Once the cupcakes are completely cool, use a knife or piping bag to frost each cupcake generously with the dairy-free chocolate frosting.
Decorate as Frankenstein’s Monster: Create fun monster features using edible eyes and colored candies. Place the edible eyes on top of the frosting and use the candies for mouth and hair details.
Serve and Enjoy: Your Frankenstein’s Monster Cupcakes are ready to delight your guests! Enjoy them at your Halloween festivities or as a fun sweet treat any time of the year!
Apple Nachos With Caramel Drizzle
Apple Nachos With Caramel Drizzle are a delightful and healthy twist on a classic treat, perfect for Halloween gatherings and parties. This dessert features crisp apple slices drizzled with a rich dairy-free caramel sauce, topped with an assortment of toppings like dairy-free chocolate chips, nuts, and sprinkles. It’s an enjoyable way to indulge in fall flavors while keeping things light and dairy-free.
Prepare the Apples: Wash the apples thoroughly. Using a sharp knife, slice the apples into thin wedges or rounds, discarding the seeds.
Arrange the Apple Slices: On a large serving platter or a baking sheet, arrange the apple slices in a uniform layer, overlapping them slightly if desired.
Drizzle with Caramel Sauce: Take the dairy-free caramel sauce and warm it slightly in the microwave or on the stove until it’s pourable. Drizzle the caramel generously over the arranged apple slices.
Add Toppings: Sprinkle the dairy-free chocolate chips evenly over the apple slices, followed by the chopped nuts. If desired, add colorful rainbow sprinkles for fun, festive flair.
Garnish with Cinnamon: For an extra touch of flavor, sprinkle a light dusting of cinnamon over the top if desired.
Serve Immediately: Apple Nachos are best enjoyed fresh. Serve immediately to guarantee the apples remain crisp and the toppings stay in place. Enjoy your delicious and festive snack!