Apple Ghosts
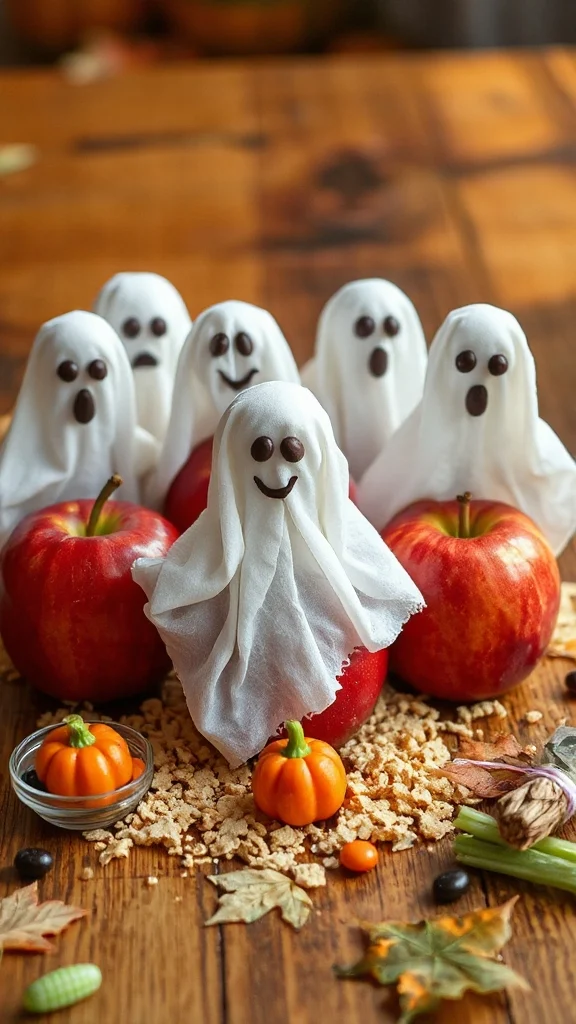
Apple ghosts are a fun and festive Halloween snack that is both healthy and easy to make. This delightful treat features fresh apple slices transformed into adorable ghost shapes, perfect for adding a spooky touch to your holiday celebration. Not only are they a hit with kids, but they are also a great way to enjoy fruit, all while being mindful of common allergens.
| Ingredients | Quantity |
|---|---|
| Apples | 2 medium |
| Mini chocolate chips or raisins | 1/4 cup |
| Lemon juice | 1 tablespoon |
| Peanut butter or almond butter (optional for adherence) | 2 tablespoons |
Instructions:
- Prepare the Apples: Start by washing the apples thoroughly under running water to remove any pesticides or wax. Pat them dry with a clean towel.
- Slice the Apples: Using a sharp knife, carefully slice the apples into thick wedges, about 1/2 inch wide. These will serve as the base for your ghost faces.
- Prevent Browning: To keep the apple slices from browning, drizzle the lemon juice over the wedges and gently toss them so that the juice coats the apples evenly.
- Shape the Ghosts: If desired, you can use a cookie cutter to press out ghost shapes from the apple wedges, but this step is optional. If you prefer, you can leave them in wedge form—both shapes are fun!
- Add Eyes: Using the mini chocolate chips or raisins, press two “eyes” onto each apple wedge or ghost shape. If you find the chips or raisins are sliding off, you can dip the back of them in a little peanut butter or almond butter to help them stick better.
- Serve and Enjoy: Arrange the finished apple ghosts on a plate or a spooky Halloween-themed tray. Enjoy them immediately as a delicious snack, or refrigerate them for up to a couple of hours before serving.
These adorable apple ghosts are sure to be a hit at your Halloween gathering while also being a healthy and allergy-friendly option!
Pumpkin-Spiced Rice Cakes
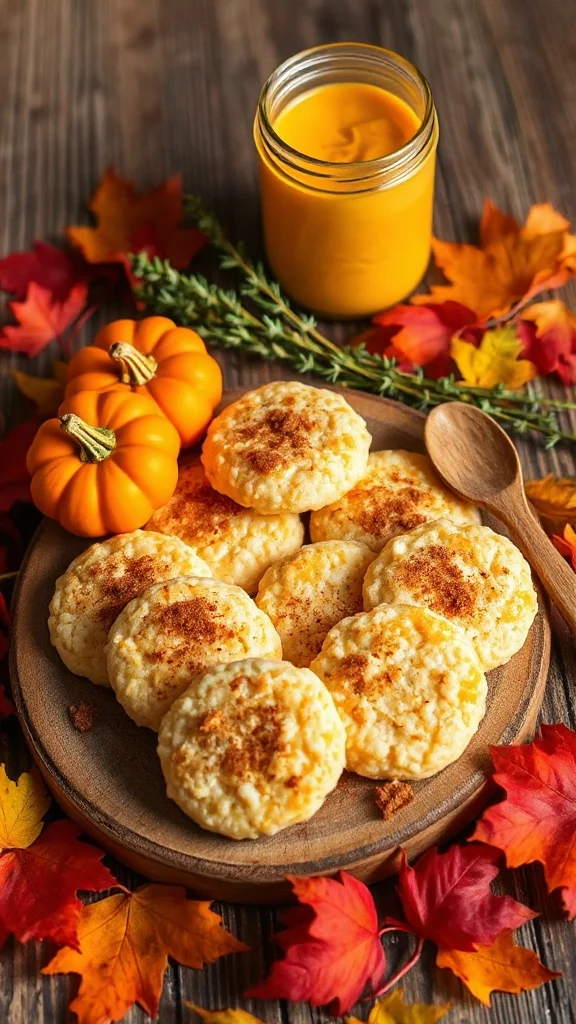
Pumpkin-Spiced Rice Cakes are a delightful and simple Halloween snack that captures the cozy flavors of fall. These light and crunchy treats are flavored with warm pumpkin spice and are suitable for those with dietary restrictions. They make for an easy-to-make snack that adds a festive touch to any Halloween gathering.
| Ingredients | Quantity |
|---|---|
| Plain rice cakes | 4 cakes |
| Pumpkin puree | 1/2 cup |
| Maple syrup | 2 tablespoons |
| Pumpkin pie spice | 1 teaspoon |
| Ground cinnamon | 1/2 teaspoon |
| Vanilla extract | 1/2 teaspoon |
| Optional toppings (nuts, seeds, or coconut flakes) | As desired |
Instructions:
- Prepare the Base: Begin by arranging your plain rice cakes on a baking sheet or serving plate. This will be the base for your pumpkin-spiced topping.
- Mix the Pumpkin Spice Topping: In a medium mixing bowl, combine the pumpkin puree, maple syrup, pumpkin pie spice, ground cinnamon, and vanilla extract. Stir the mixture well until all ingredients are thoroughly combined and smooth.
- Spread the Mixture: Using a small spatula or the back of a spoon, evenly spread the pumpkin spice mixture onto the surface of each rice cake, ensuring you cover them generously.
- Add Optional Toppings: If desired, sprinkle your choice of toppings such as nuts, seeds, or coconut flakes over the pumpkin-spiced layer on each rice cake. This adds a nice crunch and enhances the flavor.
- Serve Immediately or Store: These pumpkin-spiced rice cakes can be served immediately for a fresh snack. Alternatively, you can place them in an airtight container and store them in the refrigerator for up to 3 days. If you store them, note that the rice cakes may become slightly softer but will still be delicious.
Enjoy these festive Pumpkin-Spiced Rice Cakes as a fun and seasonal treat that everyone can enjoy!
Yogurt-Covered Freeze-Dried Fruit
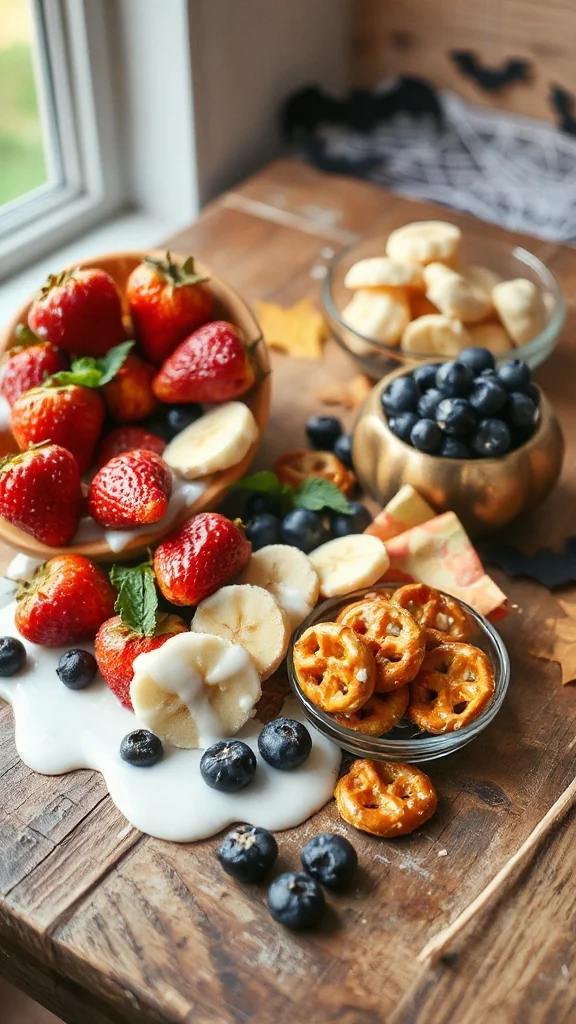
Yogurt-Covered Freeze-Dried Fruit is a crunchy and sweet Halloween snack that is both delightful and offers a fun way to incorporate fruit into your seasonal festivities. This simple treat not only satisfies your sweet tooth but also provides a guilt-free option with minimal allergens. Perfect for sharing at Halloween parties or as a fun snack for kids, these yogurt-covered goodies are sure to be a hit!
| Ingredients | Quantity |
|---|---|
| Freeze-dried fruit (strawberries, bananas, or apples) | 1 cup |
| Dairy-free yogurt (coconut or almond-based) | 1 cup |
| Honey or maple syrup (optional) | 1 tablespoon (optional) |
| Sprinkles (optional) | As desired |
Instructions:
- Prepare the Freeze-Dried Fruit: Start by choosing your favorite freeze-dried fruit. Common choices include strawberries, bananas, or apples. Make sure they are in small pieces or slices for easy coating.
- Mix the Yogurt: In a medium-sized mixing bowl, add the dairy-free yogurt. If you want to add sweetness, drizzle in honey or maple syrup at this stage and mix well until it’s smooth and fully combined.
- Coat the Fruit: Take each piece of freeze-dried fruit and dip it into the yogurt mixture, verifying it is completely coated. You can use a fork or your fingers for this step. Be sure to shake off any excess yogurt before placing it on the baking sheet.
- Arrange on a Baking Sheet: Line a baking sheet with parchment paper. As you coat each piece of fruit, place it carefully on the baking sheet in a single layer. Confirm they are not touching to avoid clumping together.
- Add Sprinkles (Optional): If you would like some added flair, give your yogurt-covered fruit a sprinkle of colorful sprinkles before the yogurt sets. This step adds a festive touch that’s perfect for Halloween.
- Freeze to Set: Once all the fruit pieces are coated and arranged on the baking sheet, place the sheet in the freezer. Allow the yogurt to set by freezing for at least 1 to 2 hours.
- Serve or Store: After the yogurt has fully set, remove the fruit from the freezer. You can serve them immediately as a crunchy and revitalizing snack or transfer them to an airtight container for later enjoyment. If stored in the freezer, they will last for up to a month.
Enjoy this delightful Yogurt-Covered Freeze-Dried Fruit as a fun, festive, and healthy Halloween treat!
Veggie Skeletons
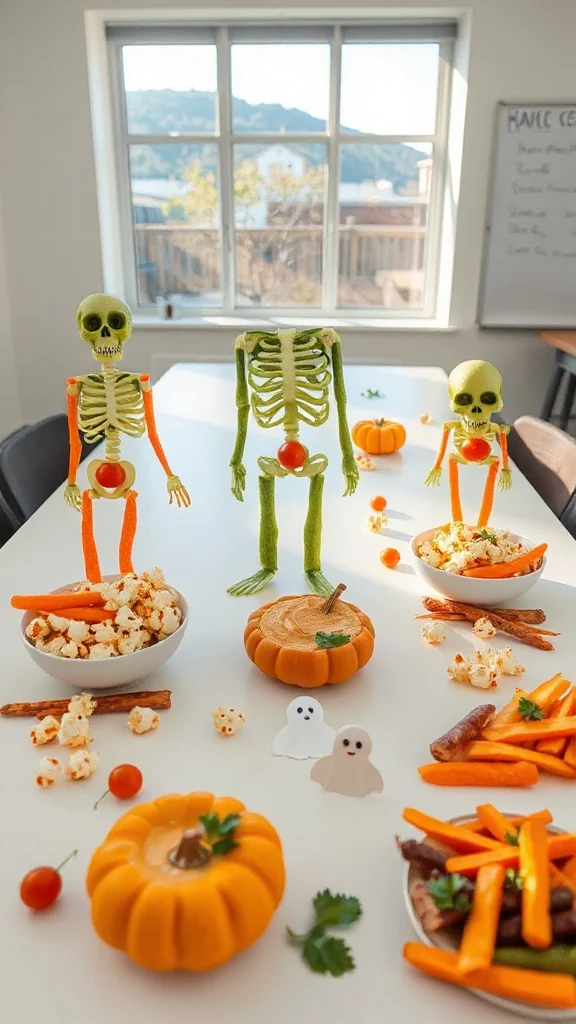
Veggie Skeletons are a fun and creative way to get kids excited about eating their vegetables during Halloween. This spooky snack not only looks adorable but is also a healthy addition to any Halloween party platter. By arranging a variety of colorful veggies into the shape of a skeleton, it encourages children to munch on fresh produce while keeping allergens to a minimum.
| Ingredients | Quantity |
|---|---|
| Celery sticks | 2-3 sticks |
| Carrot sticks | 2-3 large carrots |
| Cherry tomatoes | 1 cup |
| Cucumber | 1 medium |
| Bell pepper (any color) | 1 large |
| Broccoli florets | 1 cup |
| Hummus or ranch dressing | 1 cup (for dipping) |
Instructions:
- Prepare the Vegetables: Start by washing all the vegetables thoroughly. Peel the carrots and cut them into sticks. Slice the cucumber and bell pepper into thin strips. Set these aside on a clean cutting board.
- Create the Skull: For the skeleton’s skull, use a large cherry tomato. This will serve as the head of your Veggie Skeleton. If you’d like, you can cut out small features such as eyes (using sliced olives or small pieces of cucumber) and a mouth (using a toothpick) to add character.
- Construct the Spine: Take the celery sticks and cut them into lengths of about 3-4 inches. These will form the skeleton’s spine. Arrange them vertically on your serving plate, placing the cherry tomato at the top as the head.
- Add Ribs: For the ribcage, take carrot sticks and lay them horizontally across the celery spine. Arrange them in a way that resembles ribs, leaving some space in between for a more skeleton-like appearance.
- Form the Arms and Legs: Use bell pepper strips to create the arms and legs. For the arms, place two strips on either side of the celery spine for the shoulders and elbows. For the legs, you can use longer strips of carrot or additional celery sticks, positioning them at the bottom of the spine to resemble legs.
- Add Hands and Feet: For the fingers, you may cut smaller pieces from the bell pepper or carrot sticks and place them at the ends of the arm and leg segments to represent hands and feet.
- Incorporate Broccoli: Use a few broccoli florets to create a fun design element at the base of the Veggie Skeleton or around the plate for added color and decoration.
- Serve with Dipping Sauce: Finally, serve your Veggie Skeleton alongside a bowl of hummus or ranch dressing for dipping. This adds a delicious flavor to the crunchy veggies and makes them even more appealing.
Enjoy this creative and healthful Veggie Skeleton as a delightful Halloween snack that everyone will love!
Popcorn Monster Mix
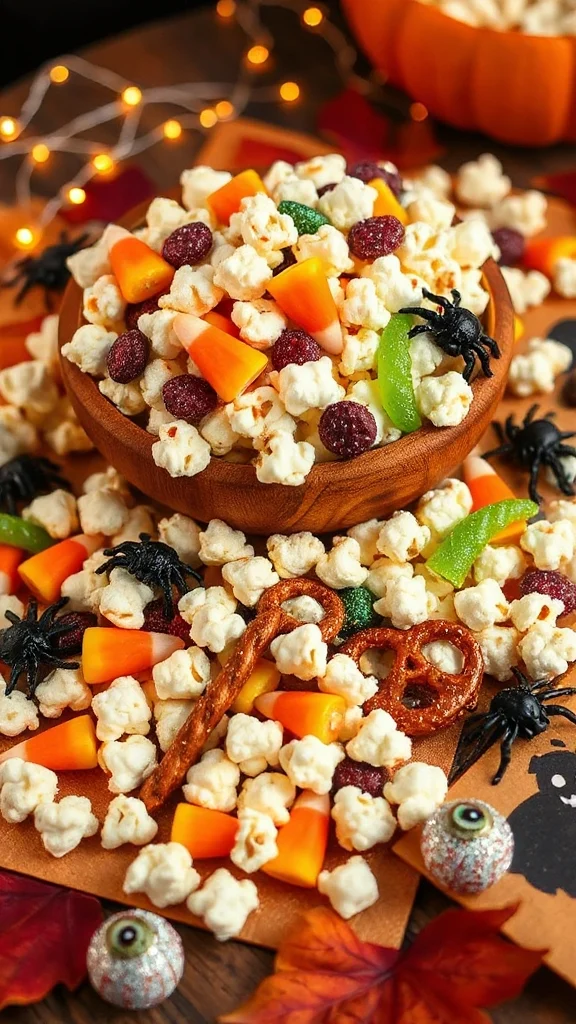
Popcorn Monster Mix is a spooky and delightful snack that combines the crunchiness of popcorn with fun add-ins, making it perfect for Halloween festivities. This mix can be easily customized to suit dietary preferences while keeping common allergens to a minimum, making it a crowd-pleaser for both kids and adults alike. With its colorful presentation and tasty flavors, it’s sure to be a hit at any Halloween gathering.
| Ingredients | Quantity |
|---|---|
| Popcorn (popped) | 8 cups |
| Dark chocolate chips | 1 cup |
| Pretzel sticks | 1 cup |
| Mini marshmallows | 1 cup |
| Candy corn | 1 cup |
| Sunflower seeds | ½ cup |
| Edible candy eyeballs | ½ cup |
| Optional sea salt | To taste |
Instructions:
- Pop the Popcorn: Start by making 8 cups of popcorn using your preferred method, whether it’s the microwave, stovetop, or air popper. Once popped, place the popcorn in a large mixing bowl, ensuring there are no un-popped kernels left behind.
- Melt the Chocolate: In a microwave-safe bowl, add the dark chocolate chips. Melt the chocolate in the microwave in 20-30 second intervals, stirring between each interval until smooth and completely melted. Be careful not to overheat it.
- Combine Popcorn and Chocolate: Drizzle the melted chocolate over the popped popcorn evenly. Use a spatula or wooden spoon to gently fold the popcorn until it is well-coated with chocolate.
- Add Mix-Ins: Once the popcorn is chocolate-coated, add the pretzel sticks, mini marshmallows, candy corn, sunflower seeds, and edible candy eyeballs into the bowl. Stir gently to combine all the ingredients, ensuring an even distribution.
- Season to Taste: If you desire a slightly salty contrast to the sweetness, sprinkle in some sea salt. Stir again to incorporate the seasoning.
- Cool and Set: Spread the popcorn mixture onto a large baking sheet lined with parchment paper. Allow it to cool for about 10-15 minutes, so the chocolate can set and bind the ingredients together.
- Serve: Once cooled, break up any clusters and transfer the Popcorn Monster Mix to a serving bowl or festive treat bags for easy snacking. Enjoy your spooky creation at Halloween parties or as a fun family treat!
Halloween Trail Mix
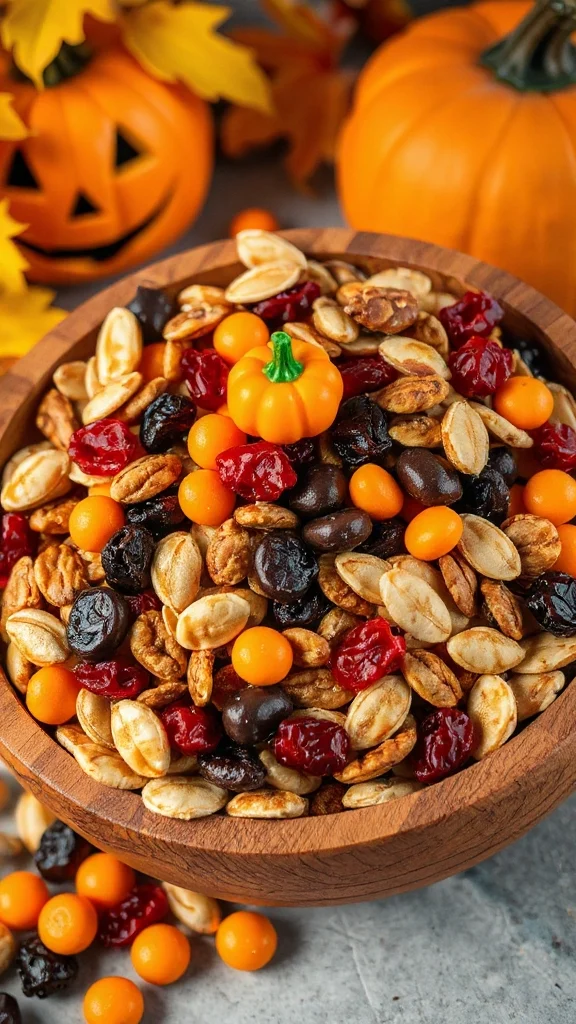
Halloween Trail Mix is a fun and festive snack that’s perfect for Halloween celebrations. This mix combines a variety of crunchy, sweet, and savory ingredients, making it a delicious and nutritious option for both kids and adults. It’s easy to prepare and can be customized based on personal preferences, while keeping common allergens to a minimum. Just toss together these spooky ingredients for a treat that will keep everyone munching throughout the festivities!
| Ingredients | Quantity |
|---|---|
| Almonds (slivered or whole) | 1 cup |
| Pumpkin seeds (pepitas) | 1 cup |
| Dried cranberries | 1 cup |
| Mini chocolate chips | ½ cup |
| Pretzel pieces | 1 cup |
| Freeze-dried strawberries | 1 cup |
| Candy corn (optional) | ½ cup |
Instructions:
- Prepare Your Ingredients: Begin by gathering all the ingredients. Measure out each item and set them aside in separate bowls for easy mixing.
- Mix the Nuts and Seeds: In a large mixing bowl, combine the slivered almonds and pumpkin seeds. Stir them together to guarantee they are evenly distributed.
- Add the Fruits: Next, add the dried cranberries and freeze-dried strawberries to the bowl with the nuts and seeds. Stir the mixture gently to incorporate the fruits.
- Incorporate the Chocolate and Pretzels: Add the mini chocolate chips and pretzel pieces to the bowl. These will add a nice sweetness and crunch to your trail mix. Stir carefully to avoid breaking the pretzels while confirming even distribution.
- Season with Candy Corn (optional): If you’d like a touch of Halloween sweetness, sprinkle in the candy corn and gently mix it into the trail mix. Feel free to adjust the quantity based on your preference.
- Serve or Store: Your Halloween Trail Mix is now ready to be served! You can enjoy it immediately or package it into fun treat bags or jars to give away as party favors. If you’re preparing it in advance, store it in an airtight container to keep it fresh.
- Enjoy: Share it at your Halloween party, as a snack for trick-or-treaters, or savor it while watching your favorite spooky movie!
This Halloween Trail Mix is not only easy to make but also delightful, offering a blend of flavors and textures that will surely be a hit at your festivities!
Chocolate-Dipped Pretzel Broomsticks
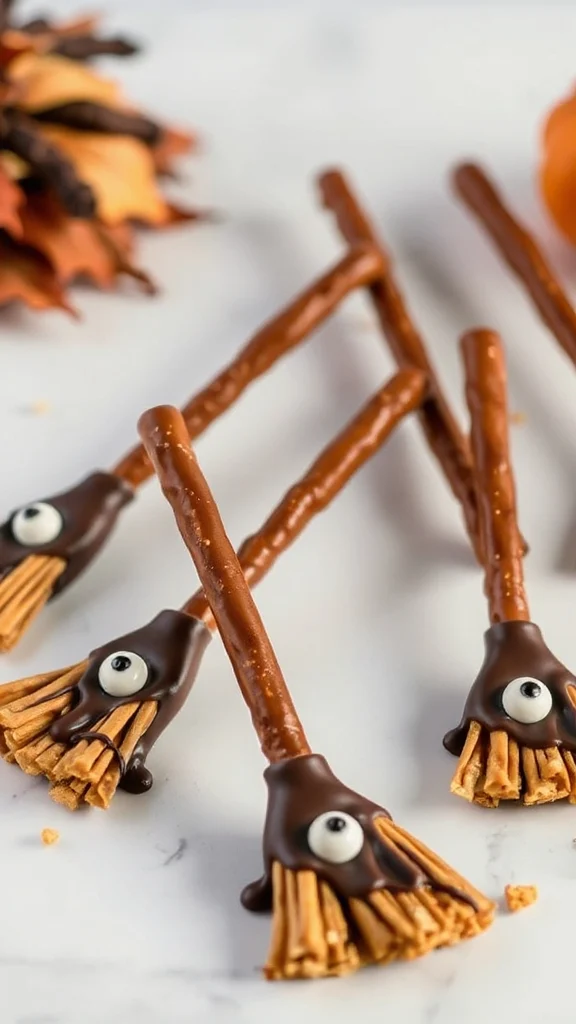
Chocolate-Dipped Pretzel Broomsticks are a whimsical Halloween treat that combines the salty crunch of pretzels with sweet, creamy chocolate. These festive snacks resemble broomsticks, making them a fun and easy craft to enjoy with family and friends during Halloween. They are not only delicious but also exciting to create!
| Ingredients | Quantity |
|---|---|
| Pretzel rods | 1 bag (10-12 rods) |
| Dark chocolate chips | 1 cup |
| White chocolate chips | ½ cup |
| Mini candy corn (optional) | ½ cup |
| Sprinkles (optional) | For decoration |
Instructions:
- Melt the Chocolate: Begin by melting the dark chocolate chips. You can do this either in a microwave-safe bowl or using a double boiler. If using the microwave, heat the chocolate in 30-second intervals, stirring after each interval until smooth. If using a double boiler, heat water in the bottom pot, place the chocolate chips in the top pot, and stir until melted.
- Dip the Pretzel Rods: Once the chocolate is melted, hold a pretzel rod by one end and dip it into the melted chocolate, ensuring to cover about two-thirds of the pretzel. Allow any excess chocolate to drip off before placing it on a parchment-lined baking sheet.
- Add Decorations: Before the chocolate sets, you can add mini candy corn or sprinkles for extra flair. Simply sprinkle them over the chocolate-coated portion of the pretzel while the chocolate is still wet.
- Melt the White Chocolate (Optional): If you want to create a broomstick effect, melt the white chocolate chips in a similar manner as the dark chocolate. Once melted, use a fork to drizzle the white chocolate over the dipped pretzels to create “broom bristles.” Let the excess chocolate drip off.
- Let Them Set: Allow the chocolate-dipped pretzel broomsticks to sit at room temperature or in the refrigerator for about 30 minutes until the chocolate is fully hardened.
- Serve: Once the chocolate has set, your Chocolate-Dipped Pretzel Broomsticks are ready to be enjoyed! Serve them on a platter at your Halloween party, or package them individually for trick-or-treaters or as fun party favors.
These Chocolate-Dipped Pretzel Broomsticks are not only visually delightful but also satisfyingly tasty, combining the perfect balance of sweet and salty that the whole family will love!