As an Amazon Associate I earn from qualifying purchases.
Editorial Policy | Disclosure Policy
Pumpkin Spice Swirl Cheesecake
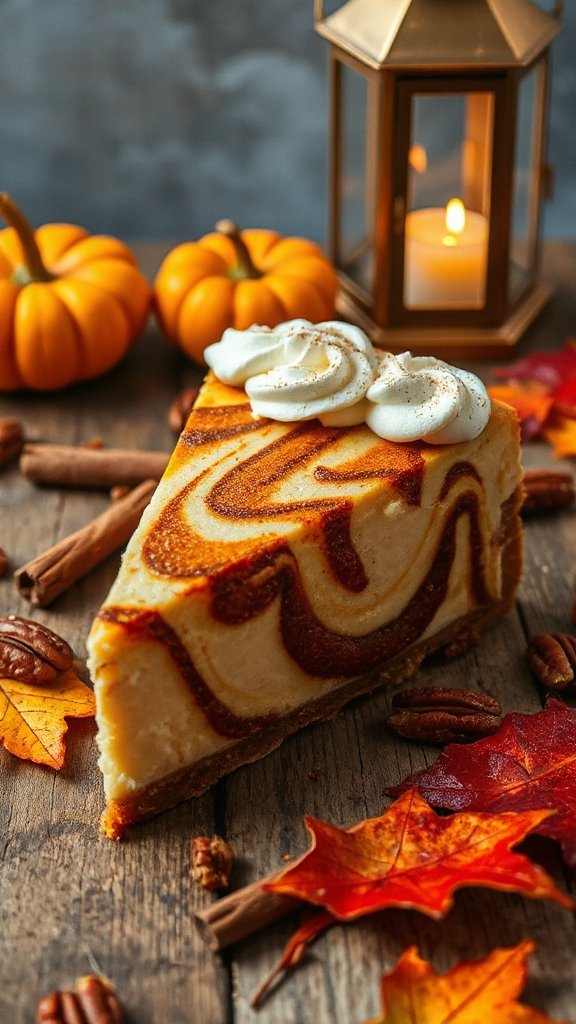
Pumpkin Spice Swirl Cheesecake is a delightful twist on the classic cheesecake, perfectly suited for the Halloween season. This creamy dessert features a rich pumpkin spice flavor that pairs beautifully with a buttery graham cracker crust, making it a festive and comforting treat for any autumn gathering.
| Ingredients | Quantity |
|---|---|
| Cream cheese | 24 ounces |
| Granulated sugar | 1 cup |
| Sour cream | 1 cup |
| Pumpkin puree | 1 cup |
| Eggs | 3 large |
| Vanilla extract | 1 teaspoon |
| Ground cinnamon | 1 teaspoon |
| Ground nutmeg | ½ teaspoon |
| Ground ginger | ½ teaspoon |
| Ground cloves | ¼ teaspoon |
| Graham cracker crumbs | 1 ½ cups |
| Unsalted butter | ½ cup (melted) |
| Brown sugar | ¼ cup |
| Salt | ¼ teaspoon |
Cooking Steps:
- Preheat the Oven: Begin by preheating your oven to 325°F (160°C).
- Prepare the Crust: In a mixing bowl, combine the graham cracker crumbs, melted butter, brown sugar, and salt. Mix until the crumbs are well-coated. Press the mixture firmly into the bottom of a 9-inch springform pan to form an even crust.
- Bake the Crust: Place the crust in the preheated oven and bake for about 8-10 minutes until it is lightly golden. Once baked, remove it from the oven and allow it to cool while you prepare the filling.
- Mix the Filling: In a large bowl, beat the cream cheese using an electric mixer on medium speed until smooth and creamy. Gradually add the granulated sugar and mix until well combined and fluffy.
- Add Sour Cream and Eggs: Blend in the sour cream until fully incorporated. Next, add the eggs one at a time, mixing on low speed just until integrated after each addition. Make sure not to overmix.
- Incorporate Pumpkin and Spices: Add the pumpkin puree, vanilla extract, ground cinnamon, nutmeg, ginger, and cloves. Mix until the mixture is smooth and creamy, ensuring all ingredients are well combined.
- Create the Swirl: Transfer about 1 cup of the cheesecake filling to a separate bowl. In this bowl, add an additional 2 tablespoons of pumpkin puree and a pinch of cinnamon. Mix until combined. This will be your pumpkin spice swirl for the top of the cheesecake.
- Assemble the Cheesecake: Pour the remaining cheesecake filling over the cooled crust in the springform pan. Then, dollop spoonfuls of the pumpkin spice mixture on top of the cheesecake filling. Use a knife or a fork to gently swirl the pumpkin mixture into the cheesecake.
- Bake the Cheesecake: Place the cheesecake in the oven and bake for about 50-60 minutes, or until the edges are set but the center is slightly jiggly. Turn the oven off and crack the door open, allowing the cheesecake to cool in the oven for about an hour. This helps prevent cracking.
- Cool and Chill: After cooling in the oven, remove the cheesecake and let it cool completely at room temperature. Once cooled, cover the cheesecake and refrigerate for at least 4 hours or overnight.
- Serve: When ready to serve, carefully remove the sides of the springform pan. Slice the cheesecake and enjoy your Pumpkin Spice Swirl Cheesecake as a perfect Halloween treat!
Ghostly Meringue Cheesecake
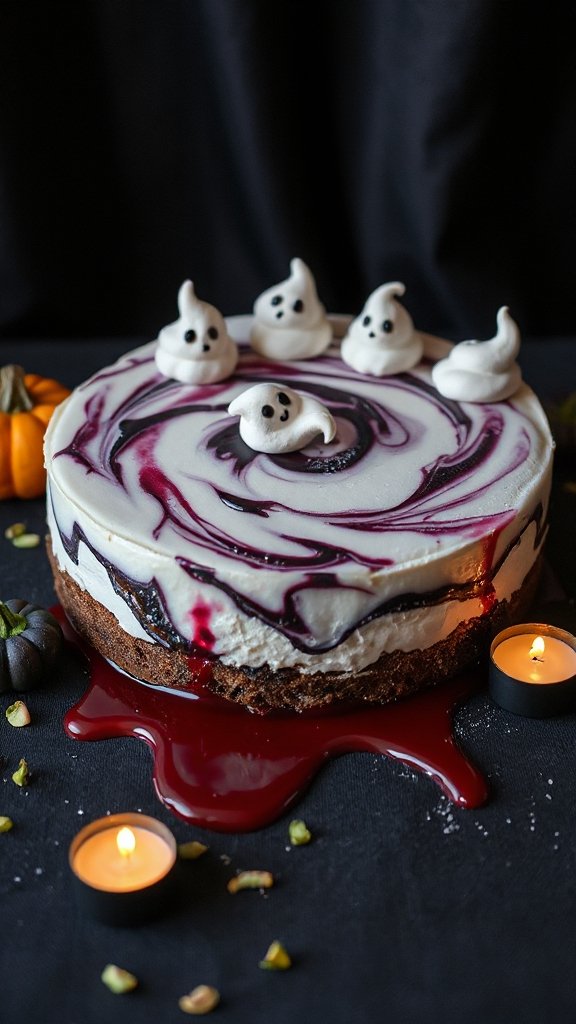
Ghostly Meringue Cheesecake is a whimsical take on the classic cheesecake, perfect for Halloween celebrations. This dessert combines a smooth and creamy vanilla cheesecake base with fluffy meringue ghosts on top, creating an enchanting treat that is sure to delight both kids and adults alike. The light, airy meringue adds a fun and spooky touch, while the cheesecake provides a rich and satisfying flavor.
| Ingredients | Quantity |
|---|---|
| Cream cheese | 24 ounces |
| Granulated sugar | 1 cup |
| Sour cream | 1 cup |
| Eggs | 3 large |
| Vanilla extract | 1 teaspoon |
| Cornstarch | 2 tablespoons |
| Heavy cream | 1 cup |
| Powdered sugar | 1 cup |
| Egg whites | 3 large |
| Cream of tartar | ¼ teaspoon |
| Chocolate chips (for eyes) | ¼ cup (optional) |
Cooking Steps:
- Preheat the Oven: Start by preheating your oven to 325°F (160°C).
- Prepare the Crust: In a mixing bowl, combine the graham cracker crumbs, melted unsalted butter, and 2 tablespoons of granulated sugar. Mix until the mixture is well-combined and crumbly. Press this mixture firmly into the bottom of a 9-inch springform pan to form an even crust.
- Bake the Crust: Place the crust in the preheated oven and bake for about 8-10 minutes until it is lightly golden and set. Once baked, remove it from the oven and let it cool while preparing the filling.
- Mix the Filling: In a large bowl, use an electric mixer to beat the cream cheese until it’s smooth and creamy. Gradually add the remaining granulated sugar and continue mixing until fluffy. Add the sour cream and blend until combined.
- Add Eggs and Vanilla: Beat in the eggs one at a time, mixing on low speed after each addition just until incorporated. Add the vanilla extract and cornstarch, mixing until everything is smooth and well-integrated.
- Pour the Filling: Pour the cheesecake filling into the cooled crust, smoothing out the top with a spatula.
- Bake the Cheesecake: Bake the cheesecake in the oven for about 55-60 minutes, or until the edges are set and the center is slightly jiggly. Once done, turn off the oven, crack the door open, and let the cheesecake cool in the oven for an hour to prevent cracking.
- Cool and Chill: Remove the cheesecake from the oven and let it cool to room temperature. Then refrigerate it for at least 4 hours, or overnight, to fully set.
- Prepare the Meringue: In a large, clean mixing bowl, whisk the egg whites and cream of tartar until soft peaks form. Gradually add the powdered sugar while continuing to whisk until firm peaks form.
- Pipe the Ghosts: Transfer the meringue to a piping bag fitted with a star tip. Pipe dollops of meringue onto a baking sheet lined with parchment paper, creating ghost shapes. Optionally, use chocolate chips to create eyes.
- Bake the Meringue: Preheat the oven again to 200°F (90°C) and bake the meringues for about 1 hour, then turn off the oven and leave the meringues inside until they are completely cool and dried out.
- Assemble the Cheesecake: Once the cheesecake is set and the meringues are cooled, top the cheesecake with the meringue ghosts. Arrange them decoratively on top.
- Serve: Slice the cheesecake and serve chilled, delighting your guests with this spooky and delicious dessert! Enjoy your Ghostly Meringue Cheesecake!
Spider Web Chocolate Cheesecake
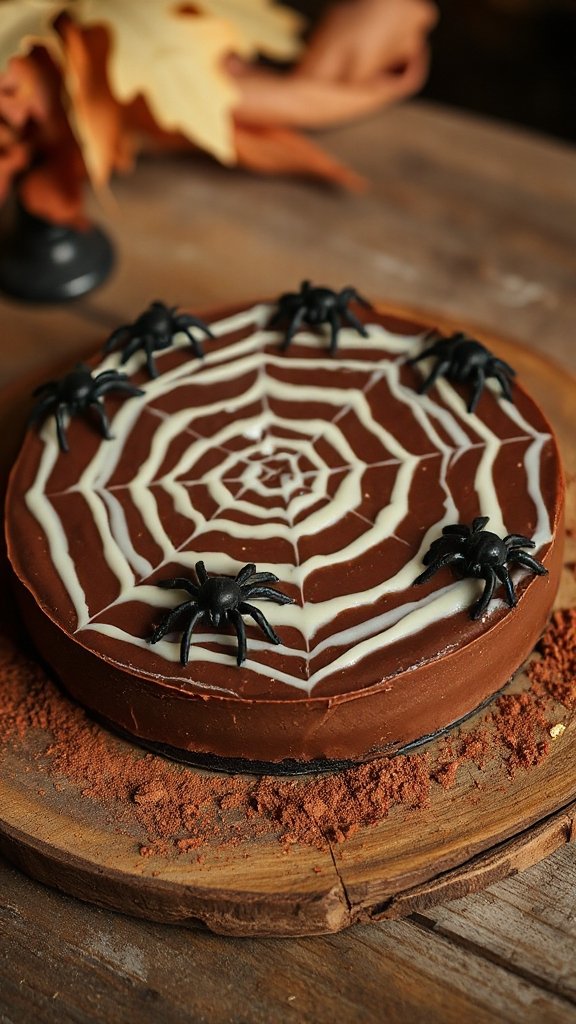
Spider Web Chocolate Cheesecake is a decadent dessert that combines the richness of chocolate with the creamy texture of cheesecake, all while being playfully decorated to resemble a spooky spider web—perfect for Halloween festivities. This treat not only satisfies your sweet tooth but also adds a festive touch to your celebration with its fun and eye-catching design.
| Ingredients | Quantity |
|---|---|
| Cream cheese | 24 ounces |
| Granulated sugar | 1 cup |
| Sour cream | 1 cup |
| Eggs | 3 large |
| Vanilla extract | 1 teaspoon |
| Cornstarch | 2 tablespoons |
| Heavy cream | 1 cup |
| Powdered sugar | 1 cup |
| Egg whites | 3 large |
| Cream of tartar | ¼ teaspoon |
| Semi-sweet chocolate chips | 8 ounces |
| White chocolate (for web) | 4 ounces |
| Black food coloring (optional) | As needed |
Cooking Steps:
- Preheat the Oven: Start by preheating your oven to 325°F (160°C).
- Prepare the Crust: In a mixing bowl, combine crushed chocolate graham crackers, melted unsalted butter, and granulated sugar (2 tablespoons). Mix until the mixture is well-combined and crumbly. Press this mixture firmly into the bottom of a 9-inch springform pan to form an even crust.
- Bake the Crust: Place the crust in the preheated oven and bake for about 8-10 minutes until it is slightly firm. Once baked, remove it from the oven and let it cool.
- Melt the Chocolate: In a microwave-safe bowl, combine the semi-sweet chocolate chips. Microwave in 30-second intervals, stirring in between, until the chocolate is fully melted and smooth. Allow to cool slightly.
- Mix the Filling: In a large bowl, use an electric mixer to beat the cream cheese until smooth. Gradually add the granulated sugar (remaining quantity) and mix until fluffy. Add the sour cream and blend until combined.
- Add Eggs and Vanilla: Beat in the eggs one at a time, mixing on low speed after each addition just until incorporated. Add the vanilla extract, cornstarch, and the melted chocolate, mixing until everything is smooth and well-integrated.
- Pour the Filling: Pour the chocolate cheesecake filling into the cooled crust, smoothing out the top with a spatula.
- Bake the Cheesecake: Bake the cheesecake in the oven for about 55-60 minutes, or until the edges are set and the center is slightly jiggly. To prevent cracking, turn off the oven, crack the door open, and let the cheesecake cool in the oven for 1 hour.
- Cool and Chill: Remove the cheesecake from the oven and let it cool to room temperature. Refrigerate for at least 4 hours or overnight.
- Create the Spider Web: Melt the white chocolate in a microwave-safe bowl. If you want to add a spooky touch, mix in a few drops of black food coloring. Using a piping bag or a small zip-top bag with a corner snipped off, drizzle the white chocolate in a spiral shape over the chilled cheesecake. Use a toothpick to drag lines from the center to the outer edge of the cheesecake, creating spider web shapes.
- Garnish: Top with chocolate spiders or any Halloween-themed decorations for an added spooky effect. Serve and enjoy your delicious Spider Web Chocolate Cheesecake!
Black Cat Cookies and Cream Cheesecake
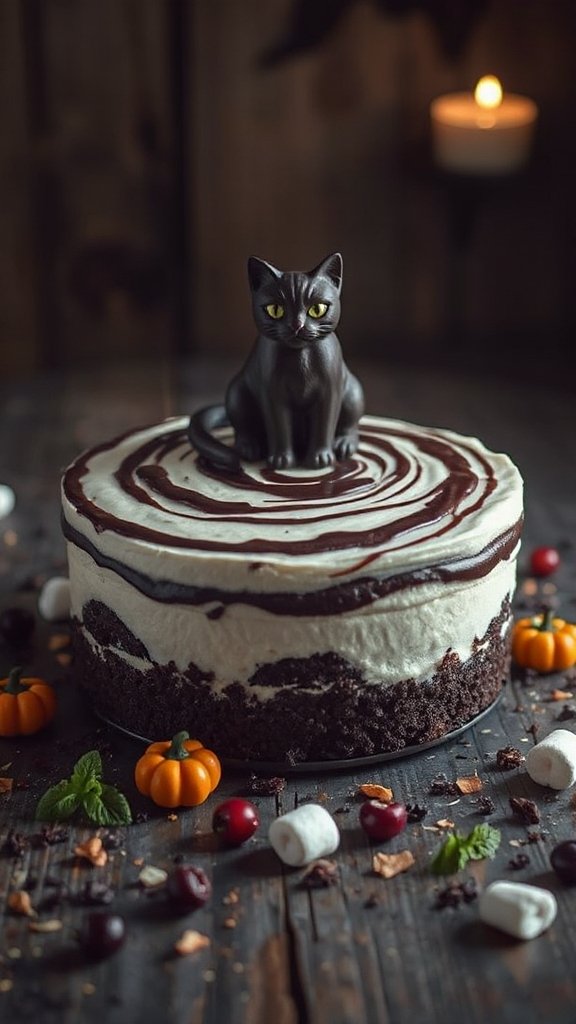
Black Cat Cookies and Cream Cheesecake is a whimsical and delicious dessert that perfectly captures the spirit of Halloween. This cheesecake features a rich and creamy filling blended with crushed cookies, all topped with a fun black cat decoration that is sure to delight both kids and adults at any Halloween gathering. With its indulgent flavor and playful presentation, this cheesecake will be a standout addition to your spooky festivities.
| Ingredients | Quantity |
|---|---|
| Cream cheese | 24 ounces |
| Granulated sugar | 1 cup |
| Sour cream | 1 cup |
| Eggs | 3 large |
| Vanilla extract | 1 teaspoon |
| Cornstarch | 2 tablespoons |
| Heavy cream | 1 cup |
| Powdered sugar | 1 cup |
| Cookies and cream cookies | 16 ounces (crushed) |
| Black food coloring (optional) | As needed |
| Chocolate curls (for decoration) | As needed |
| Edible eyes (for decoration) | As needed |
Cooking Steps:
- Preheat the Oven: Preheat your oven to 325°F (160°C).
- Prepare the Crust: In a mixing bowl, combine the crushed cookies and melted butter. Mix until the mixture is well-combined. Press this mixture firmly into the bottom of a 9-inch springform pan to form an even crust.
- Bake the Crust: Place the crust in the preheated oven and bake for about 8-10 minutes until slightly firm. Remove from the oven and allow it to cool completely.
- Mix the Filling: In a large bowl, use an electric mixer to beat the cream cheese until smooth. Gradually add the granulated sugar and mix until fluffy. Incorporate the sour cream, mixing until fully blended.
- Add Eggs and Vanilla: Beat in the eggs one at a time, mixing on low speed after each addition just until incorporated. Add the vanilla extract and cornstarch, then mix until smooth.
- Incorporate Cookies: Gently fold the crushed cookies into the cheesecake mixture until evenly distributed.
- Pour the Filling: Pour the cookies and cream filling into the cooled crust, smoothing out the top with a spatula.
- Bake the Cheesecake: Bake the cheesecake in the preheated oven for about 45-50 minutes, or until the center is set but slightly jiggly. Turn off the oven and crack the oven door, allowing the cheesecake to cool in the oven for about an hour to prevent cracks.
- Chill: Once cooled, remove the cheesecake from the oven and refrigerate for at least 4 hours, preferably overnight, until fully set.
- Decorate: Before serving, remove the cheesecake from the springform pan. Use black food coloring to tint the heavy cream and pipe out shapes to create a black cat on top. Add chocolate curls for the ears and edible eyes for decoration.
- Serve: Slice the cheesecake and serve chilled for a delightful Halloween treat that everyone will love!
Blood Orange and Vanilla Cheesecake
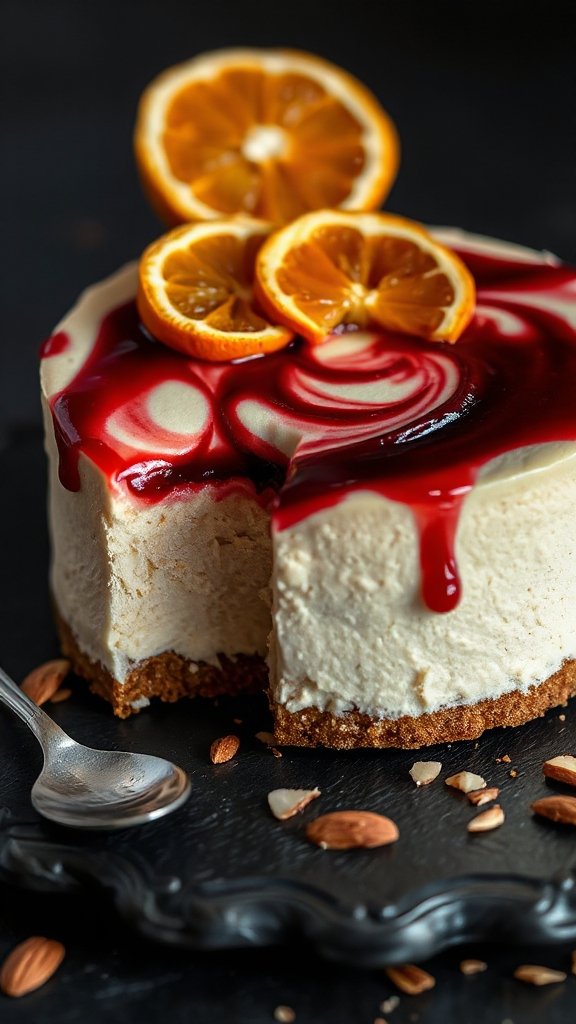
Blood Orange and Vanilla Cheesecake is a stunning and zesty dessert that brings a splash of vibrant color and unique flavor to your Halloween celebration. The creamy cheesecake base is enriched with blood orange juice and zest, making it a invigorating contrast to the sweetness. Topped with a glossy blood orange glaze and hints of vanilla, this cheesecake is not only a feast for the taste buds but also a visually striking centerpiece that captures the essence of Halloween.
| Ingredients | Quantity |
|---|---|
| Cream cheese | 24 ounces |
| Granulated sugar | 1 cup |
| Sour cream | 1 cup |
| Eggs | 3 large |
| Vanilla extract | 1 teaspoon |
| Blood orange juice | 1/2 cup |
| Blood orange zest | 2 tablespoons |
| Cornstarch | 2 tablespoons |
| Heavy cream | 1 cup |
| Powdered sugar | 1 cup |
| Additional blood orange juice (for glaze) | 1/4 cup |
| Gelatin (optional, for glaze) | 1 teaspoon |
| Blood orange segments (for decoration) | As needed |
Cooking Steps:
- Preheat the Oven: Start by preheating your oven to 325°F (160°C).
- Prepare the Crust: If you prefer a crust, you may use crushed graham crackers or cookies mixed with melted butter. Press this mixture into the bottom of a 9-inch springform pan to form an even layer.
- Bake the Crust (Optional): If using a crust, place it in the preheated oven and bake for 8-10 minutes until set. Remove from oven and allow it to cool completely.
- Mix the Cheesecake Filling: In a large mixing bowl, use an electric mixer to beat the cream cheese until smooth and creamy. Gradually add the granulated sugar, mixing until the mixture is fluffy.
- Add Sour Cream and Vanilla: Incorporate the sour cream and vanilla extract, mixing well until fully combined.
- Add Eggs, Juice, and Zest: Add the eggs one at a time, mixing on low speed after each addition until incorporated. Gently mix in the blood orange juice and zest until well blended.
- Incorporate Cornstarch: Fold the cornstarch into the mixture to fulfill a smooth texture.
- Pour the Filling: If you made a crust, pour the cheesecake filling into the cooled crust, smoothing out the top with a spatula. If not, pour directly into a greased springform pan.
- Bake the Cheesecake: Carefully place the cheesecake in the oven and bake for 45-50 minutes, or until the center is set but slightly jiggly. Turn off the oven and crack the oven door, allowing the cheesecake to cool in the residual heat for about an hour.
- Chill the Cheesecake: Once cooled, refrigerate the cheesecake for at least 4 hours, preferably overnight, to firm up completely.
- Prepare the Glaze: In a small saucepan over low heat, combine additional blood orange juice and powdered sugar until dissolved. If using gelatin, bloom it in cold water first, then stir it into the juice mixture until fully combined. Allow the glaze to cool slightly.
- Glaze the Cheesecake: Once the cheesecake has chilled, pour the blood orange glaze over the top, smoothing it out with a spatula for an even layer. Top with blood orange segments for decoration.
- Serve: Slice the Blood Orange and Vanilla Cheesecake into wedges and serve chilled. Enjoy the burst of flavors that will add a spooky delight to your Halloween festivities!
Witch’s Brew Matcha Cheesecake
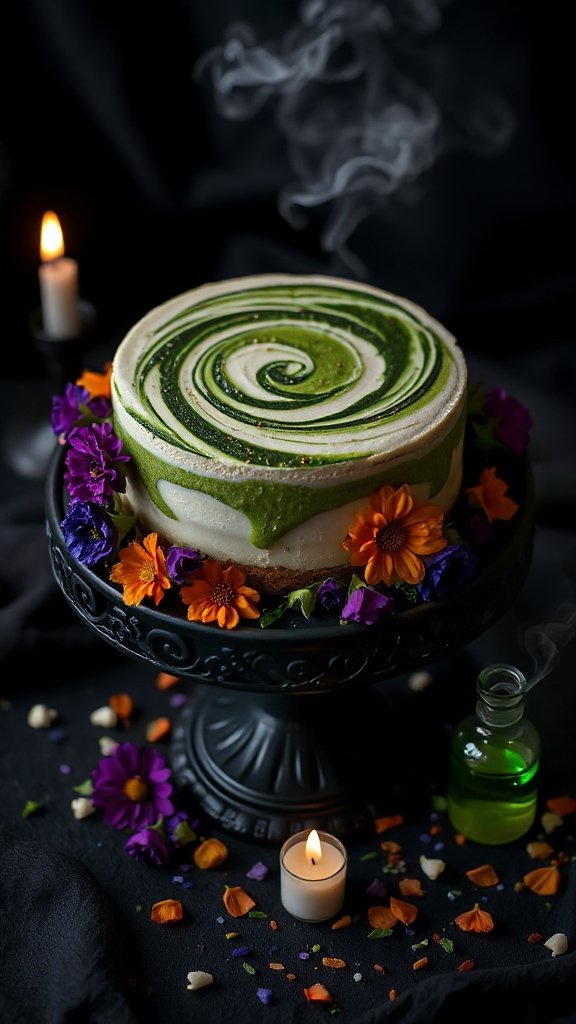
Witch’s Brew Matcha Cheesecake is a spooky yet elegant dessert that combines the earthy flavors of matcha green tea with a creamy cheesecake base. This vibrant green treat not only tantalizes the taste buds but also adds a bewitching touch to your Halloween festivities. Finished with a drizzle of chocolate or a sprinkle of edible glitter, this cheesecake will enchant your guests and elevate your Halloween dessert table.
| Ingredients | Quantity |
|---|---|
| Cream cheese | 24 ounces |
| Granulated sugar | 1 cup |
| Eggs | 3 large |
| Heavy cream | 1 cup |
| Matcha green tea powder | 2 tablespoons |
| Vanilla extract | 1 teaspoon |
| Sour cream | 1 cup |
| Cornstarch | 2 tablespoons |
| Graham cracker crumbs (for crust) | 1.5 cups |
| Unsalted butter (melted, for crust) | 1/2 cup |
| Powdered sugar (for topping, optional) | as needed |
| Chocolate drizzle (optional) | as needed |
Cooking Steps:
- Preheat the Oven: Begin by preheating your oven to 325°F (160°C).
- Prepare the Crust: In a mixing bowl, combine the graham cracker crumbs with melted butter. Stir until well mixed and the crumbs resemble wet sand. Press this mixture firmly into the bottom of a 9-inch springform pan to form an even layer.
- Bake the Crust: Place the prepared crust in the preheated oven and bake for about 8-10 minutes, or until set. Remove from the oven and allow it to cool completely.
- Mix the Cheesecake Filling: In a large mixing bowl, use an electric mixer to beat the cream cheese until smooth and creamy. Gradually add the granulated sugar and continue mixing until slightly fluffy.
- Add Eggs and Matcha: Add the eggs one at a time, mixing on low speed after each addition. Carefully sift the matcha powder into the mixture to avoid lumps, and add the vanilla extract. Mix until fully combined.
- Incorporate Sour Cream and Cornstarch: Add the sour cream and fold in the cornstarch using a spatula. Verify that everything is well blended and the texture is smooth.
- Pour the Filling: Pour the matcha cheesecake filling over the cooled crust in the springform pan. Use a spatula to smooth out the top.
- Bake the Cheesecake: Place the cheesecake in the preheated oven and bake for 50-60 minutes or until the center is slightly set but still jiggles gently when moved.
- Cool and Chill: Once baked, turn off the oven and leave the cheesecake inside for about an hour to cool slowly. This helps prevent cracking. Remove from the oven and let it cool to room temperature before transferring it to the refrigerator. Chill for at least 4 hours, preferably overnight.
- Serve: Once fully chilled, carefully release the cheesecake from the springform pan. Top with powdered sugar or a drizzle of chocolate if desired. Slice and serve to your enthusiastic guests, watching their eyes light up at this enchanting dessert!
Monster Mash Layered Cheesecake
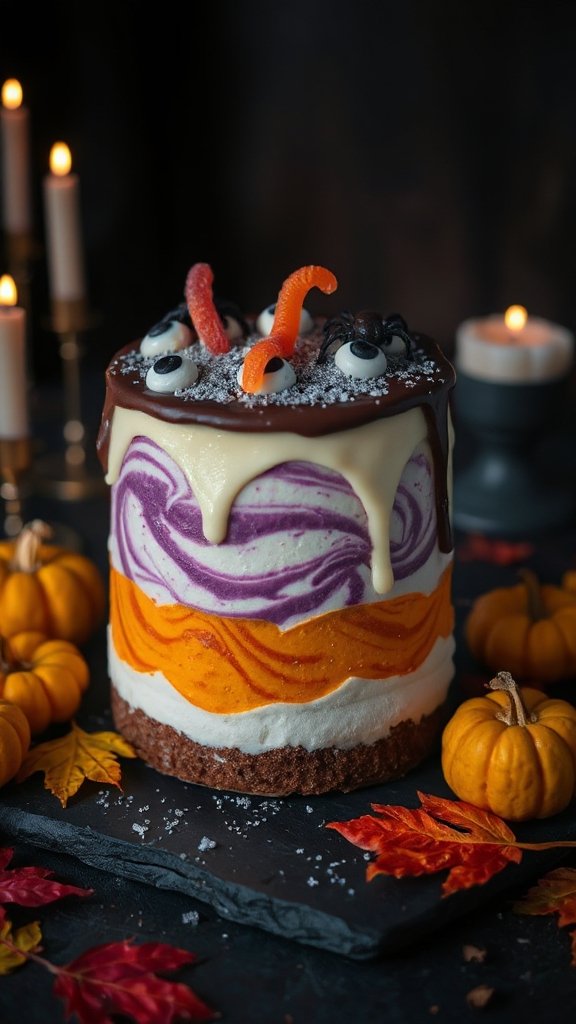
Monster Mash Layered Cheesecake is a playful and vibrant dessert perfect for Halloween celebrations. This cheesecake features layers of different flavors and colors, making it both visually stunning and delicious. Each layer comes together to create a fun mash-up of classic cheesecake flavors with an enchanting monster twist. It’s certain to be a crowd-pleaser at any spooky gathering!
| Ingredients | Quantity |
|---|---|
| Cream cheese | 24 ounces |
| Granulated sugar | 1 cup |
| Eggs | 4 large |
| Heavy cream | 1 cup |
| Vanilla extract | 2 teaspoons |
| Sour cream | 1 cup |
| Cornstarch | 1/4 cup |
| Food coloring (purple, green, orange) | as needed |
| Graham cracker crumbs (for crust) | 1.5 cups |
| Unsalted butter (melted, for crust) | 1/2 cup |
| Monster-themed sprinkles (optional) | as needed |
Cooking Steps:
- Preheat the Oven: Preheat your oven to 325°F (160°C).
- Prepare the Crust: In a mixing bowl, combine graham cracker crumbs with melted butter. Mix well until crumbs are evenly coated and have a wet sand-like texture. Press this mixture into the bottom of a 9-inch springform pan to form a compact and even layer.
- Bake the Crust: Place the crust in the preheated oven and bake for about 8-10 minutes until set. Once baked, remove from the oven and allow it to cool completely.
- Prepare the Cheesecake Batter: In a large mixing bowl, beat the cream cheese until smooth using an electric mixer. Gradually add granulated sugar and mix until fluffy. Add in the sour cream, heavy cream, and vanilla extract, mixing until fully incorporated.
- Incorporate Eggs: Add the eggs one by one, mixing on low speed after each addition. Scrape down the sides of the bowl to ascertain all ingredients are well blended.
- Divide the Batter: Once fully mixed, divide the batter into three separate bowls. Leave one bowl plain, dye one bowl purple, and the other orange using food coloring. Adjust the coloring to your preferred intensity.
- Layer the Cheesecake: Start layering by pouring one color of batter (e.g., orange) into the springform pan, spreading it evenly over the crust. Follow with the purple batter, and then the plain batter, smoothing each layer as you go.
- Bake the Cheesecake: Place the layered cheesecake in the oven and bake for 60-70 minutes, or until the center is slightly set and jiggles gently when moved.
- Cool and Chill: Once baked, remove the cheesecake from the oven and allow it to cool at room temperature for about an hour. Then, cover and refrigerate for at least 4 hours, preferably overnight.
- Decorate: Once chilled, remove the cheesecake from the springform pan. Top with monster-themed sprinkles for an extra festive touch.
- Serve: Slice the cheesecake and serve to your delightfully spooked guests! Enjoy the vibrant layers and the delicious monster mash-up of flavors.
Candy Corn Swirled Cheesecake
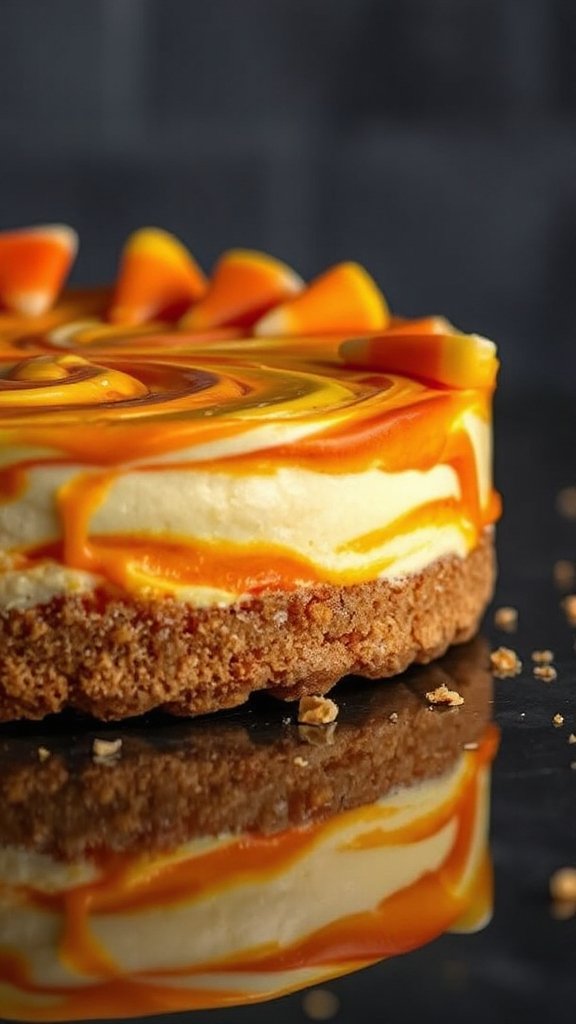
Candy Corn Swirled Cheesecake is a delightful and festive dessert that captures the essence of Halloween with its vibrant colors and flavors. This creamy cheesecake is adorned with whimsical swirls representing classic candy corn colors: yellow, orange, and white. It’s an eye-catching treat that combines the smooth texture of cheesecake with the sweetness reminiscent of everyone’s favorite Halloween candy, making it an ideal centerpiece for your Halloween festivities!
| Ingredients | Quantity |
|---|---|
| Cream cheese | 24 ounces |
| Granulated sugar | 1 cup |
| Eggs | 4 large |
| Heavy cream | 1 cup |
| Vanilla extract | 2 teaspoons |
| Sour cream | 1 cup |
| Cornstarch | 1/4 cup |
| Food coloring (yellow, orange, and white) | as needed |
| Graham cracker crumbs (for crust) | 1.5 cups |
| Unsalted butter (melted, for crust) | 1/2 cup |
| Candy corn (for topping, optional) | as needed |
Cooking Steps:
- Preheat the Oven: Begin by preheating your oven to 325°F (160°C).
- Prepare the Crust: In a mixing bowl, blend the graham cracker crumbs with the melted butter until the mixture resembles wet sand. Press this combined mixture into the base of a 9-inch springform pan to form a firm, even crust.
- Bake the Crust: Place the crust in the preheated oven and bake for about 8-10 minutes or until it is set. Once baked, allow it to cool completely while you prepare the cheesecake batter.
- Make the Cheesecake Batter: In a large mixing bowl, use an electric mixer to beat the cream cheese until it’s smooth. Gradually add the granulated sugar, mixing until light and fluffy. Next, incorporate the sour cream, heavy cream, and vanilla extract until mixed thoroughly.
- Add the Eggs: Add the eggs one at a time, mixing on a low speed to avoid overmixing. Make sure to scrape the sides of the bowl to guarantee all ingredients are fully combined.
- Divide the Batter: After the batter is fully mixed, divide it into three separate bowls. Leave one bowl plain, dye the second bowl yellow, and the final bowl orange using the food coloring. Mix well until the desired color is achieved.
- Create the Swirl: Begin layering the batter into the springform pan by spooning in the yellow batter first to form an even layer. Then, add the orange batter on top in spoonfuls. Finally, top with the plain batter. Use a knife or a skewer to gently swirl the layers together for a marbled effect, being careful not to overmix.
- Bake the Cheesecake: Place the springform pan in the oven and bake for 60-70 minutes, or until the cheesecake is set and slightly jiggly in the center. Turn off the oven and crack the oven door, allowing the cheesecake to cool inside for about 1 hour.
- Chill the Cheesecake: After cooling in the oven, transfer the cheesecake to the refrigerator and chill for at least 4 hours, or overnight for the best results.
- Serve: Once chilled, carefully remove the cheesecake from the springform pan. Optionally top with candy corn for an extra festive touch before slicing and serving. Enjoy your delightful Candy Corn Swirled Cheesecake!
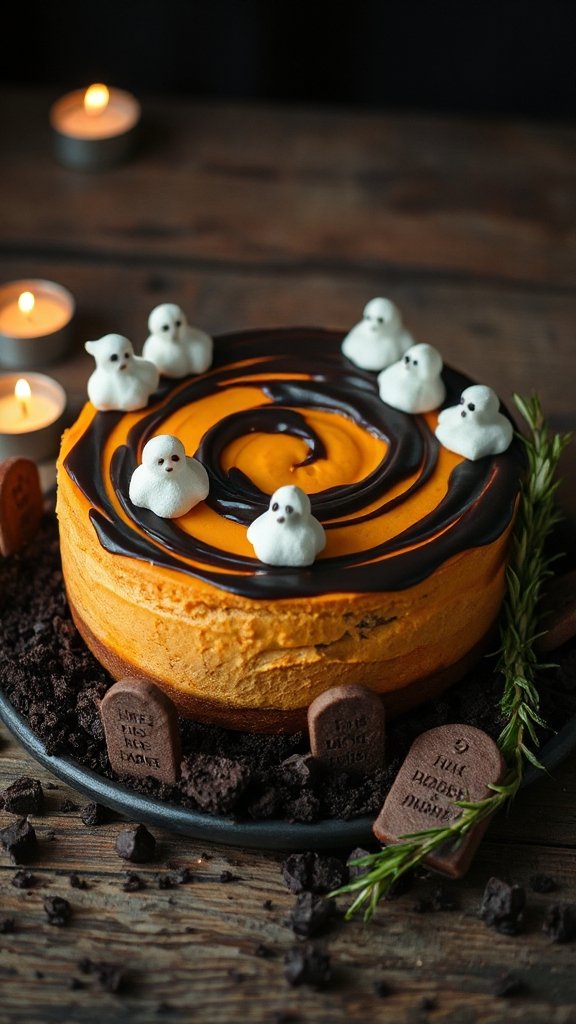
Haunted Graveyard Cheesecake
| Ingredients | Quantity |
|---|---|
| Cream cheese | 24 ounces |
| Granulated sugar | 1 cup |
| Eggs | 4 large |
| Heavy cream | 1 cup |
| Vanilla extract | 2 teaspoons |
| Sour cream | 1 cup |
| Cocoa powder | 1/2 cup |
| Cornstarch | 1/4 cup |
| Chocolate sandwich cookies (for crust) | 1.5 cups |
| Unsalted butter (melted, for crust) | 1/2 cup |
| Dark chocolate (for decoration) | 4 ounces |
| Gummy worms (for decoration, optional) | as needed |
| Edible tombstones (store-bought or homemade) | as needed |
Cooking Steps:
- Preheat the Oven: Start by preheating your oven to 325°F (160°C).
- Prepare the Crust: In a mixing bowl, combine the crushed chocolate sandwich cookies with the melted butter. Mix until the crumbs are fully coated and the mixture resembles wet sand. Press this mixture firmly into the base of a 9-inch springform pan to form an even crust.
- Bake the Crust: Bake the crust in the preheated oven for about 8-10 minutes until it is set. Remove from the oven and let it cool completely while preparing the cheesecake batter.
- Make the Cheesecake Batter: In a large mixing bowl, use an electric mixer to beat the cream cheese until smooth and creamy. Gradually add the granulated sugar and beat until the mixture is light and fluffy. Next, add the sour cream, heavy cream, vanilla extract, and cocoa powder, mixing until fully combined.
- Add the Eggs: Incorporate the eggs one at a time into the cheesecake batter, mixing on low speed after each addition to avoid overmixing. Be sure to scrape down the sides of the bowl to verify all ingredients are evenly blended.
- Pour the Batter: Once the cheesecake batter is smooth, pour it over the cooled crust in the springform pan. Smooth the top with a spatula for an even surface.
- Bake the Cheesecake: Place the cheesecake in the oven and bake for approximately 55-60 minutes, or until the edges are set and the center is slightly jiggly. Once done, turn off the oven and crack the door open, allowing the cheesecake to cool gradually inside for about 1 hour to prevent cracking.
- Cool and Chill: After an hour, remove the cheesecake from the oven and let it cool to room temperature. Once cooled, refrigerate for at least 4 hours or overnight to firm up.
- Decorate the Cheesecake: Melt the dark chocolate and drizzle over the chilled cheesecake. Use crushed cookies to resemble dirt and place edible tombstones throughout. If desired, garnish with gummy worms to create a spooky effect.
- Serve: Slice the Haunted Graveyard Cheesecake into pieces and serve on a spooky platter, delighting your guests with this haunted dessert!
Creepy Crawly Gummy Bear Cheesecake
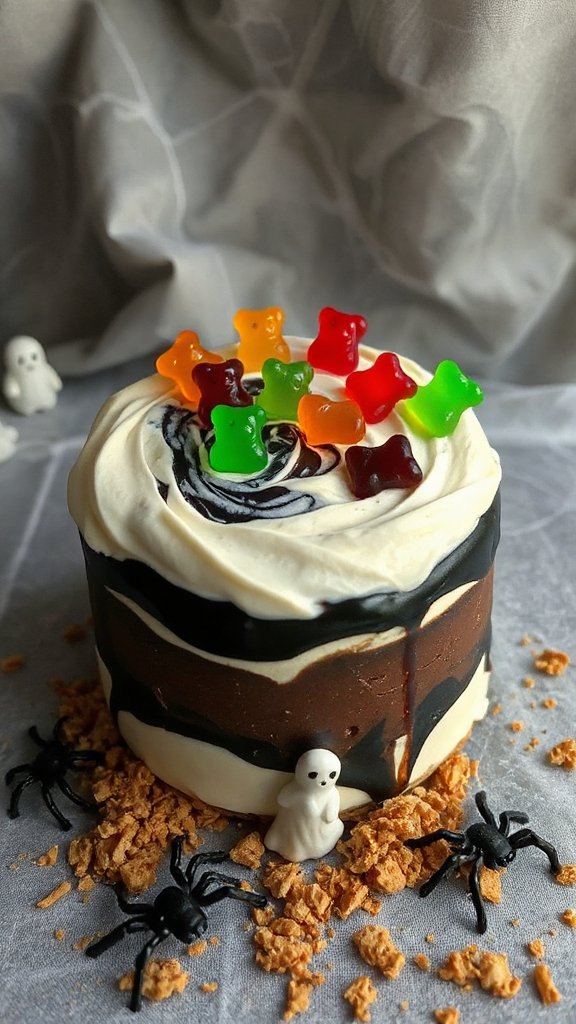
Get ready to spook your guests with this delightful Creepy Crawly Gummy Bear Cheesecake! This whimsical dessert features a creamy cheesecake base adorned with a colorful array of gummy bears, making it a fun and festive treat for any Halloween gathering. With a classic graham cracker crust and a touch of green food coloring for a ghostly hue, this cheesecake is both delicious and delightfully creepy.
| Ingredients | Quantity |
|---|---|
| Cream cheese | 24 ounces |
| Granulated sugar | 1 cup |
| Eggs | 4 large |
| Heavy cream | 1 cup |
| Vanilla extract | 2 teaspoons |
| Sour cream | 1 cup |
| Granulated green food coloring | as needed |
| Graham cracker crumbs | 1.5 cups |
| Unsalted butter (melted for crust) | 1/2 cup |
| Gummy bears (for decoration) | 1-2 cups |
Cooking Steps:
- Preheat the Oven: Begin by preheating your oven to 325°F (160°C).
- Prepare the Crust: In a mixing bowl, combine the graham cracker crumbs with the melted butter. Stir until the crumbs are fully coated and resemble wet sand. Press this mixture firmly into the bottom of a 9-inch springform pan to create an even crust.
- Bake the Crust: Place the crust in the preheated oven and bake for about 8-10 minutes until it is set. Once done, remove it from the oven and allow it to cool completely while you prepare the cheesecake batter.
- Make the Cheesecake Batter: In a large mixing bowl, beat the cream cheese using an electric mixer until smooth. Gradually add the granulated sugar, mixing until light and fluffy. Next, add the sour cream, heavy cream, and vanilla extract. Mix until everything is well combined.
- Add the Eggs and Food Coloring: Incorporate the eggs one at a time into the cheesecake batter, mixing on low speed after each addition. Add the granulated green food coloring a few drops at a time until you achieve the desired spooky green color. Make sure to scrape down the sides of the bowl for even mixing.
- Pour the Batter: Once the batter is smooth and green, pour it over the cooled crust in the springform pan. Smooth the top with a spatula for an even surface.
- Bake the Cheesecake: Place the cheesecake in the oven and bake for approximately 55-60 minutes, or until the edges are set but the center is still slightly jiggly. After baking, turn off the oven and crack the door open, allowing the cheesecake to cool gradually inside for about 1 hour to prevent cracking.
- Cool and Chill: After an hour, remove the cheesecake from the oven and allow it to cool to room temperature. Once cooled, refrigerate the cheesecake for at least 4 hours or overnight to fully set.
- Decorate with Gummy Bears: Before serving, arrange gummy bears on top of the cheesecake in a creepy crawly pattern. Feel free to get creative by mixing in other gummy candy shapes for a more festive touch.
- Serve and Enjoy: Carefully run a knife around the edge of the springform pan before releasing the sides. Slice your cheesecake, serve, and enjoy the spooky flavors of this Creepy Crawly Gummy Bear Cheesecake with your guests!
Vampire Bite Raspberry Cheesecake
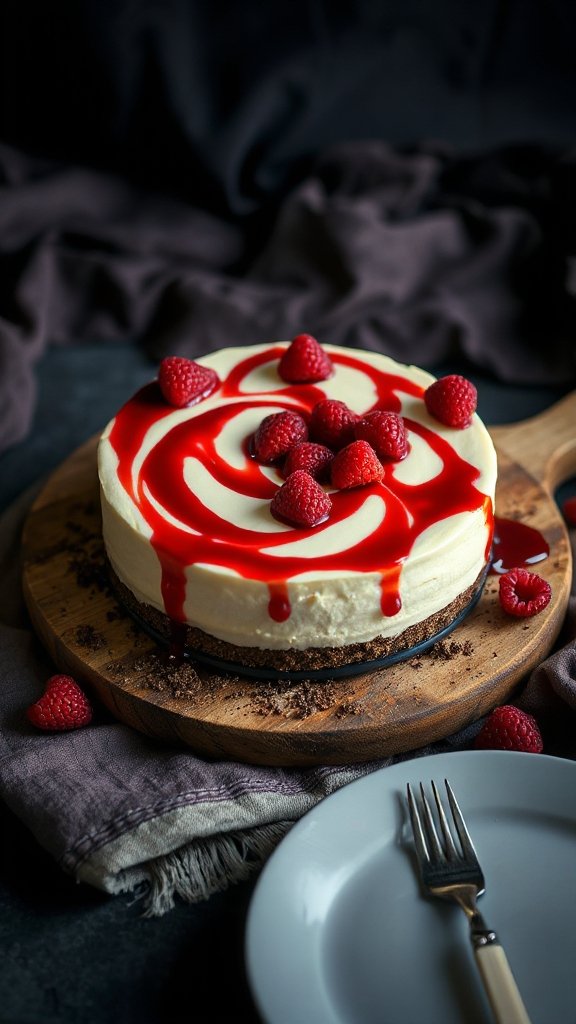
Vampire Bite Raspberry Cheesecake is a spooky yet scrumptious dessert perfect for Halloween celebrations. This decadent cheesecake features a creamy base with a swirl of tangy raspberry puree, making it look as though it’s been bitten into by a vampire! Topped with a luscious raspberry glaze and adorned with chocolate “bite” marks, this cheesecake is not only visually striking but absolutely delicious.
| Ingredients | Quantity |
|---|---|
| Cream cheese | 24 ounces |
| Granulated sugar | 1 cup |
| Eggs | 4 large |
| Heavy cream | 1 cup |
| Vanilla extract | 1 teaspoon |
| Sour cream | 1 cup |
| Fresh raspberries | 1 cup |
| Granulated raspberry puree | 1/2 cup |
| Graham cracker crumbs | 1.5 cups |
| Unsalted butter (melted for crust) | 1/2 cup |
| Dark chocolate (for decoration) | 4 ounces |
Cooking Steps:
- Preheat the Oven: Start by preheating your oven to 325°F (160°C).
- Prepare the Crust: In a mixing bowl, combine the graham cracker crumbs with the melted butter. Stir until the crumbs are well-coated and have a sand-like texture. Press this mixture firmly into the bottom of a 9-inch springform pan to create an even crust.
- Bake the Crust: Bake the crust in the preheated oven for about 8-10 minutes, or until it is set. Once baked, remove from the oven and let it cool completely while you prepare the cheesecake filling.
- Make the Raspberry Puree: In a blender or food processor, combine the fresh raspberries and granulated sugar. Blend until smooth. If desired, strain the mixture through a fine-mesh sieve to remove the seeds, creating a smooth raspberry puree.
- Prepare the Cheesecake Batter: In a large mixing bowl, beat the cream cheese with an electric mixer until creamy and smooth. Gradually add the granulated sugar and continue mixing until light and fluffy. Then, add the sour cream, heavy cream, and vanilla extract, mixing until all ingredients are well combined.
- Add the Eggs: Incorporate the eggs one at a time, mixing on low speed after each addition until fully incorporated. Avoid over-mixing, as this can cause cracks in the cheesecake.
- Add Raspberry Puree: Gently fold in the raspberry puree into the cheesecake batter, creating a marbled effect. Pour the batter over the cooled crust in the springform pan, smoothing out the top with a spatula.
- Bake the Cheesecake: Place the cheesecake in the oven and bake for approximately 55-60 minutes, or until the edges are set but the center remains slightly jiggly. After baking, turn off the oven and crack the door open, allowing the cheesecake to cool gradually for about 1 hour to prevent cracking.
- Prepare the Chocolate Bites: While the cheesecake cools, melt the dark chocolate in a microwave-safe bowl in 30-second intervals until fully melted and smooth. Use a piping bag or a small zip-top bag with a corner snipped off to pipe bite marks on top of the cheesecake after it’s set.
- Chill the Cheesecake: Once the cheesecake has cooled, refrigerate it for at least 4 hours, or overnight for the best results.
- Serve: Before serving, drizzle additional raspberry puree over the cheesecake and garnish with fresh raspberries. Slice the cheesecake and enjoy your delightful Vampire Bite Raspberry Cheesecake!
