Ghostly Pizza Bites
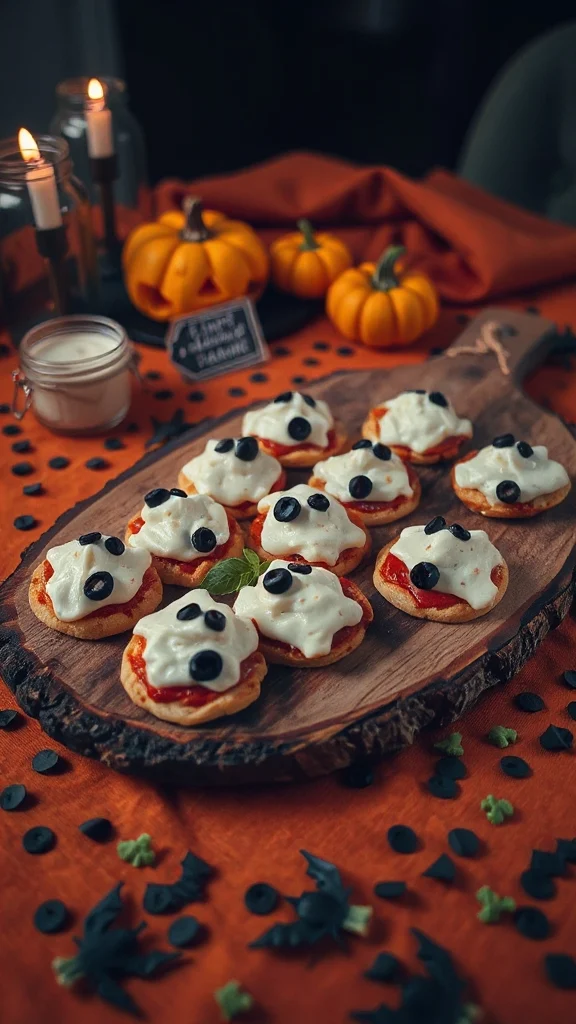
Ghostly Pizza Bites are a fun, spooky, and delicious treat perfect for Halloween gatherings or themed parties. These bite-sized snacks are not only easy to make but also budget-friendly, allowing you to create a festive atmosphere without breaking the bank. With a flaky crust and a cheesy topping, these ghost-shaped bites are guaranteed to delight both kids and adults alike!
| Ingredient | Quantity |
|---|---|
| Pre-made pizza dough | 1 package |
| Pizza sauce | 1 cup |
| Mozzarella cheese | 1 cup shredded |
| Black olives | 1/2 cup sliced |
| Flour (for dusting) | As needed |
| Olive oil | 1 tablespoon |
| Garlic powder | 1 teaspoon |
| Italian seasoning | 1 teaspoon |
Cooking Steps Instructions:
- Preheat the Oven: Begin by preheating your oven to 425°F (220°C). This will guarantee that your pizza bites are crispy and golden when they come out.
- Prepare the Dough: On a lightly floured surface, roll out your pre-made pizza dough to about 1/4 inch thickness. Use flour as needed to prevent sticking.
- Cut Ghost Shapes: Using a cookie cutter or a knife, cut the rolled dough into ghost shapes. If you don’t have a ghost-shaped cutter, you can also create an oval shape and then cut a small triangular piece out at the bottom for the ghost’s “tail.”
- Add Seasoning: In a small bowl, mix the olive oil, garlic powder, and Italian seasoning. Brush this mixture lightly over the top of each ghost-shaped dough to add flavor.
- Assemble the Pizza Bites: Spread a thin layer of pizza sauce on each ghost-shaped piece of dough, avoiding the edges. Sprinkle shredded mozzarella cheese generously over the sauce. For the eyes, place small pieces of sliced black olives where you want the ghost’s eyes to be.
- Bake: Transfer the assembled ghostly pizza bites to a baking sheet lined with parchment paper. Bake in the preheated oven for about 10-12 minutes, or until the edges are golden brown and the cheese is bubbling.
- Cool and Serve: Once baked, remove the pizza bites from the oven and let them cool for a few minutes on the baking sheet. Serve warm as a spooky snack for your Halloween celebration!
Enjoy these delightful Ghostly Pizza Bites that are guaranteed to be a hit this Halloween!
Creepy Crawly Deviled Eggs
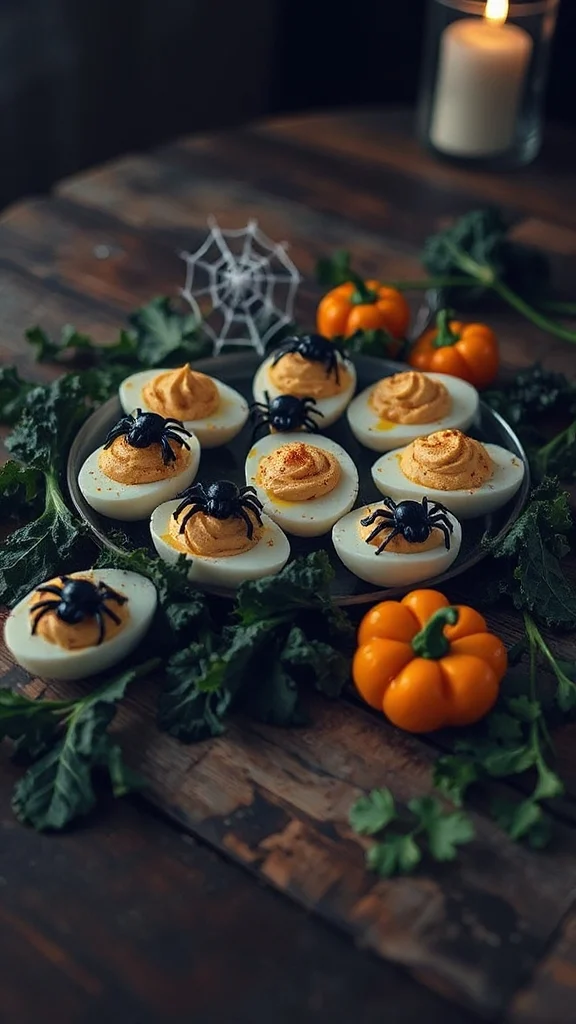
Creepy Crawly Deviled Eggs are a fun and spooky twist on the traditional deviled egg recipe, making them a delightful appetizer for any Halloween gathering. Not only are they quick and easy to prepare, but they also offer a healthy bite that guests of all ages will enjoy. These creepy creations are sure to be a conversation starter at your Halloween party!
| Ingredient | Quantity |
|---|---|
| Large eggs | 6 |
| Mayonnaise | 3 tablespoons |
| Dijon mustard | 1 teaspoon |
| Salt | 1/4 teaspoon |
| Black pepper | 1/4 teaspoon |
| Paprika | For garnish |
| Black olives | 6 (sliced) |
| Green bell pepper | 1 small (cut into small strips) |
Cooking Steps Instructions:
- Boil the Eggs: Place the large eggs in a pot and cover them with water. Bring the water to a boil over medium-high heat. Once boiling, cover the pot and remove it from the heat. Let the eggs sit for about 12 minutes.
- Cool the Eggs: After 12 minutes, carefully transfer the eggs to a bowl filled with ice water. Allow them to cool for at least 5 minutes to stop the cooking process and make peeling easier.
- Peel the Eggs: Once cooled, gently crack the eggshells and peel them under running water for easier removal. Pat the peeled eggs dry with a paper towel.
- Cut the Eggs: Slice each egg in half lengthwise. Carefully remove the egg yolks and place them in a mixing bowl. Set the egg whites aside on a serving platter.
- Prepare the Filling: Mash the egg yolks with a fork until smooth. Add mayonnaise, Dijon mustard, salt, and black pepper to the yolks. Mix until the mixture is creamy and well-combined.
- Fill the Egg Whites: Spoon or pipe the yolk mixture back into the hollowed egg whites, mounding it slightly for a more appealing look.
- Create the Creepy Crawly Look: To create the “creepy crawly” effect, take the sliced black olives and place one slice on top of each filled egg to resemble an eye. For the “legs,” use small strips of green bell pepper and arrange them around the eggs to make it look like a creepy insect.
- Garnish: Sprinkle a little paprika over the top of the deviled eggs for added color.
- Serve: Refrigerate for about 15 minutes before serving to allow the flavors to meld together. Serve these Creepy Crawly Deviled Eggs chilled on your Halloween buffet!
These Creepy Crawly Deviled Eggs are not just tasty but also add a festive touch to your Halloween menu! Enjoy!
Mummy Hot Dogs
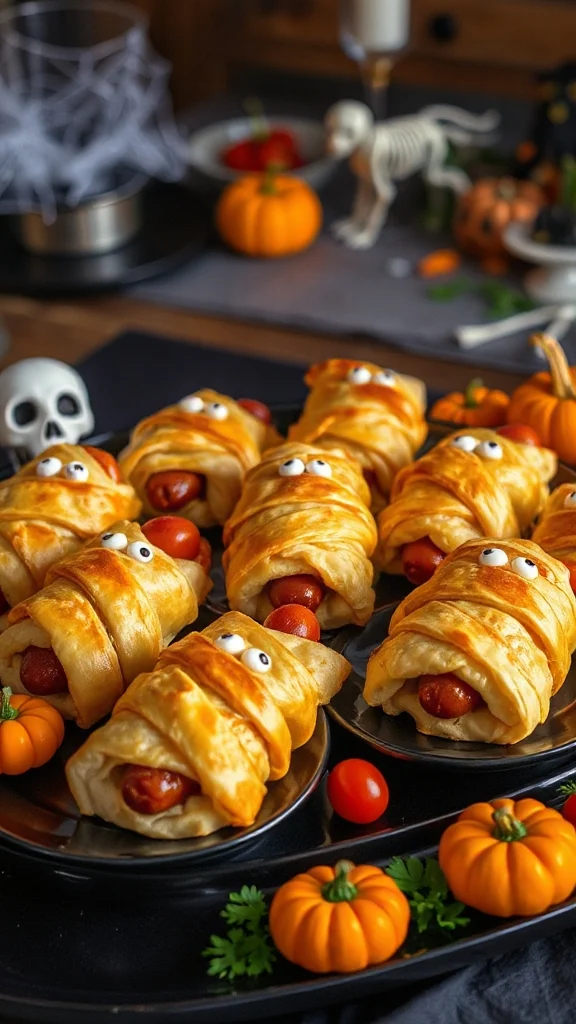
Mummy Hot Dogs are a playful and easy Halloween-inspired dish that is perfect for entertaining kids and adults alike. These delicious mini hot dogs are wrapped in crescent roll dough to resemble mummies, complete with spooky “eyes” made from mustard or dots of cheese. They’re not only fun to make but also a tasty treat that can be ready in no time!
| Ingredient | Quantity |
|---|---|
| Mini hot dogs | 8 |
| Crescent roll dough | 1 can (8 oz) |
| Mustard or cheese | For eyes |
| Cooking spray | Optional |
Cooking Steps Instructions:
- Preheat the Oven: Begin by preheating your oven to 375°F (190°C). This will guarantee that your Mummy Hot Dogs bake evenly and become crispy.
- Prepare the Dough: Open the can of crescent roll dough and unroll it onto a clean surface. Do not separate the dough into triangles; instead, pinch the seams together to create a single sheet.
- Cut the Dough: Using a pizza cutter or sharp knife, cut the dough into thin strips, about 1/4 inch wide. Make sure you have enough strips to wrap around each mini hot dog.
- Wrap the Hot Dogs: Take a mini hot dog and start wrapping it with the dough strips, leaving a small space at the top for the “face.” Overlap the strips slightly to create a wrapped mummy look, and continue until the entire hot dog is covered.
- Place on Baking Sheet: Lay the wrapped hot dogs on a baking sheet lined with parchment paper or lightly greased with cooking spray. Guarantee they are spaced out so they can cook properly.
- Bake: Place the baking sheet in the preheated oven and bake for approximately 12-15 minutes, or until the dough is golden brown and cooked through.
- Add the Eyes: Once the Mummy Hot Dogs are done baking, remove them from the oven and let them cool for a minute. Using a toothpick, dip it in mustard or cheese and place two dots on each “mummy” for eyes.
- Serve: Arrange the Mummy Hot Dogs on a serving platter and enjoy them warm. These spooky snacks will be a hit at your Halloween festivities!
Witch’s Brew Vegetable Soup
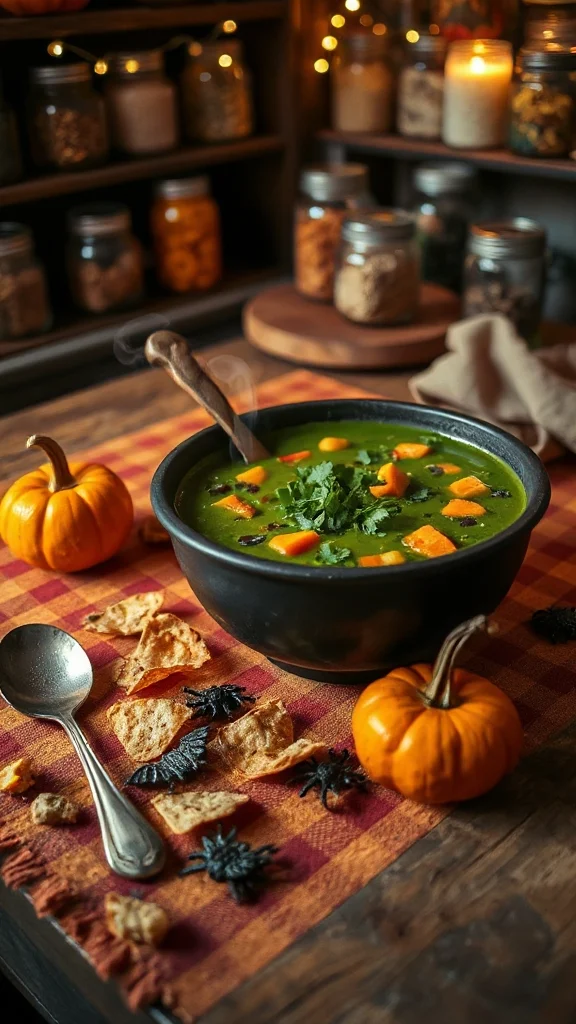
Witch’s Brew Vegetable Soup is a hearty and nutritious dish that is perfect for warming up on a chilly Halloween night. With a colorful array of vegetables, this spooky soup not only looks great but also permits you to sneak in a variety of healthy ingredients for the whole family. It’s an easy one-pot meal that can be made in under an hour, making it a fantastic addition to your Halloween menu.
| Ingredient | Quantity |
|---|---|
| Olive oil | 2 tablespoons |
| Onion, diced | 1 medium |
| Carrots, diced | 2 medium |
| Celery, diced | 2 stalks |
| Garlic, minced | 3 cloves |
| Bell pepper, diced | 1 medium |
| Zucchini, diced | 1 medium |
| Vegetable broth | 4 cups |
| Diced tomatoes (canned) | 1 can (14.5 oz) |
| Green beans, trimmed | 1 cup |
| Corn (frozen or canned) | 1 cup |
| Italian seasoning | 1 teaspoon |
| Salt | To taste |
| Pepper | To taste |
| Spinach or kale | 2 cups (fresh) |
| Optional toppings: | – |
| Croutons or cheese | For serving |
Cooking Steps Instructions:
- Heat the Olive Oil: In a large pot, heat the olive oil over medium heat. This will be the base for your soup.
- Sauté the Vegetables: Add the diced onion, carrots, and celery to the pot. Sauté for about 5-7 minutes, or until the vegetables are softened and the onion is translucent. Stir occasionally to prevent sticking.
- Add Garlic and Bell Pepper: Add the minced garlic and diced bell pepper to the pot. Cook for an additional 2-3 minutes, stirring frequently to make sure the garlic doesn’t burn.
- Incorporate Zucchini and Broth: Stir in the diced zucchini and vegetable broth, scraping the bottom of the pot to loosen any brown bits. This will add flavor to your soup.
- Add Diced Tomatoes and Green Beans: Pour in the diced tomatoes (with their juice) and add the trimmed green beans. Stir well to combine all the ingredients.
- Season the Soup: Sprinkle in the Italian seasoning, and add salt and pepper to taste. Mix thoroughly to guarantee the spices are evenly distributed.
- Simmer: Bring the soup to a gentle boil, then reduce the heat to low. Cover the pot and let the soup simmer for about 15-20 minutes, allowing the flavors to meld and the vegetables to become tender.
- Add Corn and Greens: Stir in the corn and add the fresh spinach or kale. Cook for an additional 5 minutes until the greens are wilted and tender.
- Taste and Adjust Seasoning: Before serving, taste the soup and adjust any seasonings if necessary. Add more salt or pepper to enhance the flavors.
- Serve: Ladle the Witch’s Brew Vegetable Soup into bowls and consider garnishing with croutons or cheese for an extra kick. Enjoy this warm and comforting dish during your Halloween festivities!
Spider Web Veggie Platter
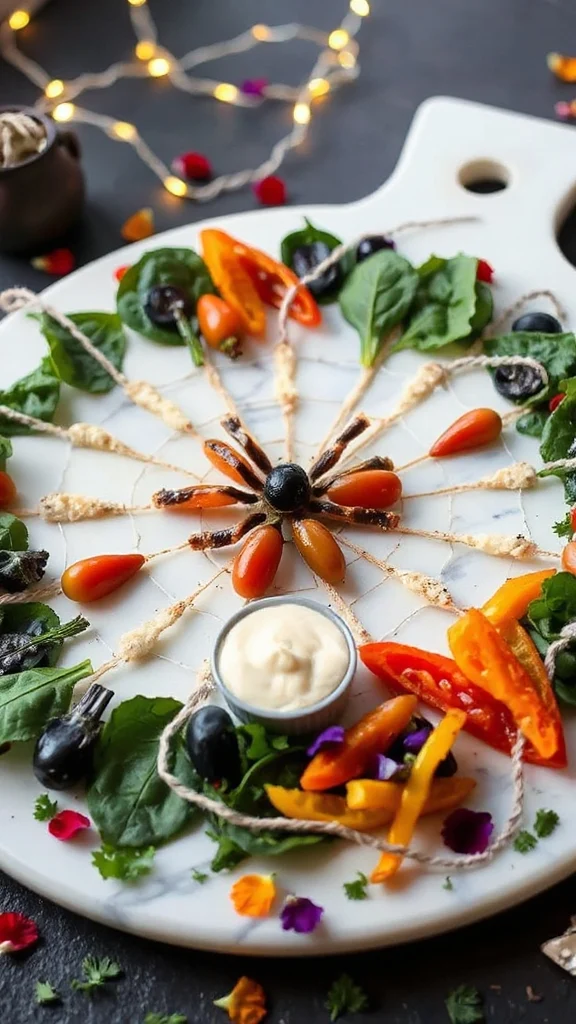
The Spider Web Veggie Platter is a fun and creative way to serve healthy snacks at your Halloween gathering. This eye-catching dish features a vibrant array of fresh vegetables arranged in a spider web design, making it a festive addition to your Halloween spread. It’s not only visually appealing but also encourages kids and adults alike to enjoy their veggies with a side of delicious dip.
| Ingredient | Quantity |
|---|---|
| Carrots, cut into sticks | 2 cups |
| Cucumbers, sliced | 2 medium |
| Bell peppers, sliced (various colors) | 1 cup |
| Cherry tomatoes | 1 cup |
| Broccoli florets | 1 cup |
| Black olives, halved | ½ cup |
| Hummus or ranch dressing | 1 cup |
| Optional: parsley for garnish | A few sprigs |
Cooking Steps Instructions:
- Prepare the Vegetables: Rinse all vegetables under cool water. Then, cut the carrots into sticks, slice cucumbers, and slice the bell peppers into strips. Cut the broccoli into bite-sized florets, and set aside.
- Arrange the Vegetables: On a large serving platter, start by placing the carrots in a circular pattern around the outer edge to form the base of the web. This outer layer will represent the first ring of the spider web.
- Create the Next Layer: Inside the ring of carrots, place cucumber slices in a circular overlap to create the next layer of the web. Make sure the cucumbers touch the carrots but don’t completely cover them.
- Add Bell Pepper Strips: Next, use bell pepper strips to form another inner circle, ensuring that they overlap slightly with the cucumber.
- Build the Web Design: In the center of the platter, place a cluster of cherry tomatoes to represent the “spider” that will sit in the middle of the web. Surround them with small pieces of broccoli to further enhance the design.
- Add the Finishing Touches: For the “spider web” effect, use black olives to draw lines radiating from the center (where the cherry tomatoes are) to the outer rings (the carrot circle). You may place a few olives on the tomatoes to represent the spider itself.
- Serve with Dip: In a small bowl, place your chosen dip (hummus or ranch dressing) in the center of the veggie platter, complementing the vibrant colors of the vegetables. Optionally, sprinkle some fresh parsley around the dip to enhance presentation.
- Garnish and Enjoy: If desired, garnish the entire platter with additional fresh parsley or any herbs you enjoy. Serve immediately and delight your guests with this creatively spooky and healthy snack!
Pumpkin Patch Fruit Cups
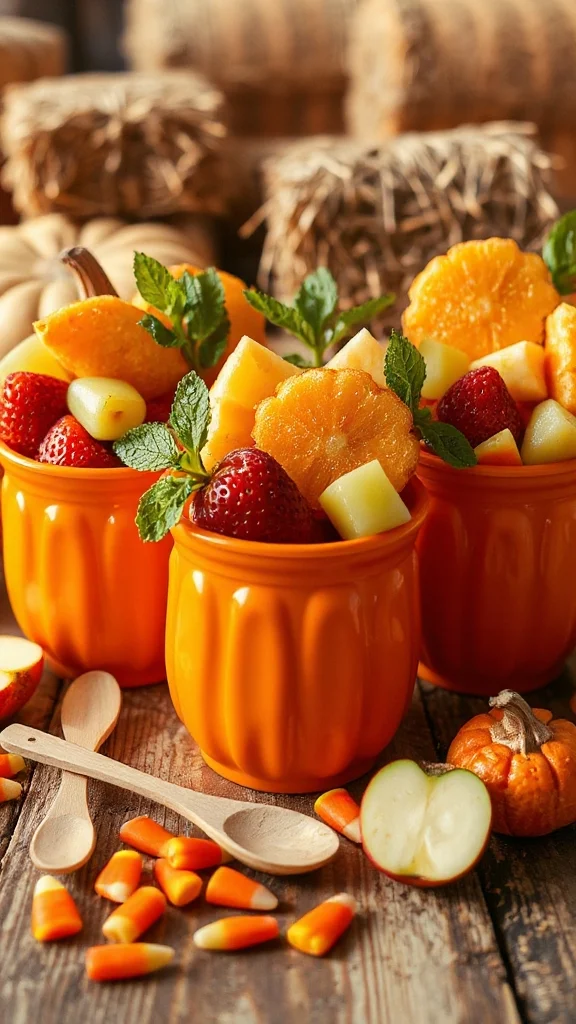
Pumpkin Patch Fruit Cups are a delightful and healthy Halloween treat that kids will love! These fun snacks transform ordinary fruit into cute pumpkin-themed cups, making them a memorable addition to any Halloween celebration. Easy to prepare, these fruit cups combine the sweetness of fruits with a whimsical presentation, perfect for spooky season parties or school celebrations.
| Ingredient | Quantity |
|---|---|
| Oranges (navel or clementines) | 4 large |
| Green grapes | 1 cup |
| Mini chocolate chips | ½ cup |
| Pineapple chunks (fresh or canned) | 1 cup |
| Kiwi, peeled and diced | 1 large |
| Optional: celery sticks for stems | 4 sticks |
Cooking Steps Instructions:
- Prepare the Oranges: Begin by slicing the tops off the oranges, about 1/3 of the way down. Carefully scoop out the insides with a spoon to create a hollow cup, making sure not to break the skin. Set the orange cups aside for later use.
- Cut Fruits: Dice the pineapple into small chunks and set aside. If you’re using fresh kiwi, peel and dice it into small pieces as well. Verify that the grapes are washed and drained.
- Mix the Filling: In a large mixing bowl, combine the diced pineapple, kiwi pieces, and green grapes. Optionally, you can also add mini chocolate chips to the fruit mixture for a sweet surprise.
- Fill the Orange Cups: Spoon the fruit mixture into each hollowed-out orange cup, filling it generously. Leave a little space at the top for garnish.
- Create the Pumpkin Stems: If desired, cut the celery sticks to about 2-3 inches long to serve as stems for your pumpkin cups. Place one celery stick into the center of each filled orange to enhance the pumpkin effect.
- Garnish and Serve: You can place mini chocolate chips on top of the fruit mixture for additional charm. Arrange the filled orange cups on a serving platter to display your Pumpkin Patch Fruit Cups.
- Chill & Enjoy: Refrigerate the fruit cups for about 30 minutes before serving, allowing them to chill and firm up. Serve these fun and fruity treats at your Halloween gathering and enjoy the festive delight!
These colorful pumpkin-themed fruit cups not only bring joy but also encourage healthy snacking during the Halloween season!
Monster Rice Krispie Treats
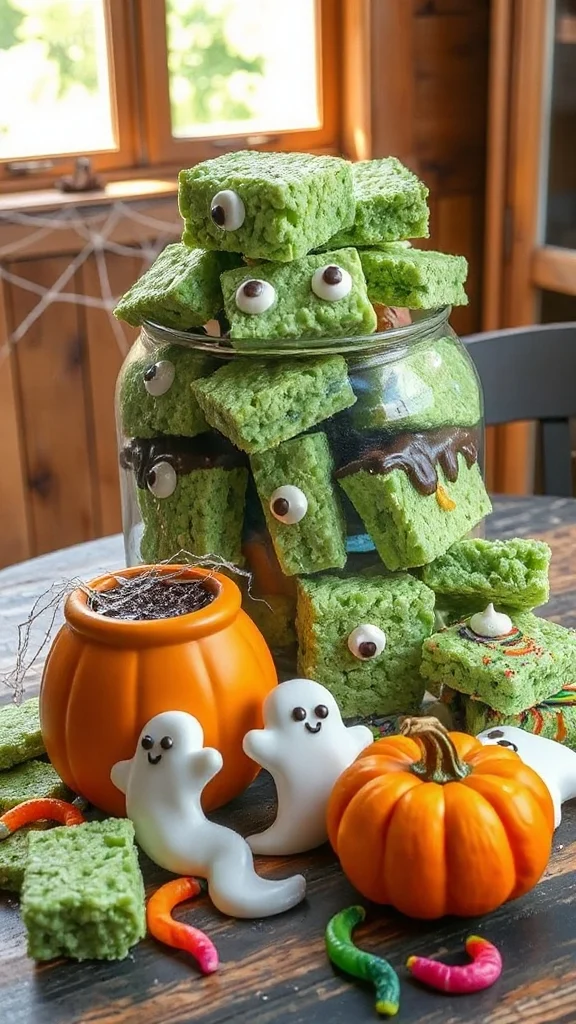
Monster Rice Krispie Treats are a fun and spooky twist on the classic Rice Krispie treat that make for delightful Halloween snacks. With their vivid colors and ghoulish faces, these treats are not only easy to make but also a hit at any Halloween party, sure to impress kids and adults alike!
| Ingredient | Quantity |
|---|---|
| Rice Krispies | 6 cups |
| Mini marshmallows | 4 cups |
| Butter | 1/2 cup (1 stick) |
| Food coloring (green, purple, or orange) | 1-2 tsp each (optional) |
| Candy eyes | 1 cup |
| Optional: Halloween sprinkles | 1/2 cup |
Cooking Steps Instructions:
- Melt the Butter and Marshmallows: In a large saucepan, melt the butter over low heat. Once melted, add the mini marshmallows, stirring continuously until they are completely melted and combined with the butter. This mixture should be smooth and gooey.
- Add Food Coloring: If you want to create colored Monster Rice Krispie Treats, this is the time to add a few drops of your chosen food coloring into the melted marshmallow mixture. Stir well until the color is evenly distributed. You can use green for monsters, purple for a spooky vibe, or orange to match the Halloween theme.
- Mix in the Rice Krispies: Remove the saucepan from heat. Gradually add the Rice Krispies, stirring gently and thoroughly to coat all of the cereal with the marshmallow mixture. Make sure to fold the mixture instead of stirring too aggressively to avoid crushing the Rice Krispies.
- Shape the Treats: Allow the mixture to cool for a few seconds, then lightly grease your hands with butter or cooking spray. Take handfuls of the mixture and form them into monster shapes or balls, about the size of a golf ball. Place the formed treats on a wax paper-lined baking sheet or a greased tray to cool completely.
- Decorate with Candy Eyes: Once the Monster Rice Krispie Treats have cooled, use candy eyes to decorate each treat. You can press the candy eyes into the treats to give them their spooky looks. If desired, you can also add Halloween sprinkles for extra flair.
- Serve and Enjoy: Once decorated, the treats are ready to serve. Arrange them on a festive Halloween platter and enjoy the spooky goodness with friends and family!
These Monster Rice Krispie Treats are not just tasty; they’re also a perfect activity to make with children, adding a fun twist to your Halloween celebration!
Eyeball Pasta Salad

Eyeball Pasta Salad is a delightfully creepy yet tasty dish that will undoubtedly be a hit at any Halloween gathering. This fun pasta salad features colorful veggies and “eyeball” meatballs, making it both visually appealing and delicious. It’s easy to prepare and can be made ahead of time, allowing you to focus on your spooky celebrations!
| Ingredient | Quantity |
|---|---|
| Pasta (e.g., rotini or bowtie) | 8 oz |
| Cherry tomatoes | 1 cup |
| Mozzarella balls | 1 cup |
| Black olives | 1/2 cup (sliced) |
| Italian dressing | 1/2 cup |
| Fresh basil (optional) | 1/4 cup (chopped) |
| Meatballs (store-bought or homemade) | 12-15 meatballs |
| Food coloring (red, optional) | Few drops |
Cooking Steps Instructions:
- Cook the Pasta: Begin by bringing a large pot of salted water to a boil. Add your chosen pasta to the boiling water and cook according to the package instructions until al dente. Once cooked, drain the pasta and rinse it with cold water to stop the cooking process. Set aside in a large mixing bowl.
- Prepare the “Eyeballs”: For the meatballs, if you’re using frozen or pre-cooked meatballs, heat them according to package instructions. If you’re making homemade meatballs, prepare them in advance and cook them until they are fully cooked through.
- Assemble the Salad: In the bowl with the cooled pasta, add the cherry tomatoes, mozzarella balls, sliced black olives, and fresh basil (if using). These ingredients will add color and flavor to your dish.
- Dress the Salad: Drizzle the Italian dressing over the pasta salad mixture and toss gently to combine all the ingredients. Confirm every piece of pasta and vegetable is coated in the dressing, adding more as needed for desired flavor.
- Create the Eyeball Effect: If you want to create an even spookier effect, take a small amount of food coloring (red) and mix it with a few drops of water. Use this mixture to coat some of the mozzarella balls (eyeballs) to give them a bloody appearance. Place a slice of black olive on top of each “eyeball” to complete the look.
- Garnish and Serve: Once you’ve incorporated the meatballs into the salad, you can arrange the decorated mozzarella balls on top or mix them in. Refrigerate the Eyeball Pasta Salad for at least 30 minutes before serving, allowing the flavors to meld. Serve it in a large bowl, and enjoy the eerie and tasty dish with your guests!
This Eyeball Pasta Salad is the perfect blend of flavors and fright for your Halloween festivities!
Haunted Halloween Cupcakes
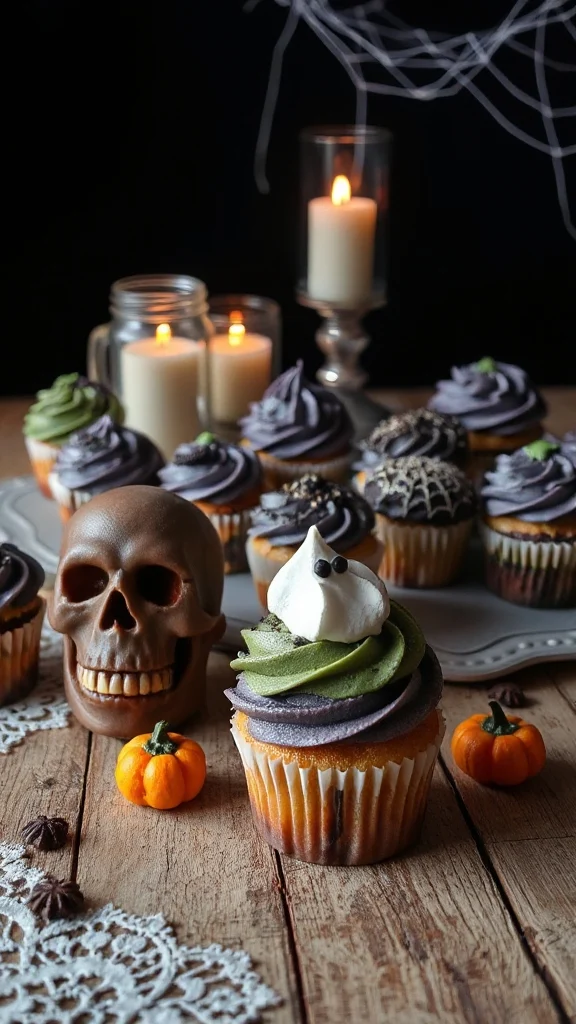
Haunted Halloween Cupcakes are an eerie and delightful treat that will add a spooky touch to any Halloween celebration. These adorable cupcakes are topped with a ghoulish frosting that resembles ghosts, making them a hit among both kids and adults. With simple ingredients and easy steps, you can whip up these festive cupcakes in no time!
| Ingredient | Quantity |
|---|---|
| Chocolate cake mix | 1 box (15.25 oz) |
| Eggs | 3 large |
| Water | 1 cup |
| Vegetable oil | 1/2 cup |
| Whipped cream (for frosting) | 2 cups |
| Powdered sugar | 2 cups |
| Vanilla extract | 1 tsp |
| Mini chocolate chips | 1/2 cup |
| Black decorating gel or candy eyes | As needed |
Cooking Steps Instructions:
- Prepare the Cupcake Batter: Preheat your oven to 350°F (175°C). In a large mixing bowl, combine the chocolate cake mix, eggs, water, and vegetable oil. Using an electric mixer, beat the mixture on low speed for 30 seconds to incorporate the ingredients, then increase to medium speed and mix for 2 minutes until smooth.
- Bake the Cupcakes: Line a cupcake pan with paper liners. Fill each cupcake liner about two-thirds of the way full with the batter. Bake in the preheated oven for 18-22 minutes, or until a toothpick inserted in the center comes out clean. Once done, let the cupcakes cool in the pan for 5 minutes before transferring them to a wire rack to cool completely.
- Make the Ghostly Frosting: In a large bowl, beat the whipped cream with a handheld mixer until it thickens. Gradually add the powdered sugar, vanilla extract, and continue to beat until the frosting holds stiff peaks and is fluffy.
- Frost the Cupcakes: Once the cupcakes are completely cooled, use a piping bag fitted with a round or star tip (or simply a spatula) to frost each cupcake with the whipped cream mixture. Create swirled “ghost” shapes by starting from the center and swirling outward to create peaks.
- Decorate with Eyes: Place mini chocolate chips or use candy eyes on top of each frosted cupcake to create the ghost eyes. If using black decorating gel, you can draw spooky expressions on the frosting to enhance the haunted appearance.
- Serve and Enjoy: Arrange the Haunted Halloween Cupcakes on a festive platter and serve them to your guests. Enjoy their delightful taste and the fun spooky vibe they bring to your Halloween festivities!
Ghoulish Guacamole and Chips

Ghoulish Guacamole and Chips is a fun and delicious dip that adds flair to any Halloween gathering. With its vibrant green color and spooky presentation, this creamy avocado dip is bound to be a crowd-pleaser. Paired with tortilla chips, it’s the perfect snack for guests to enjoy while mingling at your Halloween festivities!
| Ingredient | Quantity |
|---|---|
| Ripe avocados | 3 large |
| Lime juice | 2 tablespoons |
| Garlic | 1 clove, minced |
| Red onion | 1/4 cup, finely chopped |
| Jalapeño (optional) | 1, finely chopped |
| Salt | 1/2 teaspoon |
| Black olives (for decoration) | 1/3 cup, sliced |
| Tortilla chips | 1 bag (10-12 oz) |
Cooking Steps Instructions:
- Prepare the Avocados: Cut the ripe avocados in half and remove the pit. Use a spoon to scoop the flesh into a mixing bowl.
- Mash the Avocados: Using a fork or a potato masher, mash the avocado to your desired level of creaminess. For a chunky guacamole, mash lightly; for a smoother texture, mash more thoroughly.
- Add Flavorings: Stir in the lime juice, minced garlic, finely chopped red onion, and optional jalapeño. Mix well to combine all the ingredients. The lime juice not only adds flavor but also helps prevent the avocados from browning.
- Season the Guacamole: Add salt to taste and mix well. Give it a taste test and adjust the seasoning or add more lime juice if desired.
- Decorate with Olives: For a spooky touch, take the sliced black olives and arrange them on top of the guacamole to create creepy “eyes” or fun designs. You can get creative with the patterns!
- Serve with Chips: Transfer the ghastly guacamole to a festive serving bowl. Surround the bowl with a generous portion of tortilla chips, making it easy for guests to scoop and enjoy.
- Enjoy: Set the guacamole and chips out on the snack table, and watch your guests devour this deliciously ghoulish treat!
Skeleton Cheese Platter

The Skeleton Cheese Platter is a creative and eye-catching appetizer perfect for Halloween celebrations. This fun, spooky dish features an assortment of cheeses and snacks arranged to resemble a skeleton, making it a great conversation starter and a delightful addition to your Halloween festivities. It’s easy to assemble and offers a variety of flavors that cater to all guests.
| Ingredient | Quantity |
|---|---|
| Assorted cheeses (e.g., cheddar, mozzarella, brie) | 1 lb total (various types) |
| Crackers | 1 box |
| Grapes or cherry tomatoes | 1 cup |
| Sliced pepperoni or salami | 1 cup |
| Olives (black or green) | 1/2 cup |
| Carrots (for ribs) | 2-3 medium |
| Cucumber (for limbs) | 1 medium |
| Fresh herbs (optional, for garnish) | A few sprigs |
Cooking Steps Instructions:
- Choose the Cheese: Select a variety of cheeses to include on your platter. Aim for different colors and textures, such as sharp cheddar, creamy brie, or stringy mozzarella, to create visual contrast.
- Prepare the Base: On a large serving tray or platter, start with a base by arranging a selection of crackers for the skeleton’s body. This will provide a sturdy foundation for the rest of your ingredients.
- Create the Skull: Use round pieces of cheese (like a small ball of mozzarella or a wedge of brie) as the skull. Place this at the top center of the platter.
- Form the Rib Cage: Lay long pieces of carrot in a fan-like shape below the skull to represent the ribs. Adjust them as needed to create a bony appearance.
- Add Limbs: Cut the cucumber into long strips to represent the arms and legs of the skeleton. Position them on either side of the platter extending outward from the soda ribs.
- Incorporate the Spine: For the vertebrae, stack slices of pepperoni or salami vertically down the center of the platter, between the ribs. This will help complete the “skeleton” look.
- Create Eyes and Other Features: Use small olives to create eyes by positioning them on the cheese skull. You may also slice olives to make additional features like a smile or nose.
- Add the Finishings: Scatter a few grapes or cherry tomatoes around the platter to represent “blood” or “guts,” enhancing the spooky effect. Optionally, sprinkle some fresh herbs around for added color and aroma.
- Serve and Enjoy: Once assembled, display your Skeleton Cheese Platter where guests can easily help themselves. This fun and festive appetizer is bound to be a hit at your Halloween party!
Frighteningly Fun Jello Cups

Frighteningly Fun Jello Cups are a delightful and spooky treat perfect for Halloween parties or gatherings. These vibrant, gelatin-based sweets can be made in various flavors and colors, and they can be easily transformed into creepy creations by adding gummy worms, plastic spiders, or even eyeball decorations. Their playful and festive appearance is sure to impress guests of all ages!
| Ingredient | Quantity |
|---|---|
| Jello (your choice of flavors) | 2 boxes (3 oz each) |
| Boiling water | 4 cups |
| Cold water | 2 cups |
| Gummy worms or spiders | 1 bag |
| Plastic cups | 12 (5 oz size) |
| Whipped cream (optional) | For topping (as desired) |
Cooking Steps Instructions:
- Prepare Jello: In a mixing bowl, dissolve the contents of one box of Jello in 2 cups of boiling water. Stir the mixture thoroughly until all the crystals have completely dissolved.
- Add Cold Water: Once the Jello is fully dissolved, mix in 1 cup of cold water. Stir again to combine. Repeat this process with the second box of Jello, using the remaining 2 cups of boiling water and 1 cup of cold water.
- Layer the Jello: Pour approximately half of the prepared Jello mixture into the plastic cups, filling them about halfway. This will create the first layer. Make certain that you leave enough room in each cup for another layer later.
- Chill the First Layer: Place the cups in the refrigerator and allow the first layer of Jello to set for about 1-2 hours, or until it is firm to the touch.
- Add Creepy Crawlers: Once the first layer is set, carefully take the cups out of the refrigerator. Place a few gummy worms or plastic spiders on top of the firm Jello. Push them down gently so that they sit in the layer without completely submerging.
- Pour the Second Layer: Slowly and carefully pour the remaining Jello mixture over the first layer, filling the cups to the brim. This layer will suspend the gummy creatures inside, adding to the spooky effect.
- Chill Again: Return the cups to the refrigerator and let the second layer set for an additional 2-3 hours or until completely firm.
- Serve with a Twist: Before serving, optionally top each Jello cup with a dollop of whipped cream for a ghoulish “frosting” effect. If desired, garnish with more gummy creatures on top for added fun.
- Enjoy: Once ready, serve the Jello cups to your guests and enjoy the frighteningly fun and delicious treats!
Zombie Finger Sandwiches
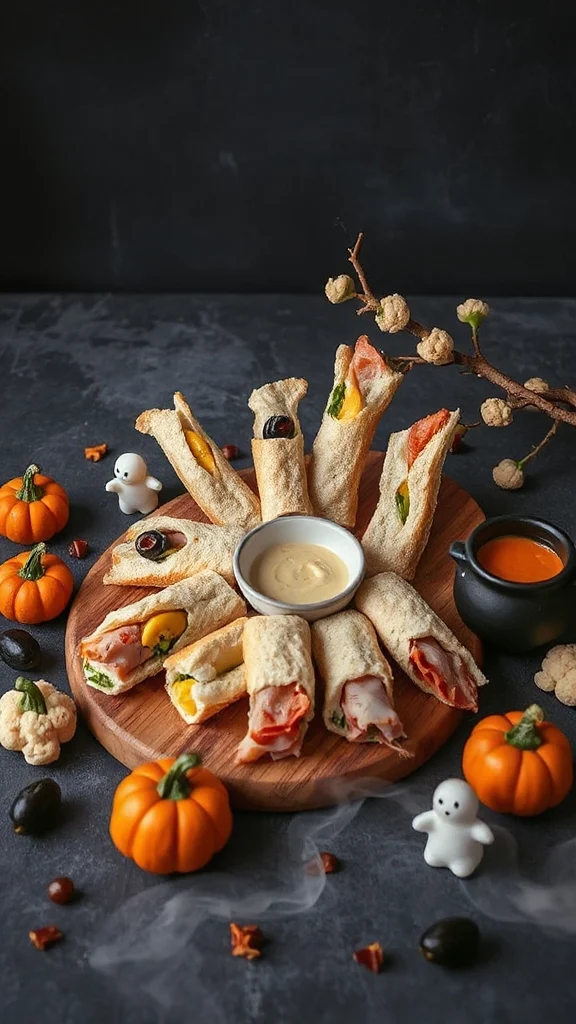
Zombie Finger Sandwiches are a creepy yet delicious addition to any Halloween gathering. These playful sandwiches can be customized with various fillings, such as deli meats, cheeses, and spreads, while their eerie appearance will have guests giggling and squealing. By cutting the bread into the shape of zombie fingers and adding garnishes like edible eyes or slivers of vegetables, you can create a spooky snack that’s both delightful and fun to eat—perfect for celebrating the season!
| Ingredient | Quantity |
|---|---|
| Bread (white or whole wheat) | 10 slices |
| Deli meat (ham, turkey, etc.) | 5-6 slices |
| Cream cheese or hummus | 1/2 cup |
| Cheddar cheese slices | 5 slices |
| Green bell pepper | 1 (for fingers) |
| Black olives | 10 (for eyes) |
| Lettuce or spinach | A few leaves |
| Mustard or other condiment (optional) | For spreading |
Cooking Steps Instructions:
- Prepare the Bread: Start by trimming the crusts off the bread slices to create neat squares or rectangles. Then, you can slice them in half if you want smaller sandwiches.
- Spread the Filling: Take each piece of bread and spread a layer of cream cheese or hummus evenly on one side. If you prefer mustard or another condiment, spread that on as well for more flavor.
- Layer the Deli Meat: Place one or two slices of deli meat on top of the spread. You can mix and match different meats or stick with a single type based on your preferences.
- Add Cheese: Cut the cheddar cheese slices into long strips, resembling fingers, and place them on top of the deli meat layer.
- Cut into Fingers: From the assembled sandwich, cut the whole piece into a finger shape. You can make them longer by cutting at an angle. Aim for about 3-4 fingers from each sandwich depending on the size.
- Create Fingernails: Slice the green bell pepper into small, pointed pieces to represent zombie fingernails and place one piece at the end of each sandwich finger.
- Add Eyes: For a truly spooky effect, slice black olives in half and place a half on top of each finger sandwich to create ‘eyes’. You can even use edible eyeballs for an extra creepy touch if you have them!
- Garnish with Greens: For added color and texture, place a few leaves of lettuce or spinach on a serving platter and arrange the zombie fingers on top. This adds a fresh touch to your spooky spread.
- Serve: Once your zombie finger sandwiches are ready, display them on a platter and watch as your guests have fun picking them up and enjoying this ghoulish treat!
- Enjoy: With a mix of delicious flavors and a playful presentation, these sandwiches are sure to be a hit at your Halloween bash!
Batty Brownie Bites
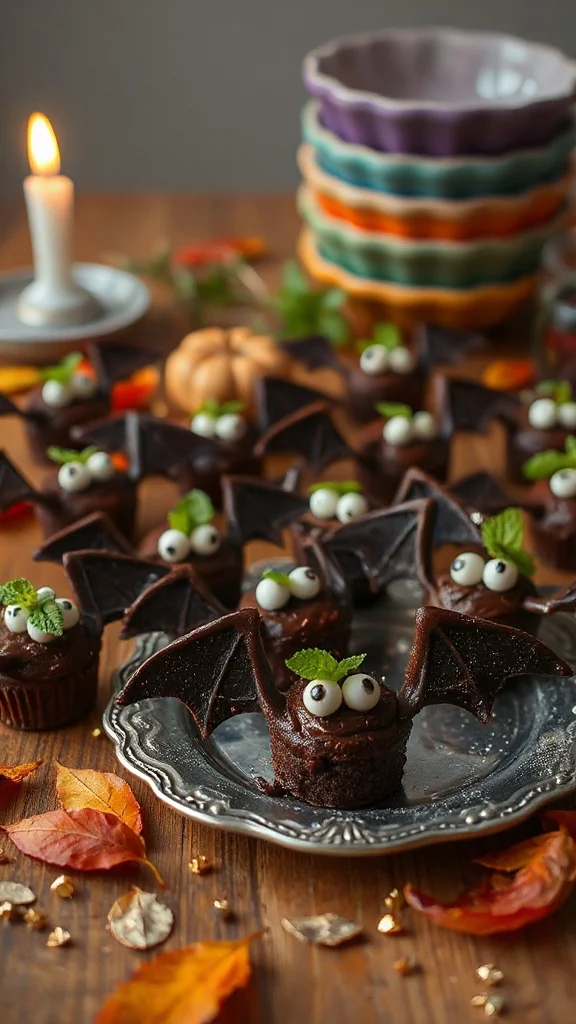
Batty Brownie Bites are a spooktacular dessert that combines the rich, gooey goodness of brownies with a playful Halloween twist. These bite-sized treats are made to resemble adorable bats and are sure to delight both kids and adults at your Halloween celebration. With just a few simple ingredients and some creativity, you can whip up these batty delights that are perfect for a sweet and festive touch to your spooky festivities!
| Ingredient | Quantity |
|---|---|
| Brownie mix (box) | 1 (family size) |
| Eggs | 2 |
| Vegetable oil | 1/3 cup |
| Water | 1/4 cup |
| Mini chocolate chips | 1 cup |
| Black icing or chocolate frosting | 1 tub |
| Oreo cookies | 10 |
| Candy eyes | 20 |
| Optional: Sprinkles (for decoration) | As desired |
Cooking Steps Instructions:
- Preheat the Oven: Start by preheating your oven to the temperature specified on the brownie mix box – usually around 350°F (175°C). This guarantees that your brownies bake evenly.
- Prepare the Brownie Batter: In a mixing bowl, combine the brownie mix, eggs, vegetable oil, and water according to the instructions on the box. Stir until all ingredients are well mixed and there are no dry lumps.
- Add Chocolate Chips: Fold in the mini chocolate chips to the brownie batter, distributing them evenly throughout for extra chocolaty goodness.
- Bake the Brownies: Pour the brownie batter into a greased or lined 9×13 inch baking dish. Spread it out evenly with a spatula. Bake in the preheated oven for the recommended time, typically around 25-30 minutes, or until a toothpick inserted in the center comes out with a few moist crumbs.
- Cool the Brownies: Once baked, remove the brownies from the oven and let them cool in the pan for about 20-30 minutes. This will make it easier to cut them into bite-sized pieces.
- Cut into Shapes: After cooling, use a sharp knife to cut the brownies into small squares or rectangles. Then, to create bat shapes, cut each square diagonally to form triangles. You can also use a bat-shaped cookie cutter if available for a fun shape.
- Assemble the Bats: To make the bat wings, take an Oreo cookie and break it in half. Place each half on either side of the brownie piece to create the wings of the bat.
- Decorate with Icing: Use black icing or chocolate frosting to pipe a small amount on the top of the brownie piece. You can create fun details like bat features or simply spread it for a glossy finish.
- Add Eyes: Place two candy eyes on top of the brownie for your bat’s eyes, pressing them gently into the frosting for a fun and spooky look.
- Optional Decoration: If desired, sprinkle some colorful sprinkles around the brownies for an added festive touch. Arrange your Batty Brownie Bites on a platter and serve them to your guests—watch as they disappear! Enjoy your Halloween treat!
Candy Corn Parfaits

Candy Corn Parfaits are a vibrant and festive treat that perfectly embodies the spirit of Halloween. These layered desserts combine sweet flavors and colors reminiscent of classic candy corn, making them a delightful and visually appealing addition to any Halloween gathering. With layers of creamy pudding, whipped topping, and crushed cookies, these parfaits are not only easy to make but also budget-friendly, ensuring your celebration is both spooky and satisfying!
| Ingredient | Quantity |
|---|---|
| Vanilla pudding mix | 1 package (3.4 oz) |
| Milk | 2 cups |
| Whipped topping (thawed) | 1 tub (8 oz) |
| Yellow food coloring | 2-3 drops |
| Orange food coloring | 2-3 drops |
| Crushed graham crackers | 1 cup |
| Candy corn | 1 bag (about 10 oz) |
| Optional: Clear cups or jars | As desired |
Cooking Steps Instructions:
- Prepare the Vanilla Pudding: In a mixing bowl, whisk together the vanilla pudding mix and milk for about 2 minutes, or until it thickens. Allow it to sit for a couple of minutes to firm up.
- Color the Pudding: Divide the pudding into three equal portions. Leave one portion plain for the white layer. Add 2-3 drops of yellow food coloring to the second portion and stir until well mixed. To the third portion, add 2-3 drops of orange food coloring and stir until the color is evenly distributed. You should now have three different colored layers: white, yellow, and orange.
- Prepare the Cups: Gather your clear cups or jars and start with the first layer. Spoon a portion of the white pudding into the bottom of each cup, filling them about a third of the way full.
- Add the Yellow Layer: Next, add a layer of the yellow pudding on top of the white layer in each cup, filling it until about two-thirds full.
- Finish with the Orange Layer: Finally, top off each cup with the orange pudding, filling it to the top. Smooth the surface with the back of a spoon for a neat appearance.
- Add Crushed Graham Crackers: Sprinkle a layer of crushed graham crackers on top of the orange pudding in each cup. This will give your parfaits a crunchy texture that contrasts nicely with the creamy pudding.
- Top with Whipped Topping: Use a spoon or a piping bag to add a dollop of whipped topping on top of the crushed graham crackers in each cup. This adds an extra touch of sweetness and creaminess.
- Garnish with Candy Corn: Finally, place a few pieces of candy corn on top of the whipped topping in each parfait for a festive finish.
- Chill and Serve: Refrigerate the parfaits for at least 30 minutes to allow the flavors to meld and the layers to set. Serve chilled at your Halloween gathering and enjoy the delightful flavors!