
Ghostly Pizza Bites
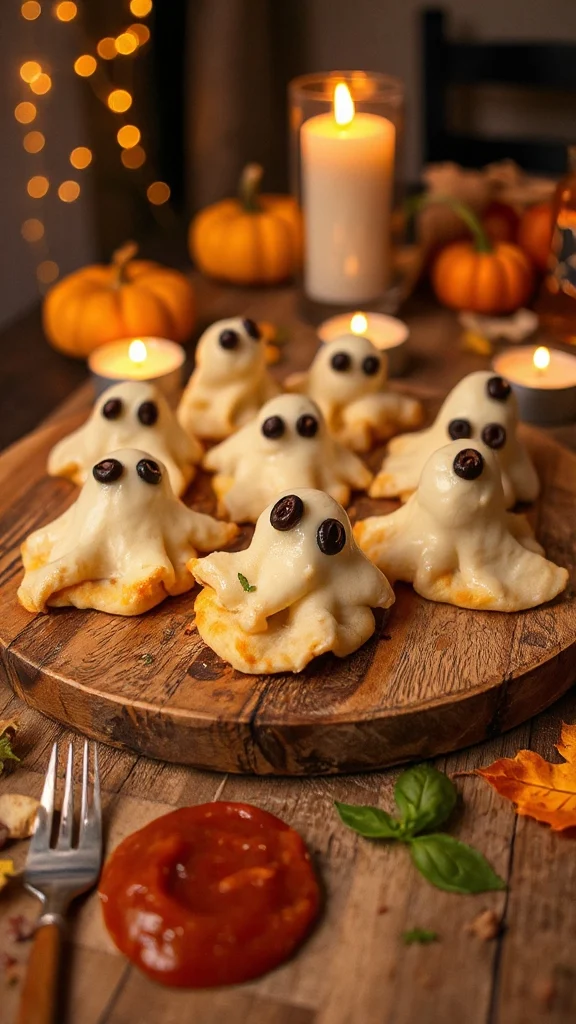
Ghostly Pizza Bites are a fun and festive snack perfect for Halloween celebrations. These bite-sized treats are easy to make and can be enjoyed by kids and adults alike. Shaped like little ghosts, these pizzas are not only delicious but also add a spooky touch to your Halloween festivities.
| Ingredients | Quantity |
|---|---|
| Refrigerated pizza dough | 1 package (about 16 oz) |
| Mozzarella cheese | 1 cup, shredded |
| Black olives | 1/2 cup, sliced |
| Pizza sauce | 1/2 cup |
| Italian seasoning | 1 tsp |
| Egg (for egg wash) | 1, beaten |
Cooking Steps:
- Preheat the Oven: Begin by preheating your oven to 425°F (220°C). This guarantees that your Ghostly Pizza Bites will cook evenly and get crispy.
- Roll Out the Dough: On a floured surface, roll out your refrigerated pizza dough to about 1/4 inch thick. Make sure it’s not too thin, or the ghosts might break when you cut them.
- Cut the Dough: Using a ghost-shaped cookie cutter or a sharp knife, cut out ghost shapes from the dough. If you don’t have a ghost-shaped cutter, you can create freehand ghost shapes.
- Arrange on Baking Sheet: Lay the cut-out ghost shapes on a baking sheet lined with parchment paper, leaving some space between each one.
- Add the Sauce: Spoon a small amount of pizza sauce onto each ghost shape. Be careful not to overload them; about a teaspoon should suffice.
- Sprinkle Cheese: Top each ghost with a generous sprinkle of shredded mozzarella cheese, allowing it to cover the sauce.
- Add Olive Eyes: Place two slices of black olives on each ghost for eyes, using them to give your ghostly bites a fun and spooky expression.
- Season it Up: Sprinkle a pinch of Italian seasoning over the top of each ghost for added flavor.
- Egg Wash: Brush the edges of each ghost with the beaten egg. This will give them a nice golden color when baked.
- Bake: Place the baking sheet in the preheated oven and bake for about 12-15 minutes or until the crust is golden brown and the cheese is bubbling.
- Cool and Serve: Once baked, remove from the oven and let them cool for a few minutes. Serve warm with extra pizza sauce for dipping, if desired.
Enjoy your Ghostly Pizza Bites at your Halloween gathering, and watch them disappear as fast as you can make them!
Spooky Stuffed Peppers

Spooky Stuffed Peppers are a creative and nutritious Halloween dish that can serve as a festive centerpiece at any Halloween gathering. These peppers are not only visually appealing, resembling haunted houses or jack-o’-lanterns, but they are also packed with flavor and can be filled with various ingredients to suit your taste. Whether you prefer a meat-based filling or a vegetarian option, these spooky peppers are bound to be a hit!
| Ingredients | Quantity |
|---|---|
| Bell peppers (orange, green, or yellow) | 4 whole |
| Ground beef or turkey | 1 lb |
| Cooked rice | 1 cup |
| Onion (diced) | 1/2 cup |
| Garlic (minced) | 2 cloves |
| Diced tomatoes | 1 can (14.5 oz) |
| Taco seasoning | 1 packet |
| Shredded cheese | 1 cup |
| Olive oil | 1 tbsp |
| Salt and pepper | To taste |
Cooking Steps:
- Preheat the Oven: Start by preheating your oven to 375°F (190°C) to ascertain the peppers cook evenly.
- Prepare the Peppers: While the oven is heating, wash the bell peppers thoroughly. Cut the tops off the peppers and remove the seeds and membranes, creating a hollow space for the stuffing. If desired, carve spooky faces into the peppers for an extra Halloween touch.
- Sauté the Vegetables: In a skillet over medium heat, add the olive oil. Once hot, add the diced onion and minced garlic. Sauté for about 3-4 minutes, or until the onions are translucent and the garlic is fragrant.
- Cook the Meat: Add the ground beef or turkey to the skillet with the onions and garlic. Cook until browned, breaking it up with a spoon as it cooks. This should take about 5-7 minutes. Drain any excess fat.
- Add Other Ingredients: Stir in the cooked rice, diced tomatoes (with their juices), and taco seasoning. Mix everything well and let it simmer for 5 minutes, allowing the flavors to combine. Season with salt and pepper to taste.
- Stuff the Peppers: Take the hollowed-out bell peppers and fill each one generously with the meat and rice mixture. Press the filling down gently to pack it in.
- Top with Cheese: Sprinkle shredded cheese evenly over the tops of the stuffed peppers for a gooey, delicious finish.
- Bake: Place the stuffed peppers upright in a baking dish and cover the dish with aluminum foil. Bake in the preheated oven for 30 minutes. Then, remove the foil and bake for an additional 10-15 minutes, or until the peppers are tender and the cheese is melted and bubbly.
- Cool and Serve: Once the peppers are done baking, allow them to cool for a few minutes before serving. Enjoy your Spooky Stuffed Peppers warm as a fun and festive addition to your Halloween spread!
Pumpkin Deviled Eggs

Pumpkin Deviled Eggs are a fun and festive twist on the classic deviled eggs, perfect for Halloween celebrations. These delightful bite-sized treats not only look adorable but also bring a savory flavor that everyone will love. With a touch of spice and a hint of creaminess, they will certainly be a hit at your Halloween gathering!
| Ingredients | Quantity |
|---|---|
| Hard-boiled eggs | 6 large |
| Mayonnaise | 3 tablespoons |
| Dijon mustard | 1 teaspoon |
| Olive oil | 1 teaspoon |
| Ground cumin | 1/2 teaspoon |
| Paprika | 1/4 teaspoon |
| Salt | To taste |
| Black olives (sliced) | 6 slices |
| Fresh parsley (for garnish) | A few sprigs |
Cooking Steps:
- Prepare the Eggs: Begin by hard-boiling the eggs. Place the eggs in a saucepan and cover them with cold water. Bring the water to a boil, then cover the pan, remove it from the heat, and let it sit for 12 minutes. Once done, transfer the eggs to an ice bath to cool completely.
- Peel the Eggs: Once the eggs are cool, carefully peel the shells off the eggs under running water. This will help loosen the shells and make peeling easier.
- Cut the Eggs: Slice each hard-boiled egg in half lengthwise. Gently remove the yolks and place them in a mixing bowl. Set the egg whites aside.
- Make the Filling: To the mixing bowl with the yolks, add mayonnaise, Dijon mustard, olive oil, ground cumin, paprika, and salt. Mix with a fork until smooth and creamy. Adjust the seasoning as needed based on your taste.
- Pipe the Filling: Transfer the yolk mixture to a piping bag or a zip-top bag with a corner snipped off. Pipe the mixture back into the hollowed-out egg whites, filling them generously.
- Decorate the Eggs: For a fun pumpkin effect, you can lightly sprinkle paprika on top of the filled eggs. Use a thin slice of black olive as the “stem” of the pumpkin by placing it at the top of each egg.
- Garnish: Finally, add a few sprigs of fresh parsley around the plate or directly on top of the eggs for a splash of color.
- Serve: Arrange the Pumpkin Deviled Eggs on a serving platter, and enjoy your festive Halloween treat!
Witch’s Brew Soup

Witch’s Brew Soup is a delightful and spooky dish perfect for Halloween gatherings. This vibrant green soup is not only delicious but also visually striking, making it a great conversation starter. Packed with vegetables and spices, it is a healthy and budget-friendly option that will warm up your festivities without breaking the bank!
| Ingredients | Quantity |
|---|---|
| Olive oil | 2 tablespoons |
| Onion | 1 medium, chopped |
| Garlic | 2 cloves, minced |
| Celery | 2 stalks, chopped |
| Carrot | 1 large, chopped |
| Vegetable broth | 4 cups |
| Broccoli | 2 cups, chopped |
| Spinach | 2 cups, fresh |
| Peas | 1 cup, frozen |
| Salt | To taste |
| Black pepper | To taste |
| Optional: Sour cream | For garnish |
| Optional: Pumpkin seeds | For garnish |
Cooking Steps:
- Heat the Oil: In a large pot, heat the olive oil over medium heat. Once the oil is hot, add the chopped onion and sauté until it becomes translucent, about 5 minutes.
- Add the Garlic and Vegetables: Stir in the minced garlic, chopped celery, and carrot. Continue to sauté for an additional 5 minutes, stirring occasionally, until the vegetables begin to soften.
- Pour in the Broth: Carefully pour the vegetable broth into the pot, and bring the mixture to a boil.
- Add Broccoli: Once boiling, add the chopped broccoli to the pot. Reduce the heat to low, cover, and simmer for about 10 minutes or until the broccoli is tender.
- Add Spinach and Peas: Stir in the fresh spinach and frozen peas. Let them cook for an additional 5 minutes until the spinach wilts and the peas are heated through.
- Blend the Soup: Using an immersion blender, blend the soup until smooth. If you don’t have an immersion blender, carefully transfer the soup in batches to a countertop blender to blend until velvety.
- Season the Soup: Taste the soup and add salt and black pepper to your liking. Stir well to incorporate the seasoning.
- Serve: Ladle the Witch’s Brew Soup into bowls and garnish with a swirl of sour cream and a sprinkle of pumpkin seeds for an extra special touch.
- Enjoy: Gather around with your guests to enjoy this spooky yet delicious Halloween soup!
Creepy Crawly Cupcakes

Creepy Crawly Cupcakes are a fun and festive dessert that adds an element of spookiness to your Halloween celebrations. These simple chocolate cupcakes topped with green-colored frosting and adorned with gummy worms make for a delightful treat that both kids and adults will enjoy. They’re not only budget-friendly, but also easy to make, ensuring your Halloween party is both sweet and memorable!
| Ingredients | Quantity |
|---|---|
| All-purpose flour | 1 cup |
| Granulated sugar | 1 cup |
| Unsweetened cocoa powder | 1/2 cup |
| Baking powder | 1 teaspoon |
| Baking soda | 1/2 teaspoon |
| Salt | 1/4 teaspoon |
| Eggs | 2 large |
| Milk | 1/2 cup |
| Vegetable oil | 1/2 cup |
| Vanilla extract | 1 teaspoon |
| Green food coloring | 2-3 drops |
| Butter (softened) | 1/2 cup (1 stick) |
| Powdered sugar | 3 cups |
| Gummy worms | For decoration |
Cooking Steps:
- Preheat the Oven: Preheat your oven to 350°F (175°C). Line a standard cupcake pan with paper liners.
- Mix Dry Ingredients: In a large mixing bowl, combine the all-purpose flour, granulated sugar, unsweetened cocoa powder, baking powder, baking soda, and salt. Mix well until all the dry ingredients are evenly combined.
- Combine Wet Ingredients: In a separate bowl, whisk together the eggs, milk, vegetable oil, and vanilla extract until smooth.
- Combine Wet and Dry Mixtures: Pour the wet mixture into the dry ingredients. Stir with a spatula or wooden spoon until just combined. Be careful not to overmix; a few lumps are okay.
- Fill Cupcake Liners: Use a scoop or spoon to fill each cupcake liner about 2/3 full with the batter.
- Bake: Place the cupcake pan in the preheated oven and bake for 18-20 minutes, or until a toothpick inserted in the center comes out clean.
- Cool Cupcakes: Once baked, remove the cupcakes from the oven and allow them to cool in the pan for 5 minutes. Then transfer the cupcakes to a wire rack to cool completely.
- Prepare the Frosting: In a medium mixing bowl, beat the softened butter until creamy. Gradually add the powdered sugar, mixing well. Add a few drops of green food coloring and beat until the frosting is smooth and reaches the desired shade of green.
- Frost the Cupcakes: Once the cupcakes are completely cool, use a spatula or a piping bag to spread or pipe the green frosting on top of each cupcake.
- Add Decorations: Top each frosted cupcake with several gummy worms casually draped over the frosting to create the creepy crawly effect.
- Serve and Enjoy: Arrange your Creepy Crawly Cupcakes on a spooky platter and present them to your guests. Enjoy this sweet and festive treat at your Halloween gathering!
Mummy Hot Dogs

Mummy Hot Dogs are a fun and whimsical Halloween-themed dish that is sure to be a hit at your spooky celebrations. These adorable little “mummies” are made by wrapping hot dogs in crescent roll dough and baking them until golden and crispy. With just a few simple ingredients, they make for a quick and budget-friendly treat that’s perfect for kids and adults alike!
| Ingredients | Quantity |
|---|---|
| Hot dogs | 8 |
| Crescent roll dough | 1 can (8 oz) |
| Mustard or ketchup | For serving |
| Candy eyes (optional) | 16 pieces |
Cooking Steps:
- Preheat the Oven: Preheat your oven to 375°F (190°C). Line a baking sheet with parchment paper or a silicone mat for easy cleanup.
- Prepare the Dough: Open the can of crescent roll dough and unroll it onto a clean surface. Separate the dough into triangles along the perforated edges.
- Cut the Dough: Using a pizza cutter or a knife, cut each triangle of dough into thin strips, about 1/2 inch wide. You will need enough strips to wrap around each hot dog.
- Wrap the Hot Dogs: Take one hot dog and start wrapping it with the strips of dough. Begin at one end, leaving a small space for the ‘face,’ and wrap the dough around the hot dog, overlapping the strips slightly as you go. Repeat this for all hot dogs.
- Bake: Place the wrapped hot dogs on the prepared baking sheet. Bake in the preheated oven for 12-15 minutes, or until the dough is golden brown and cooked through.
- Add Eyes: If you are using candy eyes, carefully remove the baking sheet from the oven once the mummies are baked. While they are still warm, press two candy eyes onto each hot dog to create the mummy face.
- Serve: Transfer the Mummy Hot Dogs to a serving platter. Serve with mustard or ketchup for dipping.
Enjoy these spooky and silly Mummy Hot Dogs as a fun addition to your Halloween festivities!
Goblin Guacamole
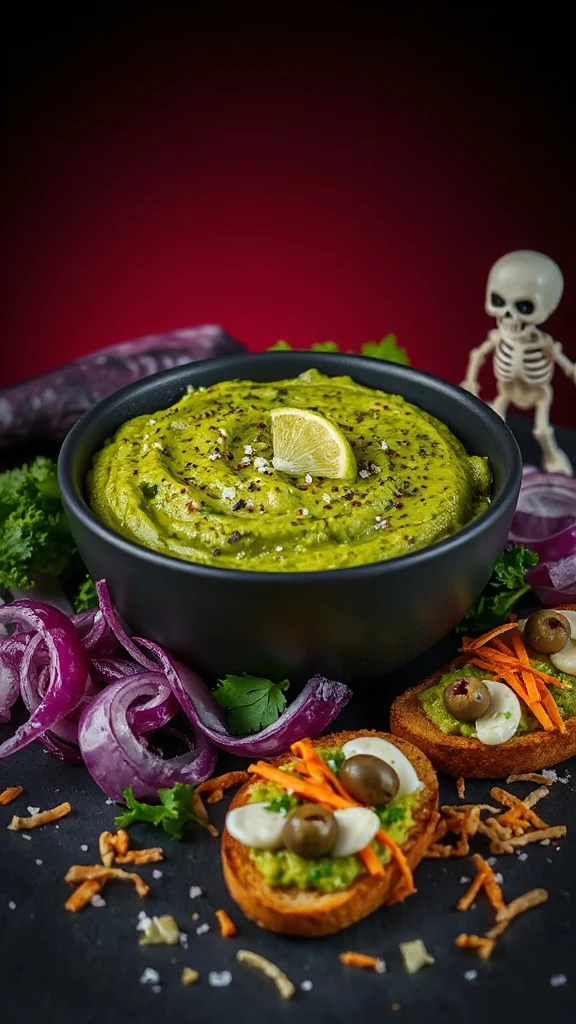
Goblin Guacamole is a lively and spooky twist on the classic avocado dip, perfect for Halloween parties or themed gatherings. This vibrant green guacamole is enhanced with fun and creative toppings that transform it into a festive goblin-inspired dish. Not only is it budget-friendly, but it’s also delicious and easy to whip up, making it a great treat for both kids and adults.
| Ingredients | Quantity |
|---|---|
| Ripe avocados | 2 |
| Lime juice | 2 tablespoons |
| Salt | 1/2 teaspoon |
| Garlic powder | 1/2 teaspoon |
| Diced onions | 1/4 cup |
| Diced tomatoes | 1/2 cup |
| Chopped cilantro | 2 tablespoons |
| Tortilla chips | For serving |
| Olive slices | For topping (optional) |
| Black beans | For topping (optional) |
Cooking Steps:
- Prepare the Avocados: Start by cutting the ripe avocados in half. Remove the pit carefully and scoop the avocado flesh into a mixing bowl.
- Mash the Avocados: Using a fork or a potato masher, mash the avocados to your desired consistency. You can leave it chunky for more texture or mash it until smooth.
- Add Flavor: Squeeze the lime juice over the mashed avocados to add flavor and prevent browning. Then, add the salt and garlic powder. Mix well until all ingredients are incorporated.
- Incorporate Vegetables: Gently fold in the diced onions, diced tomatoes, and chopped cilantro into the avocado mixture. Make sure everything is well combined.
- Create Goblin Features: To give your guacamole a fun goblin look, spread the guacamole onto a serving plate. Use the back of a spoon to create texture and dimples that resemble a goblin’s face.
- Add Toppings: If using, arrange olive slices on top of the guacamole to serve as eyes. You can also scatter some black beans around for extra decoration and to enhance the ‘goblin’ effect.
- Serve: Present the Goblin Guacamole with a generous bowl of tortilla chips for dipping. Enjoy this festive and flavorful dip at your Halloween gathering!
This Goblin Guacamole will surely delight your guests while adding a playful spirit to your Halloween menu!
Eyeball Pasta Salad
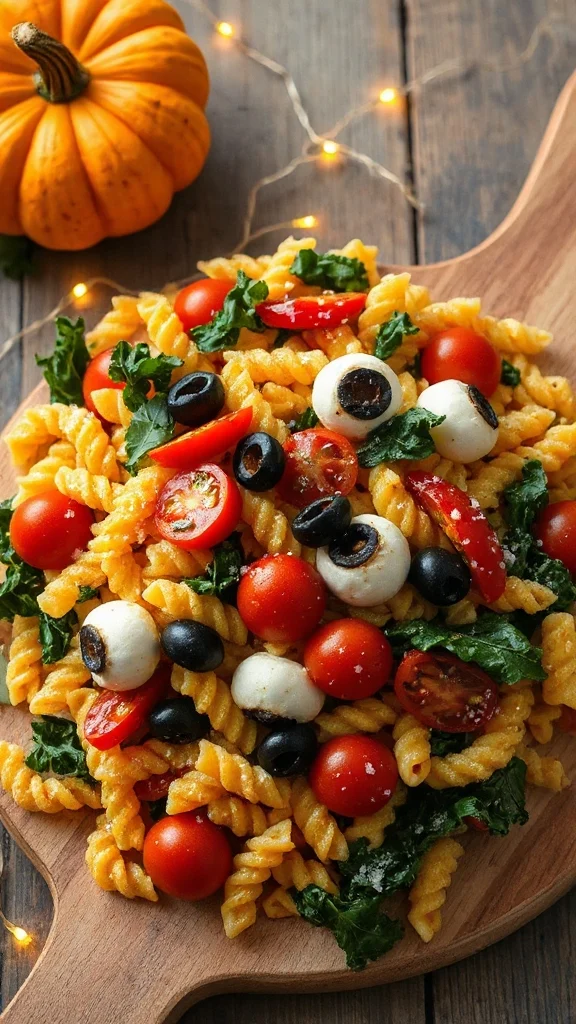
Eyeball Pasta Salad is a fun and spooky twist on a classic pasta salad, perfect for Halloween parties and gatherings. This dish features pasta shaped like eyeballs, combined with a vibrant array of veggies and a delicious dressing that will have your guests intrigued and delighted. It’s not only creepy-crawly in appearance but also budget-friendly and easy to make, making it a great addition to your Halloween menu.
| Ingredients | Quantity |
|---|---|
| Eyeball-shaped pasta | 2 cups |
| Cherry tomatoes | 1 cup |
| Mozzarella balls | 1 cup |
| Black olives | 1/2 cup |
| Cucumber | 1, diced |
| Olive oil | 1/4 cup |
| Red wine vinegar | 2 tablespoons |
| Dried oregano | 1 teaspoon |
| Salt | To taste |
| Black pepper | To taste |
| Fresh basil (optional) | For garnish |
Cooking Steps:
- Cook the Pasta: In a large pot, bring salted water to a boil. Add the eyeball-shaped pasta and cook according to package instructions until al dente. Stir occasionally to prevent sticking. Once cooked, drain the pasta and rinse it under cold water to cool it down.
- Prep the Veggies: While the pasta is cooling, wash and dice the cherry tomatoes, cucumber, and black olives. Halve the cherry tomatoes and mozzarella balls so they resemble eyeballs and can be easily mixed into the salad.
- Mix the Dressing: In a small bowl, combine the olive oil, red wine vinegar, dried oregano, salt, and black pepper. Whisk the dressing until well blended.
- Combine Ingredients: In a large mixing bowl, add the cooled pasta, diced cucumber, halved cherry tomatoes, mozzarella balls, and black olives. Gently toss the ingredients together to combine.
- Add the Dressing: Pour the dressing over the pasta mixture and toss until everything is evenly coated. Taste and adjust seasoning with more salt and pepper, if needed.
- Chill the Salad: Cover the bowl with plastic wrap or a lid and refrigerate the pasta salad for at least 30 minutes to allow the flavors to meld together.
- Serve: Before serving, give the salad a quick toss and garnish with fresh basil if desired. Present the Eyeball Pasta Salad in a spooky bowl to enhance the Halloween theme, and enjoy this ghoulishly delightful dish at your gathering!
This Eyeball Pasta Salad will be a hit at your Halloween festivities, adding a playful twist to your menu!
Haunted Harvest Nachos

Haunted Harvest Nachos are a festive and visually striking dish that brings a spooky twist to the classic nacho platter. Perfect for Halloween gatherings, these nachos feature a medley of seasonal ingredients that not only satisfy your cravings but also enhance the Halloween spirit on your table. With layers of cheesy goodness, veggies, and toppings that look eerily delicious, they are sure to be a hit among guests of all ages.
| Ingredients | Quantity |
|---|---|
| Tortilla chips | 8 cups |
| Shredded cheddar cheese | 2 cups |
| Black beans (canned) | 1 can (15 oz) |
| Pumpkin puree | 1/2 cup |
| Jalapeños, sliced | 1/4 cup |
| Chopped green onions | 1/4 cup |
| Sour cream | 1/2 cup |
| Guacamole | 1/2 cup |
| Pitted black olives | 1/4 cup |
| Cilantro (optional) | For garnish |
| Hot sauce (optional) | For serving |
Cooking Steps:
- Preheat the Oven: Start by preheating your oven to 350°F (175°C). This will guarantee the nachos bake evenly and get that perfectly melted cheese.
- Prepare the Baking Sheet: Line a large baking sheet with parchment paper or lightly grease it. This will make for easy clean-up and prevent the nachos from sticking.
- Layer the Chips: Spread the tortilla chips in an even layer across the baking sheet. Make sure to leave some space between the chips for even cooking.
- Add the Cheese: Sprinkle the shredded cheddar cheese generously over the chips, making sure to cover most of them to get that melty goodness.
- Add the Toppings: Spoon black beans over the nachos, followed by jalapeños, and dollops of pumpkin puree for a fun and unique flavor. Distribute the toppings evenly for a perfect bite every time.
- Bake: Place the baking sheet in the preheated oven and bake for about 10-15 minutes, or until the cheese is completely melted and bubbly. Keep an eye on them to prevent burning.
- Garnish and Serve: Once the nachos are out of the oven, remove them from the oven and let them cool slightly. Top with chopped green onions, pitted black olives, sour cream, guacamole, and cilantro if using. For an added kick, serve hot sauce on the side.
- Present: Arrange the Haunted Harvest Nachos on a spooky platter or serving dish to enhance the Halloween atmosphere, and get ready for everyone to enjoy this festive treat!
These nachos are not only delicious but also bring a playful and creepy touch to your Halloween festivities.
Frankenstein Fruit Skewers
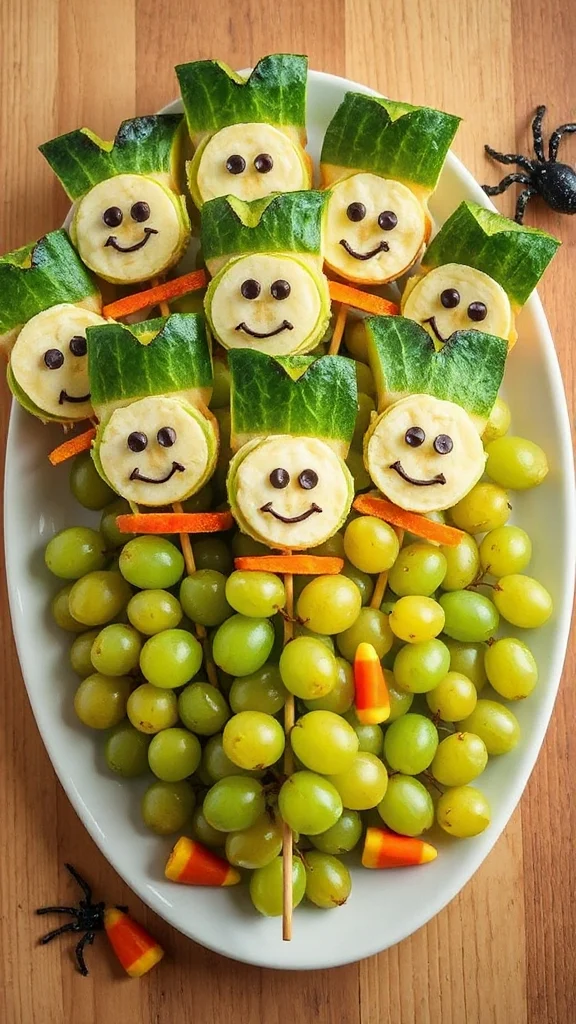
Frankenstein Fruit Skewers are a fun and playful Halloween treat that delights both kids and adults alike. These vibrant and healthy skewers feature an assortment of fruits, artistically arranged to resemble Frankenstein’s monster. They are not only easy to assemble but also add a whimsical and colorful touch to your Halloween festivities, making them an instant hit at any gathering.
| Ingredients | Quantity |
|---|---|
| Green grapes | 1 cup |
| Cantaloupe | 1 small melon |
| Honeydew melon | 1 small melon |
| Banana | 1 large |
| Mini marshmallows | 1 cup |
| Chocolate chips | 1/2 cup |
| Skewers | 8-10 (6-inch or 8-inch) |
| Edible eyes (candy) | |
Scary S’mores Treats

Scary S’mores Treats are a spooky twist on the classic campfire treat, perfect for Halloween gatherings. These gooey, chocolaty bites are not only easy to make but also a hit among kids and adults alike. With a creative presentation, you can transform ordinary s’mores into delightful little monsters that will add a frightful fun to your dessert table.
| Ingredients | Quantity |
|---|---|
| Graham crackers | 12 sheets |
| Marshmallows | 2 cups |
| Chocolate bars | 2 cups (or equivalent chocolate chips) |
| Red icing gel | 1 tube |
| Edible candy eyes | 1 pack |
| Dark chocolate chips | 1 cup (for melting) |
Directions:
- Prepare Your Ingredients: Start by gathering all your ingredients and preheat your oven to 350°F (175°C). Line a baking sheet with parchment paper for easy cleanup.
- Melt the Chocolate: In a microwave-safe bowl, add the dark chocolate chips. Microwave in 30-second increments, stirring between each, until the chocolate is fully melted and smooth. Be careful not to overheat.
- Assemble the S’mores: On the baking sheet, lay out 6 sheets of graham crackers. Place a layer of marshmallows on top of each graham cracker. Then, break the chocolate bars into squares and place one square on top of the marshmallows.
- Bake: Once assembled, place the baking sheet in the oven and bake for about 5-7 minutes, or until the marshmallows are puffed and golden brown. Keep a close eye on them to prevent burning.
- Add the Top Layer: While still warm, remove the baking sheet from the oven. Quickly place another graham cracker on top of each stack to create a sandwich effect, pressing down gently.
- Decorate: Allow the s’mores to cool for a few minutes. Once they are cool enough to handle, use the red icing gel to create “blood” drips on the sides of the s’mores. Stick edible candy eyes onto the top of the s’mores, making sure to add them while the chocolate is still slightly tacky so they stick well.
- Cut and Serve: Cut each s’more into smaller squares or serve whole. Arrange them creatively on a plate to showcase their spooky features. Enjoy your Scary S’mores Treats at your Halloween celebration!
Chilling Cheese Balls

Chilling Cheese Balls are a fun and festive appetizer that make the perfect addition to any Halloween gathering. Shaped like creepy little creatures or jack-o’-lanterns, these cheese balls are not only delicious but also easy to customize for maximum spookiness. Whether you’re throwing a party or simply celebrating the season, these chilling cheese balls will be a hit with guests of all ages!
| Ingredients | Quantity |
|---|---|
| Cream cheese | 8 oz |
| Shredded cheddar cheese | 1 cup |
| Garlic powder | 1 tsp |
| Onion powder | 1 tsp |
| Salt | 1/2 tsp |
| Black olives | 1 can |
| Chopped fresh herbs (like parsley) | 1/4 cup |
| Mini pretzels | 1 cup |
| Food coloring (optional, for decoration) | as needed |
Directions:
- Prepare Your Base: In a mixing bowl, combine the cream cheese, shredded cheddar cheese, garlic powder, onion powder, and salt. Use a fork or a hand mixer to blend until the mixture is smooth and well-combined.
- Shape the Cheese Balls: With clean hands, take small portions of the cheese mixture and roll them into balls, about 1-2 inches in diameter. You can decide on different sizes for more variety.
- Set the Chilling Station: Once shaped, place the cheese balls on a plate or baking sheet lined with parchment paper. Put the plate in the refrigerator for about 30 minutes to let them firm up.
- Add Decorations: After chilling, remove the cheese balls from the fridge. If desired, divide some of the cheese balls into smaller ones and use food coloring to tint the cheese balls an orange hue for a pumpkin effect.
- Create Faces and Features: For eyes and mouths, slice black olives into small pieces. Press the pieces gently into the cheese balls to create spooky faces or use mini pretzels to make antennae for a fun bug look.
- Garnish: For an extra touch, roll the cheese balls in chopped fresh herbs to give them a garden-like appearance or sprinkle additional shredded cheese on top.
- Serve: Arrange the chilling cheese balls on a festive platter. They can be served with an assortment of crackers, vegetables, or pretzels for dipping. Enjoy these spooky, cheesy delights at your Halloween party!
Spider Web Dip

Spider Web Dip is a delicious and visually striking appetizer perfect for Halloween gatherings. This layered dip combines creamy refried beans, zesty sour cream, and fresh toppings, all topped with an intricate spider web design created from sour cream. It’s not only packed with flavor but also adds a fun and spooky element to your festive table.
| Ingredients | Quantity |
|---|---|
| Refried beans | 1 can (16 oz) |
| Sour cream | 1 cup |
| Taco seasoning | 1 packet (1 oz) |
| Shredded cheddar cheese | 1 cup |
| Diced tomatoes (drained) | 1 cup |
| Sliced black olives | 1/2 cup |
| Chopped green onions | 1/4 cup |
| Fresh cilantro (optional) | For garnish |
| Extra sour cream (for web) | 1/2 cup |
Directions:
- Prepare the Bean Base: In a mixing bowl, take the refried beans and add the taco seasoning. Mix well until the seasoning is fully incorporated into the beans.
- Layer the Dip: In a shallow serving dish (like a pie plate or a rectangular dish), spread the seasoned refried beans in an even layer across the bottom.
- Add Sour Cream Layer: Carefully spread the sour cream over the refried beans, creating a smooth second layer. It helps to use a spatula for even spreading.
- Top with Cheese and Vegetables: Evenly sprinkle the shredded cheddar cheese over the sour cream layer. Then add the diced tomatoes, followed by the sliced black olives and chopped green onions.
- Create the Spider Web: In a small bowl, take the extra sour cream and place it in a piping bag or a zip-top bag with a corner snipped off. Start from the center of your dip, and pipe a spiral outward towards the edge of the dish. Then, use a knife or toothpick to gently drag lines from the center to the edge of the dish, creating the classic spider web look.
- Garnish: If desired, sprinkle some fresh cilantro over the top for an extra pop of color and flavor.
- Serve: Serve the Spider Web Dip with tortilla chips, pita chips, or fresh vegetable sticks for dipping. Enjoy this spooky and creamy delight at your Halloween celebration!
Tasty Tombstone Brownies
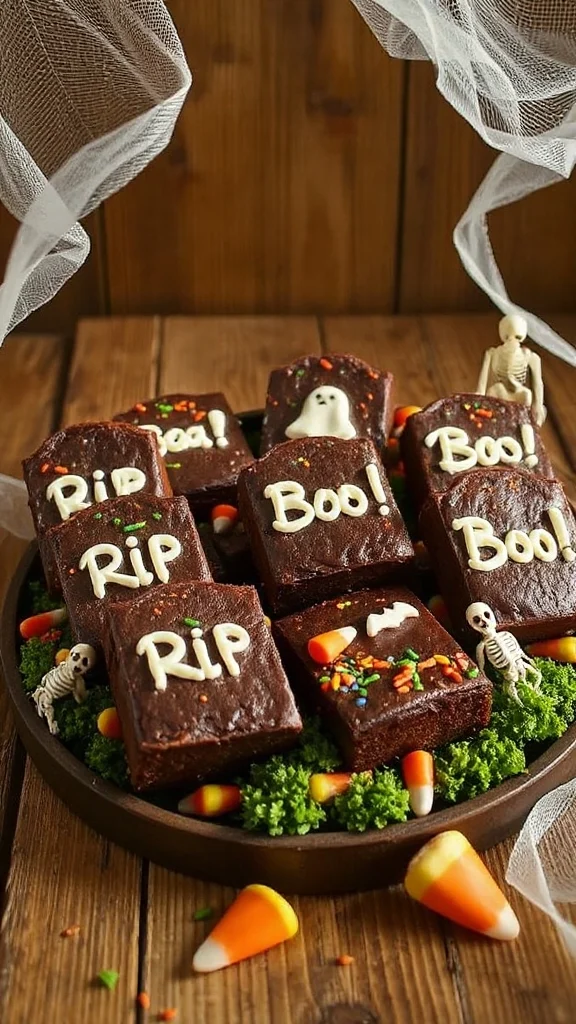
Tasty Tombstone Brownies are a fun and festive dessert to bring a spooky touch to your Halloween celebrations. These fudgy brownies are topped with a delightful cream cheese frosting and decorated to resemble eerie tombstones, making them an eye-catching treat that everyone will enjoy. With their rich chocolate flavor and haunting appearance, they are sure to be a hit at any Halloween gathering.
| Ingredients | Quantity |
|---|---|
| Unsweetened cocoa powder | 1/2 cup |
| All-purpose flour | 1 cup |
| Granulated sugar | 1 cup |
| Brown sugar | 1/2 cup |
| Baking powder | 1/4 teaspoon |
| Salt | 1/4 teaspoon |
| Eggs | 2 large |
| Vanilla extract | 1 teaspoon |
| Unsalted butter (melted) | 1/2 cup |
| Cream cheese (softened) | 8 oz |
| Powdered sugar | 2 cups |
| Milk | 2-3 tablespoons |
| Black decorating gel | For decoration |
| Edible grave marker candies (optional) | For decoration |
Directions:
- Preheat the Oven: Begin by preheating your oven to 350°F (175°C). Grease a 9×9 inch baking pan or line it with parchment paper for easy removal of the brownies.
- Mix Dry Ingredients: In a medium mixing bowl, whisk together the cocoa powder, flour, baking powder, salt, granulated sugar, and brown sugar until thoroughly combined.
- Combine Wet Ingredients: In another large mixing bowl, beat the eggs and vanilla extract until well combined. Then, add the melted butter and mix until smooth.
- Combine Mixtures: Gradually add the dry ingredients into the wet mixture, stirring gently until the batter is just combined. Be careful not to overmix; it’s okay if there are a few lumps.
- Bake the Brownies: Pour the brownie batter into the prepared baking pan and spread it evenly. Bake in the preheated oven for 20-25 minutes or until a toothpick inserted in the center comes out with a few moist crumbs (not wet batter).
- Cool Brownies: Once baked, remove the brownies from the oven and let them cool in the pan for about 10-15 minutes. Then, transfer the brownies onto a wire rack to cool completely.
- Prepare Frosting: While the brownies are cooling, in a large mixing bowl, combine softened cream cheese and powdered sugar. Mix well until smooth and creamy. Add milk as needed to achieve a spreadable consistency.
- Frost the Brownies: Once the brownies are completely cool, spread the cream cheese frosting evenly over the top.
- Create Tombstones: Use the black decorating gel to pipe grave marker shapes and letters onto the frosted brownies to simulate tombstones. You can also place edible grave marker candies on the brownies for added flair.
- Cut and Serve: Once decorated, cut the brownies into squares or rectangles to resemble tombstones. Serve them on a spooky-themed platter and enjoy your Tasty Tombstone Brownies at your Halloween festivities!
Blood-Red Punch

Blood-Red Punch is a thrilling and invigorating beverage perfect for Halloween parties. This vibrant drink combines fruit juices, soda, and a splash of grenadine to create a deliciously spooky concoction that will delight ghouls and goblins of all ages. Its striking red hue and fizzy texture make it an ideal choice to serve alongside your favorite Halloween treats.
| Ingredients | Quantity |
|---|---|
| Cranberry juice | 4 cups |
| Orange juice | 2 cups |
| Lemon-lime soda | 2 cups |
| Grenadine syrup | 1/2 cup |
| Fresh fruit (optional: oranges, lemons, limes) | For garnish |
| Ice | As needed |
Directions:
- Combine Juices: In a large pitcher, pour in the cranberry juice and orange juice. Stir them together until well combined to create a flavorful base for your punch.
- Add Grenadine: Slowly add the grenadine syrup to the juice mixture. As you pour, watch the deep red color swirl through the juices, creating a visually striking effect.
- Incorporate Soda: Gently pour in the lemon-lime soda to the pitcher. Use a spoon to softly stir the mixture; this will help retain the fizz without flattening the punch.
- Prepare for Serving: Fill a punch bowl or a large serving pitcher with ice. This will keep your punch cold and invigorating as it’s served.
- Garnish and Serve: If desired, slice fresh fruit such as oranges, lemons, or limes, and add them to the punch for a decorative touch. Pour the Blood-Red Punch into cups or glasses and serve immediately to your guests, ensuring they enjoy the spooky vibe of the night!