
Ghostly Cauliflower Bites
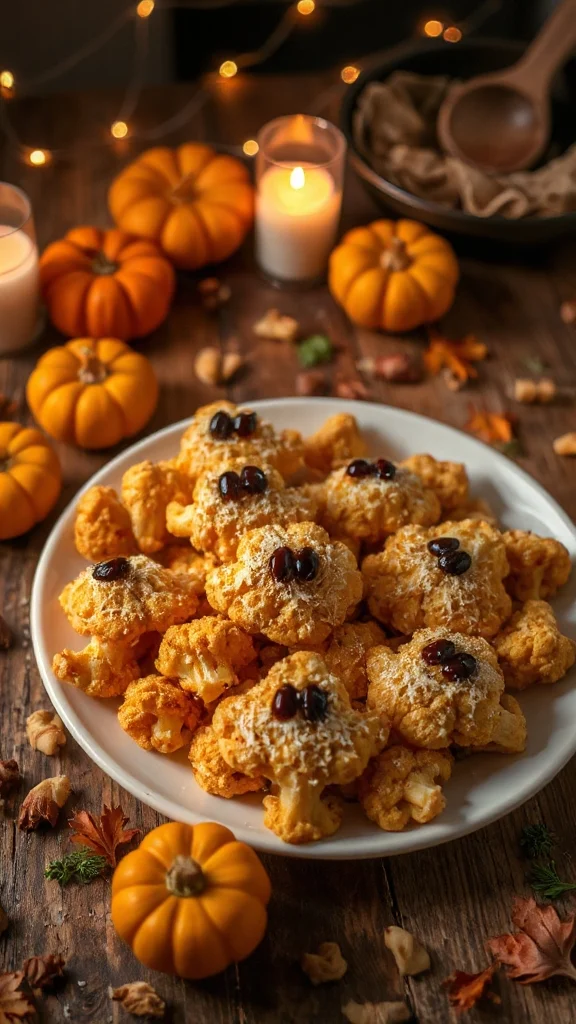
Ghostly Cauliflower Bites are a fun and spooky snack perfect for Halloween gatherings. These crispy, air-fried cauliflower florets are seasoned to perfection and resemble little ghostly figures that will delight both kids and adults. With just a handful of ingredients, you can whip up this healthy and delicious treat that adds a festive touch to your Halloween festivities.
| Ingredients | Quantity |
|---|---|
| Cauliflower florets | 1 medium head |
| Olive oil | 2 tablespoons |
| Garlic powder | 1 teaspoon |
| Onion powder | 1 teaspoon |
| Salt | ½ teaspoon |
| Black pepper | ¼ teaspoon |
| Parmesan cheese (optional) | ¼ cup |
Cooking Steps:
- Prepare the Cauliflower: Begin by removing the leaves and stem from the cauliflower head. Cut the cauliflower into small florets, approximately 1 to 2 inches in size, guaranteeing they are uniform for even cooking.
- Preheat the Air Fryer: Before seasoning the cauliflower, preheat your air fryer to 400°F (200°C) for about 5 minutes. This helps achieve a crispy texture.
- Season the Cauliflower: In a large mixing bowl, add the cauliflower florets. Drizzle the olive oil over the florets and sprinkle the garlic powder, onion powder, salt, and pepper. If you’d like to add an extra layer of flavor, mix in the Parmesan cheese. Toss everything together until the cauliflower is well coated with the oil and seasonings.
- Air Fry the Cauliflower: Place the seasoned cauliflower florets in the air fryer basket in a single layer, guaranteeing they are not overcrowded. You may need to air fry in batches depending on the size of your air fryer. Cook for 12-15 minutes, shaking the basket halfway through the cooking time to guarantee even crispiness.
- Check for Doneness: Once the cauliflower bites are golden brown and crispy, check for doneness. They should be tender on the inside and crunchy on the outside. If they need a little more time, continue air frying in 2-minute increments until you reach the desired texture.
- Serve: Once done, remove the cauliflower bites from the air fryer and allow them to cool for a minute. Arrange them on a serving platter and watch as they resemble little ghostly creatures! You can serve them with your favorite dipping sauce on the side for added enjoyment.
Enjoy these Ghostly Cauliflower Bites as a healthy, festive treat that will scare away hunger!
Spooky Sweet Potato Fries
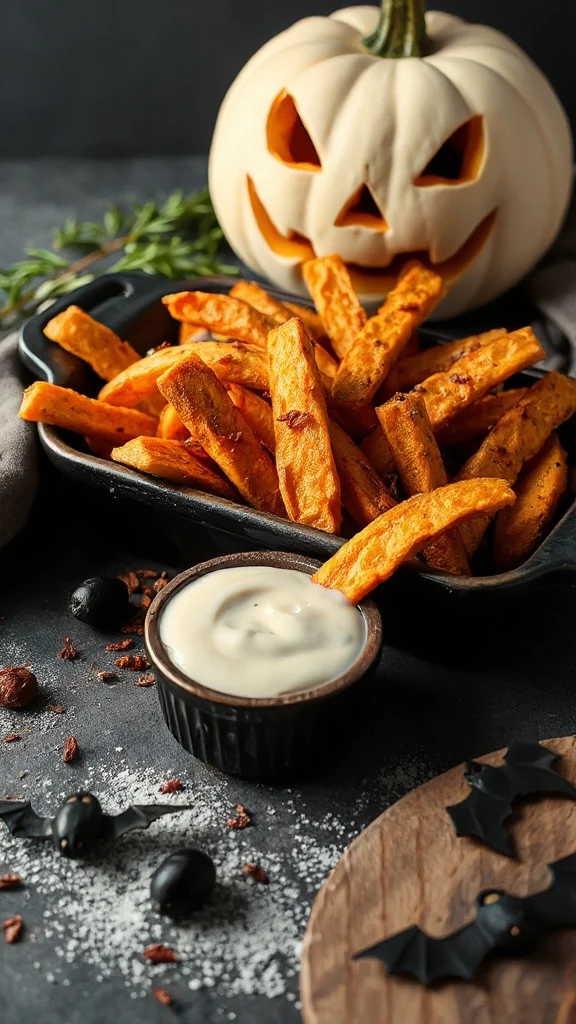
Spooky Sweet Potato Fries are a delightful and healthier alternative to traditional fries, perfect for adding a splash of color and a touch of Halloween fun to your snack table. These sweet potato fries are crispy on the outside, tender on the inside, and can be easily made in your air fryer for a guilt-free treat. Seasoned with a hint of spice and sweetness, they’re a fantastic choice for both kids and adults alike.
| Ingredients | Quantity |
|---|---|
| Sweet potatoes | 2 medium-sized |
| Olive oil | 2 tablespoons |
| Salt | ½ teaspoon |
| Black pepper | ¼ teaspoon |
| Paprika | 1 teaspoon |
| Garlic powder | ½ teaspoon |
| Cinnamon | ¼ teaspoon (optional) |
Cooking Steps:
- Prepare the Sweet Potatoes: Begin by washing and peeling the sweet potatoes. Cut them into thin strips, about 1/4 inch thick, to guarantee even cooking and crispiness.
- Preheat the Air Fryer: Preheat your air fryer to 400°F (200°C) for about 5 minutes. This step is essential for achieving that perfect crispy texture.
- Season the Sweet Potatoes: In a large mixing bowl, add the sweet potato fries. Drizzle the olive oil over the fries, then sprinkle with salt, black pepper, paprika, garlic powder, and cinnamon (if using). Toss everything until the sweet potato fries are evenly coated with the oil and seasonings.
- Air Fry the Sweet Potatoes: Place the seasoned sweet potato fries in the air fryer basket in a single layer to allow for proper air circulation. You may need to cook them in batches depending on the size of your air fryer. Cook for 15-20 minutes, shaking the basket halfway through to guarantee even cooking.
- Check for Doneness: After cooking, check the fries for doneness. They should be golden brown and crispy on the outside. If they require additional crisping, air fry for another 2-3 minutes.
- Serve: Once cooked to your liking, remove the sweet potato fries from the air fryer and let them cool slightly. Arrange them on a serving platter, and watch as they add a colorful pop to your Halloween spread! Serve with your favorite dipping sauces like ketchup, aioli, or a spicy sriracha mayo for an extra treat.
Enjoy these Spooky Sweet Potato Fries, and let their flavor and fun appearance steal the show at your Halloween festivities!
Crispy Pumpkin Fries

Crispy Pumpkin Fries are a fun and festive snack that beautifully captures the essence of fall and Halloween. These fries are not only delicious but also packed with nutrients, making them a great alternative to traditional fries. Air-frying enhances their natural sweetness and provides a satisfying crunch, perfect for munching at any Halloween gathering.
| Ingredients | Quantity |
|---|---|
| Fresh pumpkin | 1 medium-sized |
| Olive oil | 2 tablespoons |
| Salt | ½ teaspoon |
| Black pepper | ¼ teaspoon |
| Garlic powder | ½ teaspoon |
| Italian seasoning | 1 teaspoon |
| Parmesan cheese (optional) | ¼ cup grated |
Cooking Steps:
- Prepare the Pumpkin: Start by washing the pumpkin thoroughly. Cut it in half, scoop out the seeds and stringy insides, and then slice it into thin fries, about 1/4 inch thick. For better texture, try to keep the fries uniform in size.
- Preheat the Air Fryer: Preheat your air fryer to 400°F (200°C) for about 5 minutes. This helps guarantee that your fries cook evenly and become crispy.
- Season the Pumpkin Fries: In a large mixing bowl, add the cut pumpkin fries. Drizzle the olive oil over the fries, then sprinkle with salt, black pepper, garlic powder, and Italian seasoning. Toss gently until the fries are evenly coated in oil and seasonings.
- Air Fry the Pumpkin Fries: Place the seasoned pumpkin fries in the air fryer basket in a single layer. Depending on the size of your air fryer, you may need to cook them in batches. Air fry for 12-15 minutes, shaking the basket halfway through to promote even cooking and crispiness.
- Check for Doneness: After 12 minutes, check the fries. They should be golden brown and crispy on the edges. If they need more time, air fry for an additional 2-3 minutes, keeping a close eye to avoid burning.
- Add Cheese (Optional): If using Parmesan cheese, sprinkle it over the fries in the last 2-3 minutes of cooking to allow it to melt and adhere to the fries.
- Serve: Once the fries are done, remove them from the air fryer and let cool for a minute. Serve them in a bowl or on a platter, perfect for dipping in your favorite sauces like ranch, marinara, or a spicy aioli.
Enjoy these Crispy Pumpkin Fries as a delightful treat for your Halloween celebration!
Mummy Meatballs
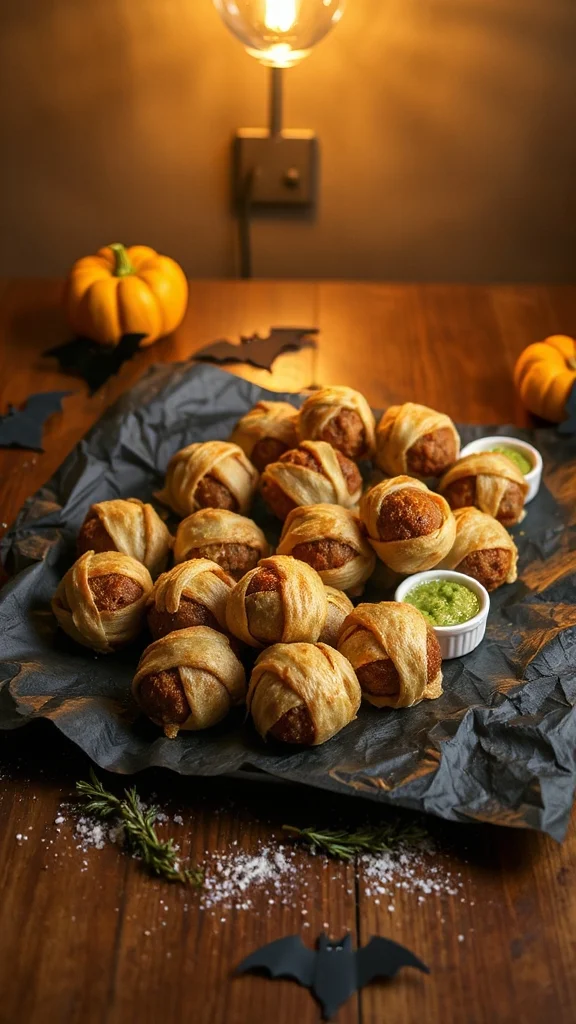
Mummy Meatballs are a spooky and fun appetizer that’s perfect for Halloween gatherings. These meatballs are wrapped in crescent dough to resemble mummies, giving them a festive appearance while being incredibly delicious. They can be served with a side of marinara sauce for dipping, making them an enjoyable treat for guests of all ages.
| Ingredients | Quantity |
|---|---|
| Ground beef (or turkey) | 1 pound |
| Bread crumbs | 1/2 cup |
| Parmesan cheese | 1/4 cup |
| Egg | 1 large |
| Garlic powder | 1 teaspoon |
| Onion powder | 1 teaspoon |
| Salt | 1 teaspoon |
| Black pepper | 1/2 teaspoon |
| Crescent roll dough | 1 tube (8 oz) |
| Black olives | 6 (for eyes) |
| Marinara sauce | For dipping (optional) |
Cooking Steps:
- Preheat the Oven: Begin by preheating your oven to 375°F (190°C).
- Make the Meatball Mixture: In a large mixing bowl, combine the ground beef (or turkey), bread crumbs, Parmesan cheese, egg, garlic powder, onion powder, salt, and black pepper. Mix all the ingredients together thoroughly until they are well combined.
- Form the Meatballs: Once the mixture is ready, use your hands to form small meatballs, about the size of a golf ball. Place them on a baking sheet lined with parchment paper.
- Prepare the Crescent Dough: Open the tube of crescent roll dough and unroll it on a clean surface. Separate the dough into individual triangles.
- Wrap the Meatballs: Take small strips of the crescent dough and wrap them around each meatball to resemble mummy bandages. Leave some space for the “eyes,” and create an overlapping effect for a more authentic look.
- Add the Eyes: Once the meatballs are wrapped, place a small piece of black olive on each meatball to act as the eyes.
- Bake the Mummy Meatballs: Place the baking sheet in the preheated oven and bake the meatballs for 15-20 minutes, or until the dough is golden brown and the meatballs are cooked through (the internal temperature should reach 160°F or 70°C).
- Serve: Remove the mummy meatballs from the oven and let them cool for a couple of minutes. Serve them warm on a platter with marinara sauce on the side for dipping.
Enjoy these Mummy Meatballs as a delightful Halloween snack that are sure to impress your guests!
Witch’s Broomstick Snacks
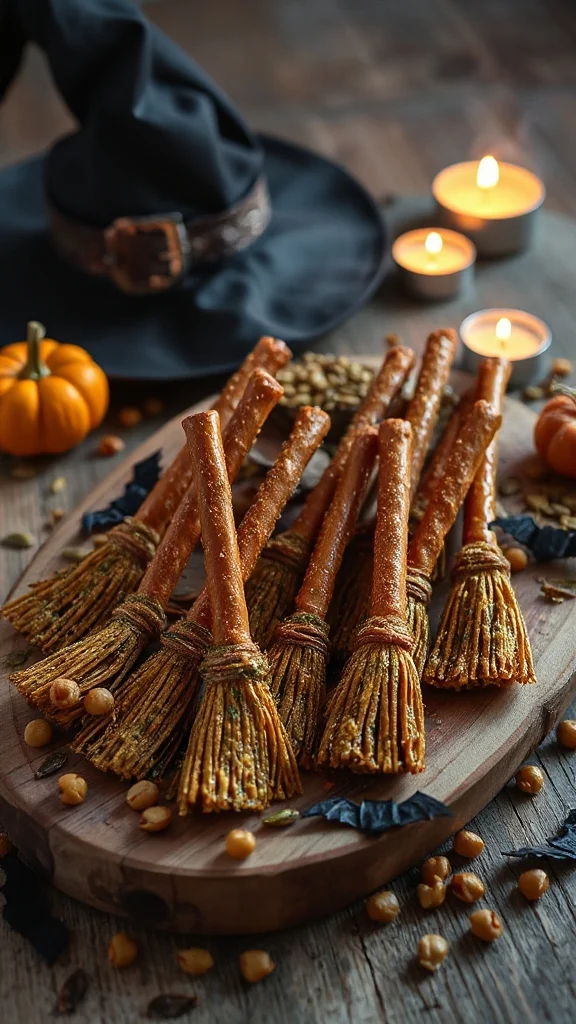
Witch’s Broomstick Snacks are a fun and creative Halloween treat that’s perfect for any spooky gathering. These bite-sized snacks are made with pretzel sticks and cheese, making them both simple to prepare and delightful to eat. Kids and adults alike will love these whimsical broomsticks that add a festive touch to your Halloween festivities.
| Ingredients | Quantity |
|---|---|
| String cheese | 8 sticks |
| Pretzel sticks | 8 sticks |
| Fresh parsley (or chives) | 8 sprigs |
| Optional: cheese dip | For serving (optional) |
Cooking Steps:
- Prepare the String Cheese: Begin by unwrapping each string cheese stick and cutting them in half to create two shorter pieces. Depending on the size of your pretzel sticks, you may leave them as is or cut them down further to match.
- Attach the Broomsticks: Take one half of the string cheese and press it firmly onto one end of a pretzel stick. This cheese will represent the “bristles” of the broomstick.
- Add the Broom Handle: After attaching the cheese, take another pretzel stick and insert it into the other end of the string cheese, making sure it is securely fastened. This will create the illusion of a broomstick.
- Garnish with Parsley: To give your broomsticks a more festive appearance, take a small sprig of fresh parsley or chives and tie it around the string cheese where it meets the pretzel stick. This adds a touch of color and resembles the binding of a broom.
- Repeat for More Broomsticks: Continue the process with the remaining string cheese, pretzel sticks, and parsley until you have completed all of your Witch’s Broomstick Snacks.
- Serve: Arrange the finished broomsticks on a platter for serving. If desired, provide a side of cheese dip for extra flavor and fun.
Enjoy these Witch’s Broomstick Snacks as a perfect Halloween treat that is sure to thrill your guests and make your celebration a little more magical!
Batty Stuffed Peppers

Batty Stuffed Peppers are a fun and adorable Halloween snack that combines delicious flavors with a spooky twist. These adorable stuffed bell peppers are shaped like bats and filled with a tasty mixture of ground meat and rice, making them a hearty and festive addition to your Halloween festivities. Perfect for both kids and adults, these batty snacks will be the highlight of your Halloween gathering!
| Ingredients | Quantity |
|---|---|
| Bell peppers (black or purple) | 4 large peppers |
| Ground beef or turkey | 1 pound |
| Cooked rice | 1 cup |
| Onion (finely chopped) | 1 small onion |
| Garlic (minced) | 2 cloves |
| Taco seasoning | 1 packet |
| Shredded cheese (optional) | 1 cup |
| Olive oil | 1 tablespoon |
| Salt | To taste |
| Black olives (for decoration) | 8 slices |
Cooking Steps:
- Preheat the Oven: Begin by preheating your oven to 375°F (190°C). This guarantees that your Batty Stuffed Peppers will cook evenly.
- Prepare the Bell Peppers: While the oven is heating, wash the bell peppers. Slice the tops off and carefully remove the seeds and membranes inside. You can cut wing shapes from the tops you removed if desired, but this is optional.
- Cook the Filling: In a large skillet, heat the olive oil over medium heat. Add the chopped onion and minced garlic, sautéing them until the onion becomes translucent, about 3-4 minutes. Then, add the ground beef or turkey to the skillet, cooking until it’s browned. Drain any excess fat.
- Mix in Rice and Seasoning: Once the meat is cooked, stir in the cooked rice and taco seasoning. Mix thoroughly and allow the filling to warm for an additional 2-3 minutes. Season with salt to taste.
- Stuff the Peppers: Carefully fill each bell pepper with the meat and rice mixture, pressing down gently to pack the filling in. If desired, top each filled pepper generously with shredded cheese.
- Arrange and Bake: Place the stuffed peppers upright in a baking dish. If you have cut wings from the tops, insert them into the filling to resemble bat wings. Pour a small amount of water into the bottom of the baking dish to help steam the peppers as they bake. Cover the dish with aluminum foil.
- Bake: Place the baking dish in the preheated oven and bake for about 25-30 minutes. After this time, remove the foil and let them bake for an additional 10 minutes, until the peppers are tender and cheese is bubbly.
- Decorate with Olives: After removing the peppers from the oven, allow them to cool slightly. Place a slice of black olive on each stuffed pepper to represent bat eyes.
- Serve: Arrange the Batty Stuffed Peppers on a serving platter and enjoy this spooky snack with family and friends!
These delightful Batty Stuffed Peppers are sure to be a hit at your Halloween celebrations, combining delicious taste with a fun, spooky presentation!
Creepy Chocolate-Covered Strawberries

Creepy Chocolate-Covered Strawberries are a spooky yet delicious Halloween treat that combines the sweetness of fresh strawberries with the indulgence of rich chocolate. Dressed up with a few creative touches, these creepy snacks are perfect for any Halloween gathering, making them an eye-catching and delightful dessert that both kids and adults will love.
| Ingredients | Quantity |
|---|---|
| Fresh strawberries | 1 pound |
| Semi-sweet chocolate chips | 1 cup |
| White chocolate chips | 1/2 cup |
| Black or dark food coloring | A few drops |
| Edible eyes (for decoration) | 1 package |
| Parchment paper | For lining baking tray |
Cooking Steps:
- Prepare the Strawberries: Rinse the strawberries under cold water and dry them thoroughly with paper towels. Make sure they are completely dry to guarantee the chocolate adheres well.
- Melt the Semi-Sweet Chocolate: In a microwave-safe bowl, add the semi-sweet chocolate chips. Microwave in 30-second intervals, stirring after each interval until fully melted and smooth.
- Dip the Strawberries: Hold a strawberry by the stem and dip it into the melted semi-sweet chocolate, fully covering it. Allow any excess chocolate to drip off before placing it upright on a baking tray lined with parchment paper.
- Create Creepy Faces: While the semi-sweet chocolate is still wet, use edible eyes to create spooky faces on the strawberries. Be creative; you can make different expressions!
- Melt the White Chocolate: In another microwave-safe bowl, melt the white chocolate chips using the same method as before. If you want to create a more frightening look, add a few drops of black or dark food coloring to the melted white chocolate and mix well.
- Drizzle with White Chocolate: Once the white chocolate is melted and smooth, use a fork or a piping bag to drizzle the mixture over the chocolate-covered strawberries, adding to their creepy appearance.
- Chill: Place the decorated strawberries in the refrigerator for about 30 minutes, or until the chocolate hardens completely.
- Serve: Once the chocolate has set, arrange your Creepy Chocolate-Covered Strawberries on a serving platter and enjoy!