As an Amazon Associate I earn from qualifying purchases.
Editorial Policy | Disclosure Policy
Spooky Stuffed Mushrooms
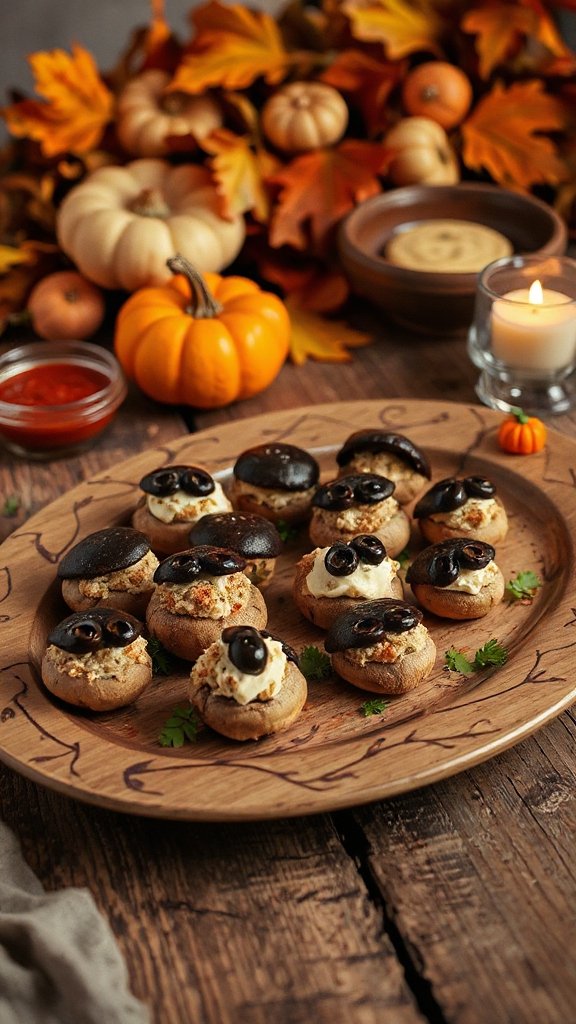
Spooky Stuffed Mushrooms are a fun and festive appetizer perfect for Halloween gatherings. These bite-sized treats are not only delicious but also visually appealing, making them a great addition to your spooky spread. The earthy flavor of the mushrooms combined with a creamy, seasoned filling creates a delightful contrast that everyone will love.
| Ingredients | Quantity |
|---|---|
| Large mushrooms | 16-20 mushrooms |
| Cream cheese | 8 oz |
| Garlic | 2 cloves, minced |
| Fresh parsley | 2 tbsp, chopped |
| Grated Parmesan cheese | 1/4 cup |
| Italian seasoning | 1 tsp |
| Salt | 1/2 tsp |
| Black pepper | 1/4 tsp |
| Olive oil | 1 tbsp |
| Breadcrumbs | 1/4 cup |
Cooking Steps:
- Preheat the Oven: Preheat your oven to 375°F (190°C).
- Prepare the Mushrooms: Clean the mushrooms with a damp paper towel to remove any dirt. Carefully remove the stems from the mushrooms and set the caps aside. Finely chop the stems and keep them for the stuffing.
- Sauté the Filling: Heat olive oil in a pan over medium heat. Add the chopped mushroom stems and minced garlic. Sauté for about 3-4 minutes until the mixture is soft and fragrant.
- Mix the Filling: In a mixing bowl, combine the sautéed mushroom stems and garlic with cream cheese, grated Parmesan, chopped parsley, Italian seasoning, salt, and black pepper. Mix until well combined.
- Stuff the Mushroom Caps: Using a small spoon or a piping bag, carefully fill each mushroom cap with the cheese mixture, pressing gently to guarantee they are well-stuffed.
- Top with Breadcrumbs: Sprinkle a bit of breadcrumbs on top of each stuffed mushroom for added texture and crunch.
- Bake the Mushrooms: Place the prepared stuffed mushrooms on a baking sheet lined with parchment paper. Bake in the preheated oven for 20-25 minutes, until the mushrooms are tender and the tops are golden brown.
- Cool and Serve: Allow the mushrooms to cool for a few minutes before serving. Arrange them on a platter and enjoy your Spooky Stuffed Mushrooms as a delightful Halloween treat!
Mummy-Wrapped Sausages

Mummy-Wrapped Sausages are a playful and easy-to-make appetizer that will delight your guests at any Halloween party. These little treats resemble mummies, with flaky pastry “bandages” wrapping around savory sausages. They’re fun to assemble, delicious to eat, and are certain to be a hit at your spooky gathering!
| Ingredients | Quantity |
|---|---|
| Cocktail sausages | 1 package (about 10-12 sausages) |
| Refrigerated crescent roll dough | 1 can (8 oz) |
| Mustard or ketchup (for eyes) | As needed |
| Optional: Italian seasoning or garlic powder | To taste |
Cooking Steps:
- Preheat the Oven: Start by preheating your oven to 375°F (190°C). This guarantees that the pastry gets nicely cooked and golden brown.
- Prepare the Sausages: Open the package of cocktail sausages and set them aside. If you prefer, you can lightly pat them dry with a paper towel to make sure the dough sticks well.
- Roll Out the Dough: Open the can of crescent roll dough and unroll it onto a clean surface. Gently press the perforations in the dough to seal them, creating one flat sheet.
- Cut the Dough: Using a pizza cutter or knife, slice the dough into thin strips, about ½ inch wide. This will serve as the “bandages” for your mummies.
- Wrap the Sausages: Take one cocktail sausage and start wrapping it with the dough strips, leaving a gap at the top for the “eyes.” Overlap the strips as you wrap to give the appearance of mummy bandages. Repeat this for all the sausages.
- Bake the Mummies: Place the wrapped sausages on a baking sheet lined with parchment paper. Make sure to space them out so they don’t touch while baking. Then, pop them into the preheated oven and bake for 12-15 minutes, or until the dough is golden brown.
- Add the Eyes: Once the mummies are baked, remove them from the oven and let them cool slightly. Using a tiny dot of mustard or ketchup, add “eyes” to each sausage by placing a small dollop on the exposed part of the sausage at the top.
- Serve and Enjoy: Arrange your Mummy-Wrapped Sausages on a serving platter and enjoy them warm. They’re the perfect spooky snack for your Halloween festivities!
Pumpkin Deviled Eggs
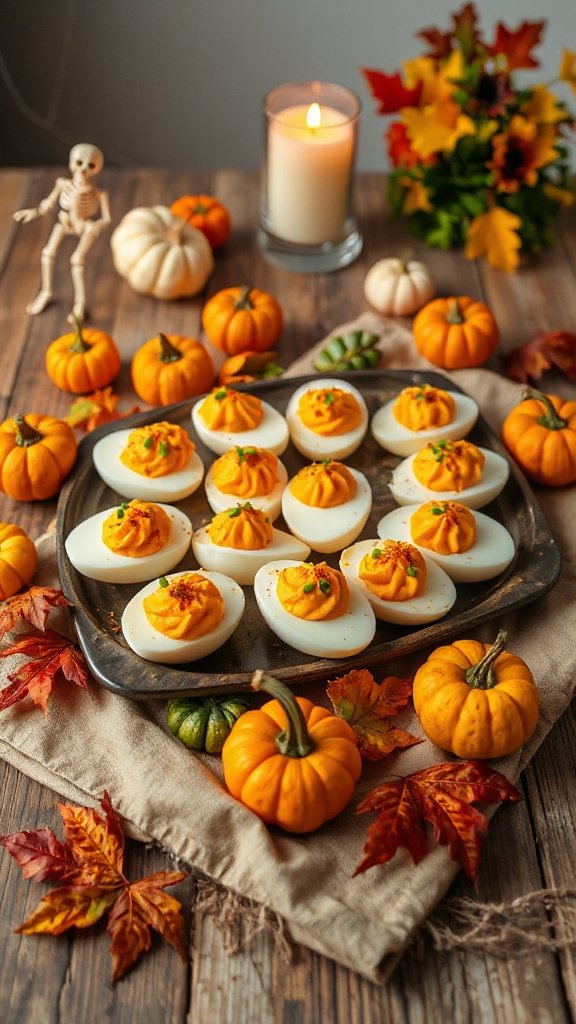
Pumpkin Deviled Eggs are a festive and delightful twist on the classic deviled eggs, perfect for Halloween-themed parties. With their vibrant orange color and pumpkin-like appearance, these charming little bites not only look great on your platter but also bring exciting flavors that will impress your guests. They’re simple to make in advance, allowing you more time to enjoy the festivities!
| Ingredients | Quantity |
|---|---|
| Large eggs | 6 |
| Mayonnaise | 3 tablespoons |
| Mustard | 1 teaspoon |
| Apple cider vinegar | 1 teaspoon |
| Paprika | 1/2 teaspoon |
| Salt | 1/4 teaspoon |
| Black olives (sliced) | 6 slices |
| Green onion (chopped) | 2 tablespoons (for garnish) |
| Optional: Food coloring (orange) | A few drops (if desired) |
Cooking Steps:
- Boil the Eggs: Place the eggs in a saucepan and cover them with cold water. Bring the water to a boil over medium-high heat. Once boiling, reduce the heat to low and cover the pot. Allow the eggs to cook for about 9-12 minutes.
- Cool the Eggs: After boiling, remove the eggs from the heat and carefully transfer them to a bowl of ice water. Let them sit for 5-10 minutes to cool completely, which will make peeling easier.
- Peel the Eggs: Once cooled, gently tap the eggs on a hard surface to crack the shells. Start peeling from the wider end, as this area usually has an air pocket that makes peeling easier. Rinse the peeled eggs under cold water to remove any sticky bits of shell.
- Prepare the Filling: Slice the peeled eggs in half lengthwise and carefully remove the yolks, placing them in a mixing bowl. Set the egg whites aside on a serving platter.
- Mix the Filling: To the bowl with the yolks, add mayonnaise, mustard, apple cider vinegar, paprika, and salt. If you’re using food coloring to achieve a pumpkin hue, add a few drops now. Mash everything together using a fork until smooth and well combined.
- Fill the Egg Whites: Spoon or pipe the yolk mixture back into the hollowed egg whites. You can use a piping bag fitted with a star tip for a more decorative look.
- Create Pumpkin Features: For the pumpkin touch, place a slice of black olive on top of each filled egg half to represent the “stem.” Optionally, you can sprinkle some chopped green onion over the filling for added color and flavor.
- Chill and Serve: Refrigerate the Pumpkin Deviled Eggs for about 30 minutes before serving. This allows the flavors to meld and guarantees they are nice and chilled for your guests to enjoy at your Halloween celebration!
Graveyard Taco Dip
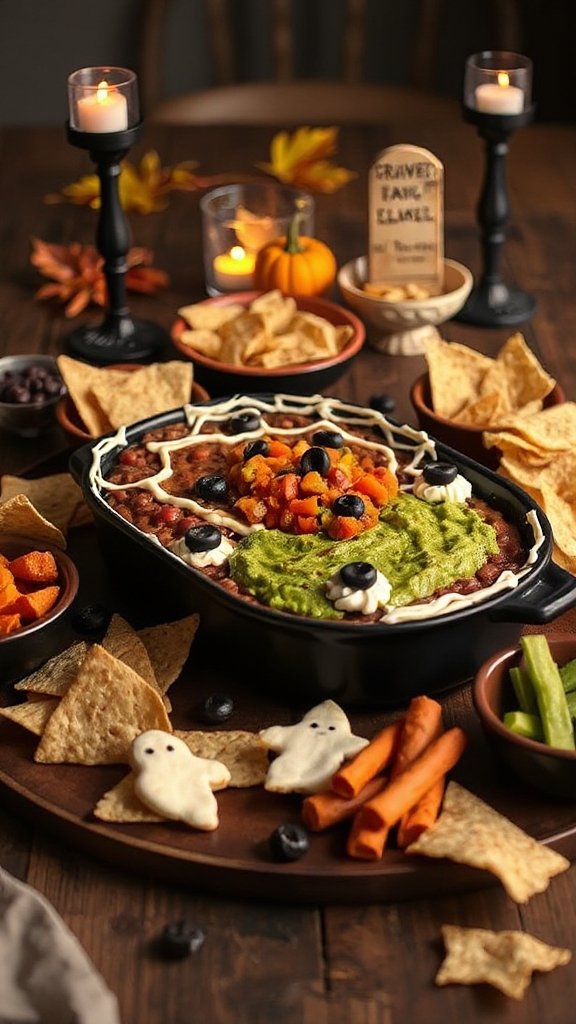
Graveyard Taco Dip is a fun and spooky appetizer that is sure to be a hit at any Halloween gathering. This layered dip features classic taco flavors with cream cheese, guacamole, salsa, cheese, and olives, all topped with cute edible decorations to create a graveyard scene. It’s easy to make ahead of time, allowing you to relax and enjoy the festivities with your friends and family!
| Ingredients | Quantity |
|---|---|
| Cream cheese | 8 oz (softened) |
| Sour cream | 1 cup |
| Taco seasoning | 1 tablespoon |
| Guacamole | 1 cup |
| Salsa | 1 cup |
| Shredded cheese (cheddar or Mexican) | 1 cup |
| Black olives (sliced) | 1/2 cup |
| Tortilla chips | For serving |
| Optional: Edible decorations (e.g., plastic tombstones, skeletons) | As needed |
Cooking Steps:
- Prepare the Cream Cheese Mixture: In a medium bowl, combine the softened cream cheese and sour cream. Add the taco seasoning and mix until well blended and creamy.
- Layer the Dip: In a shallow serving dish or a rectangular platter, spread the cream cheese mixture evenly across the bottom. This will be the first layer of your dip.
- Add Guacamole: Next, spoon the guacamole on top of the cream cheese layer, spreading it out evenly to cover the entire surface.
- Add Salsa: Layer the salsa over the guacamole, ensuring it is spread out evenly to create the third layer of flavors.
- Sprinkle the Cheese: Evenly sprinkle the shredded cheese over the salsa layer. This cheese will melt slightly and add a delicious topping to your dip.
- Top with Olives: Arrange the sliced black olives on top, creating tombstone shapes or simply scattering them to represent spooky gravestones.
- Add Decorations: If desired, use edible decorations like plastic tombstones or skeletons to create a fun graveyard scene on top of the dip. This adds a festive touch that guests will enjoy.
- Chill and Serve: Cover the dip with plastic wrap and refrigerate for at least 30 minutes before serving, to allow the flavors to meld together. Serve the dip with tortilla chips for dipping. Enjoy your delicious and spooky Graveyard Taco Dip!
Witch’s Broom Cheese Ball
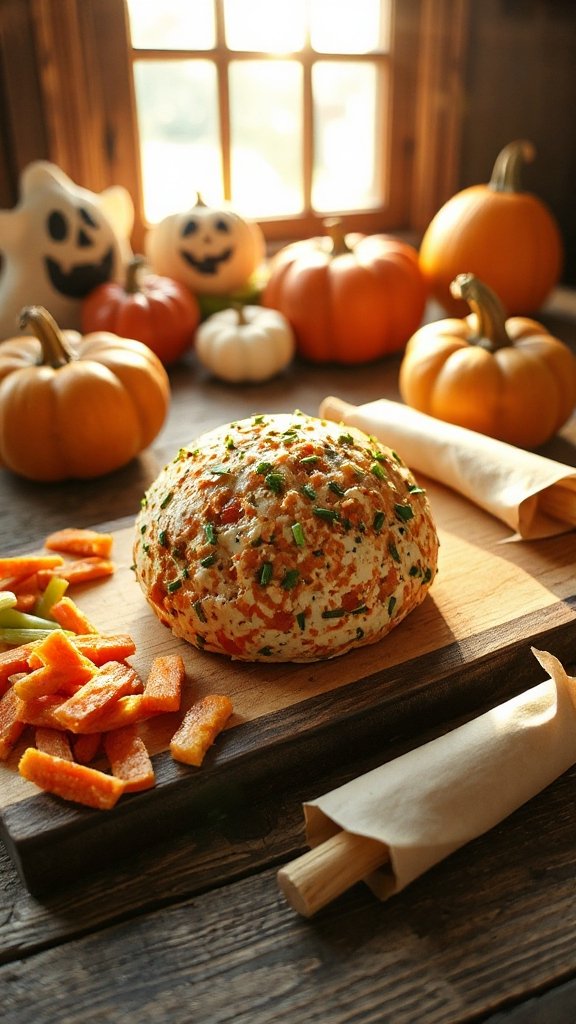
Witch’s Broom Cheese Ball is a fun and festive appetizer that adds a touch of whimsy to your Halloween festivities. This cheese ball is made with cream cheese, shredded cheese, and flavorful seasonings, shaped to resemble a witch’s broom. It’s not only delicious but also easy to prepare in advance, allowing you to spend more time enjoying the eerie celebrations!
| Ingredients | Quantity |
|---|---|
| Cream cheese | 8 oz (softened) |
| Shredded cheddar cheese | 1 cup |
| Garlic powder | 1 teaspoon |
| Onion powder | 1 teaspoon |
| Worcestershire sauce | 1 teaspoon |
| Fresh parsley (finely chopped) | 2 tablespoons |
| Pecans (finely chopped) | 1/2 cup |
| Pretzel sticks | For serving |
| Chives (for broom bristles) | As needed |
Cooking Steps:
- Combine Cheese Mixture: In a mixing bowl, combine the softened cream cheese, shredded cheddar cheese, garlic powder, onion powder, Worcestershire sauce, and chopped parsley. Mix well until all the ingredients are thoroughly blended together.
- Form the Cheese Ball: Using your hands, gather the cheese mixture and shape it into a ball or a broomstick shape. If making a broomstick shape, form one end narrower to represent the broom head and keep the other end thicker.
- Roll in Pecans: Once shaped, roll the cheese ball in the chopped pecans, pressing gently to guarantee they adhere to the surface of the cheese. This adds a beautiful texture and flavor, reminiscent of the broom’s handle.
- Create Broom Bristles: Take a bunch of chives and cut them into long, thin strips. Use these strips to create the bristles of the broom by attaching them to the thinner end of your cheese ball. This adds a fun and realistic touch to your Witch’s Broom Cheese Ball.
- Chill: Place the finished cheese ball on a serving plate and cover it with plastic wrap. Refrigerate for at least 30 minutes to allow the flavors to meld together and the cheese ball to firm up.
- Serve: When ready to serve, present your Witch’s Broom Cheese Ball alongside pretzel sticks for dipping. Guests can grab a pretzel stick to enjoy with the creamy cheese ball, making for a delightful and spooky treat!
Enjoy your festive Witch’s Broom Cheese Ball at your Halloween gathering!
Creepy Vegetable Platter
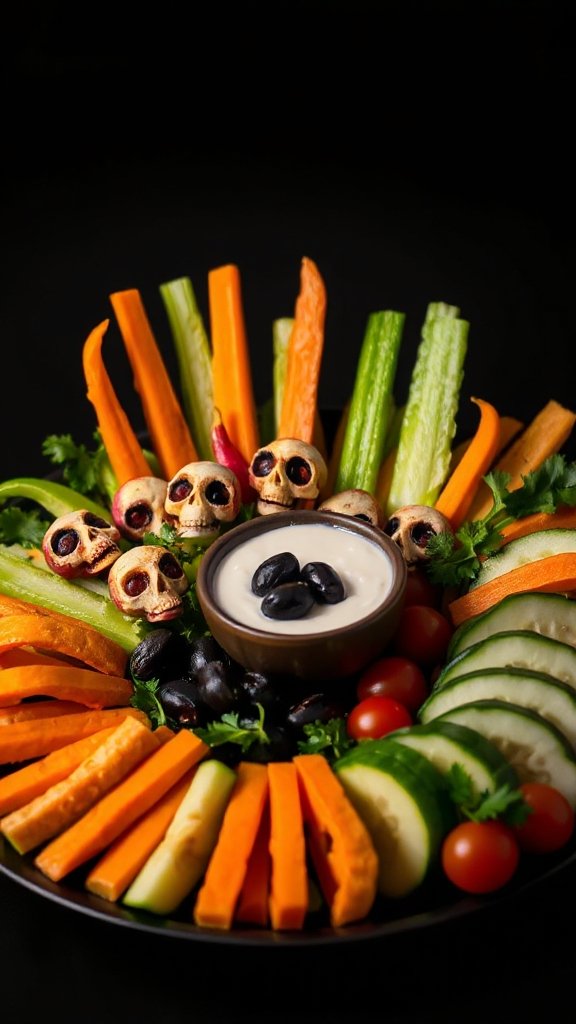
A Creepy Vegetable Platter is a fun and creative way to present healthy snacks at your Halloween gathering. This visually spooky assortment of vegetables not only motivates your guests to munch on nutritious options but can also be a delightful centerpiece that sparks conversations. With a tasty dip in the middle and vegetables artfully arranged to resemble creepy creatures, this platter is sure to be a hit at any Halloween event!
| Ingredients | Quantity |
|---|---|
| Carrots (cut into sticks) | 2 cups |
| Celery (cut into sticks) | 2 cups |
| Cherry tomatoes | 1 cup |
| Cucumber (sliced into rounds) | 1 large cucumber |
| Radishes (cut in half) | 1 cup |
| Bell peppers (cut into ghost shapes) | 1 red, 1 yellow, or orange |
| Broccoli florets | 1 cup |
| Cauliflower florets | 1 cup |
| Black olive slices | For decorating |
| Hummus or ranch dip | 1 cup |
Cooking Steps:
- Prepare the Vegetables: Start by washing all the vegetables thoroughly. Cut the carrots and celery into sticks, making sure they’re long enough for dipping. Slice the cucumber into rounds and cut the radishes in half.
- Create Ghost Peppers: For the bell peppers, use a small knife to cut out ghost shapes. You can create spooky faces by using small knife incisions for eyes and mouths, making them look like little ghost figures.
- Arrange the Vegetables: Choose a large, round platter to create an eye-catching presentation. Place the hummus or ranch dip in the center of the platter. Arrange the carrot sticks, celery sticks, cucumber rounds, cherry tomatoes, and radish halves around the dip, creating a colorful and inviting circle.
- Add Creepy Creatures: Use the broccoli and cauliflower florets to form clusters that resemble creepy critters or monsters. You can arrange them in a way that they look like they’re peeking out around the dip. Create a few “eyes” using the black olive slices; place them on top of the broccoli and cauliflower for an added ghoulish touch.
- Final Touches: Fill any gaps on the platter with remaining vegetables to guarantee a full and festive look. Adjust the placement of all items to achieve a balanced and scary appearance.
- Chill and Serve: If you’re preparing the platter ahead of time, cover it with plastic wrap and refrigerate until ready to serve. Just before serving, you can make any necessary adjustments to heighten the creepy effect.
Enjoy the Creepy Vegetable Platter as a festive way to encourage healthy eating during your Halloween celebration!
Monster Meatballs
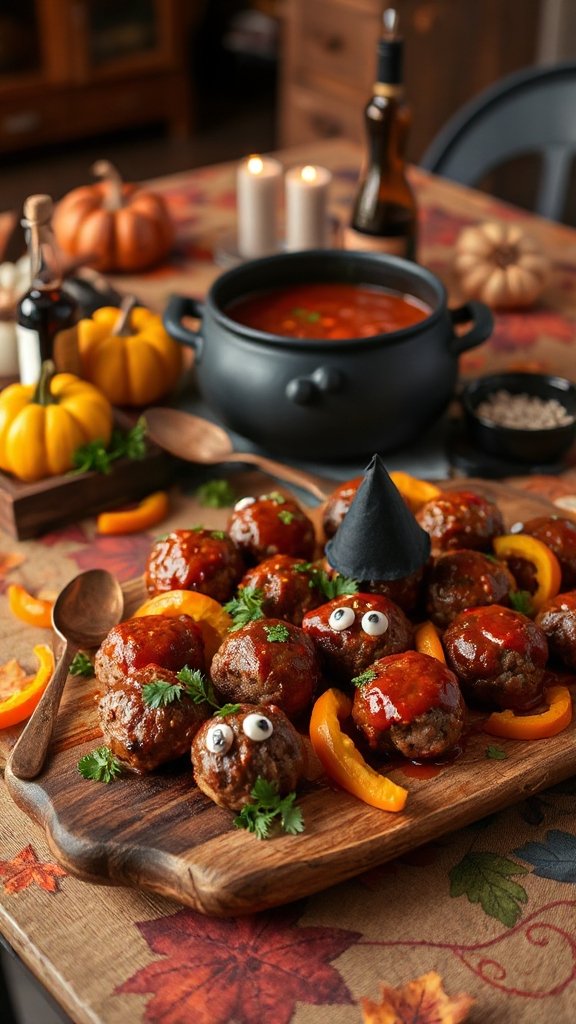
Monster meatballs are a playful twist on traditional meatballs, transforming them into spooky creatures that are perfect for a Halloween party. These tasty bites can be made ahead of time, guaranteeing you spend more time enjoying the festivities with your guests. With simple ingredients and a little creativity, you can create meatballs that are not only delicious but also delightfully terrifying!
| Ingredients | Quantity |
|---|---|
| Ground beef or turkey | 1 pound |
| Italian bread crumbs | 1 cup |
| Grated Parmesan cheese | 1/2 cup |
| Fresh parsley (chopped) | 1/4 cup |
| Garlic (minced) | 2 cloves |
| Egg | 1 large |
| Salt | 1 teaspoon |
| Black pepper | 1/2 teaspoon |
| Marinara sauce | 2 cups |
| Mozzarella cheese (cubed) | 1 cup |
| Candy eyes (or sliced olives) | For decorating |
Cooking Steps:
- Preheat the Oven: Start by preheating your oven to 400°F (200°C) to guarantee it’s ready for baking the monster meatballs.
- Mix the Ingredients: In a large bowl, combine the ground beef or turkey, Italian bread crumbs, grated Parmesan cheese, chopped parsley, minced garlic, egg, salt, and black pepper. Use your hands to mix the ingredients thoroughly until everything is well incorporated.
- Shape the Meatballs: With your hands, take a portion of the meat mixture and roll it into a ball shape, roughly the size of a golf ball. Place the meatballs on a baking sheet lined with parchment paper. This should yield about 12-15 meatballs depending on size.
- Add Cheese: Create an indentation in the center of each meatball and insert a small cube of mozzarella cheese. Roll the meatball again to enclose the cheese, guaranteeing that it won’t leak while baking.
- Bake the Meatballs: Once the meatballs are shaped and filled, place the baking sheet in the preheated oven. Bake for about 20-25 minutes, or until the meatballs are golden brown and cooked through, with an internal temperature of 160°F (71°C).
- Heat the Marinara Sauce: In a small saucepan, heat the marinara sauce over medium heat until it is warm, stirring occasionally to prevent sticking.
- Decorate the Meatballs: Once the meatballs are done baking, transfer them to a serving dish. Pour the warm marinara sauce over the top, creating a ‘bloody’ effect. Add candy eyes or cut olives on top of each meatball to create spooky faces.
- Serve and Enjoy: Serve your monster meatballs warm as a fun appetizer or main dish. These spooky treats are sure to be a hit with your guests and will add a festive touch to your Halloween celebration!
Ghostly Caprese Skewers
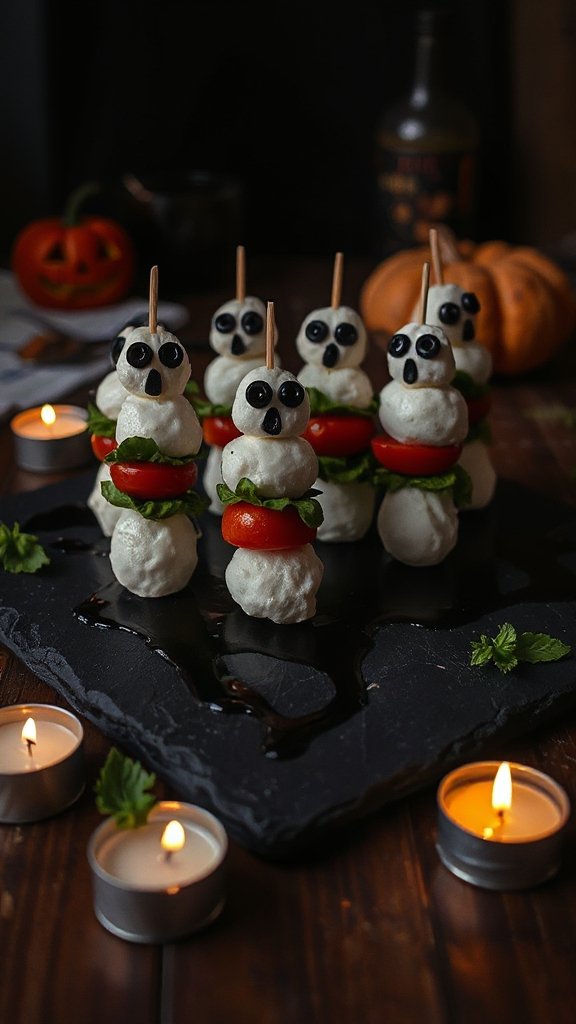
Ghostly Caprese Skewers are a fun and festive appetizer that adds a touch of whimsy to your Halloween celebrations. These delightful bites feature fresh mozzarella and cherry tomatoes arranged on skewers, resembling ghostly figures with a simple twist—candy eyes! Not only are they a breeze to prepare in advance, but they also offer a light and invigorating taste that balances out heavier Halloween fare.
| Ingredients | Quantity |
|---|---|
| Fresh mozzarella balls | 1 pound |
| Cherry tomatoes | 1 pint |
| Fresh basil leaves | 1 bunch |
| Balsamic glaze (optional) | For drizzling |
| Candy eyes | For decorating |
| Salt | To taste |
| Black pepper | To taste |
| Skewers (6-inch) | 12-15 |
Cooking Steps:
- Prepare the Ingredients: Begin by washing and drying the cherry tomatoes and basil leaves. Drain the fresh mozzarella balls if they are in any liquid. Gather all your ingredients on a clean surface.
- Assemble the Skewers: Take a skewer and start by threading a mozzarella ball onto it, followed by a cherry tomato. Add a fresh basil leaf next, and finish with another mozzarella ball. The skewer should have a pattern of mozzarella, tomato, basil, and mozzarella, resembling a ghost shape.
- Add Candy Eyes: After all the skewers are assembled, take a small piece of kitchen adhesive or simply a drop of balsamic glaze on the top of the mozzarella balls to stick the candy eyes onto them. These will create a ghostly face on your Caprese skewers.
- Season and Drizzle: Once the eyes are in place, sprinkle a little salt and ground black pepper over the skewers for added flavor. If you’re using balsamic glaze, drizzle it over the assembled skewers for a nice visual effect as well as flavor enhancement.
- Chill Before Serving: Place the skewers on a platter or charcuterie board and refrigerate them until you are ready to serve. Chilling them for at least 30 minutes enhances the flavor and keeps them fresh.
- Serve and Enjoy: To serve, arrange the skewers on a festive tray, and let your guests enjoy these eerie yet delicious Ghostly Caprese Skewers that add a spooky twist to your Halloween menu!
Frankenstein Guacamole
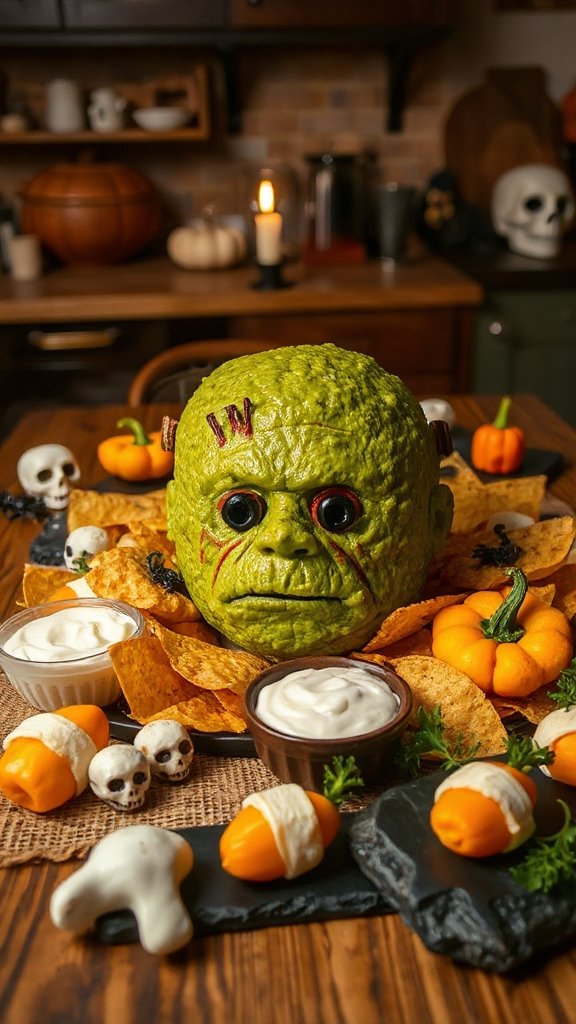
Frankenstein Guacamole is a fun and festive twist on the classic avocado dip that will elevate your Halloween gathering. Vibrantly green and decorated to resemble the iconic Frankenstein monster, this guacamole not only tastes delicious but also serves as an eye-catching centerpiece for your snack table. Pair it with crunchy tortilla chips, and your guests will enjoy this spooky, savory dip.
| Ingredients | Quantity |
|---|---|
| Ripe avocados | 3 |
| Lime juice | 2 tablespoons |
| Salt | To taste |
| Black pepper | To taste |
| Garlic powder | 1 teaspoon |
| Red onion | 1/2, finely chopped |
| Fresh cilantro | 1/4 cup, chopped |
| Cherry tomatoes | 1 cup, halved |
| Black olives | 10, sliced |
| Tortilla chips | For serving |
Cooking Steps:
- Prepare Avocados: Begin by cutting the ripe avocados in half lengthwise. Remove the pits and scoop the flesh into a mixing bowl.
- Mash the Avocados: Using a fork or a potato masher, mash the avocado to your desired level of creaminess. Leave it slightly chunky for added texture.
- Add Flavorings: Pour the lime juice over the mashed avocados to prevent browning and to enhance the flavor. Season with salt, black pepper, and garlic powder. Mix well to combine all the ingredients.
- Incorporate Vegetables: Gently fold in the finely chopped red onion and fresh cilantro into the avocado mixture. This adds freshness and a pop of color to your guacamole.
- Create Frankenstein’s Face: Transfer the guacamole to a serving bowl. Using a spatula, shape the guacamole into a slight oval or rectangle, mimicking Frankenstein’s head. Use the halved cherry tomatoes to create eyes, placing them on the top half of the guacamole.
- Add the Mouth and Hair: Slice the black olives into circles and place them vertically to form a mouth. For Frankenstein’s hair, use additional black olives, sticking them into the top of the guacamole, so they fan out like hair.
- Garnish & Serve: Once your Frankenstein Guacamole is assembled, serve it immediately with tortilla chips on the side for dipping. Enjoy your spooky appetizer as part of your Halloween festivities!
Spider Web Hummus
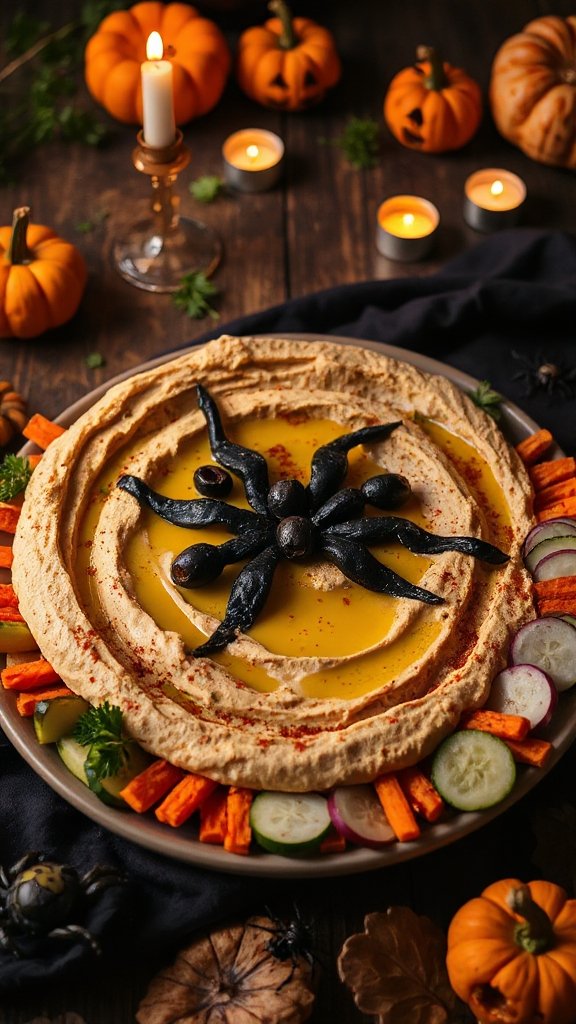
Spider Web Hummus is a spooktacular and healthy appetizer that takes the traditional chickpea dip to another level with a fun Halloween twist. This creamy, garlicky hummus is topped with a mesmerizing spider web design made from olive oil and balsamic vinegar, perfect for setting the mood at your Halloween party. Serve it with a variety of fresh veggies or crispy pita chips for dipping, and watch your guests be amazed by this delightfully eerie dish.
| Ingredients | Quantity |
|---|---|
| Canned chickpeas | 1 (15 oz) can |
| Tahini | 1/4 cup |
| Garlic cloves | 2, minced |
| Lemon juice | 2 tablespoons |
| Olive oil | 2 tablespoons |
| Cumin | 1 teaspoon |
| Salt | To taste |
| Water | 2-4 tablespoons |
| Balsamic vinegar | 1 tablespoon |
| Olive oil (for web) | 1 tablespoon |
| Black olives | 2, cut in half |
| Fresh parsley | For garnish |
Cooking Steps:
- Prepare Chickpeas: Begin by draining and rinsing the canned chickpeas under cold water. Set aside to let them drain fully.
- Blend Ingredients: In a food processor, combine the drained chickpeas, tahini, minced garlic, lemon juice, olive oil, cumin, and salt. Blend until the mixture is smooth.
- Adjust Consistency: With the food processor running, gradually add water, one tablespoon at a time, until you reach your desired consistency—smooth and creamy. Scrape down the sides of the bowl as needed to maintain even blending.
- Taste Test: Once the hummus is well-blended, taste and adjust seasonings if necessary, adding more salt or lemon juice to suit your preferences.
- Transfer to Serving Bowl: Spoon the hummus into a shallow serving bowl or dish, smoothing the top with a spatula.
- Create the Spider Web: Drizzle one tablespoon of olive oil over the surface of the hummus. Then, using a toothpick or the back of a spoon, draw lines from the center outward, creating a web-like pattern.
- Add the Balsamic Vinegar: Drizzle the balsamic vinegar over the hummus in the center, allowing it to spread slightly into the olive oil to enhance the contrast of colors.
- Decorate with Olives: Arrange the halved black olives along the edges or in the center to represent spiders lurking in the web.
- Garnish & Serve: Finish by sprinkling some fresh parsley on top for a pop of color. Serve your Spider Web Hummus with fresh veggies, pita chips, or any of your favorite dippers. Enjoy this healthy and festive treat that’s bound to impress your Halloween guests!
Eyeball Pasta Salad
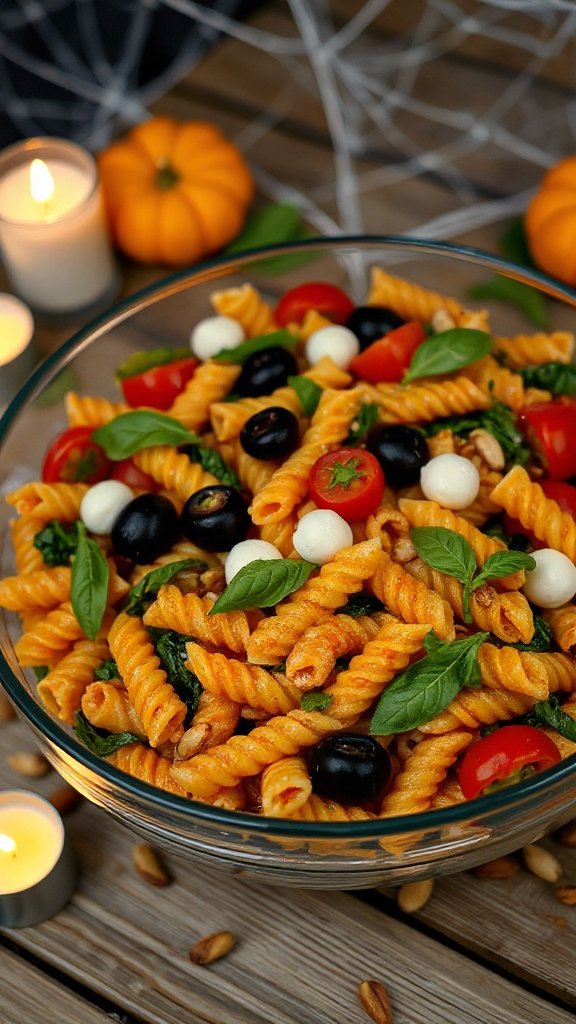
Eyeball Pasta Salad is a fun and festive dish that combines the classic flavors of a pasta salad with a spooky twist that’s perfect for Halloween. Loaded with colorful ingredients and topped with mozzarella “eyeballs” and olives, this dish is sure to be a showstopper at your Halloween gathering. Not only is it visually appealing, but it’s also easy to prepare and can be made ahead of time for added convenience.
| Ingredients | Quantity |
|---|---|
| Pasta (rotini or fusilli) | 8 oz |
| Cherry tomatoes | 1 cup |
| Black olives (sliced) | 1/2 cup |
| Mozzarella balls (bocconcini) | 1 cup |
| Fresh basil leaves | 1/4 cup, chopped |
| Olive oil | 3 tablespoons |
| Red wine vinegar | 2 tablespoons |
| Garlic powder | 1 teaspoon |
| Salt | To taste |
| Black pepper | To taste |
Cooking Steps:
- Cook the Pasta: Bring a large pot of salted water to a boil. Add the pasta and cook according to package instructions until al dente. Once cooked, drain and rinse under cold water to stop the cooking process. Set aside in a large mixing bowl.
- Prepare the Ingredients: While the pasta is cooking, wash and halve the cherry tomatoes. Slice the black olives and set aside. Drain the mozzarella balls if necessary.
- Make the Dressing: In a small bowl, whisk together the olive oil, red wine vinegar, garlic powder, salt, and black pepper until well combined. This will be your dressing for the salad.
- Combine the Salad: To the bowl with the cooked pasta, add the halved cherry tomatoes, sliced black olives, chopped fresh basil, and mozzarella balls. Pour the dressing over the salad and toss everything together gently until well incorporated.
- Create Eyeballs: For added spookiness, take the mozzarella balls and place a slice of black olive on top of each one to resemble eyeballs. Arrange these “eyeballs” throughout the pasta salad for a fun presentation.
- Chill the Salad: Cover the bowl with plastic wrap and refrigerate for at least 30 minutes to allow the flavors to meld together. This also makes it easier to serve.
- Serve: Once chilled, give the pasta salad a gentle toss before serving. Place it in a festive bowl and enjoy your Eyeball Pasta Salad at your Halloween celebration. Don’t forget to watch your guests’ reactions when they spot the eerie “eyeballs”!
