As an Amazon Associate I earn from qualifying purchases.
Editorial Policy | Disclosure Policy
Ghostly Pizza Bites
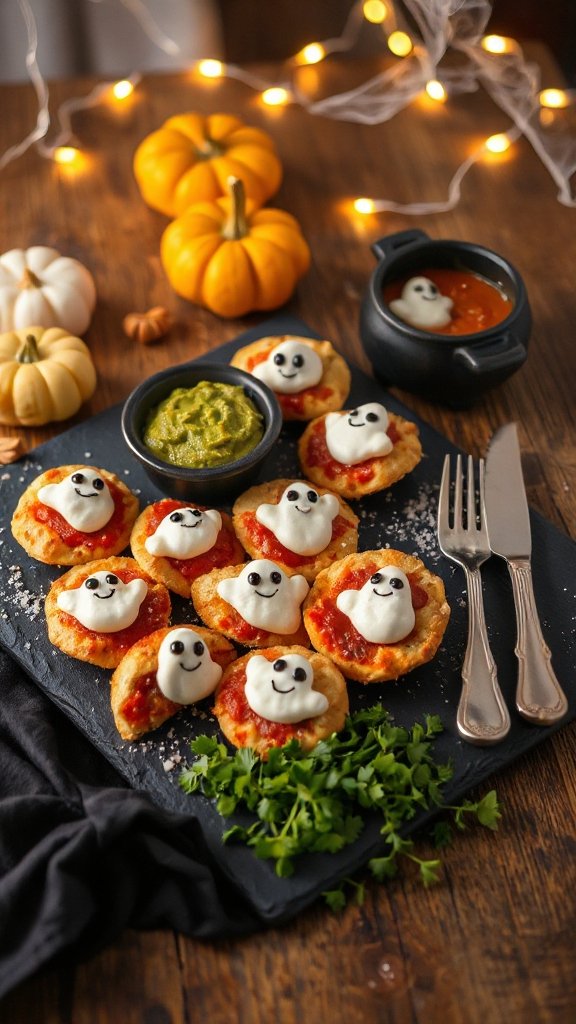
Ghostly Pizza Bites are a fun and spooky party snack that will delight guests of all ages. They feature mini pizza rounds topped with cheese and decorated to look like friendly ghosts. These bite-sized treats are easy to make and can be enjoyed hot or at room temperature, making them perfect for a Halloween gathering.
| Ingredients | Quantity |
|---|---|
| Pre-made pizza dough | 1 lb (about 450g) |
| Mozzarella cheese | 8 oz (about 225g) |
| Black olives | 1/2 cup |
| Pizza sauce | 1/2 cup |
| Olive oil | 1 tbsp |
| Italian seasoning | 1 tsp |
| Flour (for dusting) | As needed |
Cooking Instructions:
- Preheat the Oven: Start by preheating your oven to 425°F (220°C).
- Prepare the Dough: On a lightly floured surface, roll out the pre-made pizza dough to about 1/4 inch thickness. Use a round cutter or a glass to cut out circles (approximately 3-4 inches in diameter) from the dough. You should get about 12-16 circles.
- Prepare the Cheese: Slice the mozzarella cheese into small pieces or use shredded mozzarella. This will be the “ghost” part of your pizza bites.
- Assemble the Pizza Bites: Place the dough circles on a lined baking sheet. Spread a teaspoon of pizza sauce on each circle, leaving a small border around the edges. Add a piece of mozzarella cheese on top of each sauce-covered dough circle.
- Create Ghost Faces: Cut the black olives in half to create two “eyes” for each ghost. Place the halved olives on top of the cheese to create ghostly faces. You can use a small piece of olive for the mouth if desired.
- Brush with Olive Oil: Lightly brush the edges of each pizza bite with olive oil and sprinkle with Italian seasoning to add flavor.
- Bake: Place the baking sheet in the preheated oven and bake for 12-15 minutes, or until the crust is golden and the cheese is melted and bubbly.
- Cool and Serve: Once baked, remove the ghostly pizza bites from the oven and let them cool for a few minutes. Serve them warm and enjoy the spooky delight with your party guests!
Mummy Hot Dogs
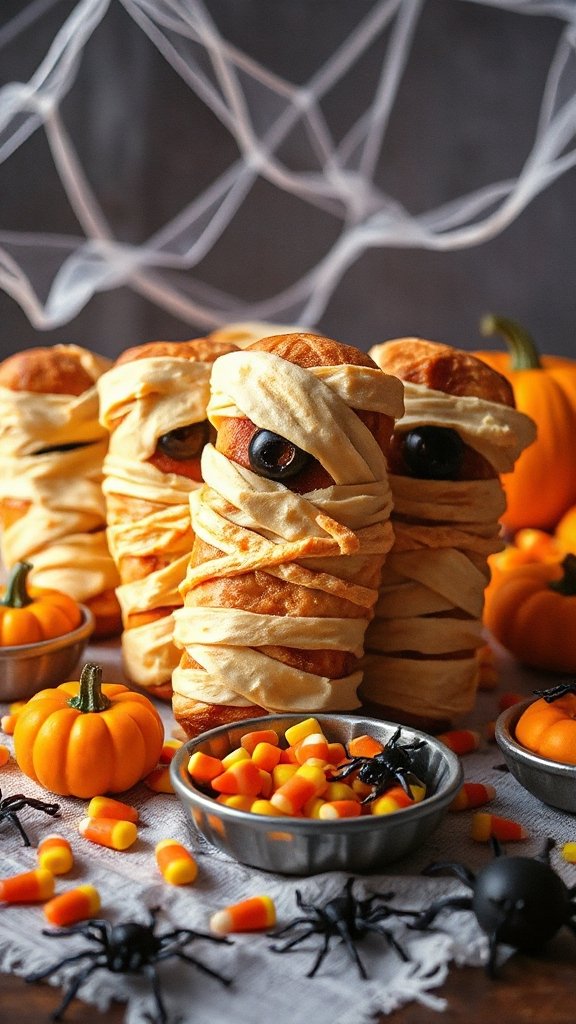
Mummy Hot Dogs are a playful and delicious snack that brings a spooky twist to the classic hot dog. Wrapped in crescent roll dough, these little “mummies” are not only adorable but also easy to create, making them a perfect addition to your Halloween party spread. With their golden-brown exteriors and eerie eyes, they are sure to be a hit among guests of all ages!
| Ingredients | Quantity |
|---|---|
| Hot dogs | 8 |
| Refrigerated crescent roll dough | 1 tube (8 oz) |
| Mustard or ketchup (for eyes) | As needed |
| Cooking spray | Optional |
Cooking Instructions:
- Preheat the Oven: Begin by preheating your oven to 375°F (190°C).
- Prepare the Dough: Open the tube of refrigerated crescent roll dough and unroll it. Do not separate the triangles; instead, press the seams together to create a sheet of dough.
- Cut the Dough: Using a pizza cutter or a sharp knife, slice the dough sheet into thin strips (about 1/4 inch wide). You will need enough strips to wrap around each hot dog.
- Wrap the Hot Dogs: Take a hot dog and start wrapping the dough strips around it, leaving a small gap at the top for the “face” of the mummy. Wrap it in a crisscross pattern, ensuring that the dough overlaps slightly. Repeat this process for all hot dogs.
- Arrange on Baking Sheet: Place the wrapped hot dogs on a baking sheet lined with parchment paper. If desired, spray lightly with cooking spray for extra crispiness.
- Bake: Place the baking sheet in the preheated oven and bake for 12-15 minutes, or until the dough is golden brown and cooked through.
- Add Eyes: After removing the mummy hot dogs from the oven, let them cool for a minute. Using mustard or ketchup, place small dots on the dough to create eyes for your mummies.
- Serve: Arrange the Mummy Hot Dogs on a platter and serve warm with extra dipping sauces like mustard or ketchup for added fun. Enjoy your spooky creation with friends and family!
Witch Hat Cookies
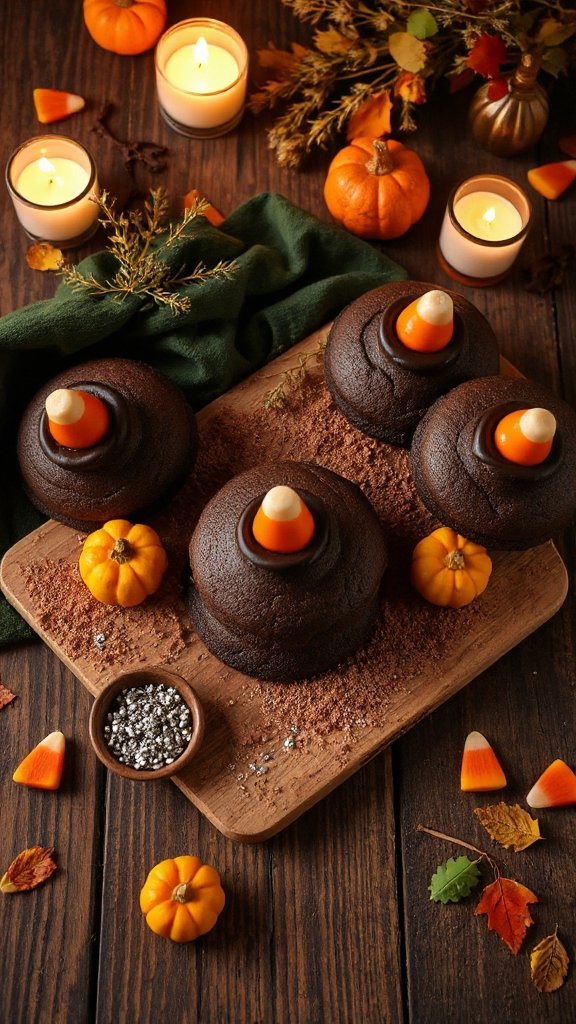
Witch Hat Cookies are a fun and festive treat that will delight both kids and adults at your Halloween party. With their chocolatey cone shape and vibrant green icing, these cookies not only taste delicious but also serve as a whimsical decoration for your spread. Easy to assemble, they can be prepared in no time, making them a perfect addition to your spooky dessert table.
| Ingredients | Quantity |
|---|---|
| Sugar cookies (store-bought or homemade) | 24 cookies |
| Chocolate ice cream cones | 12 cones |
| Green candy melts | 1 cup |
| Chocolate frosting | 1 tub (15 oz) |
| Edible googly eyes | As needed |
| Orange sprinkles (optional) | For decoration |
Cooking Instructions:
- Prepare the Cookies: If using store-bought sugar cookies, ascertain they are fully cooled before assembly. If making homemade cookies, bake them according to your favorite recipe and let them cool completely.
- Melt the Candy Melts: In a microwave-safe bowl, place the green candy melts. Microwave in 30-second intervals, stirring in between, until melted and smooth. Be careful not to overheat.
- Assemble the Witch Hats: Take one sugar cookie and pipe a ring of chocolate frosting around the edge to create a base for the cone. If you prefer, you can also spread the frosting with a knife.
- Attach the Ice Cream Cone: Carefully place an ice cream cone upside down in the center of the cookie, pressing down gently so it adheres to the frosting.
- Coat the Cone: Dip the top of the ice cream cone into the melted green candy melts, allowing the excess to drip off. Alternatively, you can use a spoon to drizzle the melted candy over the cone. Ascertain the cone is fully coated.
- Add Eyes: Before the green candy sets, place edible googly eyes on the cone to mimic the spooky look of a witch. Aim for two eyes per cone for maximum effect.
- Sprinkle for Extra Fun: If desired, sprinkle orange sprinkles around the base of the cone and on the cookie for added color and decoration.
- Let Set: Allow the witch hat cookies to sit for about 10-15 minutes until the candy melts have hardened, ascertaining everything stays in place.
- Serve: Arrange your Witch Hat Cookies on a platter and enjoy the spooky treats with your guests! These colorful cookies will surely be a highlight at your Halloween celebration.
Pumpkin Deviled Eggs
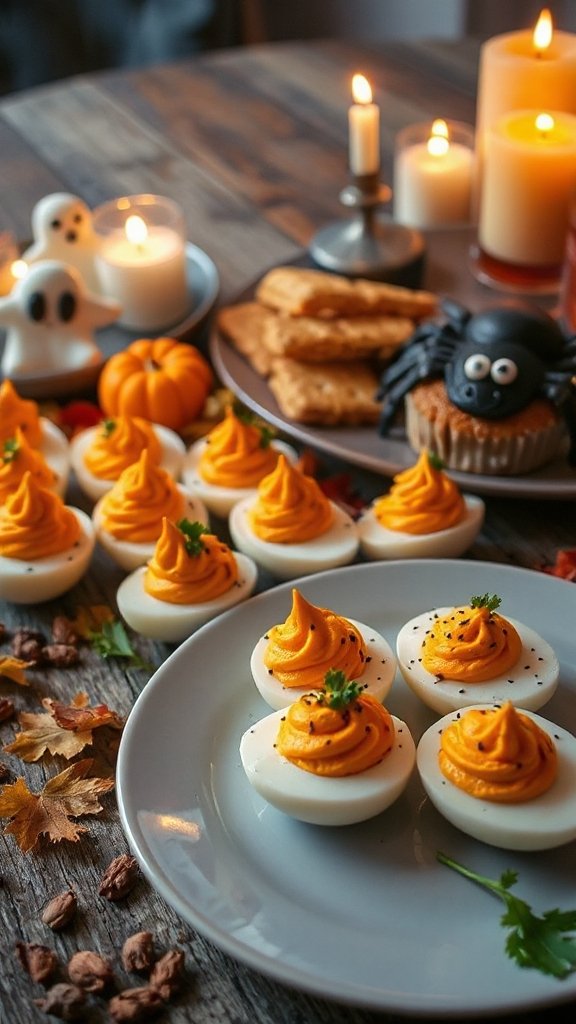
Pumpkin Deviled Eggs are a creative and delicious twist on traditional deviled eggs. These festive bites not only taste amazing but also bring a pop of color and Halloween spirit to your party platter with their pumpkin-like appearance made using a simple food coloring technique. Perfect for both kids and adults, these savory treats are sure to be a hit at your Halloween gathering.
| Ingredients | Quantity |
|---|---|
| Large eggs | 12 eggs |
| Mayonnaise | 1/3 cup |
| Yellow mustard | 1 tablespoon |
| Apple cider vinegar | 1 teaspoon |
| Salt | 1/4 teaspoon |
| Ground black pepper | 1/4 teaspoon |
| Paprika | For garnish |
| Green onions (chopped) | For garnish (optional) |
| Orange food coloring | 1-2 drops (or as desired) |
| Fresh parsley leaves | For garnish (optional) |
Cooking Instructions:
- Boil the Eggs: Place the large eggs in a saucepan and cover them with water. Bring to a boil over medium-high heat. Once boiling, cover the pot and remove it from heat. Let it sit for 12-15 minutes.
- Cool the Eggs: After the time is up, carefully transfer the eggs to a bowl of ice water to cool them for about 5-10 minutes. This will make them easier to peel.
- Peel the Eggs: Once cooled, gently tap each egg on a hard surface and roll it slightly to crack the shell. Peel the eggs under running water to help remove the shells cleanly.
- Cut Eggs and Remove Yolks: Slice each egg in half lengthwise and carefully scoop out the yolks into a mixing bowl. Place the egg whites on a serving platter.
- Prepare the Filling: Mash the yolks with a fork and add mayonnaise, yellow mustard, apple cider vinegar, salt, and black pepper. Mix until the filling is smooth and creamy.
- Add Color: Add drops of orange food coloring to the yolk mixture to achieve the desired pumpkin color. Stir well until the color is evenly distributed.
- Fill the Egg Whites: Use a spoon or piping bag to fill each egg white half with the orange yolk mixture, creating a dome on top that resembles a small pumpkin shape.
- Garnish: Sprinkle a pinch of paprika over each filled egg for added color. Then, for a final touch, garnish with chopped green onions or small pieces of fresh parsley atop each egg to resemble pumpkin stems.
- Serve: Arrange the Pumpkin Deviled Eggs on your serving platter and enjoy these festive treats with your guests! They are perfect for your Halloween party and make for a delightful addition to any festive menu.
Creepy Crawly Cupcakes
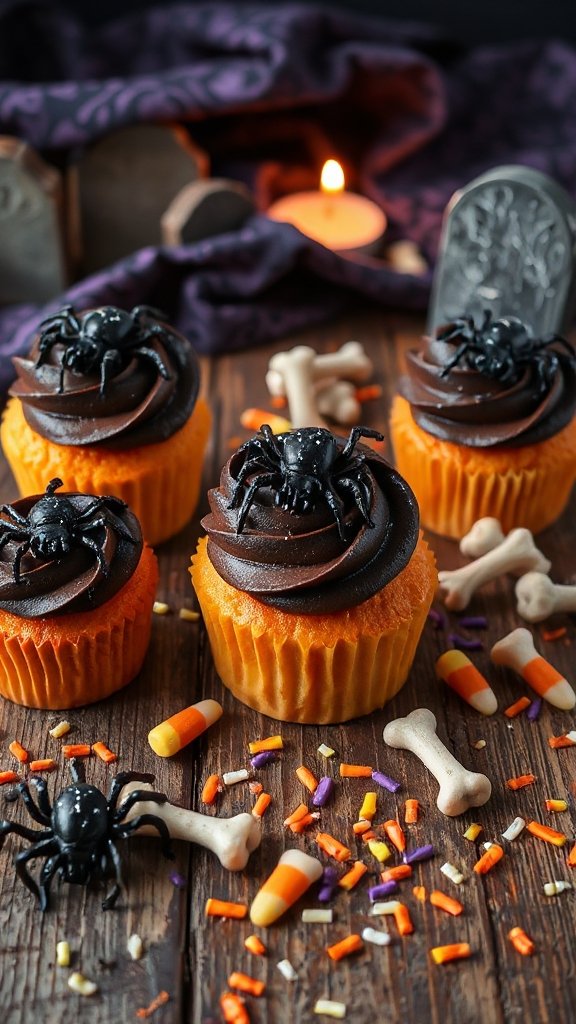
Creepy Crawly Cupcakes are a fun and whimsical dessert perfect for Halloween parties. These chocolate cupcakes are topped with a rich, creamy frosting and are adorned with edible decorations to resemble creepy crawlies like spiders and bugs. Whether you’re serving them to kids or adults, these cupcakes are sure to be a delightful treat that will add to the spooky atmosphere of your gathering.
| Ingredients | Quantity |
|---|---|
| All-purpose flour | 1 ½ cups |
| Unsweetened cocoa powder | ½ cup |
| Baking powder | 1 teaspoon |
| Baking soda | ½ teaspoon |
| Salt | ¼ teaspoon |
| Sugar | 1 cup |
| Eggs | 2 large |
| Whole milk | ½ cup |
| Vegetable oil | ⅓ cup |
| Vanilla extract | 1 teaspoon |
| Boiling water | ½ cup |
| Chocolate frosting | 1 batch (store-bought or homemade) |
| Edible spider decorations | As needed |
| Edible googly eyes | As needed |
Cooking Instructions:
- Preheat the Oven: Preheat your oven to 350°F (175°C). Line a cupcake pan with cupcake liners to prepare for baking.
- Mix Dry Ingredients: In a large bowl, whisk together the all-purpose flour, cocoa powder, baking powder, baking soda, and salt until well combined.
- Combine Wet Ingredients: In another bowl, beat together the sugar, eggs, milk, vegetable oil, and vanilla extract until smooth.
- Incorporate Ingredients: Gradually add the wet ingredients to the dry ingredients, stirring until just combined.
- Add Boiling Water: Carefully stir in the boiling water to the batter. This will thin out the batter but will result in moist cupcakes; mix until fully combined.
- Pour Batter into Liners: Using a measuring cup or a ladle, pour the batter into each cupcake liner, filling them about two-thirds full.
- Bake: Place the cupcake tray in the preheated oven and bake for 18-20 minutes, or until a toothpick inserted into the center comes out clean.
- Cool the Cupcakes: Once baked, remove the cupcakes from the oven and allow them to cool in the pan for about 5 minutes. Then, transfer them to a wire rack to cool completely.
- Frost the Cupcakes: Once the cupcakes have cooled, generously frost each one with chocolate frosting using a spatula or piping bag.
- Decorate: Place the edible spider decorations on top of the frosted cupcakes, and add googly eyes to create a spooky effect.
- Serve and Enjoy: Arrange the cupcakes on a festive platter, and watch as your guests delight in these creepy and delicious treats!
Spooky Cheese and Crackers
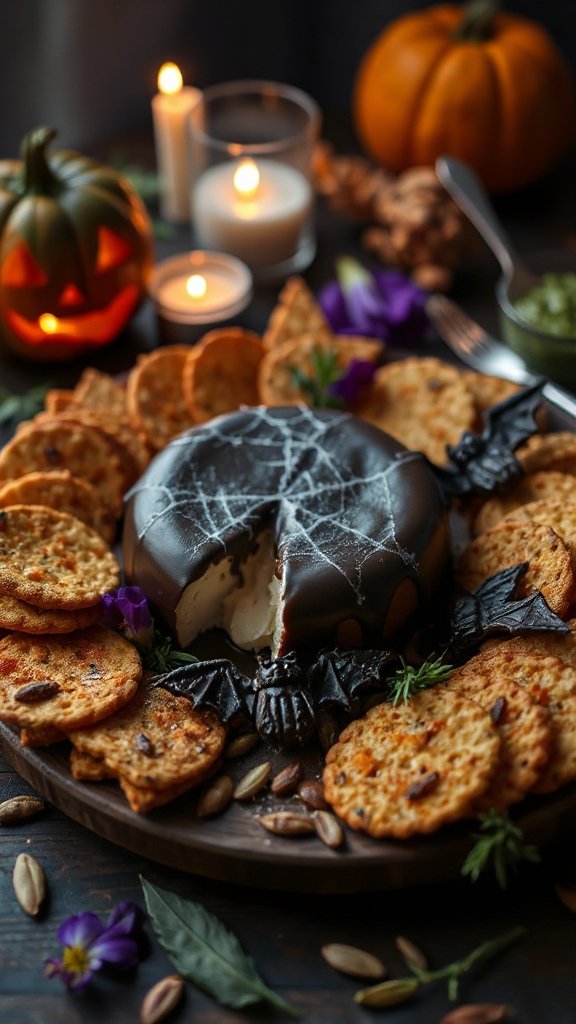
Spooky Cheese and Crackers are a delightful and easy-to-make snack that adds a touch of fun to your Halloween party spread. This simple dish consists of an assortment of cheeses cut into spooky shapes, paired with crunchy crackers and garnished with creepy accents like olives or pimentos. It’s perfect for mingling guests who want a savory bite between sweet treats.
| Ingredients | Quantity |
|---|---|
| Assorted cheeses (cheddar, mozzarella, gouda) | 8 oz total |
| Crackers (your choice) | 1 box |
| Black olives | ½ cup |
| Pimento-stuffed green olives | ½ cup |
| Cheese slicer or knife | As needed |
| Cookie cutters (various spooky shapes) | As needed |
Cooking Instructions:
- Prepare the Cheese: Use a cheese slicer or a knife to cut the assorted cheeses into thick slices. Once sliced, use cookie cutters in spooky shapes (like ghosts, pumpkins, or bats) to create fun cheese shapes from the slices.
- Arrange Crackers: On a large platter or wooden serving board, create a base layer by arranging the crackers in a pattern, either in rows or a creative design.
- Add Cheese Shapes: Place the spooky cheese shapes on top of the arranged crackers. Space them out to create an eye-catching display.
- Garnish with Olives: To add an extra spooky touch, use the black olives as “eyes” on the cheese shapes. You can cut the pimento-stuffed green olives in half to create eyeballs or use them whole alongside the cheese shapes.
- Final Touches: Feel free to embellish your platter with additional ingredients, such as nuts or dried fruit, to add color and texture.
- Serve and Enjoy: Your Spooky Cheese and Crackers are now ready to serve! Set them out on the buffet table for guests to enjoy while they indulge in other Halloween treats.
Monster Fruit Kabobs
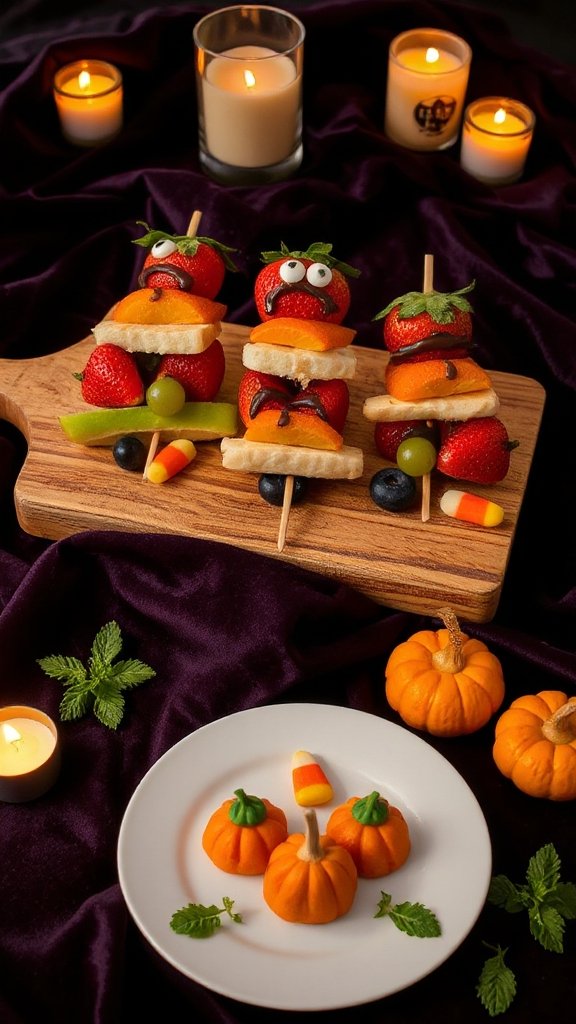
Monster Fruit Kabobs are a fun and visually appealing snack that can elevate your Halloween party spread with a combination of fruity flavors and spooky designs. These kabobs are not only a healthy option but also a creative way to present fruit in a way that dazzles both kids and adults alike. With simple ingredients and minimal preparation, they are perfect for adding a splash of color to your festive table.
| Ingredients | Quantity |
|---|---|
| Fresh strawberries | 1 cup |
| Green grapes | 1 cup |
| Banana | 2 medium, sliced |
| Cantaloupe | 1 cup, cubed |
| Mini marshmallows | 1 cup |
| Blackberries | 1 cup |
| Wooden skewers | 10-12 sticks |
| Candy eyes (optional) | 1 package |
Cooking Instructions:
- Prepare the Fruit: Wash the strawberries and grapes under cold water. Slice the bananas into thick rounds and cube the cantaloupe into bite-sized pieces. Set all the fruit aside in separate bowls.
- Skewering Process: Take a wooden skewer and start adding the fruit pieces. Begin with a strawberry, followed by a slice of banana, a few grapes, and a piece of cantaloupe. For the spooky effect, you can also slide a mini marshmallow onto the skewer, adding to the kabob’s height and creating a ghoulish appearance.
- Add Monster Features: If you’re using candy eyes, press one or two onto the marshmallow, making it look like a monster. Feel free to get creative by alternating the fruit patterns to make each kabob look unique.
- Repeat for Remaining Skewers: Continue the process until all the skewers are filled with assorted fruit. You should have a colorful and fun collection of kabobs ready to go.
- Arrange and Serve: Place the finished Monster Fruit Kabobs in a glass or jar for a festive display or lay them flat on a serving platter. You can even create a fun centerpiece by tying a ribbon around the glass or platter.
- Enjoy: Your Monster Fruit Kabobs are now ready for your Halloween guests to enjoy. These fresh and fruity snacks will not only please the palate but will also add a whimsical touch to your Halloween festivities!
Eyeball Jello Shots
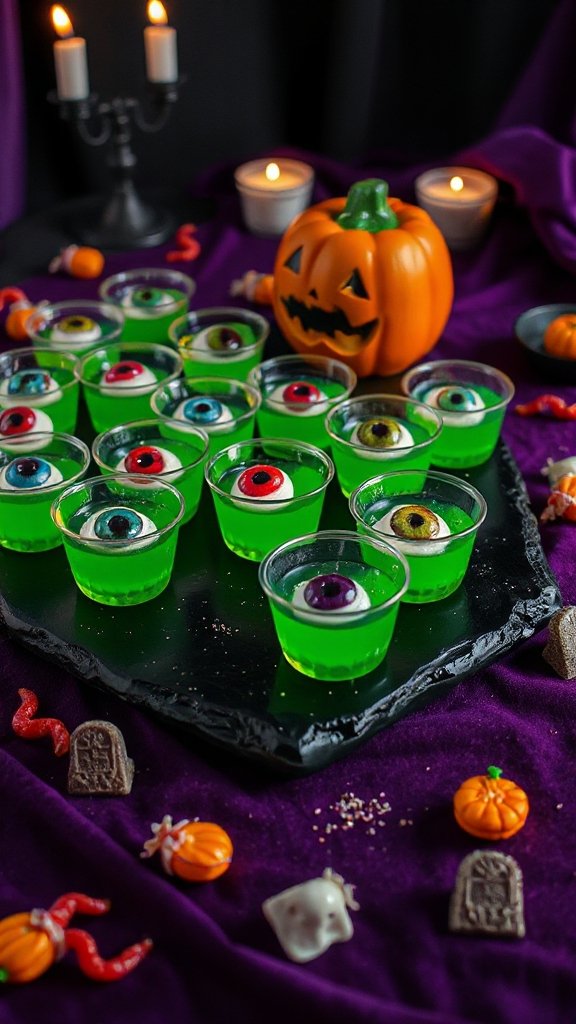
Eyeball Jello Shots are a creative and fun way to add a spooky flair to your Halloween party. These colorful gelatin treats resemble creepy eyeballs, making them a perfect addition to your Halloween festivities. They are not only visually striking but also delicious, combining fruity flavors with a festive presentation that will leave your guests talking about them long after the party is over.
| Ingredients | Quantity |
|---|---|
| Unflavored gelatin | 2 packets (1 oz each) |
| Water | 1 cup |
| Fruit juice (any flavor) | 1 cup |
| Sweetened condensed milk | 1 cup |
| Food coloring (red) | 1-2 drops |
| Gummy eyeballs (with candy) | 10-12 pieces |
| Plastic shot cups | 10-12 cups |
Cooking Instructions:
- Prepare the Jello: In a medium saucepan, bring 1 cup of water to a boil. Once boiling, remove it from heat and sprinkle the 2 packets of unflavored gelatin over the hot water. Stir continuously until the gelatin is completely dissolved, which typically takes about 2-3 minutes.
- Add Juice: After the gelatin is fully dissolved, add 1 cup of your chosen fruit juice to the mixture. Stir well until the juice is thoroughly combined with the gelatin.
- Pour into Cups: Carefully pour the gelatin mixture into your plastic shot cups, filling each cup about three-quarters full. Allow the cups to sit at room temperature until slightly cooled, then transfer them to the refrigerator.
- Chill: Let the Jello shots chill in the refrigerator for about 3-4 hours, or until they are fully set. This will guarantee they maintain their shape and texture when served.
- Prepare Eyeball Filling: While the Jello shots are setting, mix together the sweetened condensed milk with a few drops of red food coloring in a small bowl until you reach your desired shade of “blood.” This will be the “eyeball” part of your shot.
- Add Eyeballs: Once the Jello shots have set, carefully remove them from the refrigerator. Gently press a gummy eyeball into the center of each shot, making sure it sticks well.
- Top with Cream: Using a small spoon, scoop a small amount of the sweetened condensed milk mixture over the gummy eyeball to give it a spooky effect. This will resemble the “sclera” of the eye.
- Final Chill: Return the completed Eyeball Jello Shots to the refrigerator for another 30 minutes to firm up the creamy topping.
- Serve and Enjoy: Once the final preparations are complete, your Eyeball Jello Shots are ready to be served! Display them on a spooky tray or platter, and watch your guests’ reactions as they indulge in these creative treats.
Haunted Popcorn Mix
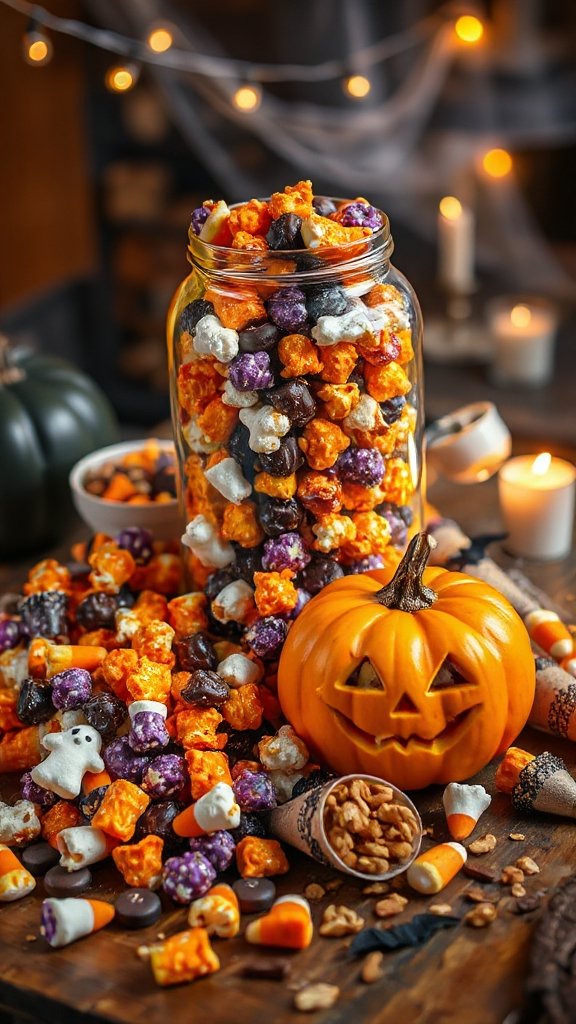
Haunted Popcorn Mix is a delightful and eerie snack perfect for Halloween parties. This fun and tasty treat combines popcorn, chocolate, and a variety of other spooky ingredients to create a colorful mix that both kids and adults will enjoy. It’s easy to make and can be served in festive bowls or bags for a fun grab-and-go snack!
| Ingredients | Quantity |
|---|---|
| Popcorn (popped) | 8 cups |
| White chocolate chips | 1 cup |
| Black chocolate chips | 1 cup |
| Candy corn | 1 cup |
| Halloween-themed sprinkles | 1/2 cup |
| Pretzel pieces | 1 cup |
| Marshmallows (mini) | 1 cup |
| Sea salt | 1/2 teaspoon |
Cooking Instructions:
- Pop the Popcorn: Begin by preparing your popcorn according to package instructions. If using an air popper, you’ll need about 1/2 cup of unpopped kernels to yield 8 cups of popped corn. Once done, set aside in a large mixing bowl.
- Melt White Chocolate: In a microwave-safe bowl, add the white chocolate chips. Microwave in 30-second intervals, stirring between each interval until completely melted and smooth. Be cautious not to overheat and burn the chocolate.
- Coat the Popcorn: Drizzle the melted white chocolate over the popped popcorn in the large mixing bowl. Use a spatula or large spoon to gently toss the popcorn, ensuring each piece is evenly coated with the white chocolate.
- Melt Black Chocolate: Repeat the melting process for the black chocolate chips. Once melted, drizzle the black chocolate over the coated popcorn, similarly mixing it into the popcorn until well distributed.
- Mix in Other Ingredients: Add the candy corn, pretzel pieces, mini marshmallows, and Halloween-themed sprinkles to the popcorn mixture. Gently fold all the ingredients together until well combined.
- Sprinkle with Sea Salt: Lightly sprinkle the sea salt over the mixture to enhance the sweet and salty flavor profile. Stir again to incorporate the salt evenly.
- Cool and Set: Spread the haunted popcorn mix out on a baking sheet lined with parchment paper. Allow it to cool for about 30 minutes so the chocolate can harden.
- Serve: Once the chocolate is set, break the popcorn mix into clusters. Serve in festive bowls, individual bags, or allow your guests to scoop their own mixture from a large decorated bowl. Enjoy the spooky goodness at your Halloween party!
Vampire Teeth Apples
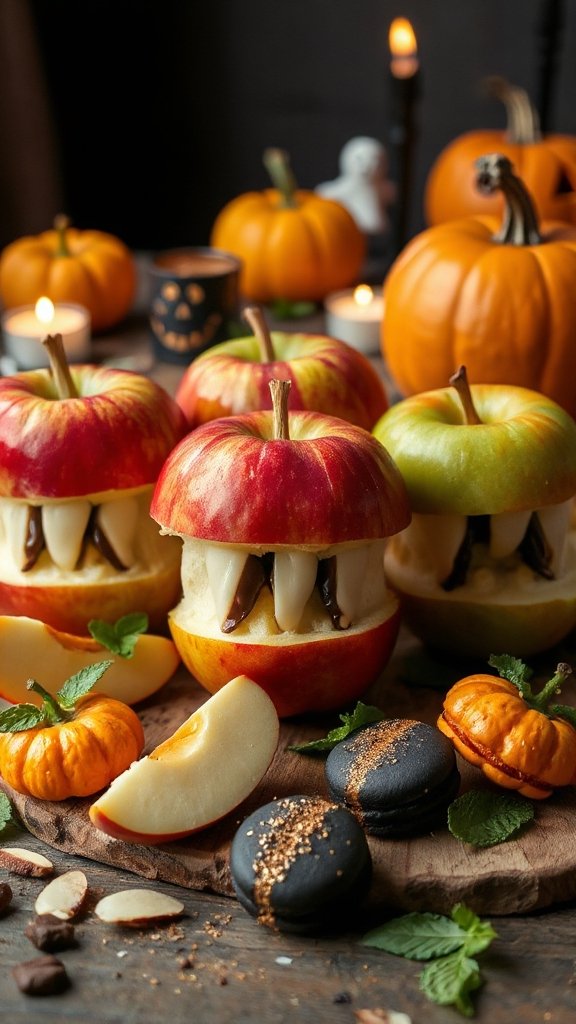
Vampire Teeth Apples are a fun and healthy Halloween treat that kids and adults alike will love. These spooky snacks combine the sweetness of apples with the crunch of almonds while adding a whimsical Halloween twist. They are easy to prepare and make for a great addition to any Halloween party or gathering.
| Ingredients | Quantity |
|---|---|
| Apples (medium-sized) | 2-3 |
| Almonds (sliced or whole) | 1 cup |
| Nut butter (e.g., almond or peanut) | 1/2 cup |
| Mini marshmallows | 1/2 cup |
| Optional: Red food coloring | A few drops (for added effect) |
Cooking Instructions:
- Prepare the Apples: Wash and dry the apples thoroughly. Using a sharp knife, slice each apple into quarters or wedges. Remove the core and seeds to create a safe-to-eat wedge.
- Spread Nut Butter: Take a butter knife or a spoon and spread a thin layer of nut butter on the cut side of each apple wedge. This will not only add flavor but also help the almonds stick.
- Create the Teeth: Take a slice of almond and press it into the nut butter at the front edge of the apple wedge to resemble a tooth. You can use whole almonds for the back teeth and sliced almonds for the front ones, placing them strategically to mimic a vampire’s scary fangs.
- Add Mini Marshmallows: For an extra spooky effect, stick mini marshmallows between the almond teeth to create a “mouth.” You can use a little more nut butter if needed to help the marshmallows stick.
- Garnish (Optional): If desired, add a few drops of red food coloring on the apples to simulate blood for an even more creepy look. Just dab the food coloring around the edges of the apple slices.
- Serve: Arrange the Vampire Teeth Apples on a spooky-themed platter and serve immediately. Enjoy your ghoulish creation at your Halloween party!
These Vampire Teeth Apples are sure to be a hit with all your party guests!
Candy Corn Marshmallow Treats
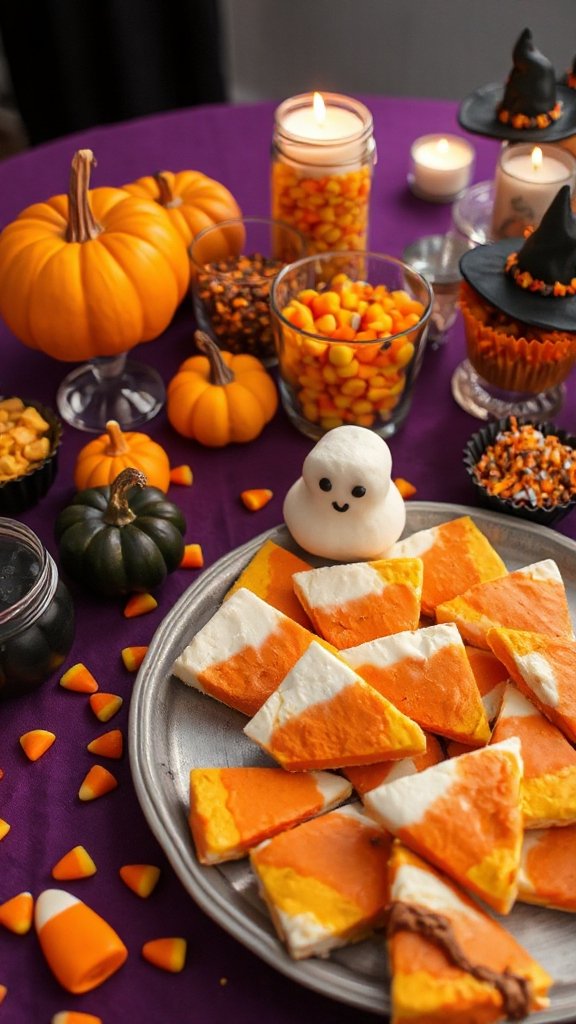
Candy Corn Marshmallow Treats are a festive and delightful no-bake snack perfect for Halloween parties. These treats combine the classic rice cereal crispiness with the sweet, chewy goodness of marshmallows, all while resembling the iconic candy corn colors. They are fun to make and will definitely add a colorful touch to your holiday festivities.
| Ingredients | Quantity |
|---|---|
| Butter | 4 tablespoons |
| Mini marshmallows | 4 cups |
| Rice cereal | 6 cups |
| Yellow food coloring | A few drops |
| Orange food coloring | A few drops |
| Optional: Candy corn | For garnish |
Cooking Instructions:
1. Grease the Pan: Start by greasing a 9×13 inch baking pan with butter or cooking spray to prevent the treats from sticking.
2. Melt the Butter: In a large saucepan, melt the butter over low heat. Once melted, remove it from the heat.
3. Add Mini Marshmallows: Stir in the mini marshmallows into the melted butter. Keep stirring until completely melted and smooth.
4. Separate the Mixture: Divide the melted marshmallow mixture into three bowls. This will allow you to create the different colors for your candy corn treats.
5. Color the Mixtures:
- In the first bowl, add a few drops of orange food coloring and mix until fully combined.
- In the second bowl, add yellow food coloring and stir until you achieve the desired color.
- Leave the third bowl plain (white) for the base of the candy corn.
6. Add Rice Cereal: Into each bowl, add 2 cups of rice cereal and mix gently until fully coated with the marshmallow mixture.
7. Layer the Mixtures:
- Press the plain (white) rice cereal mixture into the bottom of the prepared baking pan, using a spatula or your hands (dampen them to prevent sticking) to flatten it evenly.
- Next, add the yellow layer by pressing the yellow rice cereal mixture on top of the white layer.
- Finally, add the orange layer on top, again pressing firmly to guarantee all layers stick together.
8. Cool: Allow the treats to cool at room temperature for about 30 minutes to set.
9. Cut & Serve: Once set, cut the treats into squares or triangles to mimic candy corn shapes. For added festivity, garnish with a few pieces of candy corn on top before serving.
These Candy Corn Marshmallow Treats are sure to be a colorful and tasty addition to your Halloween party spread!
