
As an Amazon Associate I earn from qualifying purchases.
Editorial Policy | Disclosure Policy
Gluten-Free Chocolate Brownies

Gluten-free chocolate brownies are a decadent dessert that can be enjoyed by those with gluten sensitivities or celiac disease. Rich, fudgy, and packed with chocolate flavor, these brownies are sure to satisfy any sweet tooth while being safe for everyone to indulge in. Easy to make and requiring just a few simple ingredients, you can whip up a batch in no time!
| Ingredients | Quantity |
|---|---|
| Gluten-free all-purpose flour | 1 cup |
| Unsweetened cocoa powder | 1/2 cup |
| Sugar | 1 cup |
| Brown sugar | 1/2 cup |
| Eggs | 3 large |
| Unsalted butter, melted | 1/2 cup (1 stick) |
| Vanilla extract | 1 teaspoon |
| Baking powder | 1 teaspoon |
| Salt | 1/4 teaspoon |
| Chocolate chips (optional) | 1/2 cup |
Cooking Steps:
- Preheat your oven to 350°F (175°C) and grease a 9×9 inch baking pan or line it with parchment paper.
- In a large bowl, mix together the melted butter, sugar, and brown sugar until well combined.
- Add in the eggs and vanilla extract, then mix until smooth.
- In another bowl, whisk together the gluten-free flour, cocoa powder, baking powder, and salt.
- Gradually add the dry ingredients to the wet ingredients, stirring just until combined. Fold in chocolate chips if using.
- Pour the batter into the prepared pan and spread it evenly.
- Bake for 20-25 minutes, or until a toothpick inserted in the center comes out with a few moist crumbs.
- Allow the brownies to cool in the pan before cutting into squares and serving. Enjoy!
Nut-Free Oatmeal Cookies

Nut-free oatmeal cookies are a delicious and wholesome treat that everyone can enjoy, even those with nut allergies. Chewy and slightly sweet, these cookies are packed with oats and can be customized with your favorite add-ins, like raisins or chocolate chips. Perfect for school lunches or as an afternoon snack, they’re simple to make and require no nuts!
| Ingredients | Quantity |
|---|---|
| Old-fashioned rolled oats | 2 cups |
| All-purpose flour | 1 cup |
| Brown sugar | 1 cup |
| Granulated sugar | 1/2 cup |
| Baking soda | 1 teaspoon |
| Salt | 1/2 teaspoon |
| Unsalted butter, softened | 1/2 cup (1 stick) |
| Eggs | 2 large |
| Vanilla extract | 1 teaspoon |
| Raisins or chocolate chips (optional) | 1 cup |
Cooking Steps:
- Preheat your oven to 350°F (175°C) and line a baking sheet with parchment paper.
- In a large bowl, cream together the softened butter, brown sugar, and granulated sugar until light and fluffy.
- Beat in the eggs and vanilla extract until well combined.
- In a separate bowl, whisk together the rolled oats, flour, baking soda, and salt.
- Gradually add the dry ingredients to the wet ingredients, mixing until just combined. Fold in raisins or chocolate chips if desired.
- Drop spoonfuls of the dough onto the prepared baking sheet, spacing them about 2 inches apart.
- Bake for 10-12 minutes, or until the edges are lightly golden.
- Allow the cookies to cool on the baking sheet for a few minutes before transferring to a wire rack to cool completely. Enjoy!
Dairy-Free Banana Bread
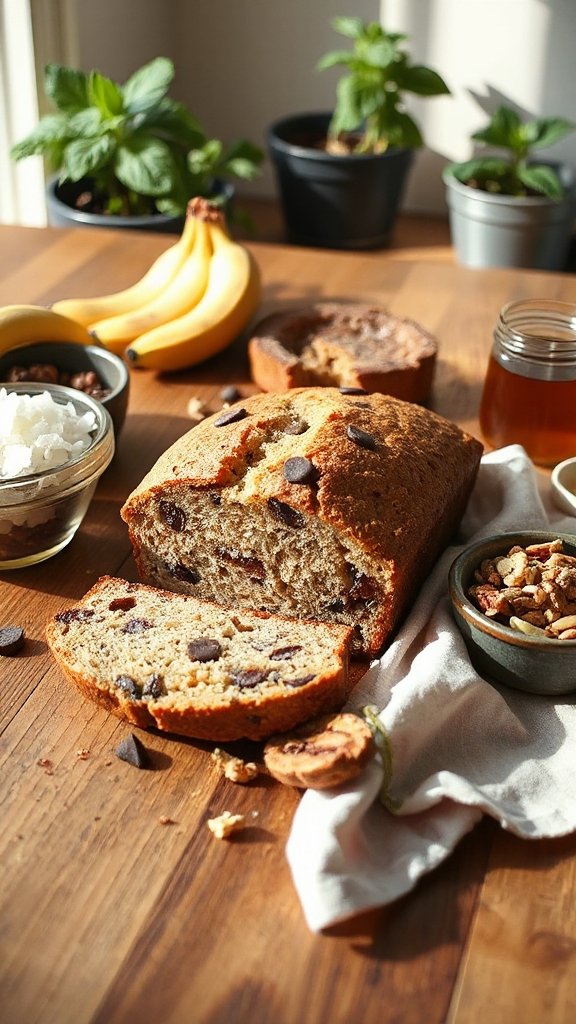
Dairy-free banana bread is a moist and flavorful treat perfect for breakfast or as a snack. This recipe uses ripe bananas for natural sweetness and substitutes traditional dairy ingredients with plant-based alternatives, making it suitable for those with dairy sensitivities. It’s simple to bake, and you’ll love the delightful aroma that fills your kitchen!
| Ingredients | Quantity |
|---|---|
| Ripe bananas | 3, mashed |
| All-purpose flour | 2 cups |
| Granulated sugar | 3/4 cup |
| Baking soda | 1 teaspoon |
| Baking powder | 1 teaspoon |
| Salt | 1/2 teaspoon |
| Dairy-free milk (e.g., almond or soy) | 1/3 cup |
| Vegetable oil | 1/3 cup |
| Vanilla extract | 1 teaspoon |
| Optional: chopped walnuts or chocolate chips | 1/2 cup |
Cooking Steps:
- Preheat your oven to 350°F (175°C) and grease a 9×5 inch loaf pan.
- In a large bowl, combine the mashed bananas, vegetable oil, dairy-free milk, sugar, and vanilla extract until smooth.
- In another bowl, whisk together the flour, baking soda, baking powder, and salt.
- Gradually mix the dry ingredients into the wet ingredients until just combined. Fold in any optional ingredients like walnuts or chocolate chips.
- Pour the batter into the prepared loaf pan and smooth the top.
- Bake for 50-60 minutes, or until a toothpick inserted in the center comes out clean.
- Allow the banana bread to cool in the pan for about 10 minutes before transferring it to a wire rack to cool completely. Enjoy!
Vegan Pumpkin Muffins

Vegan pumpkin muffins are a delicious and wholesome option for those looking for a dairy-free and egg-free treat. These moist and spiced muffins are perfect for breakfast, snacks, or even as a healthy dessert. Made with pumpkin puree and warm spices, they are bursting with flavor and provide a wonderful aroma while baking.
| Ingredients | Quantity |
|---|---|
| Whole wheat flour | 2 cups |
| Pumpkin puree | 1 cup |
| Granulated sugar | 3/4 cup |
| Baking soda | 1 teaspoon |
| Baking powder | 1 teaspoon |
| Ground cinnamon | 1 teaspoon |
| Ground nutmeg | 1/4 teaspoon |
| Salt | 1/2 teaspoon |
| Dairy-free milk (e.g., almond or soy) | 1/2 cup |
| Vegetable oil | 1/3 cup |
| Vanilla extract | 1 teaspoon |
| Optional: pumpkin seeds | 1/4 cup |
Cooking Steps:
- Preheat your oven to 350°F (175°C) and line a muffin tin with paper liners.
- In a large bowl, mix the pumpkin puree, vegetable oil, dairy-free milk, granulated sugar, and vanilla extract until well combined.
- In a separate bowl, whisk together the whole wheat flour, baking soda, baking powder, ground cinnamon, nutmeg, and salt.
- Gradually add the dry ingredients to the wet mixture and stir until just combined. If desired, fold in pumpkin seeds.
- Spoon the batter into the prepared muffin tin, filling each cup about 2/3 full.
- Bake for 18-20 minutes, or until a toothpick inserted into the center comes out clean.
- Allow the muffins to cool in the tin for a few minutes before transferring them to a wire rack. Enjoy your delicious vegan pumpkin muffins!
Egg-Free Chocolate Chip Cookies

Egg-Free Chocolate Chip Cookies are a delightful treat that everyone can enjoy, regardless of dietary restrictions. These cookies are soft, chewy, and packed with chocolatey goodness, making them a perfect snack or dessert for both kids and adults. The absence of eggs guarantees they are suitable for those with egg allergies, while still maintaining the classic cookie taste that everyone loves.
| Ingredients | Quantity |
|---|---|
| All-purpose flour | 2 cups |
| Granulated sugar | 1 cup |
| Brown sugar | 1/2 cup |
| Baking soda | 1 teaspoon |
| Baking powder | 1/2 teaspoon |
| Salt | 1/2 teaspoon |
| Dairy-free butter | 1/2 cup (softened) |
| Dairy-free milk | 1/4 cup |
| Vanilla extract | 1 teaspoon |
| Dairy-free chocolate chips | 1 cup |
Cooking Steps:
- Preheat your oven to 350°F (175°C) and line a baking sheet with parchment paper.
- In a large bowl, cream together the softened dairy-free butter, granulated sugar, and brown sugar until smooth.
- Stir in the dairy-free milk and vanilla extract, mixing until well combined.
- In a separate bowl, whisk together the all-purpose flour, baking soda, baking powder, and salt.
- Gradually add the dry ingredients to the wet mixture, stirring until just combined. Fold in the dairy-free chocolate chips.
- Drop spoonfuls of dough onto the prepared baking sheet, spacing them a couple of inches apart.
- Bake for 10-12 minutes, or until the edges are golden. Allow the cookies to cool on the baking sheet for a few minutes before transferring them to a wire rack. Enjoy your delicious egg-free chocolate chip cookies!
Allergy-Friendly Rice Krispie Treats
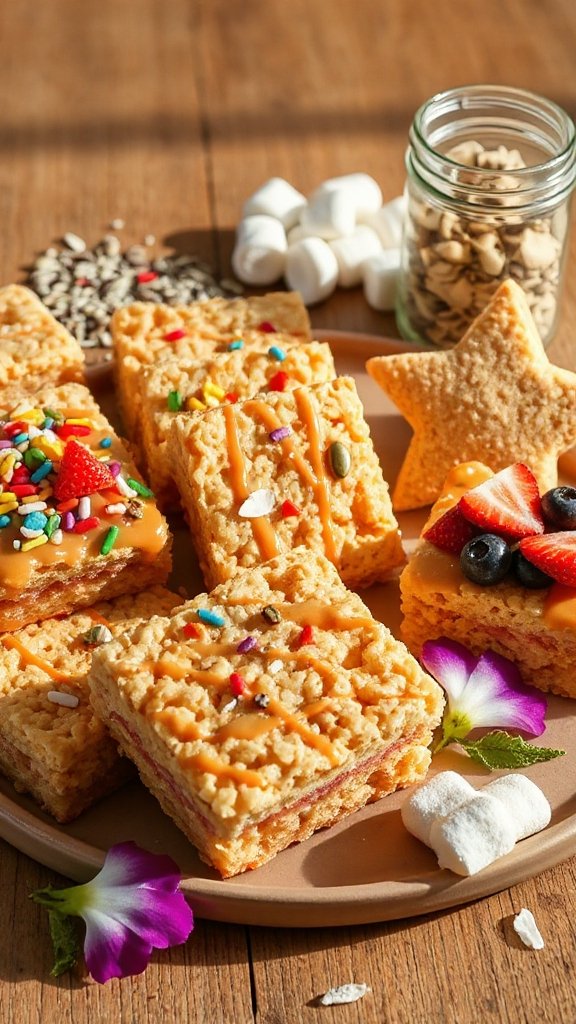
Allergy-Friendly Rice Krispie Treats are a simple and nostalgic dessert that can be enjoyed by those with various dietary restrictions. These treats are made without traditional marshmallows, making them suitable for individuals with dairy or gluten allergies. The combination of crispy rice cereal and a sweet, sticky mixture creates a chewy, crunchy delight that is easy to make and even easier to eat!
| Ingredients | Quantity |
|---|---|
| Allergy-friendly crispy rice cereal | 6 cups |
| Dairy-free marshmallow fluff | 1 cup |
| Dairy-free butter or coconut oil | 1/4 cup |
| Vanilla extract | 1 teaspoon |
| Optional mix-ins (such as dairy-free chocolate chips or sprinkles) | 1/2 cup |
Cooking Steps:
- In a large saucepan, melt the dairy-free butter or coconut oil over low heat.
- Once melted, stir in the dairy-free marshmallow fluff and vanilla extract, mixing until smooth and well combined.
- Gradually add the crispy rice cereal, mixing until all the cereal is evenly coated with the marshmallow mixture.
- If desired, fold in any optional mix-ins before transferring the mixture to a greased 9×9-inch pan.
- Press the mixture firmly into the pan using a spatula or your hands to create an even layer.
- Allow the treats to cool for about 30 minutes before cutting into squares and serving. Enjoy your delicious allergy-friendly Rice Krispie Treats!
Coconut Macaroons

Coconut macaroons are a delightful treat that is both chewy and sweet, making them an excellent dessert for those with allergy sensitivities. These gluten-free, nut-free treats are primarily made from shredded coconut, egg whites, and a touch of sweetener, resulting in a simple yet satisfying confection that can be enjoyed by many.
| Ingredients | Quantity |
|---|---|
| Shredded coconut (unsweetened) | 3 cups |
| Egg whites | 2 large |
| Honey or maple syrup | 1/2 cup |
| Vanilla extract | 1 teaspoon |
| Pinch of salt | 1/4 teaspoon |
Cooking Steps:
- Preheat your oven to 325°F (163°C) and line a baking sheet with parchment paper.
- In a large bowl, combine the shredded coconut, egg whites, honey (or maple syrup), vanilla extract, and salt; mix until all ingredients are evenly combined.
- Using a spoon or your hands, form small mounds of the mixture and place them on the prepared baking sheet, spacing them about 1 inch apart.
- Bake in the preheated oven for 15-20 minutes, or until the edges are golden brown.
- Allow the macaroons to cool on the baking sheet for 5 minutes before transferring to a wire rack to cool completely. Enjoy your allergy-friendly coconut macaroons!
Fruit and Nut Energy Bites

Fruit and nut energy bites are a healthy and convenient snack option, perfect for those who may have allergy sensitivities. These no-bake treats are packed with wholesome ingredients, providing a burst of energy and natural sweetness. They are gluten-free, nut-free (if you substitute sunflower seeds for nuts), and can easily be tailored to suit your dietary needs.
| Ingredients | Quantity |
|---|---|
| Medjool dates (pitted) | 1 cup |
| Rolled oats | 1 cup |
| Sunflower seeds (or nuts) | 1/2 cup |
| Chia seeds | 1/4 cup |
| Coconut flakes (unsweetened) | 1/4 cup |
| Vanilla extract | 1 teaspoon |
| Pinch of salt | 1/4 teaspoon |
Cooking Steps:
- In a food processor, combine the pitted Medjool dates, rolled oats, sunflower seeds, chia seeds, coconut flakes, vanilla extract, and salt.
- Pulse until the mixture becomes sticky and well combined.
- Scoop out small portions and roll them into bite-sized balls.
- Place the energy bites in the refrigerator for about 30 minutes to firm up.
- Enjoy your delicious and nutritious fruit and nut energy bites!
Lemon Poppy Seed Mini Cakes

Lemon poppy seed mini cakes are a delightful, allergy-friendly dessert option that provides a revitalizing citrus flavor and a light, fluffy texture. These mini cakes are gluten-free and can be made dairy-free by using plant-based alternatives, making them perfect for those with dietary sensitivities or allergies. They are sure to impress your guests and make for a lovely addition to any gathering.
| Ingredients | Quantity |
|---|---|
| Almond flour | 2 cups |
| Coconut flour | 1/2 cup |
| Baking powder | 1 tablespoon |
| Poppy seeds | 2 tablespoons |
| Maple syrup | 1/2 cup |
| Unsweetened applesauce | 1/2 cup |
| Lemon juice | 1/4 cup |
| Lemon zest | 1 tablespoon |
| Coconut oil (melted) | 1/4 cup |
| Salt | 1/4 teaspoon |
Cooking Steps:
- Preheat the oven to 350°F (175°C) and grease a mini muffin tin.
- In a large mixing bowl, combine almond flour, coconut flour, baking powder, poppy seeds, and salt.
- In another bowl, whisk together the maple syrup, applesauce, lemon juice, lemon zest, and melted coconut oil until smooth.
- Pour the wet ingredients into the dry ingredients and mix until just combined.
- Divide the batter evenly among the mini muffin tin compartments.
- Bake for 12-15 minutes, or until a toothpick inserted in the center comes out clean.
- Allow the mini cakes to cool in the pan for a few minutes before transferring them to a cooling rack.
- Serve and enjoy your allergy-sensitive lemon poppy seed mini cakes!
Chocolate Avocado Pudding
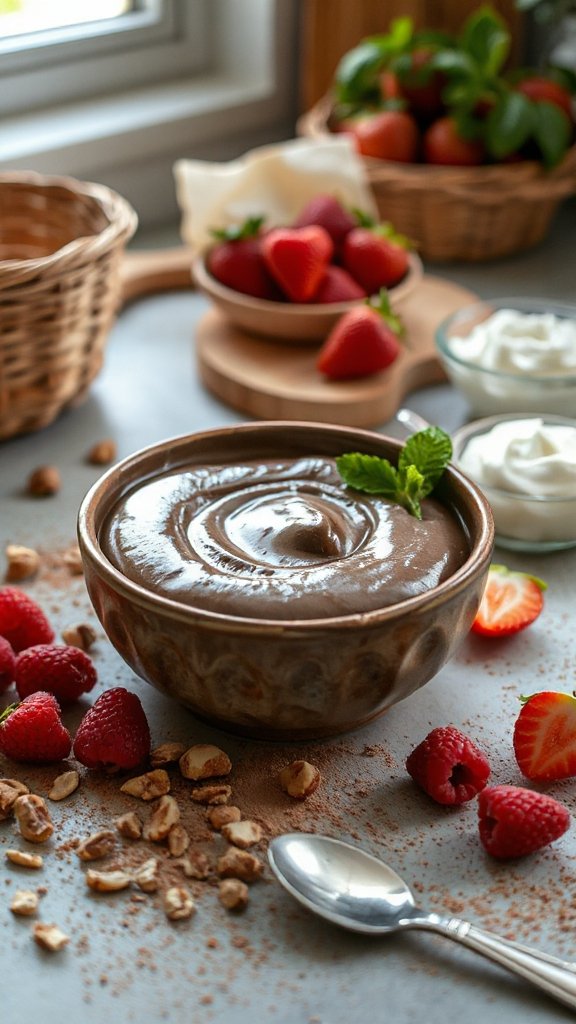
Chocolate avocado pudding is a rich and creamy dessert that is not only delicious but also allergy-sensitive, being both dairy-free and gluten-free. This indulgent treat utilizes ripe avocados to create a smooth texture while being sweetened naturally. It’s a fantastic option for those looking to satisfy their chocolate cravings without compromising their dietary needs.
| Ingredients | Quantity |
|---|---|
| Ripe avocados | 2 large |
| Unsweetened cocoa powder | 1/3 cup |
| Maple syrup | 1/4 cup |
| Vanilla extract | 1 teaspoon |
| Almond milk | 1/2 cup |
| Salt | 1/4 teaspoon |
Cooking Steps:
- Cut the ripe avocados in half, remove the pits, and scoop the flesh into a blender or food processor.
- Add cocoa powder, maple syrup, vanilla extract, almond milk, and salt to the blender.
- Blend the mixture on high speed until it is smooth and creamy, scrapping down the sides as needed.
- Taste and adjust sweetness if desired by adding more maple syrup.
- Transfer the pudding into serving bowls and chill in the refrigerator for at least 30 minutes before serving.
- Serve chilled and enjoy your allergy-sensitive chocolate avocado pudding!
No-Bake Peanut Butter Bars

No-bake peanut butter bars are a delightful and allergy-sensitive dessert option that can satisfy your sweet tooth without the need for baking. These bars are gluten-free and can easily be made dairy-free by using vegan-friendly alternatives. With a rich peanut butter flavor and a chewy texture, they are perfect for a quick treat or a healthy snack.
| Ingredients | Quantity |
|---|---|
| Natural peanut butter | 1 cup |
| Oats (gluten-free if needed) | 2 cups |
| Pure maple syrup | 1/3 cup |
| Honey or agave syrup | 1/4 cup |
| Vanilla extract | 1 teaspoon |
| Salt | 1/4 teaspoon |
| Dairy-free chocolate chips | 1/2 cup (optional) |
Cooking Steps:
- In a large mixing bowl, combine the peanut butter, maple syrup, honey/agave, vanilla extract, and salt. Mix well until smooth.
- Stir in the oats and combine until they are evenly coated with the peanut butter mixture.
- If using, fold in the dairy-free chocolate chips.
- Line an 8×8 inch baking pan with parchment paper and press the mixture into the pan firmly and evenly.
- Refrigerate for at least 1-2 hours or until the bars are firm.
- Once set, cut into squares or bars, and enjoy your no-bake peanut butter bars!