
As an Amazon Associate I earn from qualifying purchases.
Editorial Policy | Disclosure Policy
Mini Pizza Kits

Mini Pizza Kits are a fun and customizable lunch option that’s perfect for back to school! These DIY kits allow kids to assemble their own mini pizzas using a variety of toppings, making lunchtime not only delicious but interactive as well. This makes it easier for parents to prepare lunches while ensuring kids enjoy their meals, catering to their individual tastes.
| Ingredients | Quantity |
|---|---|
| Mini pita breads | 4 |
| Pizza sauce | 1/2 cup |
| Shredded mozzarella cheese | 1 cup |
| Pepperoni slices | 1/2 cup |
| Bell peppers, sliced | 1/4 cup |
| Mushrooms, sliced | 1/4 cup |
| Black olives, sliced | 1/4 cup |
| Italian seasoning | 1 tsp |
Instructions:
- Preheat the oven to 350°F (175°C).
- Place mini pita breads on a baking sheet and spoon pizza sauce onto each one.
- Sprinkle shredded mozzarella cheese evenly over the sauce.
- Add desired toppings (pepperoni, bell peppers, mushrooms, black olives).
- Sprinkle a pinch of Italian seasoning on top if desired.
- Bake in the oven for about 10-12 minutes or until the cheese is melted and bubbly.
- Allow to cool slightly before packing into lunch containers.
Build-Your-Own Tacos
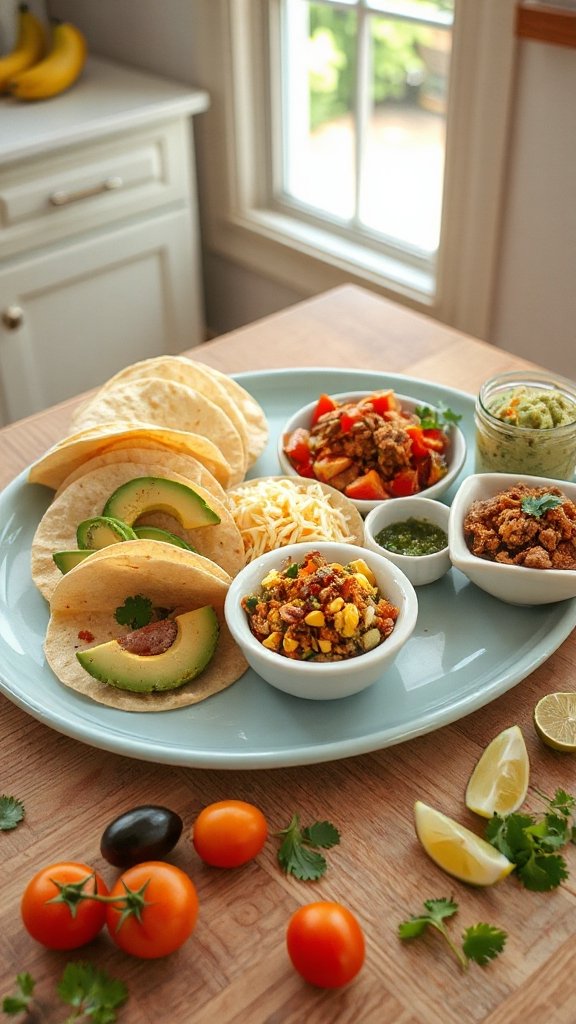
Build-Your-Own Tacos are a fun and engaging lunch option for kids heading back to school. This DIY taco kit allows children to create their own taco masterpieces using their favorite fillings and toppings. Not only does this make lunchtime more exciting, but it also encourages kids to explore different flavor combinations while being involved in their meal prep.
| Ingredients | Quantity |
|---|---|
| Small corn or flour tortillas | 4 |
| Ground beef or turkey | 1 cup |
| Taco seasoning | 1 package |
| Shredded lettuce | 1 cup |
| Chopped tomatoes | 1/2 cup |
| Shredded cheese (cheddar or Mexican blend) | 1 cup |
| Sour cream | 1/2 cup |
| Sliced jalapeños (optional) | 1/4 cup |
| Salsa | 1/2 cup |
| Avocado slices (optional) | 1/2 avocado |
Instructions:
- In a skillet over medium heat, cook the ground beef or turkey until fully cooked; drain excess fat if necessary.
- Stir in taco seasoning and follow package instructions to combine with meat.
- Heat tortillas in a dry skillet or microwave for a few seconds until warm.
- Pack the warm tortillas and taco filling in separate containers.
- Place shredded lettuce, chopped tomatoes, cheese, sour cream, jalapeños, salsa, and avocado slices in small containers to allow for customization.
- Pack everything into lunch boxes, and let kids build their own tacos at lunchtime!
DIY Sushi Rolls
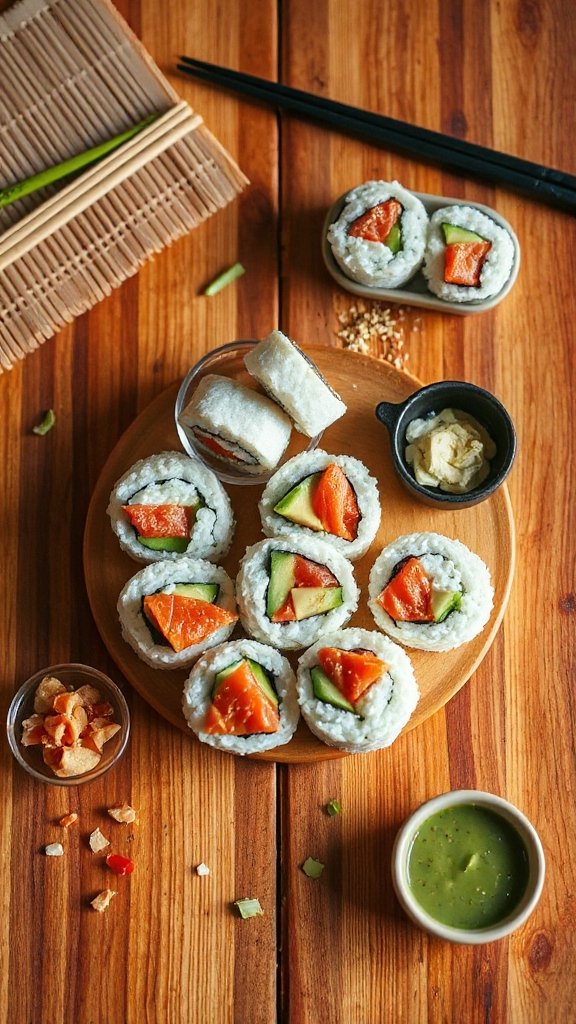
DIY Sushi Rolls are an exciting and nutritious lunch option for kids heading back to school. This hands-on meal allows children to assemble their own sushi rolls using a variety of fresh ingredients, encouraging creativity and exploration of different flavors while also introducing them to the fun of sushi-making.
| Ingredients | Quantity |
|---|---|
| Sushi rice | 2 cups |
| Nori sheets | 4-6 sheets |
| Rice vinegar | 2 tablespoons |
| Sugar | 1 tablespoon |
| Salt | 1 teaspoon |
| Cucumber strips | 1 cup |
| Carrot sticks | 1 cup |
| Avocado slices | 1 avocado |
| Cooked shrimp or crab sticks | 1 cup |
| Soy sauce | For serving |
| Pickled ginger (optional) | For serving |
Instructions:
- Rinse the sushi rice under cold water until the water runs clear, then cook according to package instructions.
- Once cooked, mix rice vinegar, sugar, and salt in a small bowl until dissolved, then fold this mixture into the warm rice.
- Lay a nori sheet on a bamboo sushi mat (or a clean surface) and spread a thin layer of sushi rice over the nori, leaving an inch at the top edge.
- Arrange cucumber, carrot, avocado, and shrimp or crab sticks in a line across the center of the rice.
- Using the mat, carefully roll the sushi away from you, pressing firmly but gently to shape it into a cylinder.
- Seal the edge of the nori with a bit of water, then slice the roll into bite-sized pieces.
- Pack sushi rolls in a lunch box with soy sauce and pickled ginger, allowing kids to enjoy their creations at school!
Yogurt Parfait Stations

Yogurt parfaits are a fun and customizable lunch option that kids can prepare themselves as they head back to school. These delicious layered treats combine creamy yogurt, fresh fruits, crunchy granola, and other delightful toppings, making them not only nutritious but also exciting to assemble. Setting up a yogurt parfait station allows kids to mix and match their favorite ingredients, promoting healthy eating habits and independence.
| Ingredients | Quantity |
|---|---|
| Yogurt (plain or flavored) | 4 cups |
| Granola | 2 cups |
| Berries (strawberries, blueberries, raspberries) | 2 cups |
| Banana slices | 2 bananas |
| Honey or maple syrup (optional) | To drizzle |
| Chopped nuts (almonds, walnuts) (optional) | 1 cup |
| Coconut flakes (optional) | 1 cup |
Instructions:
- Set out bowls with different types of yogurt for kids to choose from.
- Provide a variety of fresh fruits, granola, and optional toppings in separate containers.
- Allow the kids to layer their chosen yogurt with fruits, granola, and toppings in a cup or mason jar.
- Encourage them to get creative with their combinations and add a drizzle of honey or syrup if desired.
- Pack the completed parfaits in a lunch box, ensuring they can enjoy their crafted treats at school!
Snackable Cheese and Meat Platter
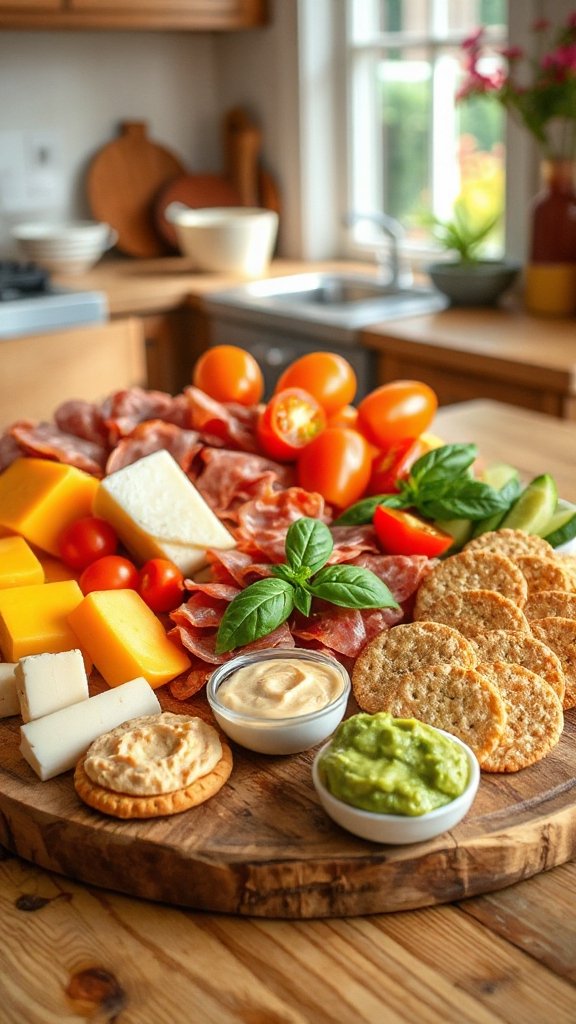
Snackable cheese and meat platters are a fun and nutritious option for back-to-school lunches. They provide a delightful selection of cheese, deli meats, and various accompaniments that can be customized to your child’s tastes. These platters encourage kids to mix and match their favorites, making lunchtime enjoyable and stress-free.
| Ingredients | Quantity |
|---|---|
| Assorted cheeses (cheddar, mozzarella, pepper jack) | 8 ounces (total) |
| Deli meats (turkey, ham, salami) | 8 ounces (total) |
| Crackers | 1 box |
| Grapes or cherry tomatoes | 1 cup |
| Baby carrots or cucumber slices | 1 cup |
| Optional: olives or pickles | 1 cup |
Instructions:
- Start by cutting the assorted cheeses into cubes or slices and arranging them on a platter.
- Roll or fold the deli meats for a neat presentation and place them alongside the cheese.
- Add a variety of crackers around the cheese and meat for extra crunch.
- Fill in the gaps with grapes or cherry tomatoes, and add baby carrots or cucumber slices for freshness.
- Include optional olives or pickles for a tangy touch.
- Pack the platter in a container or lunch box, ensuring that all components are kept fresh until lunchtime!
Veggie and Hummus Boxes
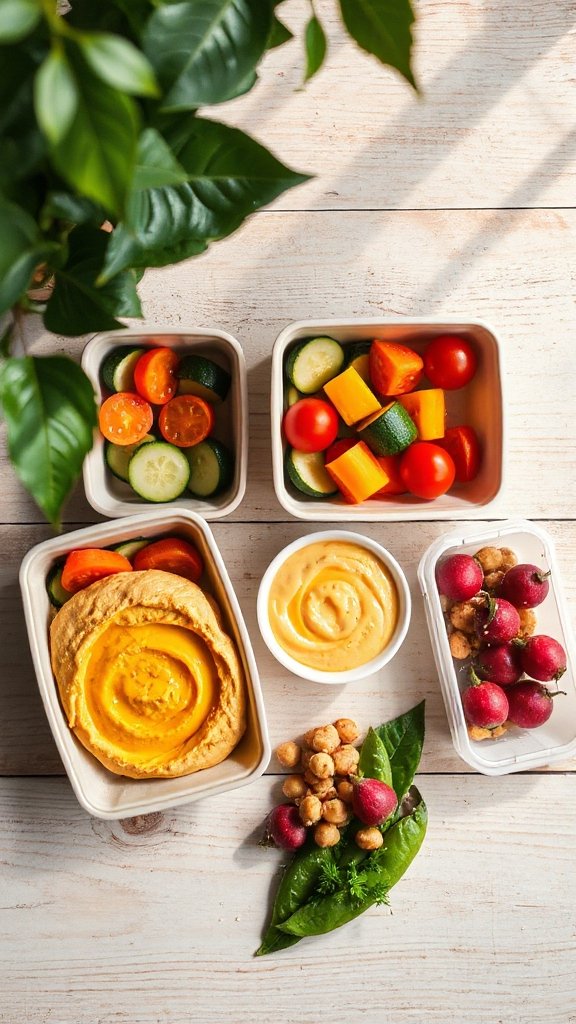
Veggie and hummus boxes are a fantastic and healthy option for back-to-school lunches. These boxes not only provide a colorful array of fresh vegetables but also come with a delicious hummus dip, making them a fun and interactive meal for kids that encourages them to enjoy their veggies.
| Ingredients | Quantity |
|---|---|
| Hummus | 1 cup |
| Carrot sticks | 1 cup |
| Cucumber slices | 1 cup |
| Bell pepper strips | 1 cup |
| Cherry tomatoes | 1 cup |
| Celery sticks | 1 cup |
| Optional: pita bread or chips | 1 cup |
Instructions:
- Prepare the vegetables by washing and cutting them into suitable sticks or slices.
- Arrange the carrot sticks, cucumber slices, bell pepper strips, cherry tomatoes, and celery sticks neatly in a lunch box.
- Place the hummus in a small container, making it easy to dip the veggies.
- If using, add pita bread or chips for extra variety and crunch.
- Seal the lunch box and store it in the refrigerator until ready to pack for school!
Fruit Kabobs
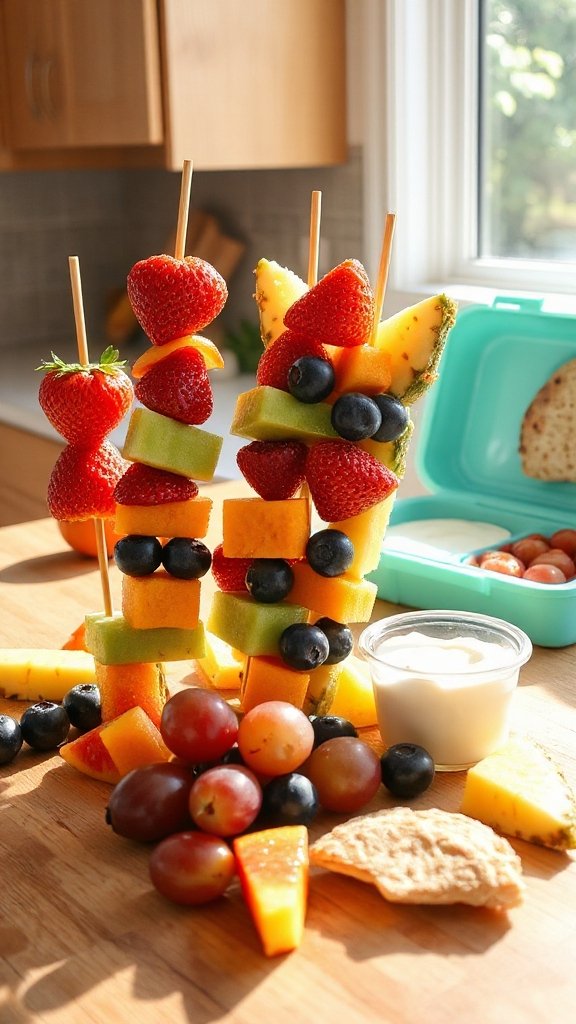
Fruit kabobs are a fun and delightful way to add a burst of color and nutrition to your child’s lunchbox. These skewers of fresh fruit not only make for a visually appealing meal but also provide a variety of vitamins and antioxidants. They are easy to assemble and perfect for kids to enjoy on-the-go.
| Ingredients | Quantity |
|---|---|
| Strawberries | 1 cup |
| Pineapple chunks | 1 cup |
| Grapes | 1 cup |
| Kiwi slices | 1 cup |
| Banana slices | 1 cup |
| Skewers | 6-8 skewers |
Instructions:
- Wash all the fruit thoroughly.
- Prepare the fruit by cutting it into bite-sized pieces as needed (e.g., slice kiwis and bananas).
- Take each skewer and alternate threading the fruit pieces onto it, creating a colorful pattern.
- Once all the fruit is skewered, wrap them in plastic wrap or place them in a lunch box.
- Store them in the refrigerator until ready to pack for school!
Breakfast for Lunch
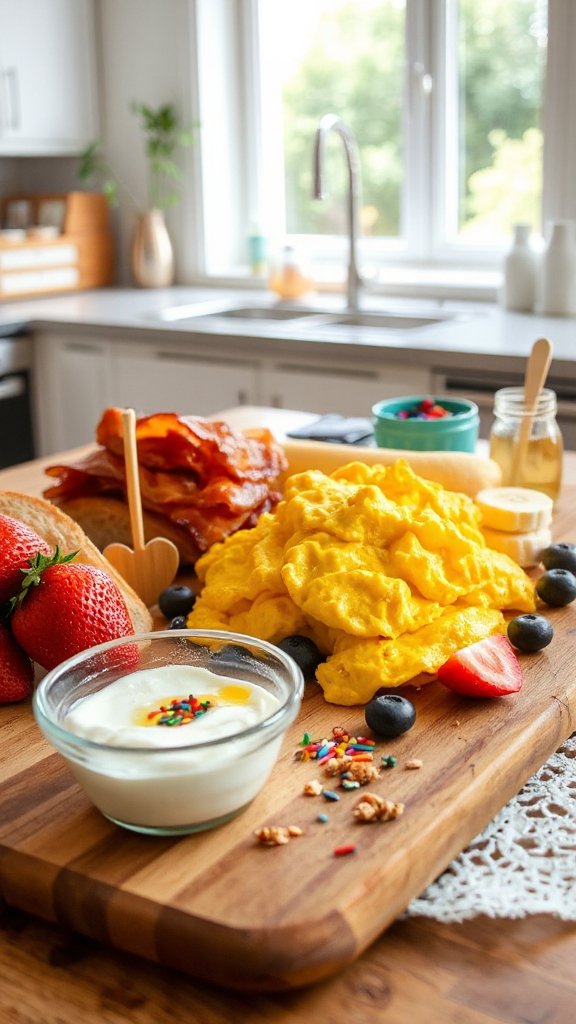
Breakfast for lunch is always a hit, and it’s a fantastic way to mix things up during the school week! With this DIY Breakfast for Lunch, you can create a fun and nutritious meal that includes mini pancakes, eggs, and a selection of toppings. Your child can build their own delightful breakfast “lunchable,” ensuring they get both energy and enjoyment out of their meal.
| Ingredients | Quantity |
|---|---|
| Mini pancakes | 10-12 pancakes |
| Scrambled eggs | 4 eggs |
| Sliced strawberries | 1 cup |
| Maple syrup | 1/4 cup |
| Whipped cream | 1/2 cup |
| Chocolate chips | 1/2 cup |
| Honey | To taste |
Instructions:
- Prepare mini pancakes according to your favorite recipe or package instructions, then keep them warm.
- Scramble the eggs in a pan and season them with salt and pepper as desired.
- Once the pancakes and eggs are ready, pack them along with the fruit, syrup, whipped cream, chocolate chips, and honey into a lunchbox.
- Let your child assemble their breakfast lunchable before enjoying it!
Pita Pocket Creations
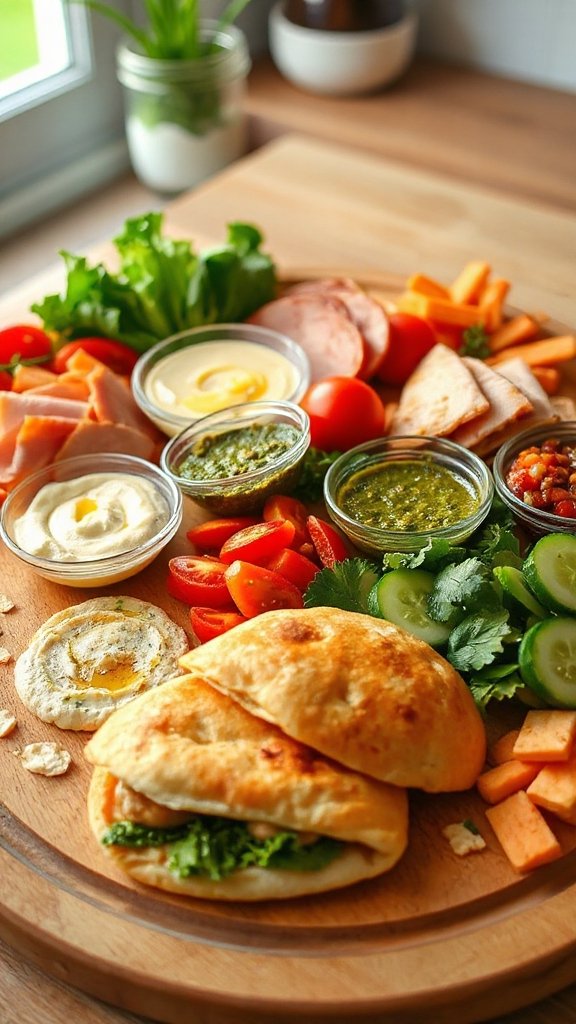
Pita pocket creations are a delightful way to pack a nutritious and fun lunch for school. These versatile pockets can be filled with an array of ingredients, allowing kids to customize their meal to suit their tastes. With a combination of protein, veggies, and delicious sauces, these pita pockets can be both filling and enjoyable.
| Ingredients | Quantity |
|---|---|
| Pita bread | 4 pockets |
| Hummus | 1 cup |
| Grilled chicken breast | 1 cup, sliced |
| Cucumber, sliced | 1 cup |
| Cherry tomatoes, halved | 1 cup |
| Shredded lettuce | 1 cup |
| Feta cheese | 1/2 cup, crumbled |
| Olive oil | 2 tablespoons |
| Lemon juice | 1 tablespoon |
| Salt and pepper | To taste |
Instructions:
- Start by slicing the pita bread in half to create pockets.
- In a small bowl, whisk together olive oil, lemon juice, salt, and pepper to make a dressing.
- Spread a generous amount of hummus inside each pita pocket.
- Fill the pockets with sliced grilled chicken, cucumber, cherry tomatoes, and shredded lettuce.
- Sprinkle crumbled feta cheese on top and drizzle with the dressing.
- Wrap the pita pockets tightly in foil or place them in a lunch container for easy transport. Enjoy!
Quinoa Salad Jars
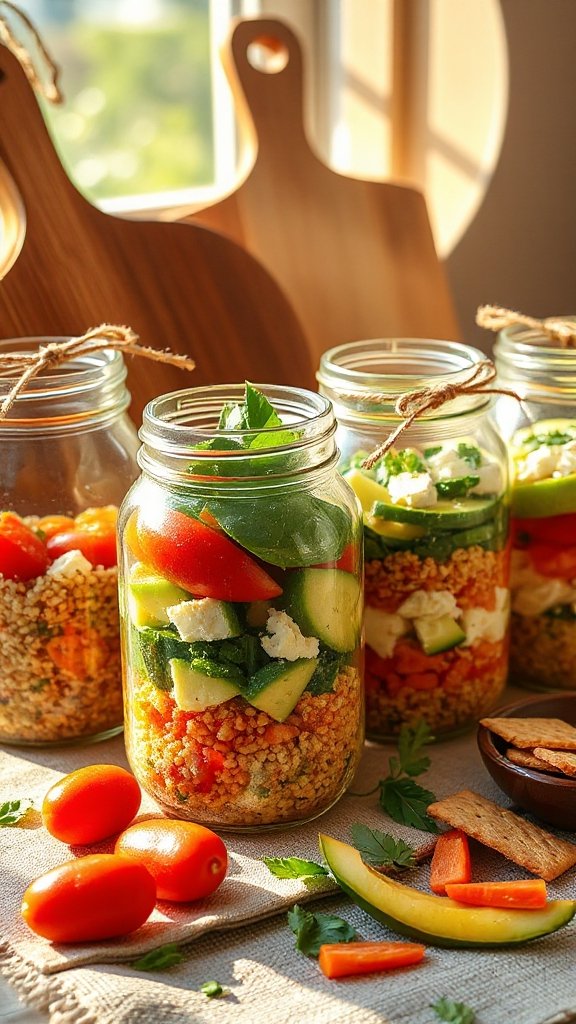
Quinoa salad jars are a vibrant and nutritious option for back-to-school lunches. These jars are perfect for layering ingredients, keeping them fresh and well-presented. Packed with protein, fiber, and plenty of colorful vegetables, quinoa salad jars are not only delicious but also highly customizable, allowing kids to mix and match their favorite flavors for a real treat.
| Ingredients | Quantity |
|---|---|
| Cooked quinoa | 2 cups |
| Cherry tomatoes, halved | 1 cup |
| Cucumber, diced | 1 cup |
| Bell pepper, diced | 1 cup |
| Black beans, rinsed | 1 can (15 oz) |
| Corn (frozen or canned) | 1 cup |
| Avocado, diced | 1 medium |
| Lime juice | 3 tablespoons |
| Olive oil | 2 tablespoons |
| Fresh cilantro, chopped | 1/4 cup |
| Salt and pepper | To taste |
Instructions:
- In a large bowl, combine cooked quinoa, cherry tomatoes, cucumber, bell pepper, black beans, corn, and avocado.
- In a separate small bowl, whisk together lime juice, olive oil, salt, and pepper.
- Drizzle the dressing over the quinoa mixture and gently toss to combine.
- Layer the salad in mason jars starting with quinoa at the bottom, followed by vegetables and beans, and topped with avocado and cilantro.
- Seal the jars and refrigerate until ready to pack for lunch. Enjoy!
DIY Wraps and Rolls
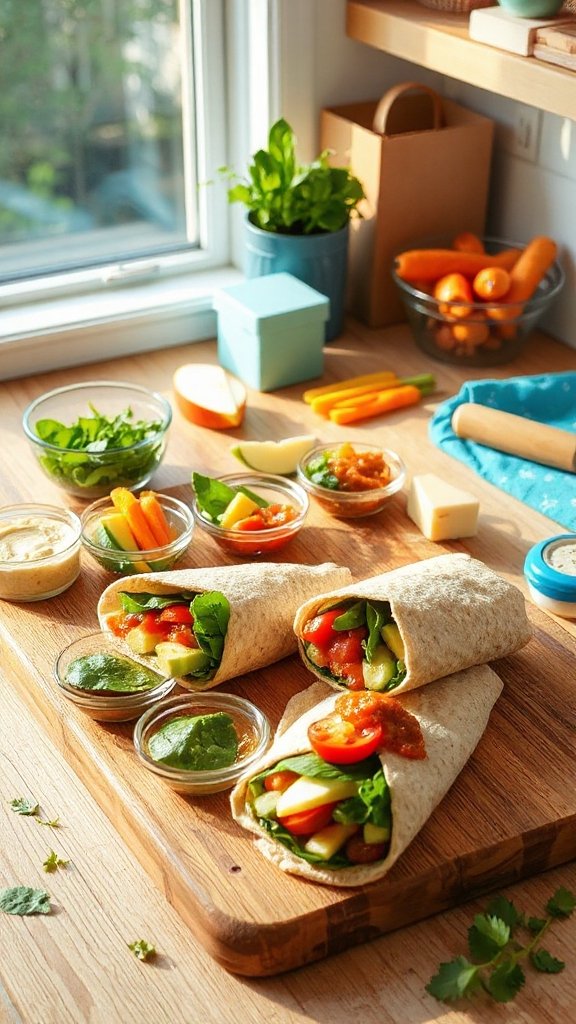
DIY wraps and rolls are a fun, portable, and versatile option for back-to-school lunches that kids will love. These wraps can be filled with a variety of ingredients, making it easy to pack in nutritious components while still being customizable to each child’s taste. Whether they prefer turkey and cheese, hummus and veggies, or a classic peanut butter and jelly, these wraps can be prepared quickly, making them an ideal addition to any lunchbox.
| Ingredients | Quantity |
|---|---|
| Tortillas (whole wheat, spinach, or flour) | 4 large |
| Sliced turkey or chicken | 8 oz |
| Cheese slices (cheddar, mozzarella, or your choice) | 4 slices |
| Hummus or cream cheese | 1/2 cup |
| Lettuce or spinach | 2 cups |
| Sliced cucumbers | 1 cup |
| Sliced bell peppers | 1 cup |
| Carrots, julienned | 1 cup |
| Optional: ranch or vinaigrette | 1/4 cup |
Instructions:
- Lay out the tortillas on a clean surface or cutting board.
- Spread a layer of hummus or cream cheese over each tortilla.
- Place sliced turkey or chicken, cheese, lettuce, cucumber, bell peppers, and carrots on top of the spread, arranging them in the center of the tortilla.
- Drizzle with ranch or vinaigrette if desired.
- Fold in the sides of the tortilla and roll it up tightly from the bottom to the top.
- Cut each wrap in half, and pack them in lunch containers or wrap them in parchment paper. Enjoy!