
As an Amazon Associate I earn from qualifying purchases.
Editorial Policy | Disclosure Policy
Apple-Shaped Cookies
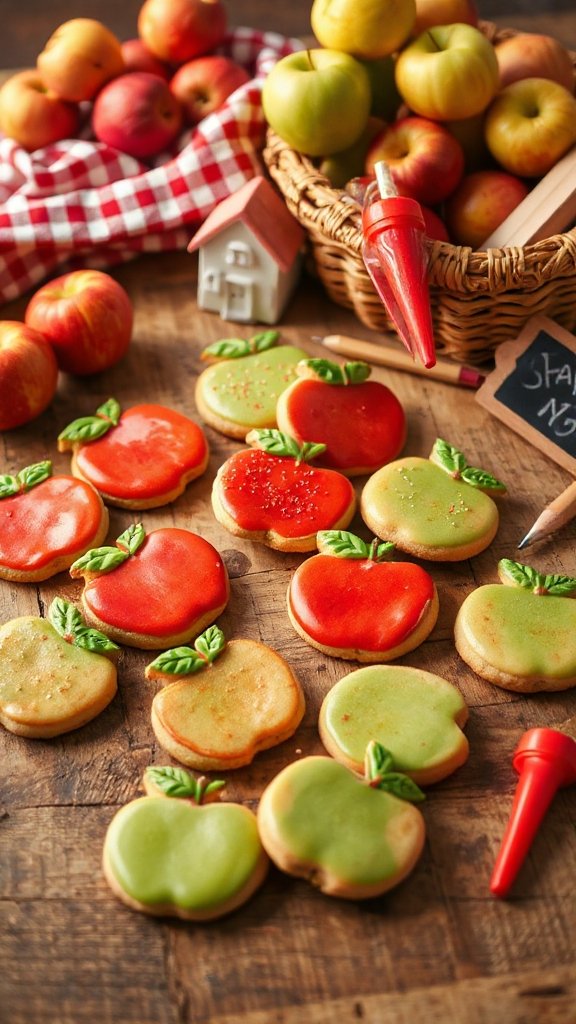
Apple-shaped cookies are a fun and festive treat perfect for celebrating the back-to-school season. These cookies are not only adorable but also delicious, making them a great snack for kids and adults alike. With a touch of creativity in decorating, you can turn simple sugar cookies into delightful apple shapes that will impress everyone at your back-to-school gatherings.
| Ingredients | Quantity |
|---|---|
| All-purpose flour | 2 ½ cups |
| Baking powder | 1 tsp |
| Baking soda | ½ tsp |
| Unsalted butter | 1 cup |
| Granulated sugar | 1 cup |
| Brown sugar | ½ cup |
| Egg | 1 |
| Vanilla extract | 1 tsp |
| Red gel food coloring | 1 tsp |
| Green fondant or icing | For leaves |
| Chocolate or green candy | For stems |
Instructions:
- Preheat the oven to 350°F (175°C) and line baking sheets with parchment paper.
- In a bowl, mix flour, baking powder, and baking soda. Set aside.
- In another bowl, cream the butter, granulated sugar, and brown sugar until fluffy. Add the egg and vanilla extract, mixing well.
- Gradually add the dry mixture to the wet mixture. Mix until combined.
- Divide the dough in half and add red gel food coloring to one half, kneading until the desired color is achieved.
- Roll out the red dough into apple shapes and place them on the baking sheets.
- Use the remaining dough to create the apple stems and leaves; shape and place them accordingly.
- Bake for 8-10 minutes or until the edges are lightly golden. Let them cool before decorating them further if desired.
Colorful Crayon Cookies

Colorful crayon cookies are a delightful and creative treat that adds a pop of color to any back-to-school celebration. These vibrant cookies not only look like crayons but bring a touch of nostalgia for both kids and adults alike. They are perfect as party favors, in lunch boxes, or as a fun activity for baking together before school starts.
| Ingredients | Quantity |
|---|---|
| All-purpose flour | 2 ½ cups |
| Baking powder | 1 tsp |
| Unsalted butter | 1 cup |
| Granulated sugar | 1 cup |
| Egg | 1 |
| Vanilla extract | 1 tsp |
| Food coloring (various colors) | 1 tsp each (choose a few colors) |
| Royal icing or colored frosting | For decorating |
Instructions:
- Preheat the oven to 350°F (175°C) and line baking sheets with parchment paper.
- In a mixing bowl, combine flour and baking powder. Set aside.
- Cream the butter and sugar together until light and fluffy. Add the egg and vanilla extract, mixing until well incorporated.
- Gradually add the dry mixture to the wet mixture until well blended.
- Divide the dough into several parts and mix in different food coloring to create a variety of colors.
- Roll out the colored dough and shape into crayon forms (rectangle or oval). Place them on the prepared baking sheets.
- Bake for 10-12 minutes or until the cookies are firm to the touch. Allow them to cool completely.
- Once cooled, decorate with royal icing or colored frosting to mimic the crayon labels and tips. Enjoy!
Back-to-School Bus Cookies
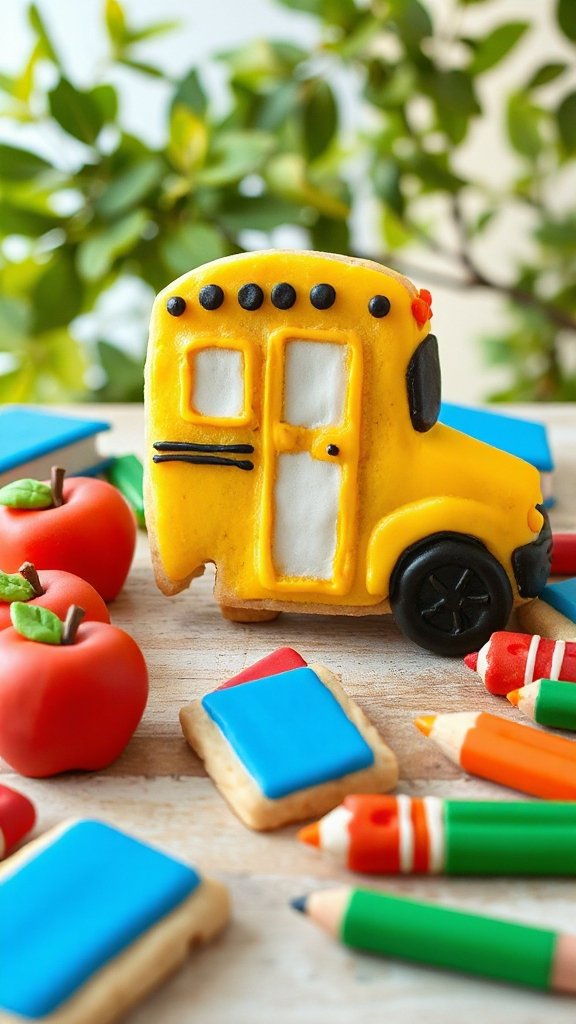
Back-to-school bus cookies are a fun and whimsical treat that captures the excitement of the new school year. Shaped like school buses, these cookies are not only charming but also delicious, making them perfect for classroom parties, lunchboxes, or just a sweet surprise to kick off the school season.
| Ingredients | Quantity |
|---|---|
| All-purpose flour | 2 ½ cups |
| Baking soda | 1 tsp |
| Unsalted butter | 1 cup |
| Granulated sugar | 1 cup |
| Brown sugar | ½ cup |
| Egg | 1 |
| Vanilla extract | 1 tsp |
| Yellow food coloring | 1 tsp |
| Royal icing or colored frosting | For decorating |
Instructions:
- Preheat the oven to 350°F (175°C) and line baking sheets with parchment paper.
- In a mixing bowl, combine flour and baking soda; set aside.
- Cream the butter, granulated sugar, and brown sugar until light and fluffy. Add in the egg and vanilla extract, mixing well.
- Gradually add the dry mixture to the wet mixture, then mix in the yellow food coloring until evenly colored.
- Roll out the dough and cut into bus shapes using a bus-shaped cookie cutter. Place on the baking sheets.
- Bake for 8-10 minutes or until lightly golden. Allow to cool completely on wire racks.
- Once cooled, decorate with royal icing or colored frosting to add windows, wheels, and other fun details. Enjoy!
Cute Pencil Cookies
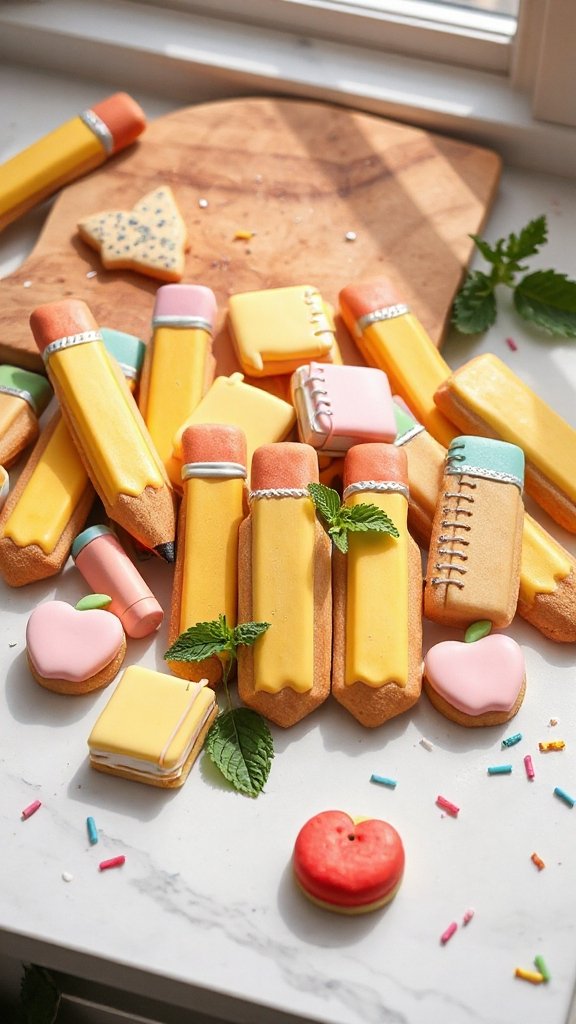
Cute pencil cookies are a delightful and creative way to celebrate the back-to-school season. Perfect for classroom treats or simply to share with your little scholars at home, these cookies are designed to resemble colorful pencils, making them both fun to look at and delicious to eat.
| Ingredients | Quantity |
|---|---|
| All-purpose flour | 2 cups |
| Baking powder | 1 tsp |
| Unsalted butter | ½ cup |
| Granulated sugar | ¾ cup |
| Egg | 1 |
| Vanilla extract | 1 tsp |
| Yellow food coloring | ½ tsp |
| Pink food coloring | ½ tsp |
| Brown food coloring | ½ tsp |
| Royal icing or colored frosting | For decorating |
Instructions:
- Preheat the oven to 350°F (175°C) and prepare baking sheets with parchment paper.
- In a bowl, mix flour and baking powder; set aside.
- Cream together the butter and sugar until fluffy. Add the egg and vanilla extract; mix well.
- Gradually incorporate the dry ingredients, then divide the dough into three portions. Tint one with yellow food coloring, one with pink, and leave the last as is for the pencil body.
- Roll out the dough and cut into pencil shapes. Place on baking sheets.
- Bake for 10-12 minutes or until lightly golden and let cool on wire racks.
- Once cooled, decorate with royal icing or colored frosting to create fun pencil designs. Enjoy!
Notebooks and Paper Cookies
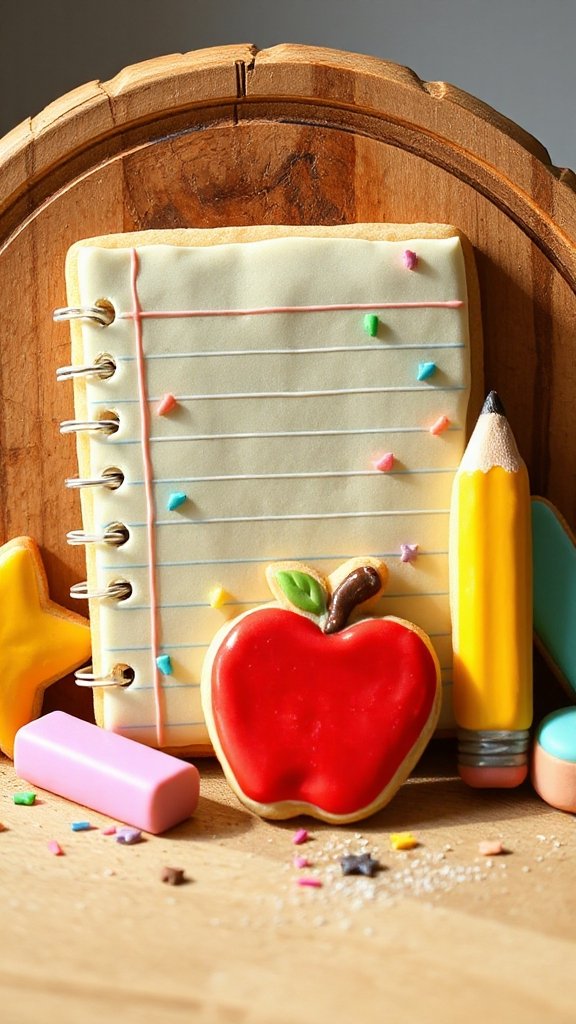
Notebooks and Paper Cookies are a fun and whimsical treat perfect for celebrating the back-to-school season. These cookies resemble classic school supplies and are sure to bring a smile to students and teachers alike. They’re great for classroom celebrations, lunchbox surprises, or as a decorative treat for home gatherings.
| Ingredients | Quantity |
|---|---|
| All-purpose flour | 2 cups |
| Baking soda | 1 tsp |
| Unsalted butter | ½ cup |
| Granulated sugar | ¾ cup |
| Egg | 1 |
| Vanilla extract | 1 tsp |
| Powdered sugar (for icing) | 2 cups |
| Milk (for icing) | 2-3 tbsp |
| Food coloring (optional) | Assorted |
Instructions:
- Preheat the oven to 350°F (175°C) and line baking sheets with parchment paper.
- In a bowl, whisk together flour and baking soda; set aside.
- In a separate bowl, cream the butter and sugar until light and fluffy, then add the egg and vanilla extract, mixing until combined.
- Gradually add the dry ingredients to the wet ingredients, mixing until a dough forms. Chill for 30 minutes.
- Roll out the dough to about ¼ inch thick and cut into notebook or paper shapes. Use a knife to create lines for notebook paper.
- Bake for 8-10 minutes until edges are lightly golden. Cool completely on wire racks.
- In a bowl, mix powdered sugar with milk and food coloring to create icing. Decorate cookies to resemble notebooks or sheets of paper with icing. Enjoy!
Classroom Chalkboard Cookies
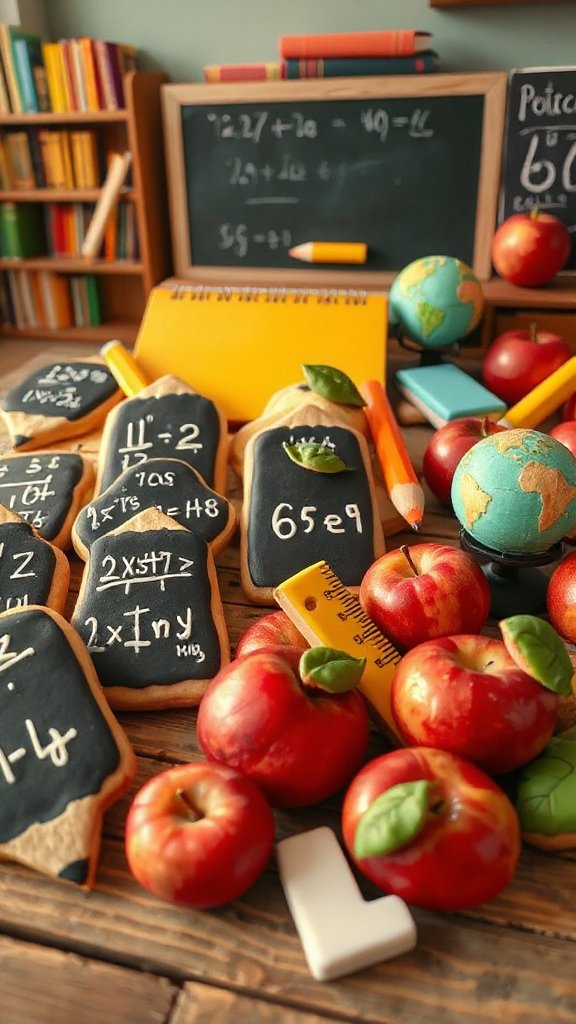
Classroom Chalkboard Cookies are a delightful and creative treat that not only celebrate the back-to-school season but also pay homage to the chalkboards found in every classroom. These cookies are designed to look like chalkboards, complete with “written” messages and vivid colors. Perfect for classroom parties, teacher gifts, or as a fun activity to do with kids, these cookies are sure to inspire creativity and learning.
| Ingredients | Quantity |
|---|---|
| All-purpose flour | 2 cups |
| Baking powder | 1 tsp |
| Unsalted butter | ½ cup |
| Granulated sugar | ¾ cup |
| Brown sugar | ¼ cup |
| Egg | 1 |
| Vanilla extract | 1 tsp |
| Cocoa powder | ¼ cup |
| Powdered sugar (for icing) | 2 cups |
| Milk (for icing) | 2-3 tbsp |
| Food coloring (optional) | Assorted |
| Black food coloring (for “chalkboard” effect) | As needed |
Instructions:
- Preheat the oven to 350°F (175°C) and line baking sheets with parchment paper.
- In one bowl, mix together flour, cocoa powder, and baking powder; set aside.
- In another bowl, cream the butter, granulated sugar, and brown sugar until light and fluffy. Add the egg and vanilla extract, mixing to combine.
- Gradually add the dry mixture to the wet ingredients until a dough forms. Chill for about 30 minutes.
- Roll out the dough to ¼ inch thick and cut into rectangle shapes to resemble chalkboards.
- Bake for 10-12 minutes or until firm, then cool completely on wire racks.
- In a bowl, combine powdered sugar with milk and black food coloring to create an icing that resembles chalkboard paint. Decorate cookies with icing to add messages or drawings, mimicking what you’d find on a real chalkboard. Enjoy!
Graduation Cap Cookies

Graduation Cap Cookies are a fun and festive treat that celebrate the achievement of graduation. These adorable cookies are shaped like graduation caps, complete with a tassel made from icing or edible decorations. Perfect for graduation parties, school celebrations, or as a gift for recent graduates, these cookies are sure to add a sweet touch to any celebration!
| Ingredients | Quantity |
|---|---|
| All-purpose flour | 2 cups |
| Baking powder | 1 tsp |
| Unsalted butter | ½ cup |
| Granulated sugar | ¾ cup |
| Brown sugar | ¼ cup |
| Egg | 1 |
| Vanilla extract | 1 tsp |
| Cocoa powder | ½ cup |
| Powdered sugar (for icing) | 2 cups |
| Milk (for icing) | 2-3 tbsp |
| Food coloring (for tassels) | Assorted |
| Black food coloring | 1 tsp (for caps) |
| Gold or yellow candy melts | ½ cup (for tassel) |
Instructions:
- Preheat the oven to 350°F (175°C) and line baking sheets with parchment paper.
- In a bowl, whisk together the flour, cocoa powder, and baking powder; set aside.
- In a separate bowl, cream the butter, granulated sugar, and brown sugar until fluffy. Beat in the egg and vanilla extract until combined.
- Gradually add the dry ingredients to the wet mixture, mixing until a dough forms. Chill the dough for about 30 minutes.
- Roll out the dough to ¼ inch thick and cut into squares for the caps and rectangles for the tassels.
- Bake for 10-12 minutes until firm, then cool on wire racks.
- In a bowl, mix powdered sugar with milk and black food coloring to create black icing for the cap. Use gold or yellow candy melts for the tassels. Decorate your cookies accordingly and enjoy!
Lunchbox Cookies
Lunchbox Cookies are the perfect treat to include in your child’s lunchbox! These soft and chewy cookies are not only delicious but can also be packed with nutritious ingredients like oats, chocolate chips, and nuts. They offer a satisfying sweet treat that fuels your child’s day while being easy to prepare and store.
| Ingredients | Quantity |
|---|---|
| All-purpose flour | 1 ½ cups |
| Old-fashioned oats | 1 cup |
| Baking soda | 1 tsp |
| Salt | ½ tsp |
| Unsalted butter | ½ cup |
| Brown sugar | ¾ cup |
| Granulated sugar | ½ cup |
| Egg | 1 |
| Vanilla extract | 1 tsp |
| Chocolate chips | 1 cup |
| Chopped nuts (optional) | ½ cup |
Instructions:
- Preheat the oven to 350°F (175°C) and line baking sheets with parchment paper.
- In a bowl, combine the flour, oats, baking soda, and salt; set aside.
- In another bowl, cream the butter, brown sugar, and granulated sugar until light and fluffy. Beat in the egg and vanilla.
- Gradually add the dry ingredients to the wet mixture, mixing until incorporated. Fold in chocolate chips and nuts.
- Drop spoonfuls of the dough onto the prepared baking sheets. Bake for 10-12 minutes until the edges are lightly golden.
- Allow to cool on wire racks before packing them into lunchboxes. Enjoy!
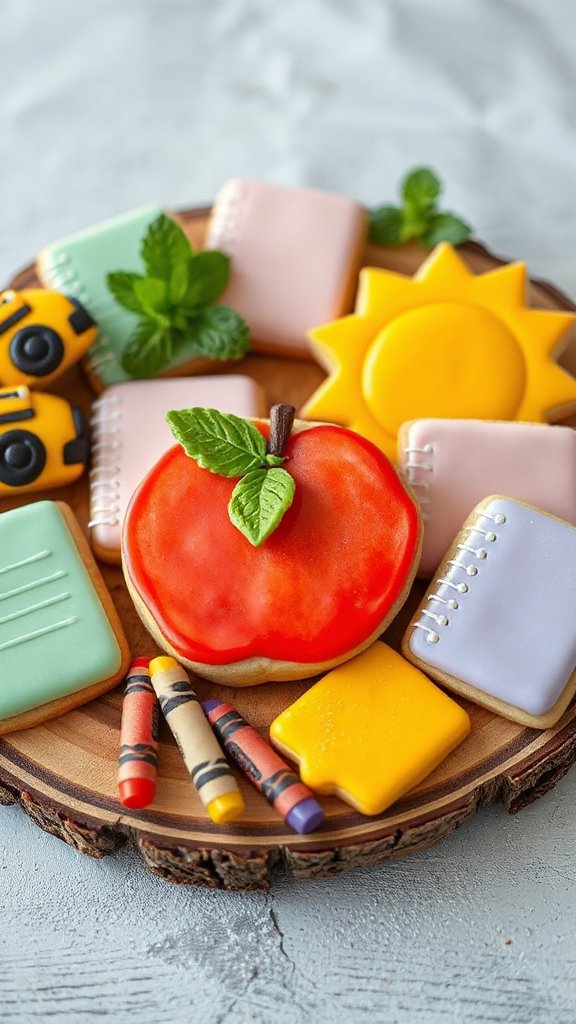
Fun School Subject Cookies

Fun School Subject Cookies are a delightful way to celebrate learning! These themed cookies are not only tasty but also visually appealing, making them perfect for a school party or to surprise your child after a long day of classes. Shaped like books, apples, or even school supplies, they can be decorated with colorful icing to match various subjects and inspire creativity.
| Ingredients | Quantity |
|---|---|
| All-purpose flour | 2 cups |
| Baking powder | 1 tsp |
| Salt | ½ tsp |
| Unsalted butter | 1 cup |
| Granulated sugar | 1 cup |
| Egg | 1 |
| Vanilla extract | 2 tsp |
| Powdered sugar | 1 cup |
| Food coloring (optional) | Various |
| Royal icing (for decoration) | As needed |
Instructions:
- Preheat the oven to 350°F (175°C) and line baking sheets with parchment paper.
- In a bowl, mix together flour, baking powder, and salt; set aside.
- In another bowl, cream the butter and sugar until light and fluffy. Beat in the egg and vanilla.
- Gradually add the dry ingredients to the wet mixture, mixing until a dough forms.
- Roll out the dough on a floured surface and cut into shapes with cookie cutters.
- Place the shapes on the prepared baking sheets and bake for 8-10 minutes until lightly golden.
- Allow to cool, then decorate with royal icing and colored sugar to reflect different school subjects. Enjoy!
Teacher’s Desk Cookies
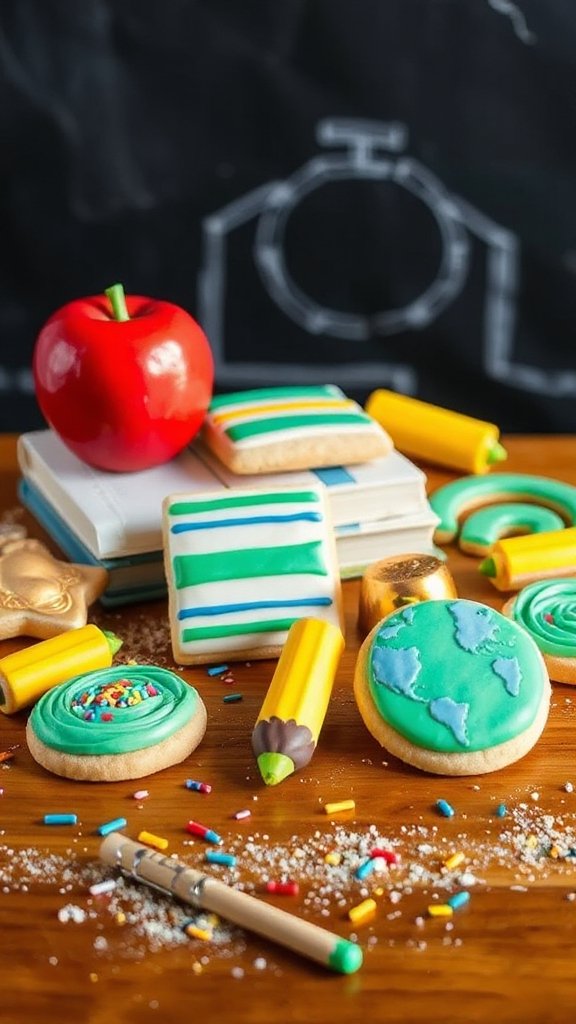
Teacher’s Desk Cookies are a fun and creative way to honor the hardworking teachers in our lives. These cookies can be shaped like school desks, books, and even stationery items like pencils and notebooks. They make a great treat for a classroom celebration, teacher appreciation events, or just as a thoughtful surprise for your child’s favorite educator.
| Ingredients | Quantity |
|---|---|
| All-purpose flour | 2 cups |
| Baking powder | 1 tsp |
| Salt | ½ tsp |
| Unsalted butter | 1 cup |
| Granulated sugar | 1 cup |
| Egg | 1 |
| Vanilla extract | 2 tsp |
| Powdered sugar | 1 cup |
| Food coloring (optional) | Various |
| Royal icing (for decoration) | As needed |
Instructions:
- Preheat the oven to 350°F (175°C) and line baking sheets with parchment paper.
- In a bowl, mix together flour, baking powder, and salt; set aside.
- In a separate bowl, cream the butter and sugar until light and fluffy. Beat in the egg and vanilla.
- Gradually add the dry ingredients to the wet mixture, mixing until a dough forms.
- Roll out the dough on a floured surface, then cut into shapes resembling desks, books, and other school items with cookie cutters.
- Place the shapes on the prepared baking sheets and bake for 8-10 minutes until they are lightly golden.
- Allow cookies to cool completely before decorating with royal icing to create fun and colorful designs. Enjoy your Teacher’s Desk Cookies!
Ruler Cookies
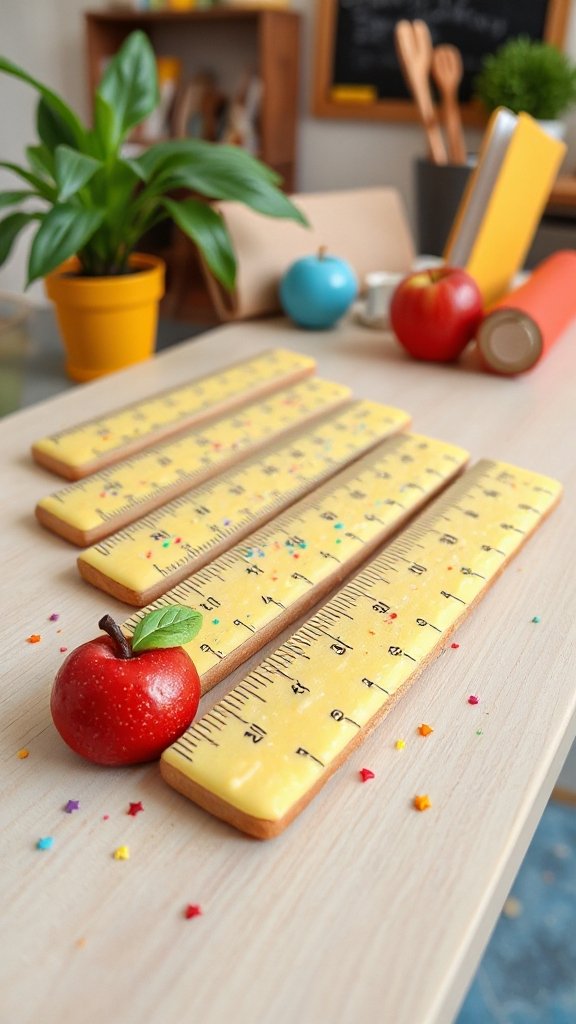
Ruler Cookies are a delightful and playful treat that adds a fun twist to back-to-school festivities. Shaped like classic wooden rulers, these cookies can be customized with colorful icing to display measurement marks, making them an eye-catching snack for classroom celebrations or a sweet surprise for your children.
| Ingredients | Quantity |
|---|---|
| All-purpose flour | 2 cups |
| Baking powder | 1 tsp |
| Salt | ½ tsp |
| Unsalted butter | 1 cup |
| Granulated sugar | 1 cup |
| Egg | 1 |
| Vanilla extract | 2 tsp |
| Powdered sugar | 1 cup |
| Food coloring (for decoration) | Various |
| Royal icing (for detailing) | As needed |
Instructions:
- Preheat the oven to 350°F (175°C) and line baking sheets with parchment paper.
- In a bowl, combine flour, baking powder, and salt; whisk to blend.
- In another bowl, cream together butter and sugar until fluffy. Add the egg and vanilla, mixing well.
- Gradually incorporate the dry ingredients into the wet mixture to form a dough.
- Roll out the dough and use a ruler-shaped cookie cutter to cut out cookies.
- Place cookies on prepared baking sheets, bake for 8-10 minutes until edges are lightly golden.
- Allow to cool before decorating with royal icing, adding measurement marks to enhance the ruler design. Enjoy your Ruler Cookies!