As an Amazon Associate I earn from qualifying purchases.
Editorial Policy | Disclosure Policy
Classic Rice Krispies Cake Pops

Classic Rice Krispies Cake Pops are a delightful twist on the traditional Rice Krispie treats, adding a fun, portable form that’s perfect for parties, celebrations, or simply as a tasty snack. These cake pops are easy to make with simple ingredients, and you can customize them with different coatings and toppings to suit your taste.
| Ingredients | Quantity |
|---|---|
| Rice Krispies cereal | 6 cups |
| Mini marshmallows | 4 cups |
| Butter | 1/2 cup (1 stick) |
| Vanilla extract | 1 teaspoon |
| Candy melts or chocolate | 12 oz |
| Lollipop sticks | 12 sticks |
| Sprinkles or other toppings | Optional (for decoration) |
Instructions:
- Prepare the 9×13 Pan: Start by greasing a 9×13-inch baking pan with butter or cooking spray. This will help your Rice Krispies mixture to easily release once set.
- Melt Butter and Marshmallows: In a large saucepan over low heat, melt the butter. Once melted, add the mini marshmallows and stir until completely melted and smooth. This should take about 2-3 minutes.
- Add Rice Krispies and Vanilla: Once the marshmallows are melted, remove the pan from the heat. Stir in the vanilla extract, then gradually add the Rice Krispies cereal. Mix until all the cereal is evenly coated with the marshmallow mixture.
- Spread into Pan: Pour the mixture into the prepared 9×13 pan. Using a buttered spatula or your hands (dampen them slightly to prevent sticking), press the mixture down evenly into the pan. Make sure it’s compact, as this will help the pops hold their shape.
- Cool and Cut: Allow the mixture to cool for about 30 minutes at room temperature. Once cooled, cut it into small squares or rectangles (approximately 1 inch by 2 inches).
- Form Cake Pops: Take each piece and roll it into a ball, about 1 inch in diameter. Don’t worry if it crumbles a bit; just squeeze gently to form. Repeat for all pieces.
- Insert Lollipop Sticks: Melt a small amount of the candy melts or chocolate according to package instructions. Dip the end of a lollipop stick into this melted candy, then insert the stick into the center of each Rice Krispie ball. This helps secure the stick in place.
- Chill the Pops: Place the assembled cake pops in the refrigerator or freezer for about 15-20 minutes or until firm. This helps the pops hold their shape and prevents them from falling apart when dipped.
- Melt Candy Coating: While the pops chill, melt the remaining candy melts or chocolate in a microwave safe bowl, following the melting instructions on the package. Stir until smooth.
- Dip Each Cake Pop: Carefully dip each Rice Krispies cake pop into the melted candy, swirling it around to coat fully. Allow excess candy to drip off.
- Decorate: If you’d like to, sprinkle toppings such as sprinkles, crushed nuts, or edible glitter over the pops while the coating is still wet.
- Set and Enjoy: Place the coated cake pops upright in a styrofoam block or a cake pop stand to set. Once the candy coating is hardened, they are ready to enjoy! Store any leftovers in an airtight container at room temperature.
Now you have a fun, delicious treat to enjoy or share with family and friends!
Rice Krispies Treats Ice Cream Cone
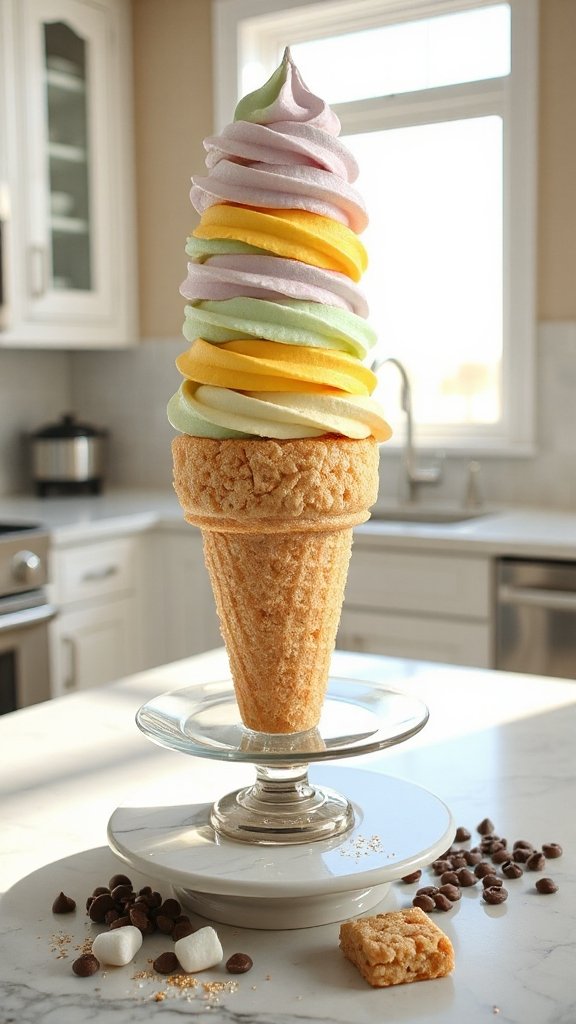
Rice Krispies Treats Ice Cream Cones are a fun and delicious spin on traditional Rice Krispie treats. This treat combines the crispy, chewy goodness of Rice Krispies with the playful shape of an ice cream cone, making it perfect for parties, summer gatherings, or a creative dessert option. With just a few ingredients, you can create a delightful and edible dessert that is guaranteed to please both kids and adults alike.
| Ingredients | Quantity |
|---|---|
| Rice Krispies cereal | 6 cups |
| Mini marshmallows | 4 cups |
| Butter | 1/2 cup (1 stick) |
| Vanilla extract | 1 teaspoon |
| Ice cream cones | 12 cones |
| Candy melts or chocolate | 12 oz |
| Sprinkles or toppings (optional) | For decoration |
Instructions:
- Prepare the Ice Cream Cones: Begin by placing your ice cream cones upright on a baking sheet. This will make it easy to fill them later.
- Melt Butter and Marshmallows: In a large saucepan, melt the butter over low heat. Once the butter has melted, add in the mini marshmallows. Stir continuously until the marshmallows are completely melted and smooth, which should take about 2-3 minutes.
- Add Rice Krispies and Vanilla: Remove the saucepan from heat. Stir in the vanilla extract, then gradually add the Rice Krispies cereal to the melted marshmallow mixture. Use a spatula to mix until all of the cereal is evenly coated.
- Fill the Ice Cream Cones: Using a spoon or your hands (but lightly greased to prevent sticking), take handfuls of the Rice Krispy mixture and carefully pack it into each ice cream cone. Push down gently to ascertain they hold their shape and fill the cone completely.
- Cool and Set: Allow the filled ice cream cones to cool at room temperature for about 30 minutes. This will help the Rice Krispies mixture to set firmly.
- Melt Candy Coating: While the cones are cooling, melt the candy melts or chocolate according to package instructions. Use a microwave-safe bowl and heat in short intervals (15-20 seconds), stirring in between until smooth.
- Dip the Cones: Once the Rice Krispies Treats in the cones are set, dip the tops of each cone into the melted candy coating, ensuring they are generously coated. Lift and allow any excess to drip off.
- Decorate: Immediately after dipping, sprinkle your favorite toppings or sprinkles over the melted candy coating while it’s still wet. This will help the toppings stick.
- Chill: Place the finished cones back on the baking sheet and refrigerate them for about 15 minutes, or until the chocolate coating is set.
- Serve: Once the coating is firm, your Rice Krispies Treats Ice Cream Cones are ready to serve! Enjoy them as a fun dessert.
These delightful treats are guaranteed to be a hit at any gathering!
Layered Rice Krispies Cupcakes

Layered Rice Krispies Cupcakes are a delightful and creative twist on the classic Rice Krispies treat, perfect for birthday parties, celebrations, or just a fun dessert at home. These cupcakes feature layers of colorful Rice Krispies treats in cupcake liners, drizzled with chocolate and topped with sprinkles for a festive finish. They are easy to make and are certain to impress both kids and adults alike!
| Ingredients | Quantity |
|---|---|
| Rice Krispies cereal | 6 cups |
| Mini marshmallows | 4 cups |
| Butter | 1/2 cup (1 stick) |
| Vanilla extract | 1 teaspoon |
| Food coloring (optional) | As desired |
| Chocolate chips or candy melts | 12 oz |
| Sprinkles or toppings (for decoration) | Your choice |
| Cupcake liners | 12 |
Instructions:
- Prepare the Cupcake Liners: Place cupcake liners in a standard muffin tin to hold the treats as you layer them.
- Melt Butter and Marshmallows: In a large saucepan, melt the butter over low heat. Once the butter is melted, add in the mini marshmallows. Stir continuously until the marshmallows are completely melted and smooth, about 2-3 minutes.
- Add Vanilla and Rice Krispies: Remove the saucepan from heat and stir in the vanilla extract. Gradually add the Rice Krispies cereal, mixing thoroughly until all the cereal is evenly coated with the melted marshmallow mixture.
- Separate the Mixture: Divide the Rice Krispie mixture into separate bowls for layering. If you wish to color the layers, add a few drops of food coloring to each bowl and mix well until you achieve your desired colors.
- Layer the Mixture: Starting with one color, take a handful of the Rice Krispies mixture and press it firmly into the bottom of each cupcake liner. Use a spatula or your hands to ascertain it’s compact. Repeat this process with the remaining colors, layering them in the cupcake liners until you reach the top.
- Cool and Set: Allow the layered Rice Krispies cupcakes to cool at room temperature for about 30-45 minutes, allowing them to set properly before adding the chocolate drizzle.
- Melt Chocolate: While the cupcakes are cooling, melt the chocolate chips or candy melts according to the package instructions. Use a microwave-safe bowl, heating in short intervals (15-20 seconds), stirring in between until smooth.
- Drizzle Chocolate: Once the layered cupcakes are set, use a spoon or a piping bag to drizzle the melted chocolate over the tops of each cupcake, covering them as desired.
- Decorate: While the chocolate is still warm, sprinkle your favorite toppings or sprinkles on top for added fun and flair.
- Serve: Allow the cupcakes to set for a few moments before serving. Enjoy your colorful Layered Rice Krispies Cupcakes as a delightful sweet treat!
Rice Krispies Sandwich Cookies

Rice Krispies Sandwich Cookies are a fun and playful treat that combines two crispy Rice Krispies cookies with a sweet and creamy filling, creating a delightful dessert perfect for any occasion. These sandwich cookies are not only easy to make, but they also allow for customization with various fillings and toppings, ensuring that there’s something for everyone to enjoy!
| Ingredients | Quantity |
|---|---|
| Rice Krispies cereal | 4 cups |
| Mini marshmallows | 3 cups |
| Butter | 1/2 cup (1 stick) |
| Vanilla extract | 1 teaspoon |
| Powdered sugar | 1 1/2 cups |
| Cream cheese (softened) | 4 oz |
| Chocolate chips (for filling) | 1 cup (optional) |
| Food coloring (optional) | As desired |
Instructions:
- Prepare the Ingredients: Start by gathering all your ingredients and measuring them out to make the process smoother.
- Melt Butter and Marshmallows: In a large saucepan, melt the butter over low heat. Add the mini marshmallows as the butter melts. Stir continuously until the marshmallows have completely melted and the mixture is smooth, about 2-3 minutes.
- Add Vanilla and Rice Krispies: Once the marshmallows are melted, remove the saucepan from heat and stir in the vanilla extract. Gradually add the Rice Krispies cereal to the mixture, stirring well until all the cereal is evenly coated with the marshmallow mixture.
- Shape the Cookies: Use a spoon or your hands to scoop out the mixture and form small, flat cookie shapes (about 2-3 inches in diameter). Place them on a parchment-lined baking sheet, pressing them down slightly to form uniform shapes. Continue until you’ve used up the mixture.
- Cool the Cookies: Allow the Rice Krispies cookies to cool and set at room temperature for about 30 minutes or until they are firm.
- Prepare the Filling: In a separate mixing bowl, combine softened cream cheese and powdered sugar. If desired, add chocolate chips and a few drops of food coloring to create a colorful filling. Mix until smooth and well combined.
- Assemble the Sandwich Cookies: Take one Rice Krispies cookie and spread a generous layer of the filling on the flat side. Top with another cookie, flat side down, to create a sandwich. Gently press them together.
- Chill and Serve: Place the assembled sandwich cookies in the refrigerator to chill for about 15-30 minutes to set the filling. Once set, they are ready to be served. Enjoy your Rice Krispies Sandwich Cookies!
Colorful Rice Krispies Tower
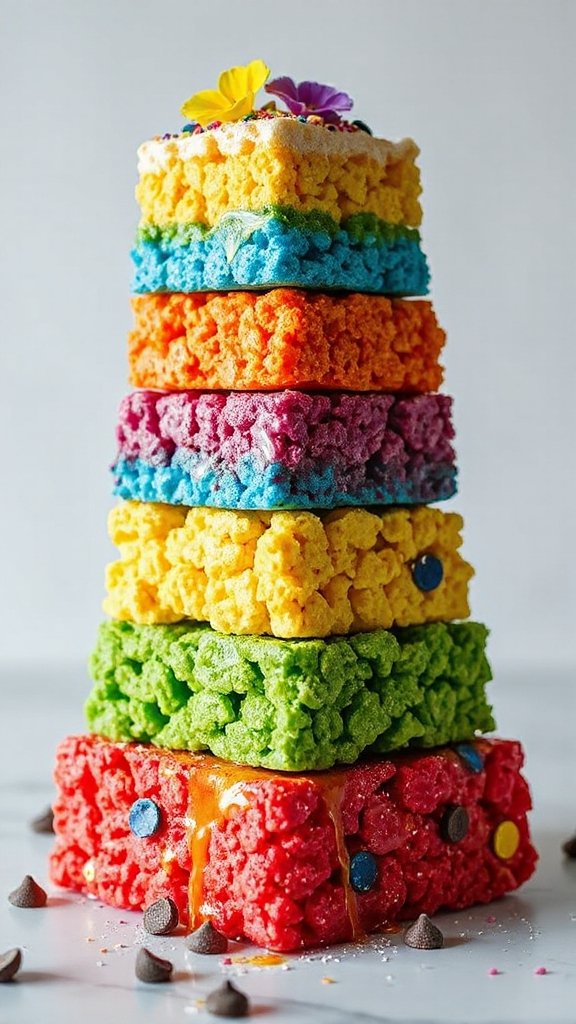
Colorful Rice Krispies Tower is a playful dessert that not only looks impressive but is also a delightful treat for both kids and adults. This towering creation is made with layers of colorful Rice Krispies treats, embellished with various candies and toppings to create a fun-filled centerpiece for your next gathering or celebration.
| Ingredients | Quantity |
|---|---|
| Rice Krispies cereal | 6 cups |
| Mini marshmallows | 4 cups |
| Butter | 1/2 cup (1 stick) |
| Vanilla extract | 1 teaspoon |
| Food coloring | As desired |
| Assorted candies (e.g., M&Ms, gummy bears, sprinkles) | 2 cups |
| Additional melted chocolate (optional for drizzling) | 1 cup |
Instructions:
- Prepare the Ingredients: Begin by measuring out all your ingredients, and gather any assorted candies you want to use for decoration and layering.
- Melt Butter and Marshmallows: In a large saucepan over low heat, melt the butter. Once melted, add the mini marshmallows. Stir frequently until the marshmallows are completely melted and smooth, which should take about 2-3 minutes.
- Add Vanilla and Food Coloring: Remove the saucepan from the heat and stir in the vanilla extract. If you want to create multiple colors, divide the melted marshmallow mixture into separate bowls. Add a few drops of food coloring to each bowl and mix well until the colors are vibrant.
- Combine Cereal with Marshmallow Mixture: Pour the Rice Krispies cereal into each bowl with colored marshmallow mixtures. Stir well to make sure the cereal is evenly coated with the marshmallow.
- Shape the Layers: Take a large baking dish or a square or rectangular pan lined with parchment paper. Press one colored mixture into the bottom of the dish to form an even layer, using a spatula or your hands to compact it down firmly. Repeat this process with the remaining colors, layering them one on top of the other. Allow the layers to set at room temperature for about 30 minutes.
- Cut into Pieces: Once set, remove the Rice Krispies tower from the dish using the parchment paper. Place it on a cutting board and use a sharp knife to cut it into squares or rectangular pieces.
- Decorate: Arrange the pieces vertically or stack them to form a tower. Use assorted candies to decorate the sides and top of the tower. You can also drizzle melted chocolate over the top for extra flair.
- Serve: Display the colorful Rice Krispies Tower on a festive platter, and enjoy it as a centerpiece for your party or gathering!
Chocolate-Dipped Rice Krispies Bites
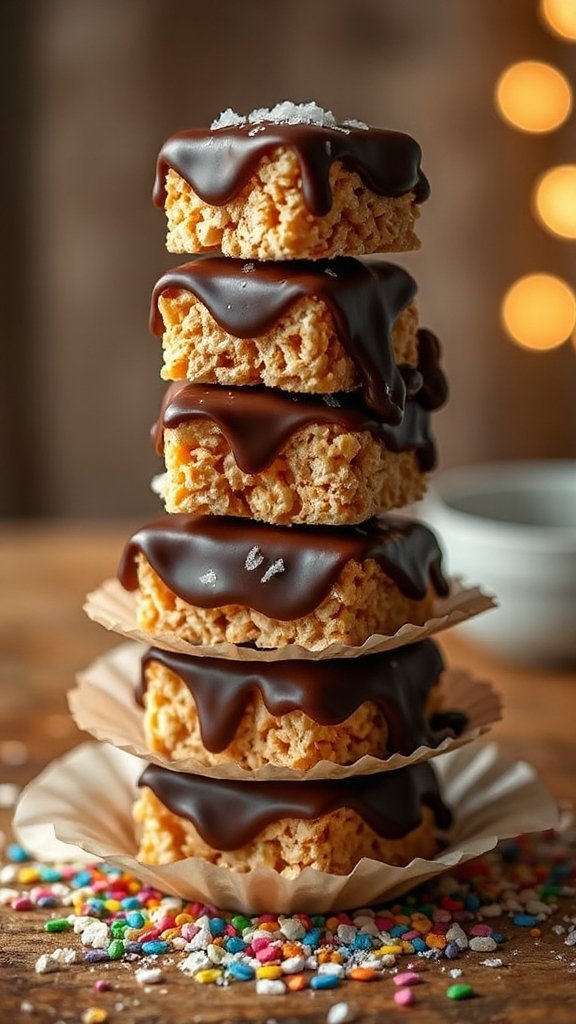
Chocolate-Dipped Rice Krispies Bites are a delightful and easy-to-make treat that combines the classic flavor of Rice Krispies treats with a rich chocolate coating. These bite-sized snacks are perfect for parties, movie nights, or as a sweet gesture for friends and family. With just a few ingredients, you can create a decadent treat that everyone will love.
| Ingredients | Quantity |
|---|---|
| Rice Krispies cereal | 6 cups |
| Mini marshmallows | 4 cups |
| Butter | 1/2 cup (1 stick) |
| Vanilla extract | 1 teaspoon |
| Semi-sweet chocolate chips | 2 cups |
| Sprinkles or toppings (optional) | As desired |
Instructions:
- Prepare the Ingredients: Measure out all the ingredients and line a 9×13 inch baking dish with parchment paper for easy removal.
- Melt Butter and Marshmallows: In a large saucepan over low heat, melt the butter. Once melted, add the mini marshmallows. Stir constantly until the marshmallows are fully melted and smooth, which typically takes about 2-3 minutes.
- Add Vanilla: Remove the saucepan from heat and stir in the vanilla extract. Mix well to combine.
- Combine Cereal with Marshmallow Mixture: Quickly add the Rice Krispies cereal to the melted marshmallow mixture. Stir well until all the cereal is evenly coated.
- Transfer to the Baking Dish: Pour the mixture into the prepared baking dish. Using a spatula or your hands (greased if necessary), press the mixture evenly into the dish to create a flat layer. Allow it to cool at room temperature for about 30 minutes.
- Cut into Bites: Once cooled and set, lift the Rice Krispies treat from the baking dish using the parchment paper. Place it on a cutting board and cut it into small bite-sized squares or rectangles.
- Melt Chocolate: In a microwave-safe bowl, place the semi-sweet chocolate chips. Microwave in 30-second intervals, stirring after each interval, until the chocolate is completely melted and smooth.
- Dip the Bites: Take each Rice Krispies bite and dip it halfway into the melted chocolate, allowing any excess chocolate to drip off. If you desire, place the chocolate-dipped bites onto a wire rack.
- Add Toppings: If using, sprinkle the tops of the chocolate-dipped bites with sprinkles or your choice of toppings before the chocolate sets.
- Let Set: Allow the chocolate to cool and set completely at room temperature or place the dipped bites in the refrigerator for faster setting.
- Serve: Once the chocolate is set, enjoy your delicious Chocolate-Dipped Rice Krispies Bites! Store any leftovers in an airtight container at room temperature.
Festive Rice Krispies Treats Wreath
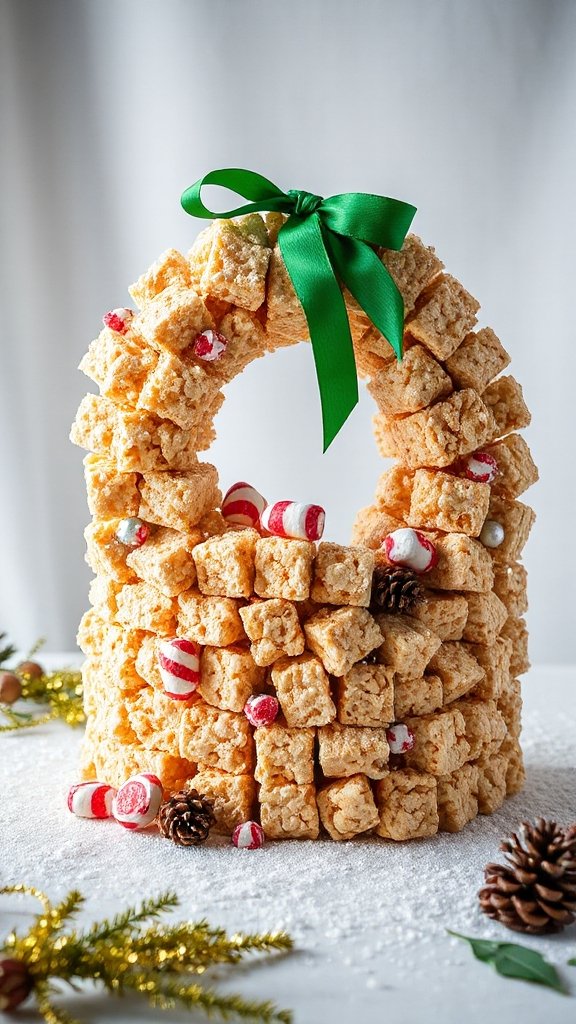
Festive Rice Krispies Treats Wreaths are a fun and cheerful twist on the classic Rice Krispies treat, perfect for holidays and celebrations. Shaped like a wreath and adorned with colorful candies and edible decorations, these delightful treats will brighten up any gathering and are sure to be a hit with both kids and adults alike!
| Ingredients | Quantity |
|---|---|
| Rice Krispies cereal | 6 cups |
| Mini marshmallows | 4 cups |
| Butter | 1/2 cup (1 stick) |
| Vanilla extract | 1 teaspoon |
| Green food coloring | 1-2 drops |
| Milk chocolate chips | 1 cup |
| Assorted candy decorations (e.g., M&Ms, gumdrops, sprinkles) | As desired |
| Edible glitter (optional) | As desired |
Instructions:
- Prepare the Ingredients: Measure out all the ingredients and line a round cake pan or a circular baking sheet with parchment paper. If you don’t have a round pan, you can shape the wreath by hand on a flat surface later.
- Melt Butter and Marshmallows: In a large saucepan, melt the butter over low heat. Once melted, add the mini marshmallows and stir continuously until the marshmallows are fully melted and the mixture is smooth, usually taking about 2-3 minutes.
- Add Vanilla and Food Coloring: Remove from heat and stir in the vanilla extract. Add 1-2 drops of green food coloring, mix well to achieve your desired shade of green.
- Combine Cereal with Marshmallow Mixture: Quickly add the Rice Krispies cereal to the marshmallow mixture. Stir until the cereal is fully coated and combined with the marshmallow mixture.
- Shape the Wreath: Pour the mixture into the prepared round cake pan. Using a greased spatula or your hands, press the mixture evenly into the pan to form a circular wreath shape. If using a flat surface, shape it into a wreath directly on parchment paper, ensuring to leave an opening in the center.
- Cool and Set: Allow the wreath to cool at room temperature for about 30 minutes until set.
- Melt Chocolate: In a microwave-safe bowl, melt the milk chocolate chips by microwaving in 30-second intervals, stirring in between, until smooth.
- Decorate the Wreath: Once the Rice Krispies wreath has cooled and is firm, drizzle the melted chocolate over the wreath or dip parts of it in the chocolate. Immediately add your assorted candy decorations, sprinkles, or edible glitter to make it festive.
- Let It Set: Allow the chocolate to set at room temperature for approximately 15-20 minutes before serving or displaying.
- Serve and Enjoy: Once set, slice the wreath into sections or leave it whole as a stunning centerpiece. Enjoy this festive treat with friends and family!
