As an Amazon Associate I earn from qualifying purchases.
Editorial Policy | Disclosure Policy
Creepy Cut-Out Sandwiches
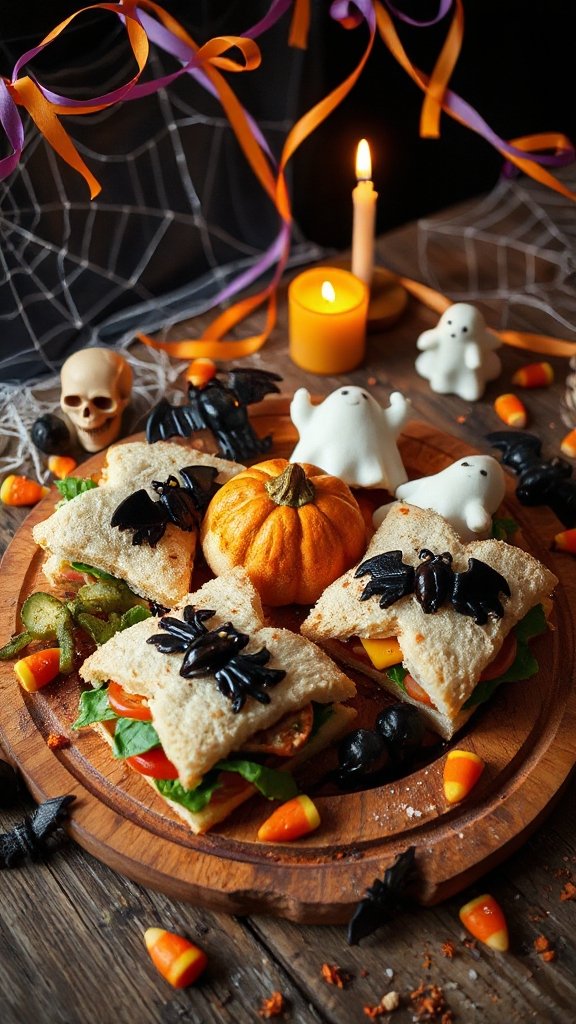
Creepy Cut-Out Sandwiches are a fun and festive treat perfect for Halloween gatherings. This spooky dish takes your standard sandwiches and gives them a ghoulish twist by using cookie cutters to create eerie shapes and personalized designs. They are sure to delight both kids and adults alike, adding a playful element to any Halloween feast.
| Ingredients | Quantity |
|---|---|
| Bread (white or whole grain) | 4-6 slices |
| Cheese (cheddar or mozzarella) | 4-6 slices |
| Deli meat (turkey or ham) | 4-6 slices |
| Lettuce or spinach | Handful |
| Mustard or mayonnaise | As needed |
| Cookie cutters (various Halloween shapes) | – |
| Olive slices (for decoration) | 8-12 slices |
| Bell pepper (for decoration) | 1, cut into strips |
| Pickles (optional for decoration) | 4-6 slices |
Instructions:
- Prepare Your Ingredients: Begin by gathering all your ingredients and setting up a clean working area. Make sure you have your cookie cutters handy and select various Halloween shapes like bats, ghosts, or pumpkins for the sandwiches.
- Cut the Bread: Take a slice of bread and place it on a cutting board. Using your cookie cutter, press down firmly to create a sandwich shape. Remove the cut-out piece and set it aside. Repeat this process with the remaining bread slices until you have enough shaped pieces for your sandwiches.
- Layer the Fillings: On one of the bread cut-outs, spread a thin layer of mustard or mayonnaise to add flavor. Layer with a slice of cheese, followed by a slice of deli meat, and then add a layer of lettuce or spinach.
- Top with Another Cut-Out: Take another shaped piece of bread and place it on top of your layered filling to create a sandwich. Press down gently to seal the fillings inside.
- Create Faces: Get creative by using the olive slices for eyes and strips of bell pepper for a mouth, or any other decorative touches you want. You can place these on the top piece of bread to give your sandwiches a spooky face.
- Repeat and Serve: Continue assembling the rest of your sandwiches until you have as many as you want. Arrange them on a platter and serve immediately, or keep them in the refrigerator until you’re ready for the Halloween party.
Now you have a delicious and delightfully creepy treat to enjoy during your spooky celebrations!
Ghoulish Ghostly Grilled Cheese
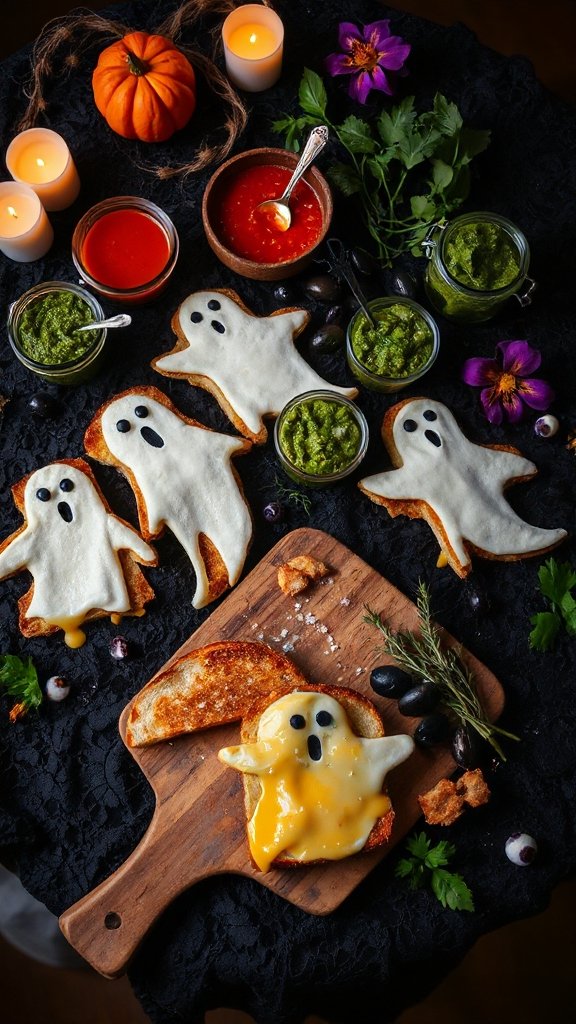
Ghoulish Ghostly Grilled Cheese is a fun and spooky version of the classic grilled cheese sandwich, perfect for Halloween-themed gatherings. With crispy edges and gooey cheese, these sandwiches are transformed into whimsical ghost shapes that will surely be a hit with both kids and adults alike. Easy to make and delicious to eat, they add a playful touch to your Halloween festivities.
| Ingredients | Quantity |
|---|---|
| Bread (sourdough or white) | 4 slices |
| Cheese (sharp cheddar or mozzarella) | 4 slices |
| Butter | 2 tbsp |
| Olive slices (for decoration) | 8 slices |
| Food-safe marker (optional for faces) | 1 |
Instructions:
- Prepare Your Ingredients: Gather all the ingredients and verify that your cooking area is clean and organized. You will need a frying pan or skillet for cooking the sandwiches.
- Cut the Bread: Using a large ghost-shaped cookie cutter, press down on each slice of the bread to create ghost shapes. You should get two ghost shapes from each slice, resulting in a total of 4 ghosts (2 sandwiches).
- Assemble the Sandwiches: Take one ghost-shaped piece of bread and place a slice of cheese on it. Cover it with another ghost-shaped piece of bread, creating your first sandwich. Repeat with the remaining pieces to make a second sandwich.
- Heat the Pan: Place your frying pan or skillet over medium heat and add 1 tablespoon of butter. Allow it to melt and coat the bottom of the pan evenly.
- Cook the Sandwiches: Carefully place one of the assembled sandwiches in the heated pan. Cook for about 3-4 minutes or until the underside is golden brown and crispy. Flip the sandwich over and add the remaining tablespoon of butter to the pan if needed. Cook for another 3-4 minutes on this side until it’s also golden brown and the cheese is melted.
- Add Faces: Once both sandwiches are cooked, remove them from the pan and let them cool slightly. Use olive slices to create spooky eyes on each ghost, placing them directly onto the cheese. If desired, you can also use a food-safe marker to draw ghostly faces on the bread.
- Serve and Enjoy: Cut the sandwiches in half to show the gooey cheese inside, and arrange them on a platter for a ghoulishly delightful presentation. Serve warm and enjoy your Ghoulish Ghostly Grilled Cheese at your Halloween gathering!
Spooky Sliders
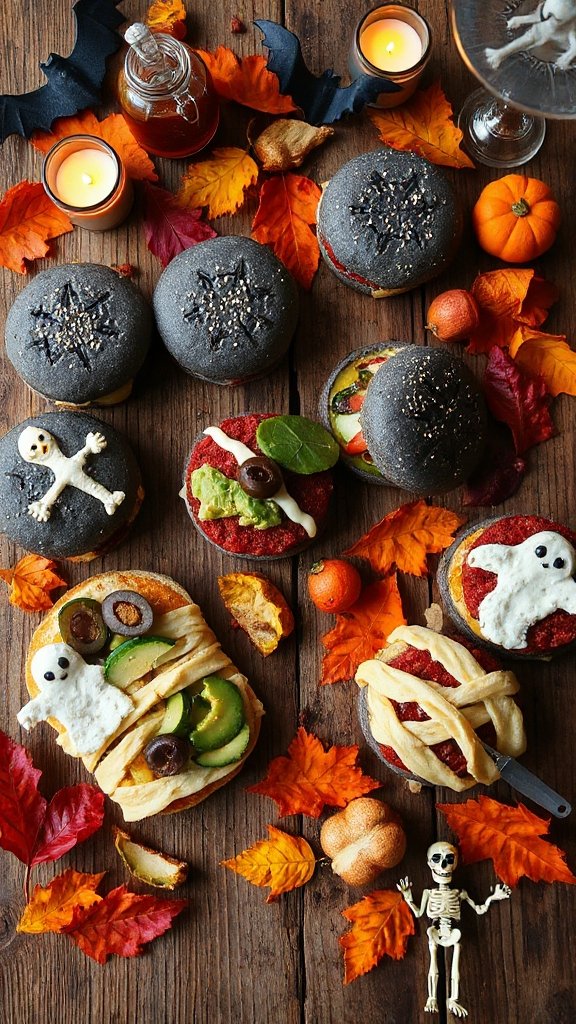
Spooky Sliders are the perfect bite-sized treat for your Halloween gatherings, combining a delicious burger with festive fun! These mini burgers can be customized to suit your tastes and are sure to delight both kids and adults alike. With creative toppings and a spooky presentation, Spooky Sliders will steal the show at your Halloween feast.
| Ingredients | Quantity |
|---|---|
| Slider buns | 12 buns |
| Ground beef or turkey | 1 lb |
| Cheese slices (cheddar or gouda) | 6 slices |
| Lettuce | 1 cup |
| Tomato slices | 1 cup |
| Pickles | 1 cup |
| Ketchup | 1/2 cup |
| Mustard | 1/4 cup |
| Olive slices (for eyes) | 12 slices |
| Food-safe marker (optional for faces) | 1 |
Instructions:
- Prepare the Patties: In a large bowl, combine the ground beef or turkey with a pinch of salt and pepper. Form the mixture into 12 small patties, about 1/4 inch thick. Make a slight indentation in the center of each patty to help them cook evenly.
- Cook the Patties: Preheat a grill or skillet over medium heat. Place the patties on the grill or skillet and cook for about 3-4 minutes on one side. Flip the patties and cook for an additional 2 minutes on the other side. Place a slice of cheese on each patty during the last minute of cooking, allowing it to melt.
- Prepare Mummy Buns: While the patties are cooking, slice the slider buns in half and toast them lightly on the grill or in a toaster, if desired. This adds a nice crispness to the buns.
- Assemble the Sliders: Start by placing the bottom half of the slider buns on a serving platter. Add a lettuce leaf on each bun, followed by a cooked patty with melted cheese. Top with a slice of tomato, a pickle, and your choice of ketchup or mustard.
- Create Spooky Faces: To add a spooky touch, use olive slices to create eyes by placing them on top of the cheese. If desired, use a food-safe marker to draw ghostly or spooky faces on the top half of the buns.
- Finish Assembling: Place the top half of the buns over each assembled slider. Press down gently to hold everything together.
- Serve and Enjoy: Serve your Spooky Sliders on the platter and watch as your guests enjoy these frightfully delicious mini burgers. Enjoy the combination of flavors along with the Halloween spirit!
Wicked Witch Wraps
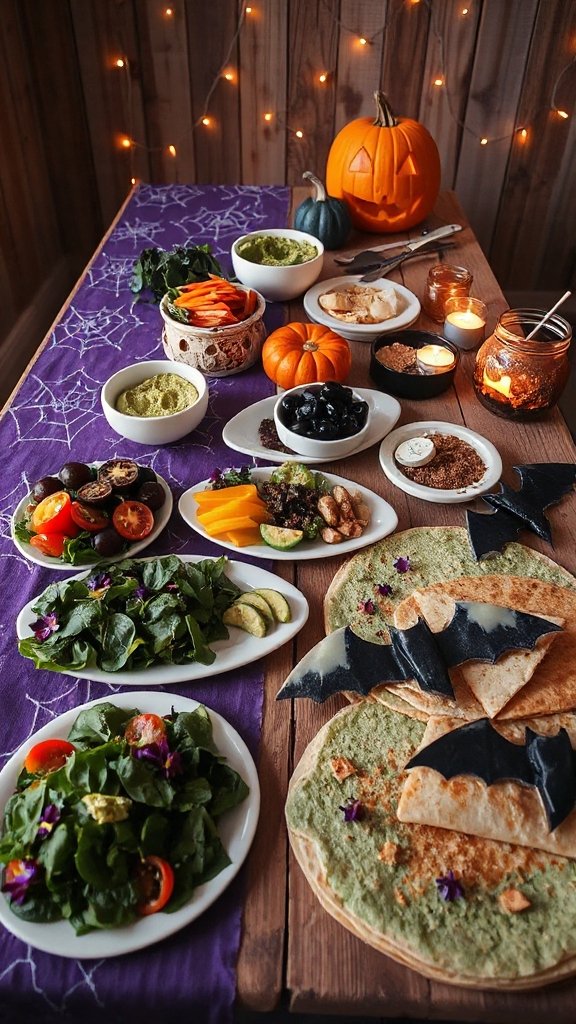
Wicked Witch Wraps are a fun and festive option for your Halloween party, perfect for both kids and adults. These wraps are not only tasty but also visually playful, making them a hit with your guests. Filled with delicious ingredients and presented as spooky witches, they’re a good way to incorporate healthy items into your Halloween spread.
| Ingredients | Quantity |
|---|---|
| Large tortillas | 6 tortillas |
| Cream cheese | 1 cup |
| Spinach leaves | 2 cups |
| Sliced cucumbers | 1 cup |
| Bell pepper (sliced for hair) | 1 pepper |
| Black olives (sliced for eyes) | 12 olives |
| Carrot sticks (for broomsticks) | 6 sticks |
| Edible black food coloring (optional) | 1 tube |
Instructions:
- Prepare the Wrap Filling: Start by spreading a generous layer of cream cheese evenly over each tortilla. This will serve as the ‘glue’ to hold the fillings in place.
- Layer the Spinach: Place a handful of spinach leaves on top of the cream cheese. Make certain the leaves cover a good portion of the tortilla, as this will add color and a healthy crunch.
- Add the Cucumber: Arrange the sliced cucumbers across the center of each wrap for some invigorating crunch and to form the ‘face’ of the witch.
- Create Hair with Bell Pepper: Take the sliced bell pepper and place it at the top of each wrap to create the witch’s hair. You can use various colors for a more vibrant look.
- Make the Eyes: Use the sliced black olives to create eyes by placing two pieces on top of the cucumber slices on each wrap. This adds a spooky touch for the witch’s face.
- Roll the Wraps: Starting from one side, carefully roll up the tortilla into a tight wrap. Make sure to keep the fillings inside as you roll. Once done, slice each wrap in half diagonally to reveal the colorful filling.
- Add Broomsticks: To complete the look, insert a carrot stick into the bottom end of each wrap to mimic a broomstick, adding an extra fun element to your Wicked Witch Wraps.
- Serve and Enjoy: Arrange the Wicked Witch Wraps on a serving platter and watch your guests delight in these deliciously creepy creations. Enjoy watching them devour this festive, healthy option at your Halloween gathering!
Mummy Meatball Sandwiches
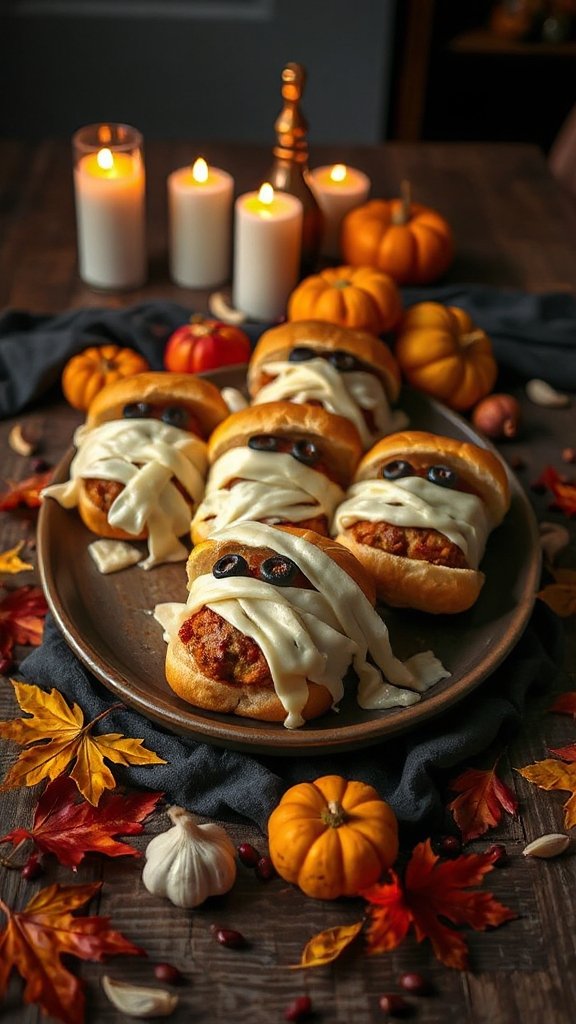
Mummy Meatball Sandwiches are a spooky and delicious twist on traditional meatball subs, perfect for serving at your Halloween gatherings. These sandwiches not only boast a tasty meatball filling enveloped in a gooey, cheesy crust, but they are also adorned with ‘bandages’ that give them a delightful mummified appearance. They are sure to be a hit with kids and adults alike!
| Ingredients | Quantity |
|---|---|
| Frozen meatballs | 12 meatballs |
| Sub rolls | 6 rolls |
| String cheese | 6 sticks |
| Pizza sauce | 1 cup |
| Olive oil | 2 tablespoons |
| Italian seasoning | 1 teaspoon |
| Mozzarella cheese (shredded) | 1 cup |
Instructions:
- Preheat the Oven: Start by preheating your oven to 375°F (190°C). This will guarantee that your meatball sandwiches bake evenly and achieve a delicious golden color.
- Prepare the Meatballs: In a mixing bowl, combine the frozen meatballs with olive oil and Italian seasoning. Toss until the meatballs are evenly coated. Place the meatballs on a baking sheet lined with parchment paper and bake for about 15-20 minutes or until heated through.
- Prepare the Sandwich Rolls: While the meatballs are baking, slice each sub roll lengthwise, creating a pocket for the fillings. Make sure not to cut all the way through so that the rolls can hold the filling securely.
- Add Pizza Sauce: Once the meatballs are fully cooked, remove them from the oven. Place 2-3 meatballs into each sliced roll and drizzle pizza sauce over the top of the meatballs.
- Create Mummy Bandages: Using string cheese, cut strips that mimic bandages. Drape these strips over the meatballs in the rolls, leaving gaps in between to resemble the wrappings of a mummy. You can also use shredded mozzarella to add extra cheesiness and a mummy-like texture.
- Top with More Cheese: Sprinkle a generous amount of shredded mozzarella cheese over the top of the string cheese to create a gooey cheesy layer.
- Bake the Sandwiches: Place the assembled sandwiches back on the baking sheet and return them to the oven. Bake for an additional 10 minutes, or until the cheese is melted and bubbly, and the edges of the bread are slightly golden.
- Add Mummy Eyes: To finish decorating your Mummy Meatball Sandwiches, slice black olives in half and place half an olive on top of each sandwich to resemble the eyes of the mummy.
- Serve and Enjoy: Once out of the oven, allow them to cool for a few minutes before serving. Arrange on a platter and enjoy watching your guests delight in these fun and festive Mummy Meatball Sandwiches at your Halloween celebration!
Bloody Beetroot Spread
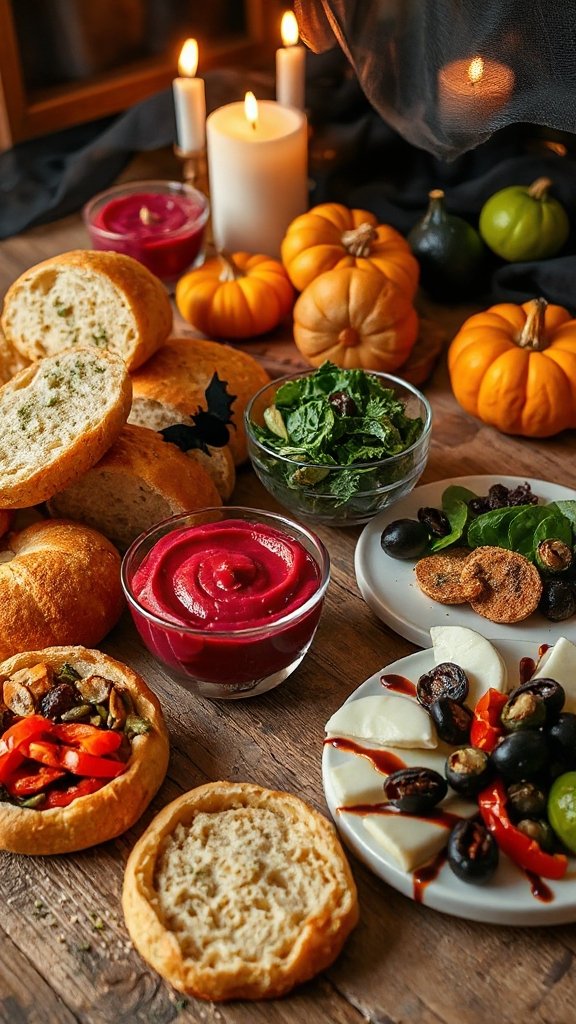
Bloody Beetroot Spread is a vibrant and flavorful dip that adds a spooky touch to your Halloween festivities. This creamy and earthy spread not only looks like it’s dripping with blood, but it’s also packed with nutritious ingredients that make it a healthy alternative for your holiday snacking. Perfect for pairing with bread, crackers, or veggies, this spread is certain to be a crowd-pleaser at any Halloween party.
| Ingredients | Quantity |
|---|---|
| Cooked beetroot | 2 cups (diced) |
| Cream cheese | 8 oz |
| Greek yogurt | 1/2 cup |
| Garlic clove | 1 (minced) |
| Lemon juice | 2 tablespoons |
| Olive oil | 1 tablespoon |
| Salt | 1/2 teaspoon |
| Black pepper | 1/4 teaspoon |
| Fresh dill or parsley | 2 tablespoons (chopped) |
Instructions:
- Prepare the Ingredients: Begin by gathering all your ingredients. Confirm that the cooked beetroot is diced into small pieces for easier blending. If you haven’t cooked the beetroots yet, you can do so by boiling or roasting them until tender.
- Blend the Base: In a food processor, combine the diced cooked beetroot, cream cheese, and Greek yogurt. These ingredients form the creamy base of your spread.
- Add Flavoring Ingredients: To the mixture in the food processor, add the minced garlic clove, lemon juice, olive oil, salt, and black pepper. These ingredients will enhance the flavor profile of the dip while maintaining its spooky appeal.
- Blend Until Smooth: Pulse the food processor until the mixture is smooth and creamy. Stop occasionally to scrape down the sides of the bowl to confirm everything is well combined. Taste the spread and adjust seasonings if necessary.
- Incorporate Fresh Herbs: Once the spread is smooth, add your chopped fresh dill or parsley to the mixture. Give it a few quick pulses to combine, keeping some of the herbs visible for decoration and added flavor.
- Chill Before Serving: Transfer the Bloody Beetroot Spread into a serving bowl and cover it with plastic wrap. Refrigerate for at least 30 minutes before serving. This chilling time allows the flavors to meld and the spread to thicken slightly.
- Serve and Enjoy: Once chilled, garnish your spread with a sprinkle of chopped herbs or a drizzle of olive oil if desired. Serve with an assortment of crackers, sliced baguette, or fresh vegetable sticks like carrots and celery for a fun and festive Halloween snack. Enjoy the eerie appeal and delicious taste of your Bloody Beetroot Spread!
Monster Meat and Cheese Platter
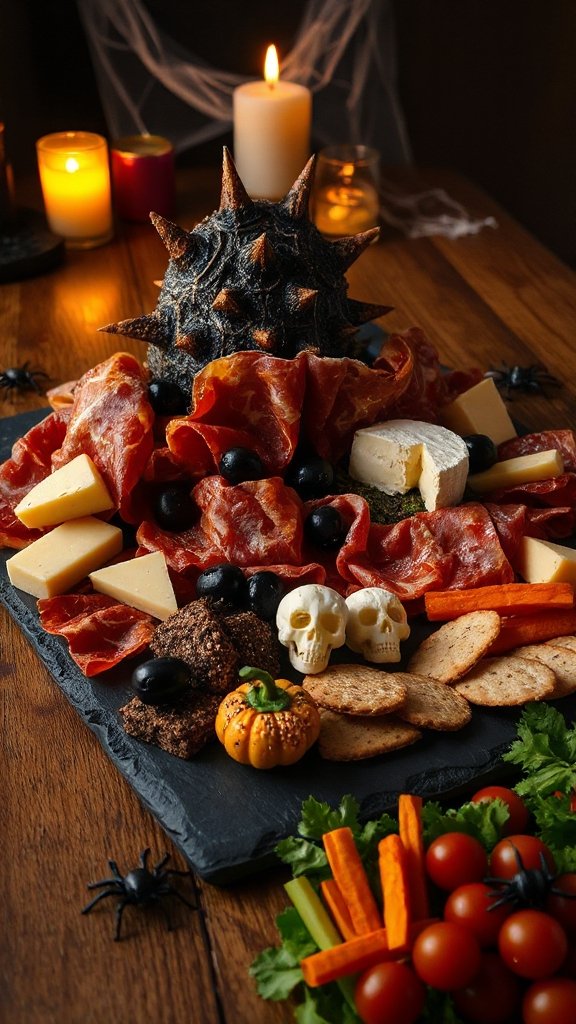
The Monster Meat and Cheese Platter is a fun and creative way to serve up a selection of meats and cheeses that will delight and surprise your guests at any Halloween gathering. This visually appealing platter can be arranged to resemble spooky monsters, making it not only a delicious snack but also a playful centerpiece for your party.
| Ingredients | Quantity |
|---|---|
| Assorted deli meats (e.g., ham, turkey, salami) | 12 oz (total) |
| Assorted cheeses (e.g., cheddar, mozzarella, pepper jack) | 8 oz (total) |
| Olives (black or green) | 1 cup |
| Cherry tomatoes | 1 cup |
| Cucumber | 1 (sliced) |
| Bell peppers (red, yellow, green) | 2 (sliced) |
| Crackers | 1 box |
| Fresh herbs (e.g., parsley) | for garnish |
| Small plastic eyes (optional) | for decoration |
Instructions:
- Gather Your Ingredients: Start by collecting all the ingredients needed for the platter. Confirm you have a variety of deli meats and cheeses to create different monster faces.
- Prepare the Base: Choose a large serving platter or cutting board as your base. Consider using a rectangular or round shape for a more interesting display.
- Arrange Meats: Lay the assorted deli meats flat on the platter. You can create monster shapes by folding or rolling the meats. For instance, create a “hairy” monster by using strips of ham or salami.
- Add Cheeses: Next, cut the cheeses into fun shapes that resemble eyes or teeth. Use cookie cutters for best results or cut them into triangles and squares. Place these cheese pieces around the meat to form different facial features.
- Create Monster Faces: Use olives and cherry tomatoes to make eyes and noses. Halve the cherry tomatoes to create red “eyes” and use whole olives for a spooky look. Add cucumber slices for mouths or teeth, arranging them creatively to complete your monster designs.
- Enhance with Vegetables: Add sliced bell peppers and cucumber to the platter for additional decoration and color. Bell pepper strips can serve as “arms” or “antennae,” while cucumber wheels can act as decorative borders or additional features.
- Fill in with Crackers: Scatter an assortment of crackers around the meat and cheese. These add crunch, flavor, and fun shapes that fit well within the monster theme.
- Garnish and Final Touches: Finish off the platter by garnishing with fresh herbs like parsley for a pop of green. If you have small plastic eyes, place them randomly on the meats or cheeses for added spooky fun.
- Serve and Enjoy: Now that your Monster Meat and Cheese Platter is assembled, serve it to your guests with toothpicks for easy snacking. Watch as they enjoy both the creativity and the delicious flavors of your Halloween creation!
Jack-o’-Lantern Veggie Sandwiches
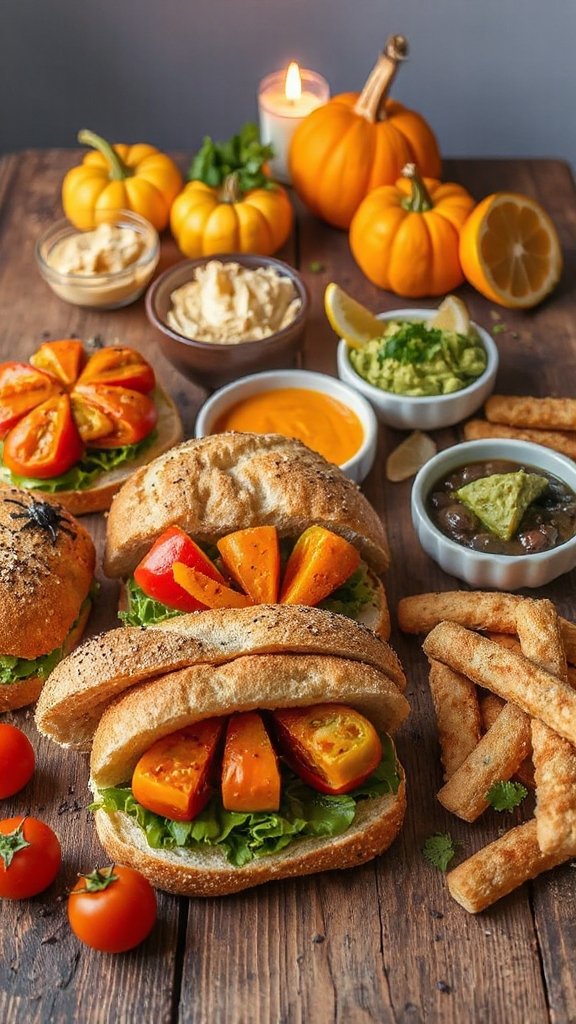
Jack-o’-Lantern Veggie Sandwiches are a fun and festive way to celebrate Halloween while enjoying a healthy snack. These sandwiches are not only delicious but also visually appealing, resembling iconic jack-o’-lanterns with their vibrant fillings and carved designs. Perfect for parties, lunchboxes, or just as a seasonal treat, these sandwiches will delight both kids and adults alike.
| Ingredients | Quantity |
|---|---|
| Whole grain or white bread | 8 slices |
| Cream cheese or hummus | 1 cup |
| Bell peppers (orange, green) | 1 each, sliced |
| Cucumber | 1, sliced |
| Shredded carrots | 1 cup |
| Olive slices | 1 cup |
| Spinach or lettuce | 1 cup |
| Cookie cutter (jack-o’-lantern shape) | 1 |
| Small sharp knife (optional) | 1 |
Instructions:
- Prepare the Bread: Start by laying out your slices of bread on a clean surface. If you like, lightly toast the bread for added crunch.
- Spread the Base Layer: Take your cream cheese or hummus and spread an even layer on one side of each slice of bread. This will act as the adhesive for your veggie fillings.
- Create the Jack-o’-Lantern Faces: Using the cookie cutter, cut out fun jack-o’-lantern shapes from half of the bread slices. Set aside the leftover pieces. For added detail, you can use a small sharp knife to carefully carve out eyes and a mouth on the jack-o’-lantern pieces.
- Layer the Veggies: On the plain slices of bread (without the jack-o’-lantern cutouts), add your shredded carrots, sliced bell peppers, cucumber, and spinach or lettuce. Try to arrange the veggies in a way that they complement the face of your jack-o’-lantern cutouts.
- Top with Faces: Once the veggies are arranged, place the jack-o’-lantern bread pieces on top to form the sandwich. Press down gently to secure the filling.
- Cut Sandwiches: Use a sharp knife to cut each sandwich into quarters or halves for easier eating. You can also make triangle-shaped halves if desired.
- Garnish and Serve: Serve your Jack-o’-Lantern Veggie Sandwiches on a festive platter. You can add additional olive slices as “eyes” on the jack-o’-lanterns for an extra spooky effect. Enjoy your creative and healthy Halloween treat!
Haunted Hummus and Pita Ghosts
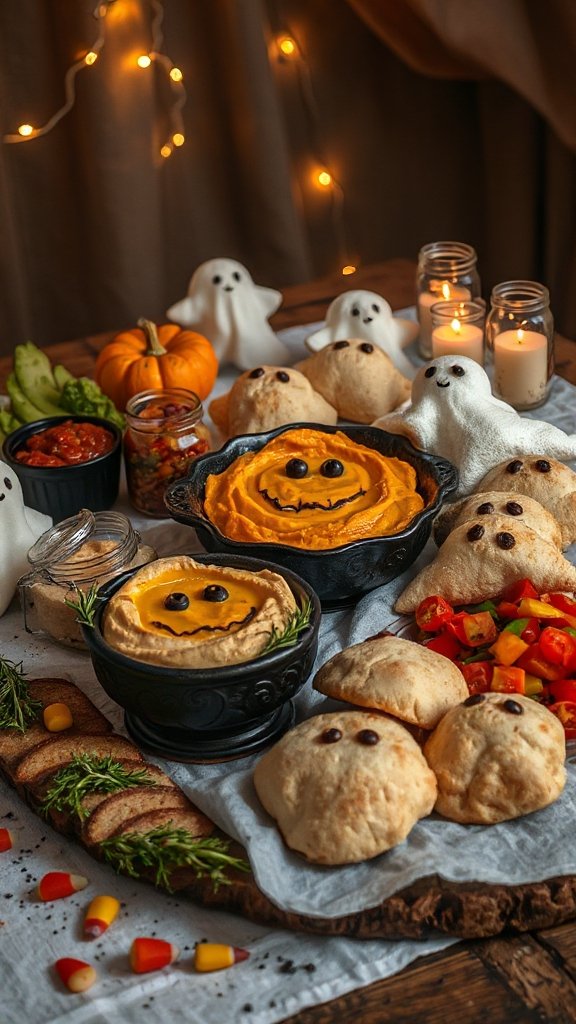
Haunted Hummus and Pita Ghosts are a creative and playful way to serve a healthy snack during the Halloween festivities. This dish features creamy hummus paired with crispy pita chips, cleverly shaped into ghostly figures that are sure to be a hit at any gathering. Both fun to make and delicious to eat, these spooky snacks are perfect for satisfying savory cravings while celebrating the season.
| Ingredients | Quantity |
|---|---|
| Hummus | 1 cup |
| Pita bread | 4 rounds |
| Olive slices | 8-10 slices |
| Black food marker or edible eyes | 10-12 pieces |
| Olive oil (optional) | For brushing |
| Garlic powder (optional) | 1 tsp |
| Paprika (optional) | For garnish |
Instructions:
- Prepare the Pita Bread: Preheat your oven to 375°F (190°C). While the oven is heating, cut each pita round into two halves to create two circles per pita. This will give you a total of 8 pita pieces.
- Shape the Ghosts: Using a sharp knife or kitchen scissors, cut each pita half into a ghost shape. Aim for a rounded top and a wavy bottom to give the appearance of floating ghosts. You can refer to images online for inspiration if needed.
- Brush with Olive Oil: If desired, brush each pita ghost shape lightly with olive oil. This will help them get crispy and golden in the oven. For added flavor, sprinkle a little garlic powder on top.
- Bake the Pita Ghosts: Arrange the ghostly pita shapes on a baking sheet. Bake in the preheated oven for about 8-10 minutes or until they are crisp and lightly golden. Keep an eye on them to prevent burning.
- Cool the Pita Ghosts: Once finished, remove the baking sheet from the oven and let the pita ghosts cool for a few minutes. They will crisp up even further as they cool.
- Assemble the Ghosts: Using the olive slices or edible eyes, attach the eyes to your cooled pita ghosts. You can either place them directly on the pita or use a small dab of hummus to help them stick.
- Serve with Hummus: Spoon the hummus into a serving bowl and place the ghost-shaped pita chips around it. You can sprinkle paprika over the hummus for a festive touch if desired.
- Enjoy: Your Haunted Hummus and Pita Ghosts are ready to be enjoyed! Serve them at your Halloween party or as a fun snack for kids (and adults!) to munch on while watching spooky movies.
Zombie Zucchini Boats
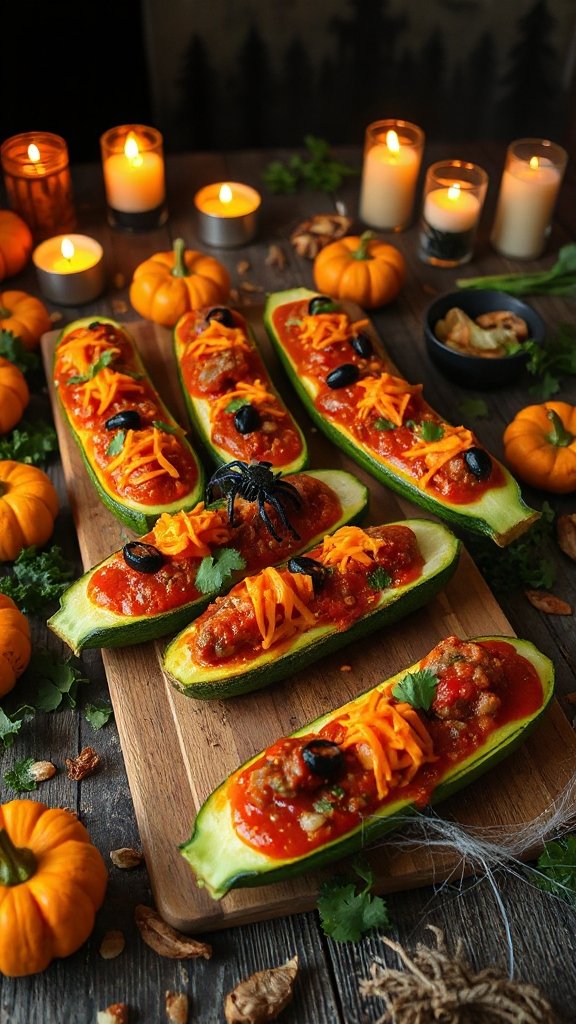
Zombie Zucchini Boats are a fun and festive way to elevate your Halloween spread while incorporating some healthy vegetables. These zucchini boats are hollowed out and filled with a delicious mixture of savory ingredients, topped with shredded cheese to give them a creepy, ghoulish appearance. Perfect for kids and adults alike, they make a great main course or appetizer that will be the highlight of your Halloween gathering.
| Ingredients | Quantity |
|---|---|
| Zucchini | 4 medium |
| Ground beef or turkey | 1 pound |
| Onion | 1 small |
| Garlic | 2 cloves |
| Marinara sauce | 1 cup |
| Italian seasoning | 1 tsp |
| Salt | To taste |
| Black olives | 1 can, sliced |
| Shredded mozzarella cheese | 1 cup |
Instructions:
- Preheat the Oven: Begin by preheating your oven to 375°F (190°C).
- Prepare the Zucchini: Wash the zucchinis thoroughly and slice them in half lengthwise. Using a spoon, scoop out the seeds and some of the flesh, creating a hollowed-out space for the filling. Set aside the scooped-out zucchini flesh for later use in the filling.
- Cook the Filling: In a skillet over medium heat, add a small amount of oil. Chop the onion and minced garlic, and sauté them in the skillet until the onion becomes translucent, about 3-4 minutes. Then, add the ground beef or turkey to the skillet, breaking it up with a spoon, and cook until browned. Drain any excess fat.
- Add Sauce and Seasoning: Stir in the reserved zucchini flesh, marinara sauce, Italian seasoning, and salt. Let the mixture simmer for about 5-7 minutes until everything is well combined and heated through.
- Stuff the Zucchini: Take the hollowed zucchini halves and place them on a baking dish. Carefully spoon the meat and sauce mixture into each zucchini boat, packing it down slightly to guarantee a generous filling.
- Top with Cheese and Olives: Sprinkle the shredded mozzarella cheese generously over the stuffed zucchini boats. For a spooky touch, add sliced black olives on top to resemble “eyes.”
- Bake the Zucchini Boats: Place the baking dish in the preheated oven and bake for about 25-30 minutes, or until the zucchinis are tender and the cheese is melty and bubbly.
- Cool and Serve: Once baked, remove the zucchini boats from the oven and let them cool for a few minutes before serving. These Zombie Zucchini Boats will be a hit at your Halloween gathering and are sure to be a spooky delicious treat!
Sinister Sweet Treat Sandwiches
| Ingredients | Quantity |
|---|---|
| Soft bread (white or whole grain) | 8 slices |
| Cream cheese (softened) | 8 oz |
| Peanut butter | 4 oz |
| Fruit preserves (jelly or jam) | 4 oz |
| Sliced strawberries | 1 cup |
| Banana slices | 1 medium banana |
| Edible googly eyes | 1 pack |
| Food coloring (optional) | As needed |
| Black licorice strips | 1 pack |
| Candy corn (for decoration) | 1 cup |
Instructions:
- Prepare the Bread: Start by laying out your slices of bread on a clean surface. You can choose to use white or whole grain bread based on your preference.
- Spread Cream Cheese: Using a butter knife, spread a generous layer of softened cream cheese evenly across half of the bread slices. This will serve as the “glue” for your fillings.
- Add Fillings: On the remaining half of the bread slices, spread a layer of peanut butter on some and fruit preserves on others. You can mix and match according to your taste.
- Create Spooky Faces: Start assembling your sandwiches by placing one slice with cream cheese and one slice with peanut butter or fruit preserves together to form a sandwich. For added spookiness, use sliced strawberries to create “mouths” and banana slices for “teeth” on the top slice of the sandwich.
- Decorate with Googly Eyes: Adorn each sandwich with edible googly eyes to give them a fun and ghastly appearance. Place them randomly on top to make each sandwich unique.
- Make Spider Webs: Use black licorice strips to create spider webs on top of the sandwiches. Simply cut the licorice into thin strips and arrange them in a web pattern to complete the spooky look.
- Cut into Shapes: For a delightful presentation, use a cookie cutter to cut the sandwiches into fun shapes, such as ghosts, bats, or pumpkins. Alternatively, you can cut them into quarters for smaller bites.
- Garnish and Serve: Place your Sinister Sweet Treat Sandwiches on a platter and sprinkle candy corn around as a decorative and festive touch. Serve immediately or cover with plastic wrap and refrigerate until serving.
Now you’re ready to wow your friends and family with these fun and spooky treats!
