As an Amazon Associate I earn from qualifying purchases.
Editorial Policy | Disclosure Policy
Creepy Crawly Pasta Salad
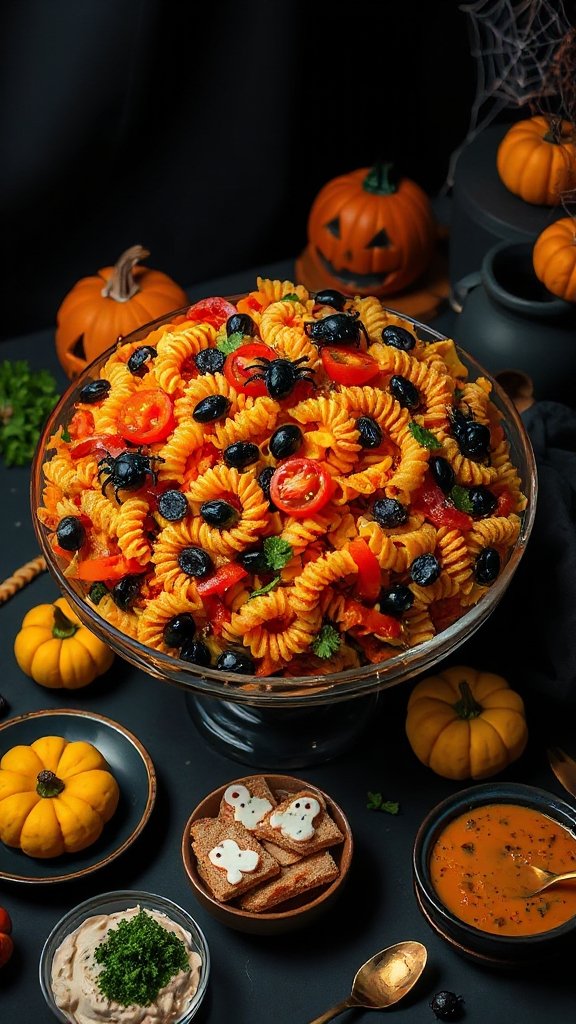
Creepy Crawly Pasta Salad is a fun and festive dish perfect for Halloween gatherings. This whimsical salad combines colorful pasta with fresh veggies and creepy-crawly gummy insects, making it a hit among both kids and adults. It’s a great side dish or appetizer that adds a playful touch to your Halloween party spread.
| Ingredients | Quantity |
|---|---|
| Rotini pasta | 2 cups |
| Olive oil | 2 tablespoons |
| Cherry tomatoes | 1 cup halved |
| Cucumber | 1, diced |
| Bell pepper (any color) | 1, diced |
| Black olives | ½ cup sliced |
| Italian dressing | ½ cup |
| Gummy worms | 1 cup |
| Salt | To taste |
| Pepper | To taste |
Cooking Steps Instructions:
- Cook the Pasta: Bring a large pot of salted water to a boil. Add the rotini pasta and cook according to package directions until al dente. Once cooked, drain the pasta and rinse it under cold water to stop the cooking process. Set aside to cool.
- Prepare the Vegetables: While the pasta cools, wash and cut the cherry tomatoes in half. Dice the cucumber and bell pepper into small pieces. Slice the black olives.
- Combine Ingredients: In a large mixing bowl, add the cooled pasta, cherry tomatoes, cucumber, bell pepper, and black olives.
- Dress the Salad: Drizzle the olive oil and Italian dressing over the pasta and vegetables. Sprinkle with salt and pepper according to your taste. Toss everything together gently until the pasta and veggies are well coated in the dressing.
- Add the Creepy Touch: Just before serving, stir in the gummy worms so they are nestled within the pasta salad, giving it that creepy crawly effect.
- Chill and Serve: If time allows, let the salad chill in the refrigerator for at least 30 minutes before serving. This helps meld the flavors together. Serve in a large bowl or on individual plates, and enjoy your spooky Halloween dish!
Spooky Stuffed Mini Peppers
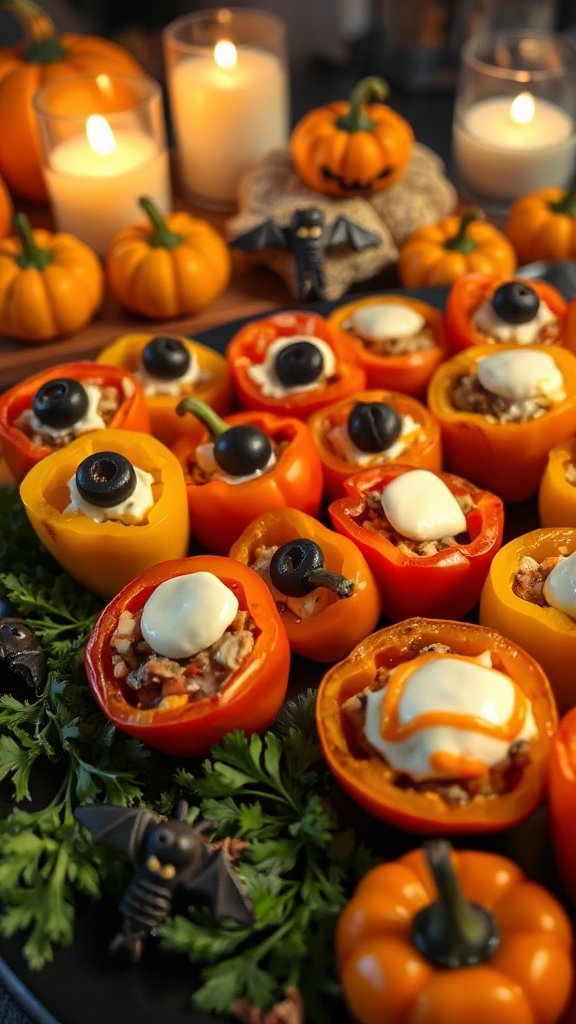
Spooky Stuffed Mini Peppers are a delightful and flavorful addition to your Halloween party spread. These bite-sized peppers are filled with a savory cheese mixture that is sure to please your guests. With their vibrant colors and spooky presentation, these stuffed mini peppers not only taste great but also add a festive touch to your celebration.
| Ingredients | Quantity |
|---|---|
| Mini bell peppers | 12-16 peppers |
| Cream cheese | 8 oz |
| Sharp cheddar cheese | 1 cup, shredded |
| Sour cream | ½ cup |
| Garlic powder | 1 teaspoon |
| Onion powder | 1 teaspoon |
| Paprika | 1 teaspoon |
| Salt | To taste |
| Pepper | To taste |
| Fresh parsley (for garnish) | Optional, for serving |
Cooking Steps Instructions:
- Preheat the Oven: Start by preheating your oven to 350°F (175°C). This will prepare it for baking the stuffed mini peppers once they are filled.
- Prepare the Mini Peppers: Wash the mini bell peppers and carefully slice them in half lengthwise. Remove the seeds and membranes, creating little boats for the stuffing. Place the halved peppers on a baking sheet, cut side up.
- Make the Cheese Filling: In a mixing bowl, combine the cream cheese, shredded sharp cheddar cheese, sour cream, garlic powder, onion powder, paprika, salt, and pepper. Use a spatula or mixer to blend the ingredients until they are well combined and creamy.
- Stuff the Peppers: Using a spoon or piping bag, fill each mini pepper half with the cheese mixture. Be generous, ensuring each pepper is packed full of the savory filling.
- Bake the Mini Peppers: Place the stuffed mini peppers in the preheated oven and bake for about 20-25 minutes, or until the peppers are tender and the cheese is melted and bubbly.
- Garnish and Serve: Once baked, remove the peppers from the oven and let them cool for a few minutes. If desired, garnish with freshly chopped parsley for a pop of color. Arrange the stuffed mini peppers on a serving platter and enjoy your spooky snacks while they’re warm!
Ghoulish Guacamole and Chips
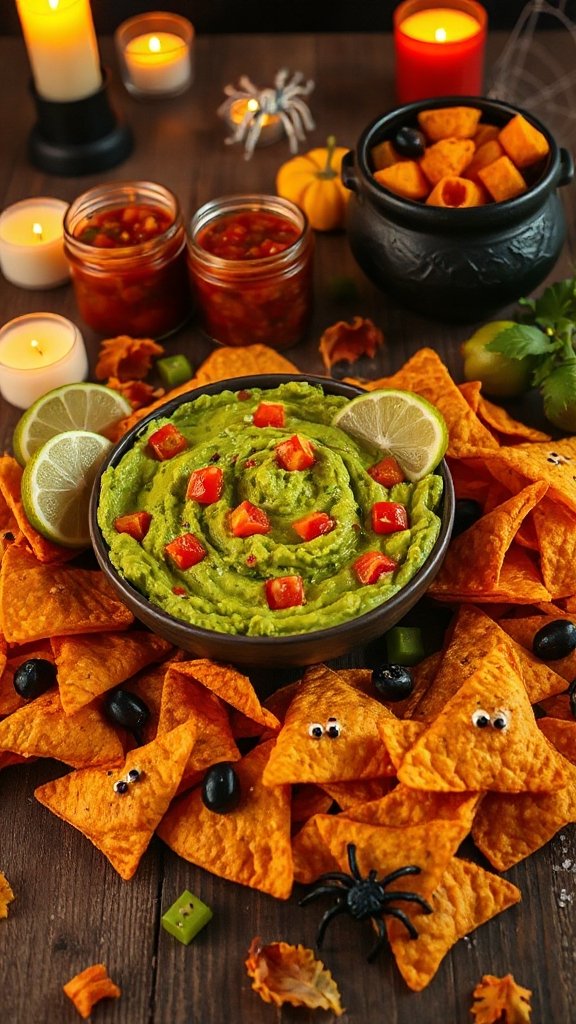
Ghoulish Guacamole and Chips is a fun and festive dip that adds a playful twist to your Halloween party spread. This creamy, flavorful guacamole is not only easy to prepare but also a crowd-pleaser, especially when paired with crunchy tortilla chips. To make it extra spooky, we’ll add some ghoulish decorations to the presentation. Get ready to delight your guests with this delicious and thematic treat!
| Ingredients | Quantity |
|---|---|
| Ripe avocados | 3 large |
| Lime juice | 2 tablespoons |
| Diced onion | 1 small |
| Diced tomato | 1 medium |
| Minced garlic | 1 clove |
| Chopped cilantro | 2 tablespoons |
| Jalapeño (optional) | 1 small, diced |
| Salt | To taste |
| Tortilla chips | 1 bag |
| Olives (for decoration) | 1 small can (black) |
| Sour cream (for decoration) | Optional |
Cooking Steps Instructions:
- Prepare the Avocados: Start by cutting the ripe avocados in half and removing the pit. Scoop the flesh into a mixing bowl.
- Mash the Avocados: Use a fork or a potato masher to mash the avocado to your desired level of creaminess. You can keep it chunky or smooth, depending on your preference.
- Add Lime Juice: Pour in the lime juice immediately after mashing the avocados. This not only adds flavor but also helps prevent browning.
- Mix in the Vegetables: Add the diced onion, diced tomato, minced garlic, chopped cilantro, and diced jalapeño (if using) to the bowl. Stir gently to combine and guarantee the ingredients are evenly distributed.
- Season the Guacamole: Sprinkle in some salt, starting with a small amount and adjusting to taste. Mix well to incorporate the seasoning.
- Prepare Serving Platter: Transfer the guacamole into a serving bowl. To make it ghoulish, use sour cream to create spooky shapes on the top. A simple ghost face with two dots for eyes and a small mouth can be fun!
- Add Olive Decorations: Slice a few black olives in half and use them to create spooky “eyes” or other fun designs in the guacamole to enhance the Halloween theme.
- Serve with Chips: Arrange tortilla chips around the guacamole bowl on a large platter. Make sure to provide plenty of chips for dipping!
- Enjoy: Gather your friends and family, dip in the chips, and enjoy the creamy, delicious flavors of your Ghoulish Guacamole while celebrating Halloween in style!
Monster Meatballs
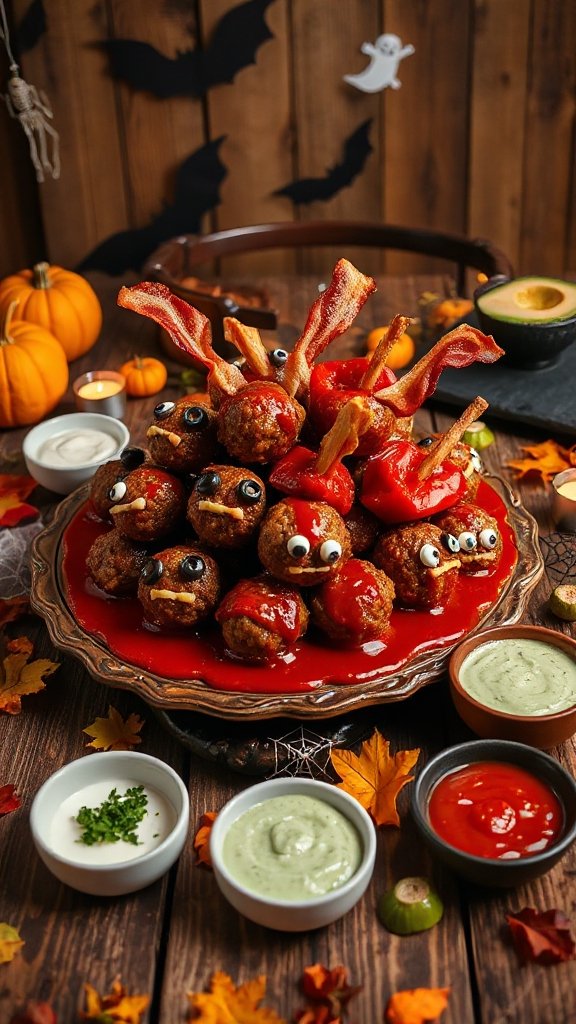
Monster Meatballs are a fun and spooky twist on traditional meatballs, perfect for your Halloween party! These savory treats can be made with ground beef or turkey and are dressed up to look like little monsters using eyes and other ghoulish garnishes. With their delicious flavor and playful presentation, these Monster Meatballs are certain to be a hit with both kids and adults alike!
| Ingredients | Quantity |
|---|---|
| Ground beef or turkey | 1 pound |
| Bread crumbs | 1/2 cup |
| Egg | 1 large |
| Parmesan cheese | 1/4 cup |
| Minced garlic | 2 cloves |
| Dried Italian herbs | 1 teaspoon |
| Salt | 1/2 teaspoon |
| Black pepper | 1/4 teaspoon |
| Marinara sauce | 1 jar (24 oz) |
| Mozzarella cheese (for eyes) | 8 small balls |
| Black olives (for eyes) | 8 small |
| Fresh parsley (for garnish) | Optional |
Cooking Steps Instructions:
- Preheat the Oven: First, preheat your oven to 375°F (190°C) to make sure it’s ready for baking the meatballs.
- Combine Ingredients: In a large mixing bowl, combine the ground beef or turkey, bread crumbs, egg, parmesan cheese, minced garlic, dried Italian herbs, salt, and black pepper. Mix everything together with your hands or a spoon until fully combined.
- Shape the Meatballs: Take a small portion of the meat mixture, about the size of a golf ball, and roll it into a ball shape. Place the meatballs on a baking sheet lined with parchment paper, making sure to leave space between them for even cooking.
- Bake the Meatballs: Place the baking sheet in the preheated oven and bake the meatballs for about 20-25 minutes, or until they are fully cooked through and have a nice golden color on the outside.
- Heat the Marinara Sauce: While the meatballs are baking, heat the marinara sauce in a saucepan over medium heat until it’s warm and simmering. Stir occasionally to prevent it from sticking to the bottom of the pan.
- Assemble the Monsters: Once the meatballs are cooked, remove them from the oven and carefully place them in the saucepan with the marinara sauce. Allow the meatballs to soak in the sauce for a couple of minutes.
- Create the Monster Faces: Using the mozzarella cheese balls, place one on top of each meatball to resemble a monster’s eye. Then, cut the black olives in half and place one half on each mozzarella ball to create the ‘pupil’.
- Garnish and Serve: If desired, chop some fresh parsley and sprinkle it over the meatballs for a touch of color. Serve the Monster Meatballs warm, with extra marinara sauce on the side for dipping.
- Enjoy: Invite your guests to gather around, enjoy the delicious Monster Meatballs, and marvel at their creepy, fun appearance!
Bewitching Pumpkin Soup
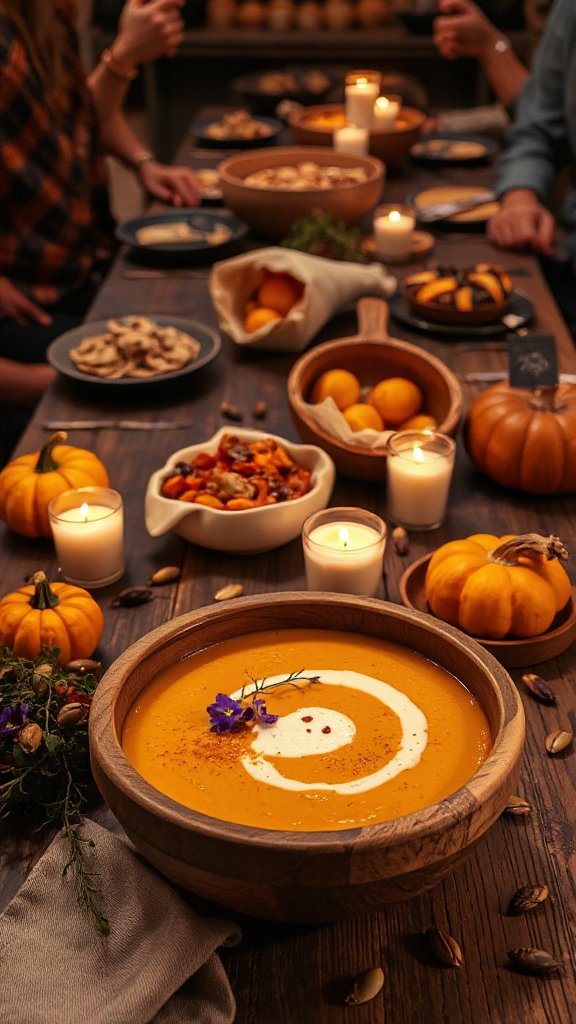
Bewitching Pumpkin Soup is a creamy, comforting dish that perfectly embodies the warm flavors of fall and the spooky spirit of Halloween. This velvety soup is made with fresh pumpkin, aromatic spices, and a touch of cream, making it an ideal starter or accompaniment for your Halloween party. Served in small bowls or cups, it’s sure to enchant your guests and add a festive touch to your table!
| Ingredients | Quantity |
|---|---|
| Fresh pumpkin (peeled and cubed) | 4 cups |
| Onion | 1 medium, chopped |
| Garlic | 2 cloves, minced |
| Chicken or vegetable broth | 4 cups |
| Coconut milk or heavy cream | 1 cup |
| Olive oil | 2 tablespoons |
| Ground cinnamon | 1/2 teaspoon |
| Ground nutmeg | 1/4 teaspoon |
| Salt | 1 teaspoon |
| Black pepper | 1/2 teaspoon |
| Optional garnish (pumpkin seeds or fresh parsley) | As desired |
Cooking Steps Instructions:
- Sauté the Aromatics: In a large pot, heat the olive oil over medium heat. Add the chopped onion and cook for about 5 minutes until it becomes translucent. Then, add the minced garlic and sauté for an additional minute, until fragrant.
- Add the Pumpkin: Add the cubed pumpkin to the pot and stir to combine with the onion and garlic mixture. Cook for about 5 minutes, stirring occasionally, to slightly soften the pumpkin.
- Pour in the Broth: Add the chicken or vegetable broth to the pot, ensuring that the pumpkin is fully submerged. Bring the mixture to a boil, then reduce the heat to low, cover, and let it simmer for about 15-20 minutes, or until the pumpkin is fork-tender.
- Blend the Soup: Once the pumpkin is fully cooked, carefully use an immersion blender to puree the soup until smooth. Alternatively, you can transfer the soup to a blender in batches, blending until smooth and then returning it to the pot.
- Stir in Cream and Spices: After blending, stir in the coconut milk or heavy cream to add richness to the soup. Then, add in the ground cinnamon, ground nutmeg, salt, and black pepper. Taste and adjust seasonings as needed.
- Heat Through: Allow the soup to heat through over low heat for another 5 minutes, stirring occasionally. Make sure it’s hot, but do not boil it again.
- Serve: Ladle the bewitching pumpkin soup into bowls or cups. If desired, garnish with a sprinkle of pumpkin seeds or a sprig of fresh parsley for an extra touch. Enjoy the comforting flavors of this festive soup with your guests!
Frighteningly Fun Fruit Platter
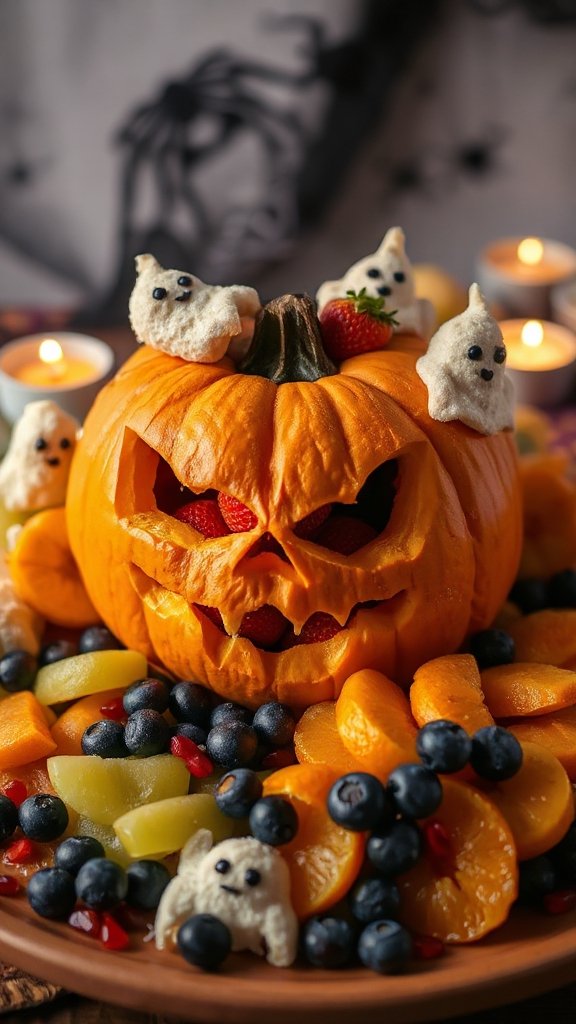
Frighteningly Fun Fruit Platter is a whimsical and colorful assortment of seasonal fruits that bring a festive flair to your Halloween party! This delightful dish not only adds a nutritious option to your spread, but it can also be arranged in spooky shapes and designs, which are sure to impress your guests both young and old. Think ghoulish grapes, terrifying tangerines, and eerie apples to keep the spirit of Halloween alive.
| Ingredients | Quantity |
|---|---|
| Seedless grapes | 2 cups |
| Tangerines | 4-6, peeled and halved |
| Apples (green or red) | 2, sliced |
| Bananas | 2, sliced |
| Strawberries | 1 cup, hulled |
| Blueberries | 1 cup |
| Halloween-themed cookie cutters | As needed (for shapes) |
| Honey or yogurt (for dipping) | Optional |
Cooking Steps Instructions:
- Prepare the Fruits: Rinse all the fruits thoroughly under cold water. Pat dry with a clean towel. Peel the tangerines and cut them in half to create pumpkin-like halves. Slice the apples and bananas into bite-sized pieces, keeping the banana slices in a round shape.
- Create Fun Shapes: Using Halloween-themed cookie cutters, cut the apple slices into fun shapes (like ghosts, bats, or pumpkins). This step is optional, but it adds a fun element to your platter.
- Assemble the Platter: On a large serving tray or platter, start arranging the prepared fruits. Create sections with grapes, tangerine halves, apple shapes, banana slices, strawberries, and blueberries. You can arrange them in a Halloween-themed design, such as a spooky face or a witch’s hat.
- Add Garnishes: If desired, use extra blueberries to create eyes on apple cut-outs, or use grapes to add spooky “warts” on tangerine halves. Get creative and have fun with how you want to present the fruit!
- Dipping Options: If you would like to add a dip, serve honey or yogurt in a small bowl on the side for guests to enjoy with their fruit.
- Serve and Enjoy: Once your fruit platter is beautifully arranged, display it at your Halloween party. Remind guests to dig in and enjoy this frightfully fun and healthy treat!
Sinister S’mores Bars
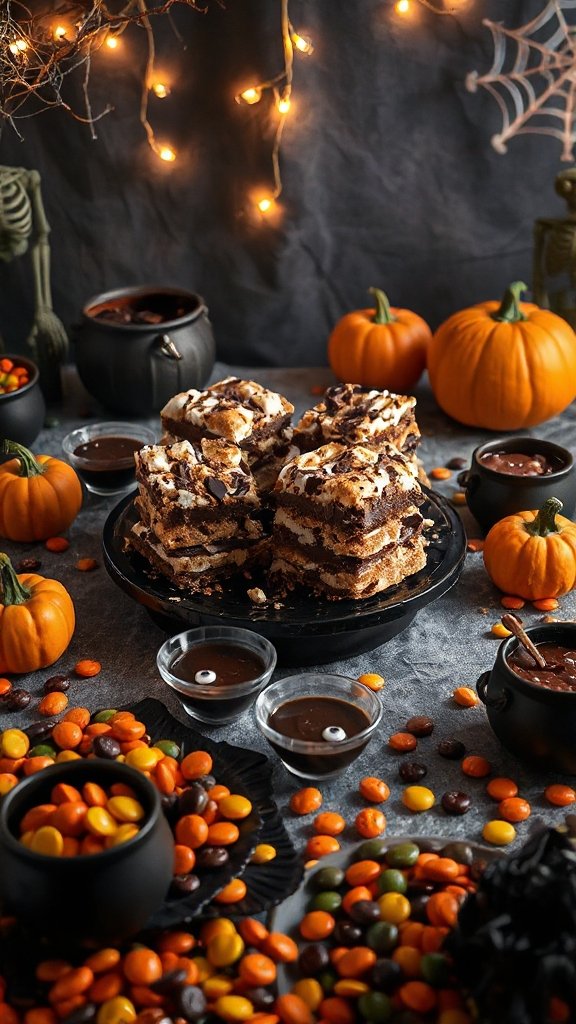
Sinister S’mores Bars are a delightful twist on the classic campfire treat, perfect for Halloween parties! These bars combine the flavors of graham cracker, chocolate, and marshmallow into easy-to-serve slices that will please guests of all ages. With a slightly eerie presentation, they add a fun and delicious touch to your spooky celebration.
| Ingredients | Quantity |
|---|---|
| Graham cracker crumbs | 2 cups |
| Unsalted butter | 1/2 cup (1 stick) |
| Granulated sugar | 1/4 cup |
| Mini marshmallows | 2 cups |
| Semi-sweet chocolate chips | 1 cup |
| Dark chocolate bar | 4 oz |
| Halloween-themed sprinkles | As needed (for decoration) |
Cooking Steps Instructions:
- Preheat the Oven: Begin by preheating your oven to 350°F (175°C). Grease a 9×9 inch baking dish or line it with parchment paper for easy removal.
- Prepare the Crust: In a mixing bowl, combine the graham cracker crumbs, melted butter, and granulated sugar. Stir until the crumbs are fully coated and the mixture resembles wet sand.
- Press the Crust: Pour the graham cracker mixture into the prepared baking dish. Using the back of a spatula or your hands, firmly press the mixture evenly into the bottom of the dish to form the crust.
- Bake the Crust: Place the baking dish in the oven and bake the crust for about 8-10 minutes, or until it is slightly golden. Remove from the oven and allow it to cool for a few minutes.
- Layer the Chocolate: Evenly sprinkle the semi-sweet chocolate chips over the baked graham cracker crust while it is still warm. This will help the chocolate melt and create a delicious layer.
- Add the Marshmallows: Top the melted chocolate layer with the mini marshmallows, spreading them out evenly. Press them down gently into the chocolate layer.
- Melt the Dark Chocolate: In a microwave-safe bowl, break the dark chocolate bar into pieces. Melt it in the microwave in 30-second intervals, stirring in between until smooth. Alternatively, you can melt it using a double boiler.
- Drizzle the Dark Chocolate: Once melted, drizzle the dark chocolate over the marshmallows in a zigzag pattern, making it look both spooky and enticing.
- Add Sprinkles: If desired, sprinkle Halloween-themed sprinkles over the top for an extra festive touch.
- Cool and Set: Allow the S’mores bars to cool at room temperature for about 30 minutes or until the chocolate has set. For quicker results, place them in the refrigerator for 15–20 minutes.
- Slice and Serve: Once set, lift the bars out of the baking dish using the parchment paper (if used). Cut into squares or rectangles and arrange them on a serving platter.
- Enjoy: Serve your Sinister S’mores Bars at your Halloween party and watch them disappear as guests indulge in this delicious treat!
