
As an Amazon Associate I earn from qualifying purchases.
Editorial Policy | Disclosure Policy
Homemade Granola Bars
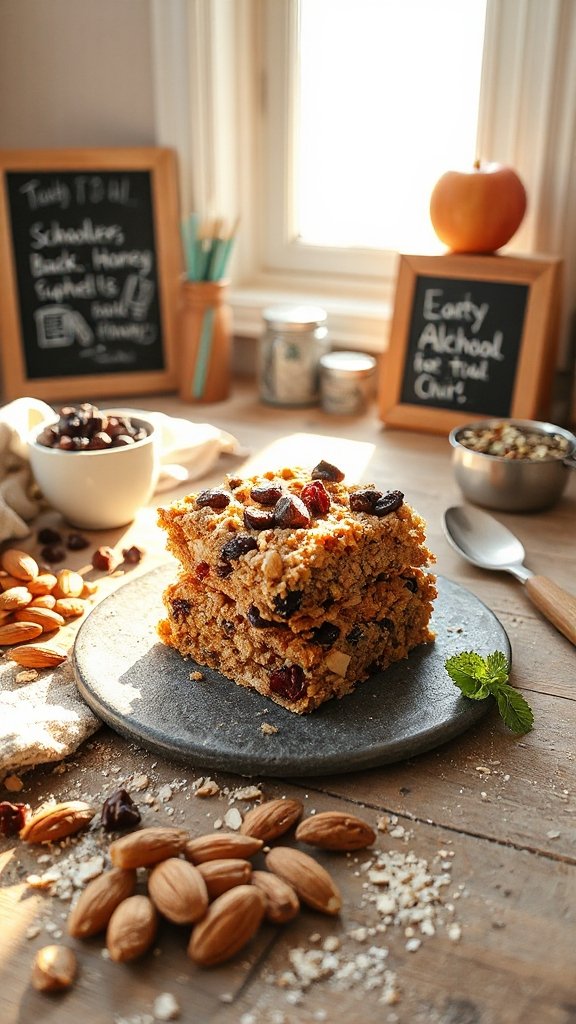
Homemade granola bars are a nutritious and tasty snack perfect for back-to-school treats, especially for those with food allergies. They are easy to make and can be customized to avoid common allergens like nuts, dairy, and gluten. Packed with oats, seeds, and dried fruits, these bars will keep your kids energized throughout the school day.
| Ingredients | Quantity |
|---|---|
| Rolled oats | 2 cups |
| Sunflower seeds | ½ cup |
| Pumpkin seeds | ½ cup |
| Honey or maple syrup | ½ cup |
| Coconut oil | ¼ cup (melted) |
| Dried cranberries (or other dried fruit) | ½ cup |
| Chia seeds | 2 tablespoons |
| Vanilla extract | 1 teaspoon |
| Salt | ¼ teaspoon |
Cooking Steps:
- Preheat your oven to 350°F (175°C) and line an 8×8-inch baking pan with parchment paper.
- In a large bowl, combine the rolled oats, sunflower seeds, pumpkin seeds, dried cranberries, chia seeds, and salt.
- In a separate bowl, mix the melted coconut oil, honey (or maple syrup), and vanilla extract.
- Pour the wet mixture into the dry ingredients and mix until well combined.
- Spread the mixture evenly in the prepared baking pan, pressing down firmly.
- Bake for 20-25 minutes or until golden brown, then let cool.
- Once cooled, cut into bars and store in an airtight container for up to one week. Enjoy!
Dairy-Free Chocolate Chip Cookies
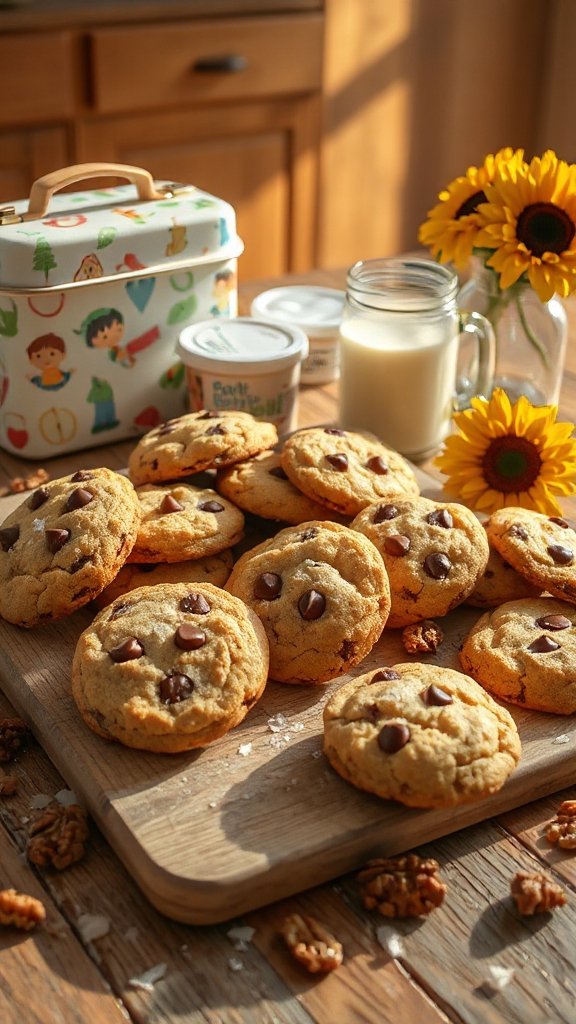
Dairy-free chocolate chip cookies are a delightful treat that everyone can enjoy, even those with dairy allergies. These cookies are soft, chewy, and loaded with dairy-free chocolate chips, making them a perfect snack for school lunches or after-school treats. Additionally, they are simple to make and can be customized with add-ins like nuts or dried fruit if desired.
| Ingredients | Quantity |
|---|---|
| All-purpose flour | 2 cups |
| Baking soda | 1 teaspoon |
| Salt | ½ teaspoon |
| Coconut oil (melted) | ½ cup |
| Brown sugar | ¾ cup |
| Granulated sugar | ¼ cup |
| Dairy-free chocolate chips | 1 cup |
| Vanilla extract | 1 teaspoon |
| Flaxseed meal | 2 tablespoons (mixed with 6 tablespoons of water for flax egg) |
Cooking Steps:
- Preheat your oven to 350°F (175°C) and line a baking sheet with parchment paper.
- In a small bowl, mix flaxseed meal with water and let sit for about 5 minutes to thicken (this acts as the egg substitute).
- In a large bowl, whisk together flour, baking soda, and salt.
- In another bowl, mix melted coconut oil, brown sugar, granulated sugar, and vanilla extract until well combined. Stir in the flax egg.
- Gradually add the dry ingredients to the wet ingredients, mixing until just combined. Fold in dairy-free chocolate chips.
- Drop heaping tablespoons of dough onto the prepared baking sheet, spacing them about 2 inches apart.
- Bake for 10-12 minutes or until the edges are lightly golden. Let cool on the baking sheet for a few minutes before transferring to a wire rack to cool completely. Enjoy!
Fruit and Nut Energy Bites
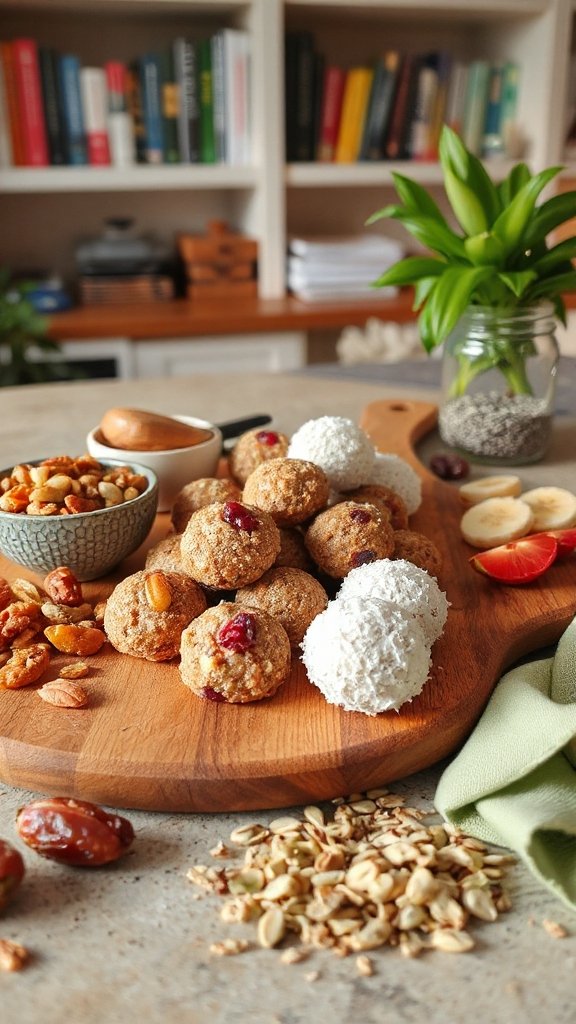
Fruit and nut energy bites are a quick and energizing snack that is perfect for on-the-go healthy eating. These bite-sized treats are packed with wholesome ingredients, making them an excellent option for school lunches, after-school snacks, or a midday energy boost. They are easy to make and can be customized with your favorite dried fruits and nuts.
| Ingredients | Quantity |
|---|---|
| Rolled oats | 1 cup |
| Natural almond butter | ½ cup |
| Honey or maple syrup | ¼ cup |
| Chia seeds | 2 tablespoons |
| Dried fruit (e.g., raisins, cranberries) | ½ cup |
| Nuts (e.g., almonds, walnuts) | ½ cup, chopped |
| Vanilla extract | 1 teaspoon |
| Pinch of salt | to taste |
Cooking Steps:
- In a large mixing bowl, combine rolled oats, almond butter, honey or maple syrup, chia seeds, dried fruit, nuts, vanilla extract, and a pinch of salt.
- Mix until all ingredients are well combined and form a sticky dough.
- Use your hands to roll the mixture into small balls, about 1 inch in diameter.
- Place the energy bites on a baking sheet lined with parchment paper and refrigerate for at least 30 minutes to set.
- Store in an airtight container in the refrigerator for up to a week. Enjoy your healthy snack!
Gluten-Free Banana Muffins
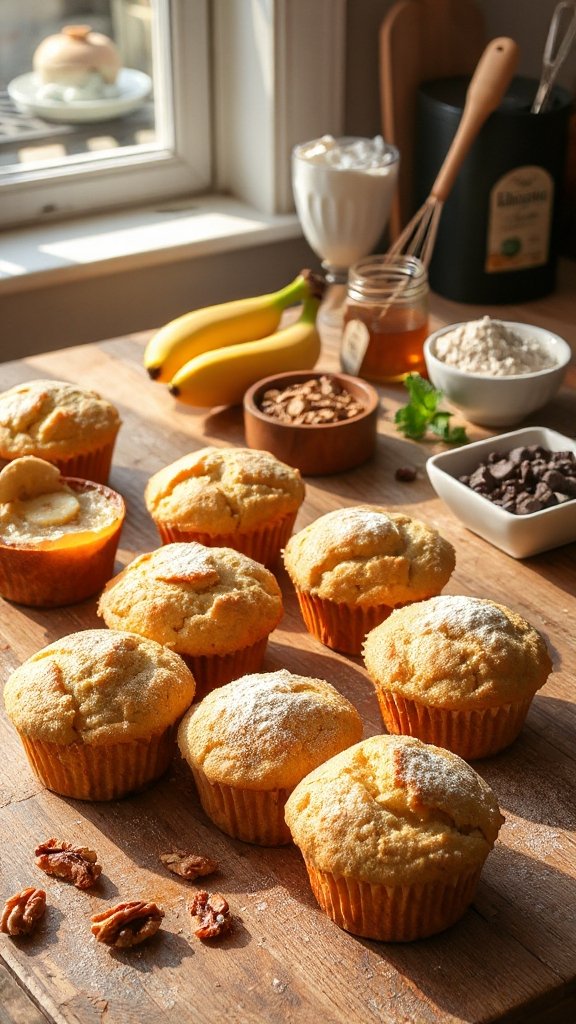
Gluten-free banana muffins are a deliciously moist and healthy treat perfect for breakfast or a snack. These muffins are made using gluten-free flour and ripe bananas, making them a great option for those with gluten sensitivities or allergies. They are easy to make, naturally sweetened, and can be enjoyed by everyone, including those with dietary restrictions.
| Ingredients | Quantity |
|---|---|
| Ripe bananas | 2 large, mashed |
| Gluten-free flour | 1 ½ cups |
| Baking powder | 1 teaspoon |
| Baking soda | ½ teaspoon |
| Salt | ½ teaspoon |
| Eggs | 2 large |
| Maple syrup (or honey) | ⅓ cup |
| Natural oil (e.g., coconut or canola) | ⅓ cup |
| Vanilla extract | 1 teaspoon |
| Optional: dairy-free chocolate chips or nuts | ½ cup |
Cooking Steps:
- Preheat the oven to 350°F (175°C) and line a muffin tin with paper liners or grease it.
- In a large bowl, combine mashed bananas, eggs, maple syrup, oil, and vanilla extract, mixing until smooth.
- In a separate bowl, whisk together gluten-free flour, baking powder, baking soda, and salt.
- Gradually add the dry ingredients to the wet ingredients, stirring until just combined. Fold in optional chocolate chips or nuts if desired.
- Divide the batter evenly among the muffin cups and bake for about 20-25 minutes, or until a toothpick inserted into the center comes out clean.
- Allow the muffins to cool in the tin for a few minutes before transferring them to a wire rack to cool completely. Enjoy your gluten-free banana muffins!
Allergy-Friendly Trail Mix
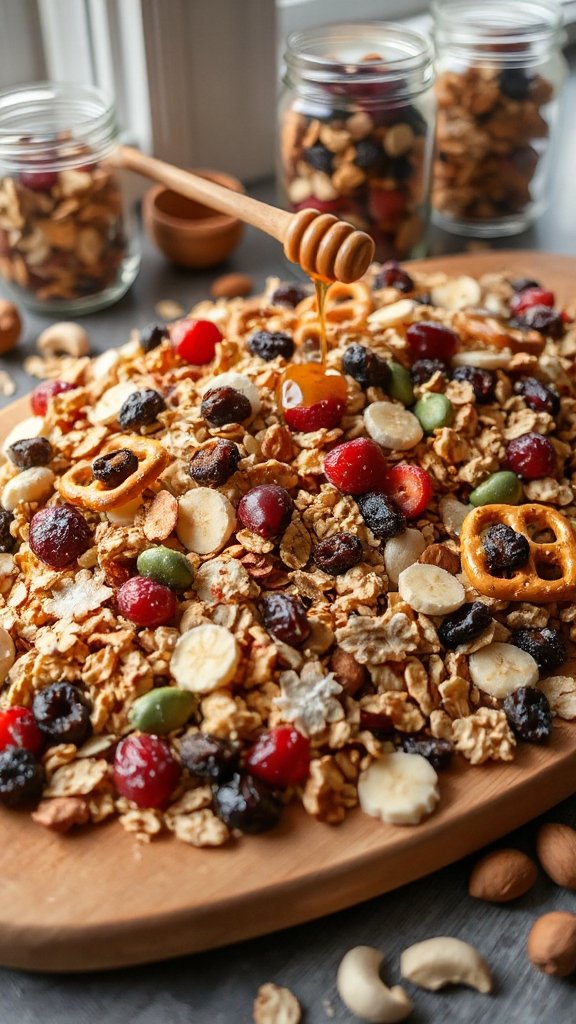
Allergy-Friendly Trail Mix is a delicious and versatile snack that can be easily customized to meet various dietary restrictions. Packed with a mix of calorie-dense nuts (if allowed), seeds, crunchy cereal, dried fruits, and allergy-friendly chocolate, this trail mix provides energy and satisfies sweet cravings without common allergens like gluten, dairy, and nuts (when adjusted). Perfect for school lunches or on-the-go snacking, it’s a healthy treat for kids and adults alike.
| Ingredients | Quantity |
|---|---|
| Gluten-free puffed cereal | 2 cups |
| Sunflower seeds | ½ cup |
| Pumpkin seeds | ½ cup |
| Dried cranberries | ½ cup |
| Raisins | ½ cup |
| Dark chocolate chips (dairy-free) | ½ cup |
| Coconut flakes (unsweetened) | ½ cup |
Cooking Steps:
- In a large bowl, combine all the ingredients: gluten-free puffed cereal, sunflower seeds, pumpkin seeds, dried cranberries, raisins, dark chocolate chips, and coconut flakes.
- Mix thoroughly until all components are well-distributed.
- Store the trail mix in an airtight container or zip-top bag for easy access.
- Enjoy as a snack or pack in lunchboxes for a nutritious treat!
Coconut Macaroons
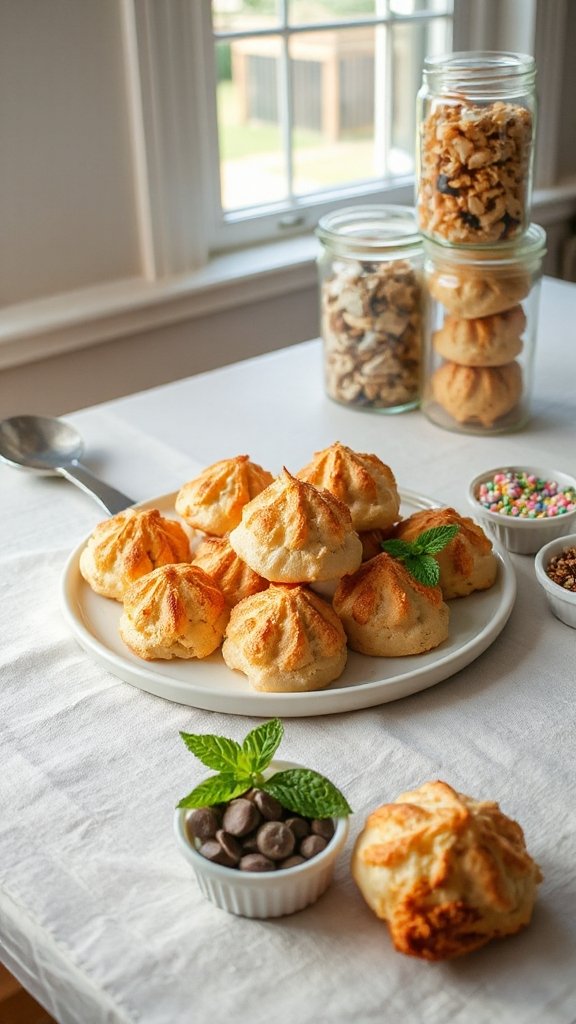
Coconut macaroons are a delightful and chewy treat that cater to those with food allergies, as they are gluten-free and versatile. These sweet, coconut-based cookies are simple to make and can be enjoyed as a snack or dessert in school lunches, ensuring that kids with allergies can indulge without worry.
| Ingredients | Quantity |
|---|---|
| Shredded unsweetened coconut | 3 cups |
| Egg whites | 3 large |
| Honey or maple syrup | ½ cup |
| Vanilla extract | 1 teaspoon |
| Salt | ¼ teaspoon |
| Dairy-free chocolate chips (optional) | ½ cup |
Cooking Steps:
- Preheat your oven to 325°F (163°C) and line a baking sheet with parchment paper.
- In a large bowl, whisk together the egg whites, honey or maple syrup, vanilla extract, and salt until well combined.
- Add the shredded coconut to the egg mixture and stir until the coconut is evenly coated.
- Use a tablespoon to scoop the mixture and form small mounds on the prepared baking sheet, spacing them about 2 inches apart.
- If desired, sprinkle the top of each macaroon with dairy-free chocolate chips.
- Bake for 20-25 minutes or until the edges are golden brown.
- Allow the macaroons to cool on the baking sheet for a few minutes before transferring them to a wire rack to cool completely. Enjoy!
Veggie and Hummus Snack Packs
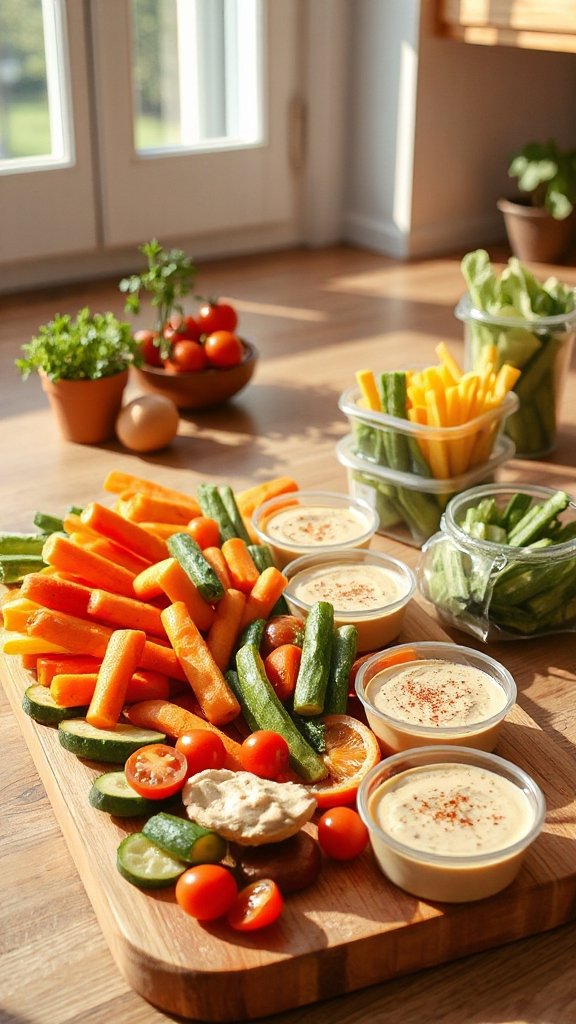
Veggie and hummus snack packs are a fresh, healthy treat that provide a nutritious option for kids heading back to school. This versatile and allergy-friendly snack features an assortment of colorful vegetables paired with creamy hummus, making it perfect for lunchboxes or after-school munching. These packs can easily cater to various dietary restrictions, ensuring everyone can enjoy them.
| Ingredients | Quantity |
|---|---|
| Hummus (store-bought or homemade) | 1 cup |
| Carrot sticks | 1 cup |
| Cucumber, sliced | 1 cup |
| Bell peppers, sliced | 1 cup |
| Celery sticks | 1 cup |
| Cherry tomatoes | 1 cup |
Cooking Steps:
- Wash and prepare all vegetables, cutting them into sticks or bite-sized pieces as needed.
- Divide the hummus into small containers for portioning.
- Arrange the prepared vegetables in snack-sized containers or bento boxes with a portion of hummus.
- Seal the containers, and store them in the refrigerator until ready to pack for school. Enjoy!
Homemade Fruit Leather
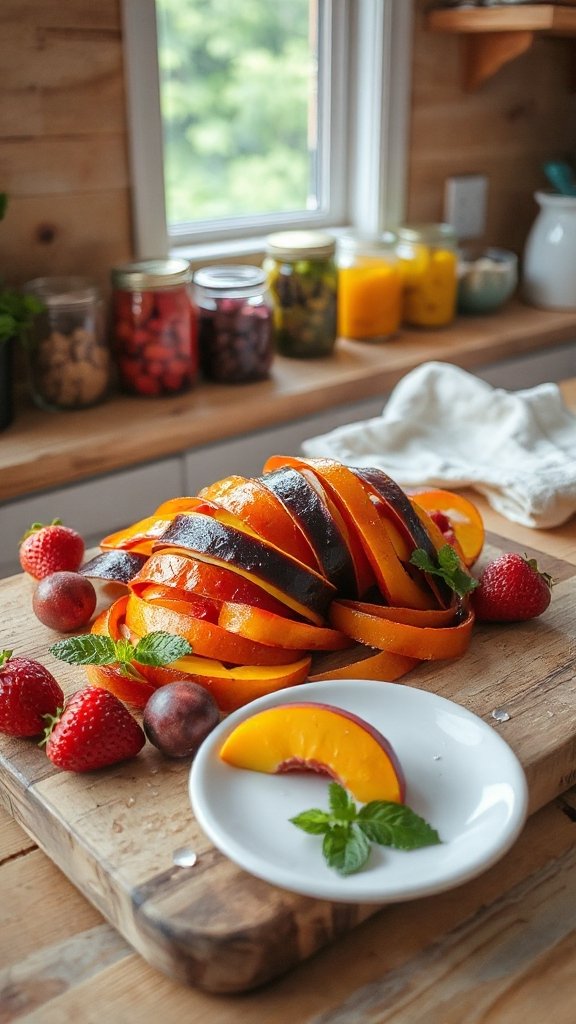
Homemade fruit leather is a delightful, chewy snack that satisfies sweet cravings while being free from common allergens, making it an excellent treat for kids heading back to school. This naturally sweetened snack is made from pureed fruit, and it’s easy to customize with your favorite flavors. Plus, it’s a healthier alternative to traditional fruit snacks, ensuring that even children with dietary restrictions can enjoy a delicious treat.
| Ingredients | Quantity |
|---|---|
| Fresh fruit (e.g., strawberries, apples, or mangoes) | 2 cups |
| Honey or maple syrup (optional) | 1-2 tablespoons |
| Lemon juice | 1 tablespoon |
Cooking Steps:
- Preheat your oven to 170°F (77°C) and line a baking sheet with parchment paper.
- Wash and chop the fresh fruit, then blend it in a food processor until smooth.
- If desired, mix in honey or maple syrup and lemon juice for added sweetness and flavor.
- Pour the fruit puree onto the prepared baking sheet and spread it into an even layer.
- Bake in the oven for 4-6 hours, until the fruit leather is dry and no longer sticky.
- Remove from the oven and let it cool completely before cutting it into strips or shapes.
- Store in an airtight container, and enjoy your homemade fruit leather as a safe and delicious school snack!
Peanut-Free Butter Cups

Peanut-Free Butter Cups are a delicious and allergen-friendly alternative to traditional chocolate peanut butter cups, perfect for kids with nut allergies. Using sunbutter or soy nut butter, these treats offer the same satisfying combination of chocolate and a creamy center, making them an enjoyable snack for school lunches or after-school treats.
| Ingredients | Quantity |
|---|---|
| Dairy-free chocolate chips | 1 cup |
| Sunbutter or soy nut butter | 1/2 cup |
| Powdered sugar | 1/4 cup |
| Vanilla extract | 1/2 teaspoon |
| Sea salt | Pinch |
| Mini cupcake liners | 12 |
Cooking Steps:
- Melt the dairy-free chocolate chips in a microwave-safe bowl, stirring every 30 seconds until smooth.
- Line a muffin tin with mini cupcake liners and spoon a small amount of melted chocolate into the bottom of each liner, coating the sides slightly.
- In a separate bowl, mix the sunbutter, powdered sugar, vanilla extract, and sea salt until well combined.
- Once the chocolate layer has set slightly, add a dollop of the sunbutter mixture on top of the chocolate in each liner.
- Cover the sunbutter mixture with another layer of melted chocolate, ensuring it’s fully sealed.
- Refrigerate the cups for at least 30 minutes until hardened. Remove from the liners and enjoy as a safe and tasty treat!
Rice Cake Treats

Rice Cake Treats are a fun and versatile snack that can be customized to cater to various food allergies. These delightful treats can be made using rice cakes as a base and topped with different spreads and toppings, making them a great choice for young students with dietary restrictions. They are easy to assemble, portable for lunch boxes, and can be enjoyed in a variety of flavors.
| Ingredients | Quantity |
|---|---|
| Rice cakes | 4-6 cakes |
| Sunflower seed butter | 1/2 cup |
| Dairy-free chocolate chips | 1/2 cup |
| Mini marshmallows | 1/2 cup |
| Dried fruit (e.g., cranberries, raisins) | 1/2 cup |
| Cinnamon | 1 teaspoon |
Cooking Steps:
- Spread a generous layer of sunflower seed butter on each rice cake.
- Melt the dairy-free chocolate chips in the microwave until smooth, stirring in between.
- Drizzle the melted chocolate over the sunflower seed butter on each rice cake.
- Top with mini marshmallows and dried fruit for added sweetness and texture, pressing them lightly into the chocolate.
- Sprinkle cinnamon over the top for an extra flavor boost, if desired.
- Allow the treats to set for a few minutes before enjoying or packing them for school!
Sunflower Seed Butter Sandwiches
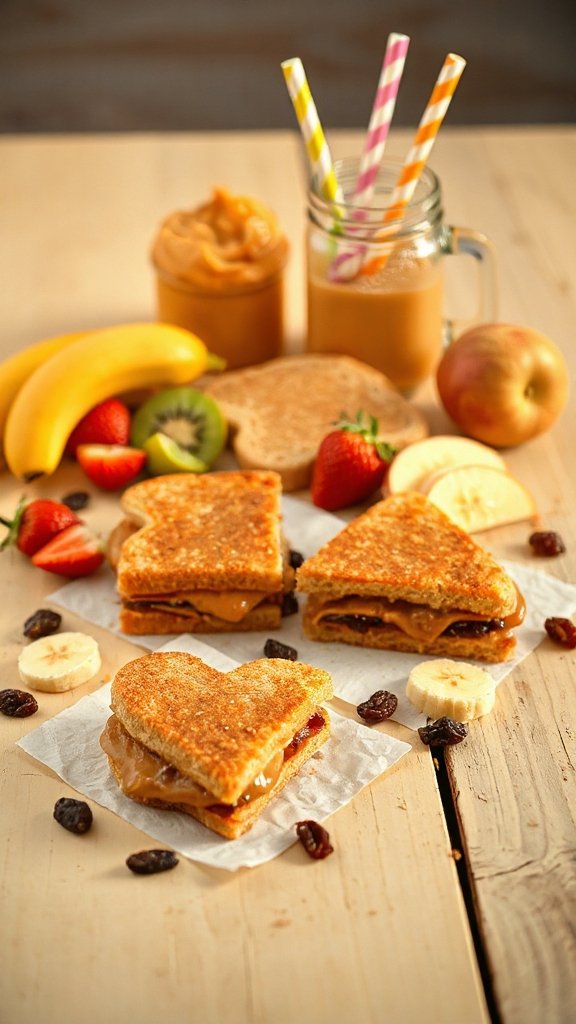
Sunflower Seed Butter Sandwiches are a nutritious and allergy-friendly alternative to traditional peanut butter sandwiches. These delicious, creamy sandwiches are made with sunflower seed butter and paired with allergy-safe bread, making them perfect for back-to-school lunches. They can be easily customized with a variety of spreads, fruits, or even honey for added sweetness, offering a delightful twist for kids with dietary restrictions.
| Ingredients | Quantity |
|---|---|
| Allergy-safe bread | 4 slices |
| Sunflower seed butter | 1/2 cup |
| Sliced bananas or apples | 1 cup |
| Honey (optional) | 2 tablespoons |
| Cinnamon (optional) | 1/2 teaspoon |
Cooking Steps:
- Spread sunflower seed butter evenly on two slices of allergy-safe bread.
- Layer sliced bananas or apples over the sunflower seed butter.
- Drizzle honey on top of the fruit, if using.
- Place the remaining slices of bread on top to create a sandwich.
- Optional: Sprinkle cinnamon over the filling before closing the sandwich for added flavor.
- Cut the sandwich into halves or quarters for easy handling and pack it for school!